Microsoft has labeled secure boot as a requirement to install Windows 11. It is a security feature provided by Unified Extensible Firmware Interface (UEFI) that prevents your system from being vulnerable to malware during the start-up process.
Secure boot allows your system to boot up only by using the trusted software from the Original Equipment Manufacturer (OEM). It provides a unique protection strategy by detecting and preventing malware from hijacking and infecting your system.
So, how do you enable it? The guide below can help you understand and effectively enable secure boot in your system.
How to Check if Secure Boot Is Enabled
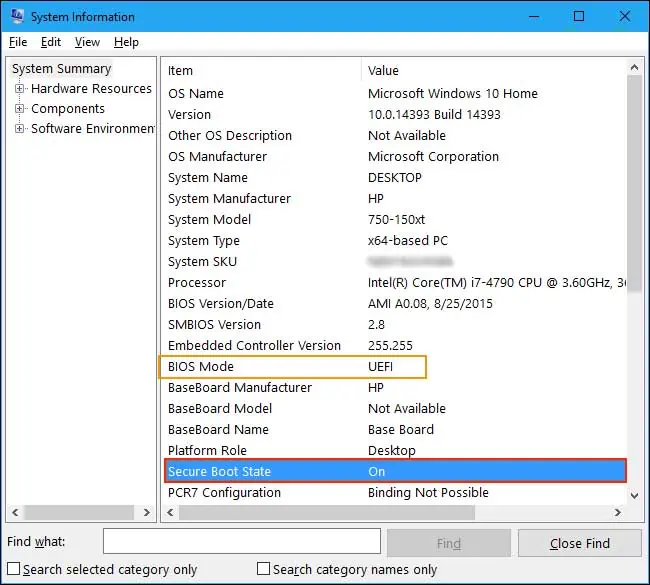
Before entering the BIOS, it’s smart to check if secure boot is enabled and available in your system. You can do so by following the steps shown below:
- On the Start menu, search for and select System Information.
- From the left panel, select System Summary.
- Scroll down till you see Secure Boot State and note whether it’s enabled or not.
- Here, you can also see the BIOS mode your system is using.

How to Enable Secure Boot
Your system will be more secure once you enable secure boot as it helps resist attacks to boot loaders and key operating system files of your PC. There are a few steps you can follow before you enable secure boot in your system.
Converting MBR to GPT partition and changing the BIOS mode to UEFI is not a prerequisite to enabling secure boot in your system. But these steps are handy if you are upgrading your operating system to Windows 11.
Convert MBR Drive Partition to GPT
Windows 11 does not boot up on the MBR drive partition. Hence, you should first convert the disk partition from MBR to GPT. Additionally, it’s recommended to back up your files before changing the disk partition as a safety measure. The steps below show you how to change your disk partition to GPT.
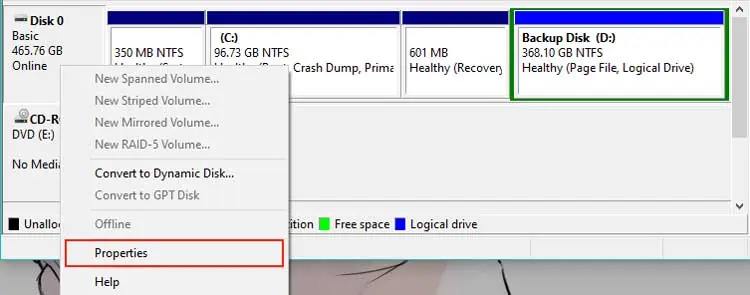
- Right-click on the Start menu icon and select Disk Management.
- Now, right-click on your disc and go to Properties.

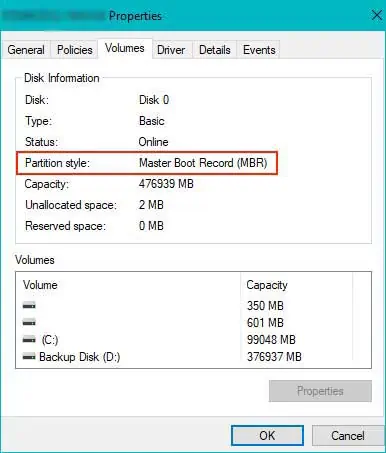
- Click on Volumes.
- If it reads GPT on Partition Style, you can move on over to the next step.
However, if the Partition Style is set as MBR, you should convert it into GPT.
- Close the window.
- Press the Windows Key + R on your keyboard to open the Run dialog box.
- On the Start menu, search for cmd and run as administrator.
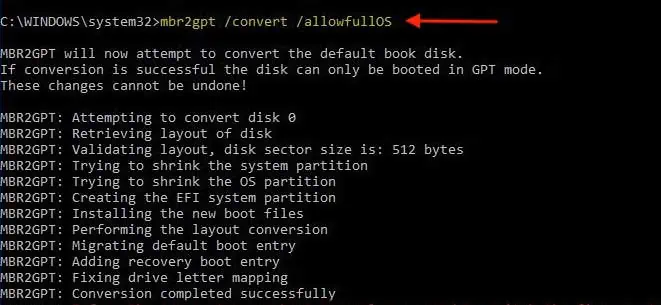
- Type the following command and hit enter.
mbr2gpt.exe /convert /allowFullOS
- After the processing is completed, your disk partition will be set as GPT.
Change the BIOS Mode From Legacy to UEFI
The UEFI firmware interface is known to address the limitations of the Legacy firmware. UEFI is more efficient and has additional security features than the Legacy firmware. It’s also more user-friendly and uses a GPT disk partition that can support up to 9.4ZB of storage.
The steps below show how to change your firmware to UEFI.
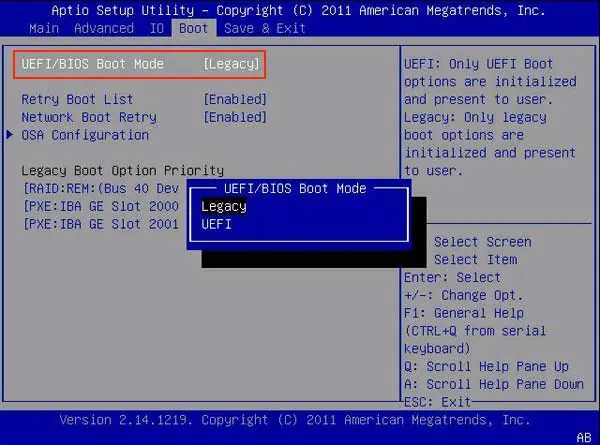
- While your PC is booting up, enter the BIOS setup by pressing F2, or the Delete button.
However, this button configuration varies depending on your system. - Go to the Boot tab.
- Set the Boot Mode to UEFI.

- Press F10 to save your changes and then, restart your PC.
Enable Secure Boot
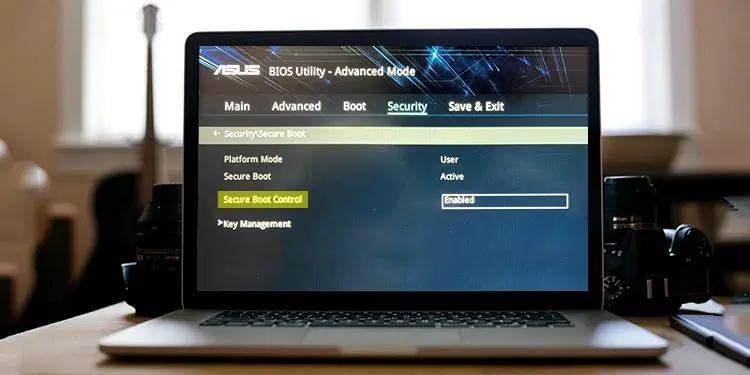
If the secure boot state is not enabled on your system, you should manually enable it through the BIOS settings. The general layout of the BIOS will be different depending on your system manufacturer, however, the core idea remains the same.
The steps below show how you can enable secure boot in your system.
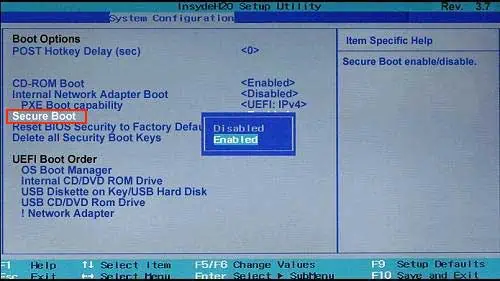
- While your PC is booting up, you can enter the BIOS setting by tapping the BIOS key set by your system manufacturer.
Tap either F10, F12, F1, F2, or the Delete button on your keyboard during Windows startup to enter the BIOS. - Look for the secure boot option in either the Boot, Security, Authentication or Custom tab.
- Enable Secure Boot.

- Press F10 to save your changes.
Alternatively, you can enter the BIOS and enable the secure boot through the Windows recovery environment as well. This companion feature of Windows 10 can help a user in troubleshooting, recovering and the booting up processes.
Here’re the steps:
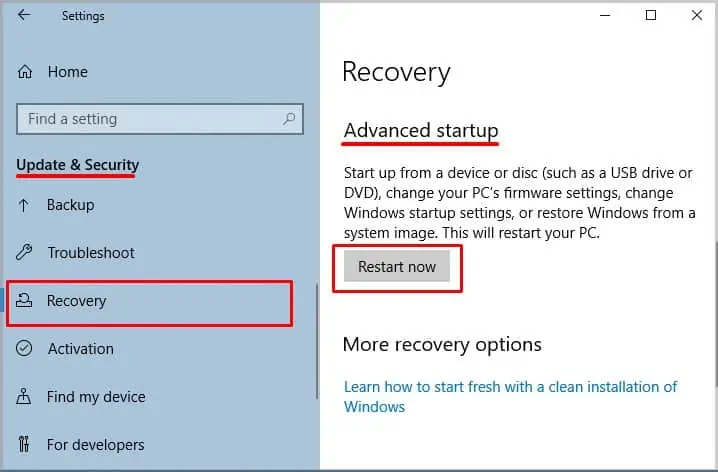
- Go to Settings on your PC.
- Click on Updates & Security.
- Select Recovery.
- Click on Restart Now.

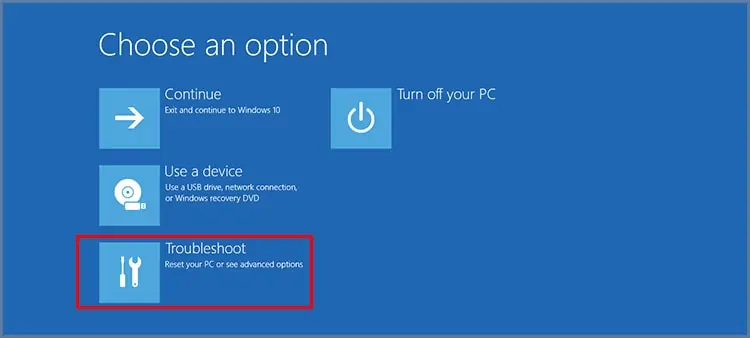
- Choose Troubleshoot.

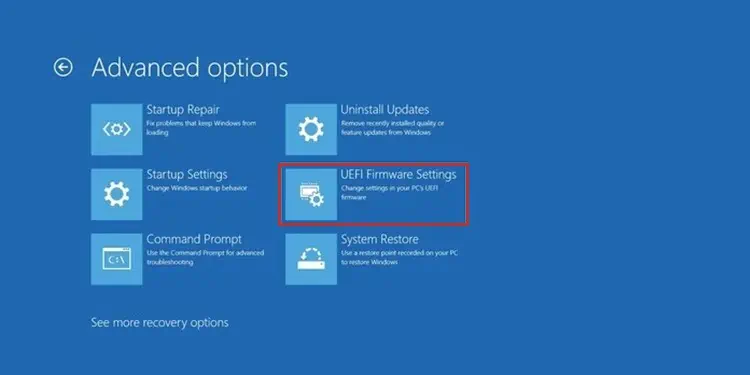
- Select Advanced Options.
- Click UEFI Firmware Settings.

- Restart your system when prompted. You’ll now enter the BIOS setting.
- Once here, head on over to the Boot tab.
- Enable Secure Boot.

- Press F10 to save your changes
And, Voila! Secure Boot is now enabled on your PC. Furthermore, the entire process is the same if you want to enable secure boot through Windows 11 user mode.

