
If you want to run a multi-core virtual machine or resolve errors like VT-x is disabled, you must enable hardware-assisted virtualization in the BIOS.
AMD labels this feature as SVM, while Intel names it VT-x.
You can enable these hardware virtualization features from the Advanced CPU Configuration section in the BIOS.
I’ll enable virtualization in my MAG B550M Mortar’s BIOS to demonstrate this process.
To do the same, your first step should be to enter the BIOS.
Get to the BIOS/UEFI
The BIOS key will be shown on the screen during POST. After you power on or restart your PC, repeatedly press this key to access the BIOS Setup utility.

The Delete key works on most desktops. Laptops have a bit more variation as different Function keys and key combos work depending on the brand and model.
Check the table below if you’re unsure what your system’s BIOS key is:
| Manufacturer | BIOS Key |
| MSI | Del |
| ASUS | Del, F2, F9 |
| Gigabyte | Del, F2 |
| ASRock | Del , F2 |
| Dell | Del, F1, F2, F3, F12, Ctrl + Alt + Enter |
| Lenovo | F2, F12, Fn + F2, Fn + F12 |
| Samsung | F2, F10, F12 |
| HP | Del, F1, F2, F10, F12 |
Find Virtualization Option in Advanced Mode
The BIOS loads in Easy Mode by default. This interface provides easy access to the main BIOS settings. To configure advanced settings like virtualization, you must switch to Advanced Mode. Here’s how you can do this:
- Press the key shown on the screen (usually at the top or bottom) to switch to Advanced Mode. In my MSI BIOS, this key is F7.

- Look for Advanced CPU Configuration or a similar section.
- Locate the virtualization option there.
- AMD’s virtualization tech is called SVM.
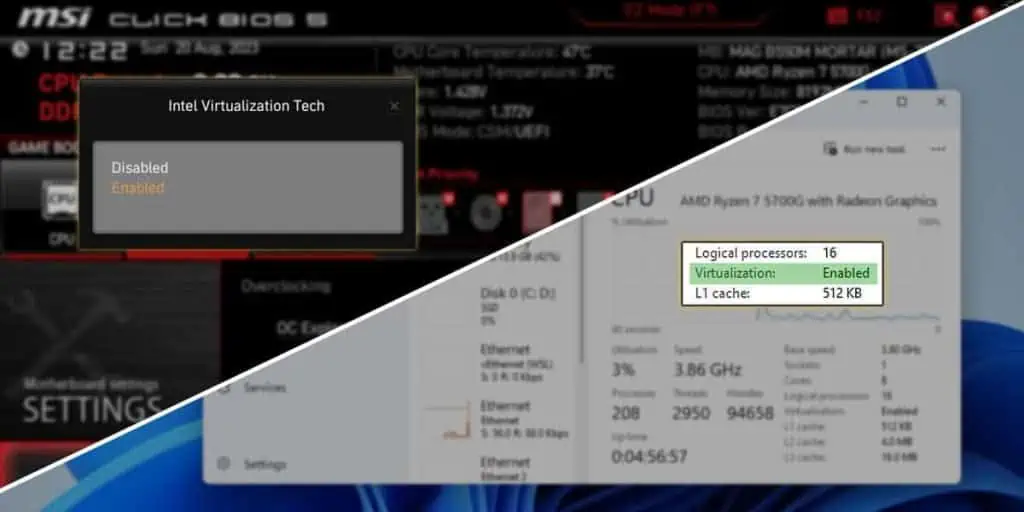
- Intel boards either call it VT-x or use the full name (Intel Virtualization Technology).
- AMD’s virtualization tech is called SVM.
- If you’re having difficulty finding these settings, check your user manual or BIOS Setup guide.


Enable Virtualization in BIOS
Once you locate the virtualization option, simply select it and set it to Enabled.
If you encounter any problems at this point, you can refer to our detailed guides for enabling virtualization on MSI, ASUS, and Gigabyte boards.
If supported, you can also enable other virtualization features like PCIe passthrough. This specific tech lets VMs directly access PCIe devices like graphics cards, network cards, etc. which can improve performance. Intel calls it their Directed I/O technology (VT-d) while AMD calls it IOMMU.

Finally, press F10 to save the changes and exit the BIOS.
Verify Virtualization Status
After enabling virtualization and exiting the BIOS, your PC should reboot to Windows. There are a few ways to verify the virtualization status in Windows.
- You can press Ctrl + Shift + Esc to open the Task Manager. You’ll find the virtualization status in the Performance > CPU tab.
- System profiling tools like CPU-Z will also show you the virtualization status. Check for instruction flags like VT-x or AMD-V.
- Or, you can just try to launch a VM. You should no longer see errors like AMD-V is disabled.


At this point, you’re free to play around with different hypervisors, VMs, and operating systems. If you feel lost regarding where to start, we have numerous virtualization guides geared toward beginners:
- Comprehensive VMware guide
- Installing Windows 11 on VMware and VirtualBox
- Installing VMware on Linux