If you upgraded to Windows 11 with low system requirements or if you’ve been using your Windows 11 PC for a long time, you will eventually see some performance decline. Even if this is not the case, you can still optimize your PC to make it run faster.
I personally know the frustration of using a slow computer. However, after I upgraded its RAM and switched to an SSD, my computer started performing a lot better. The software tweaks also helped a lot, and my PC currently runs smooth as butter.
- Upgrade Hardware: Increase RAM and switch to an SSD for improved system performance.
- Manage System Resources: Disable unnecessary startup programs, background apps, restartable apps, and visual effects to free up system resources.
- Regular Maintenance: Regularly restart your computer, keep Windows 11 updated, and enable Storage Sense for optimal system health.
- Software Management: Use Windows Security for protection, debloat Windows, and choose a resource-friendly browser.
- Optimize Storage: Defragment storage drives and turn off search indexing to speed up data retrieval.
- Power Management: Set the High Performance power plan for maximum speed.
- System Reset: When needed, reset Windows 11 for a clean slate and a performance boost.
Add More RAM
Your Windows 11 requires a minimum of 4 gigabytes of RAM to work. However, this isn’t really ideal, as running Windows 11 on 4 GB of RAM is tremendously slow. Your Windows 11 will at least need 8 – 10 GB of RAM to run smoothly.

If you’ve got the budget, you can also opt for 16 – 32 GB, which is more than enough for modern-day professional and entertainment uses.
You can either visit a service center to have your RAM increased, or you can buy the RAM sticks and install them yourself.
Upgrade to Faster SSD
If you have your operating system installed on a Hard Disk Drive (HDD), you can switch to a Solid State Drive (SSD) to increase the performance of your computer. SSDs are much faster than HDDs, and their data retrieval rate is much higher.
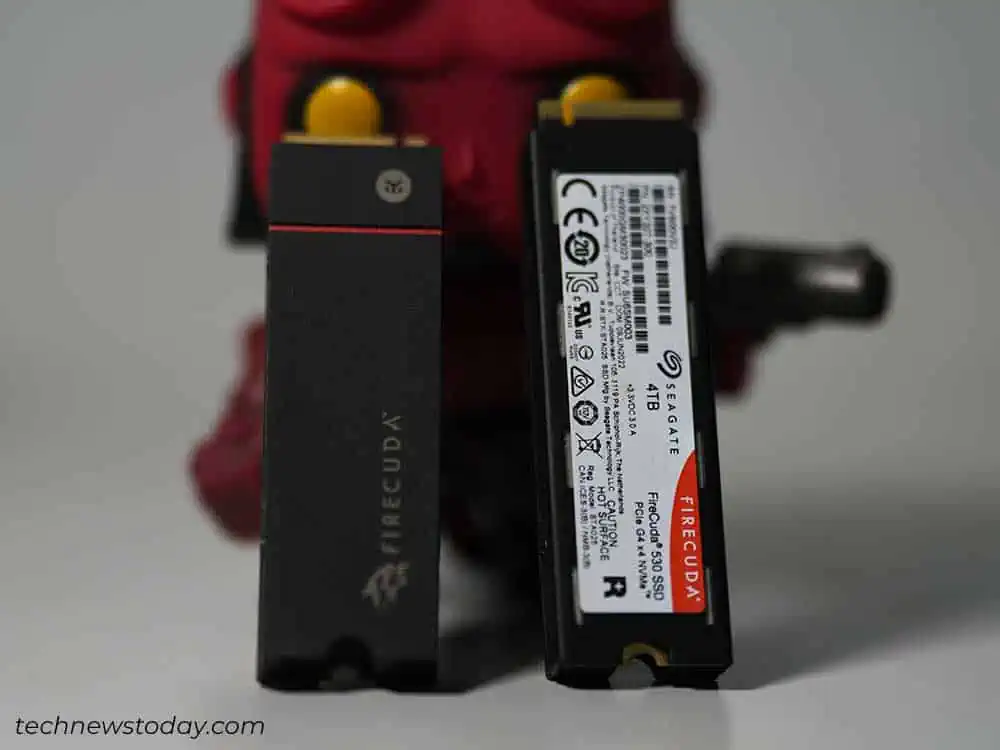
So, if your operating system is installed on an SSD, Windows will be able to retrieve system files much faster making your PC faster overall.
You can visit a service center to have an SSD installed on your computer. If you would like to do it yourself, you can install the SSD on your computer and clone your current Windows on it.
Restart Your Computer Regularly
If you have the habit of leaving your computer in sleep mode, you can periodically shut down your computer to make it run smoother. When you restart the computer, it clears all RAM and processor cache which can make your computer significantly faster.
Furthermore, leaving your computer in sleep mode for a long time can eventually result in session glitches. A computer restart will also clear these and make your computer run smoother.
Keep Windows 11 Updated
You should also keep your Windows 11 updated to the latest version. While this doesn’t directly make your computer faster, it keeps your PC running smoothly. Furthermore, some versions of Windows 11 have known bugs that affect performance, which have been patched in the latest update.
So, here’s how you can check and update your Windows 11.
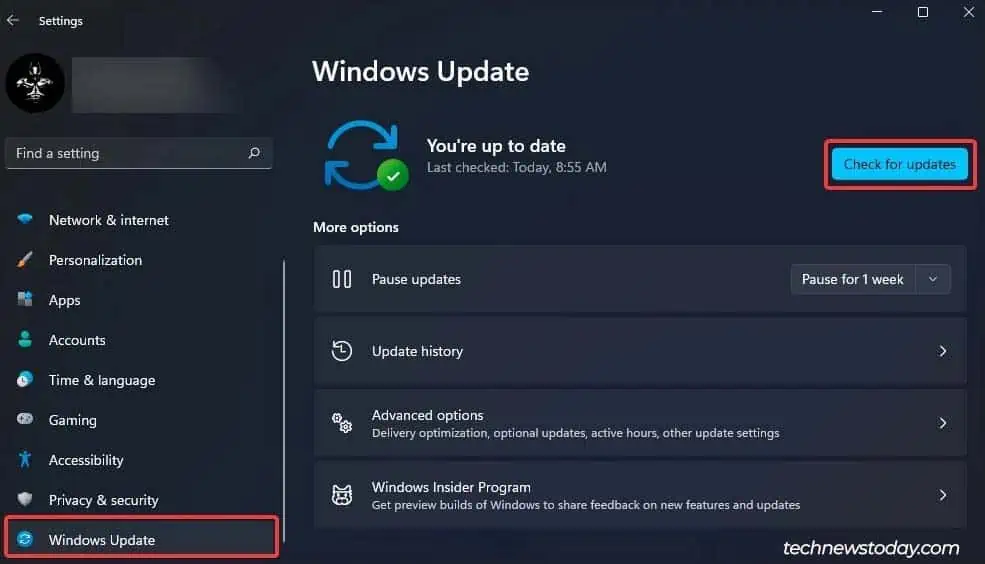
- Launch Settings by pressing Windows + I shortcut key.
- Go to Windows Update and click on Check for Updates.

- If an update is available, it should automatically start downloading. (If it shows up-to-date, you won’t need to do anything.)
- Click on the Restart now button to install the update.

Disable Startup Programs & Apps
Startup programs and apps are software that runs automatically when your computer starts. You might not necessarily use any or all of the programs that automatically launch at start.
These applications are simply hogging your system resources unnecessarily, and they cause your PC to slow down. Here’s how you can disable them.
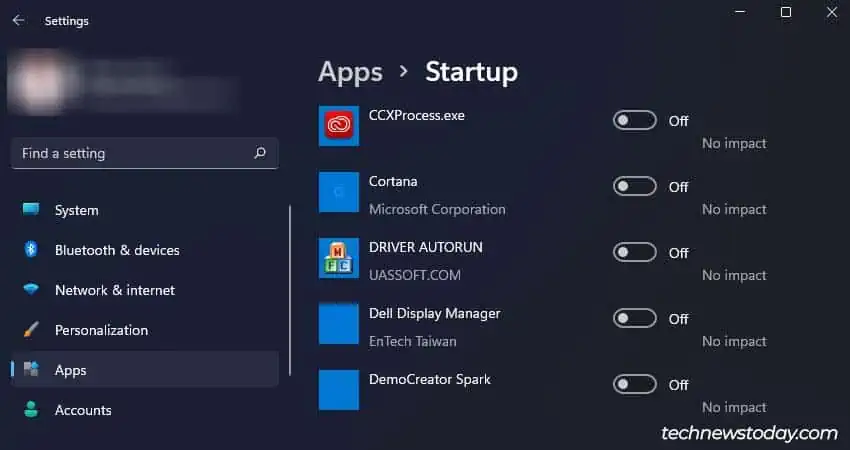
- Press Windows + I shortcut key to open Settings.
- Go to Apps > Startup.
- Toggle off all the programs and applications that are automatically launching at start. (If you want some of the software to launch at start, you can go through the list and keep them enabled.)

Disable Apps From Running in Background
Some apps will not fully close even after their active window has been removed from the foreground. These applications usually run in the background and consume your system resources.
So, you can stop those apps from running in the background and slowing down your PC.
- Launch Settings by pressing Windows + I hotkey.
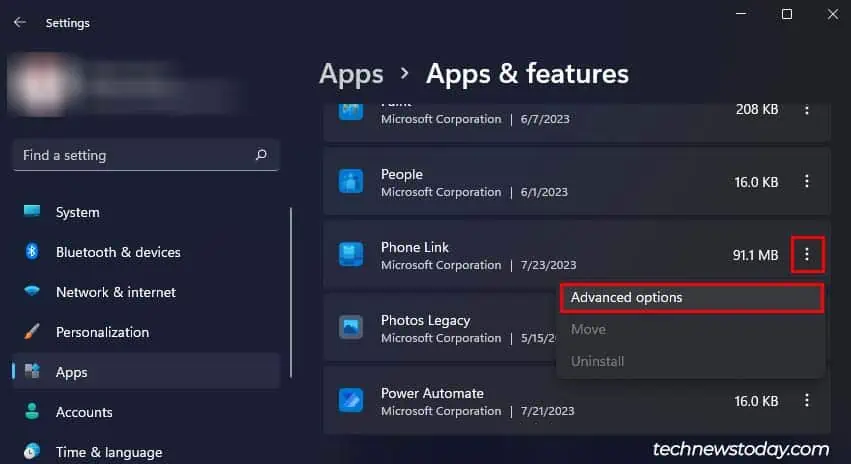
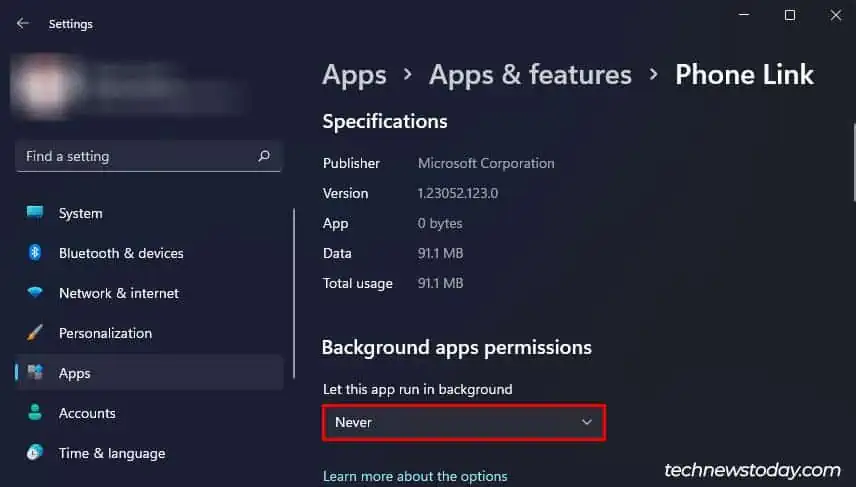
- Go to Apps > Apps & Features.
- From the list of apps, click on the vertical ellipsis icon beside the application you don’t want to run in the background.

- Select Advanced options. (Some system apps won’t have this option. You can skip those.)
- If you aren’t going to use the selected application, you can also click Uninstall to directly remove it instead.
- Under Let this app run in the background, choose Never from the drop-down menu.

- Do the same for all the other apps that you don’t want to run in the background.
Disable Restartable Apps
Restartable apps are basically apps that will automatically launch if it was open on your previous session. These apps automatically launching will consume your system resources and slow your PC down.
So, you can disable this feature altogether to stop all restartable apps from automatically launching.
- Launch Settings by pressing Windows + I shortcut key.
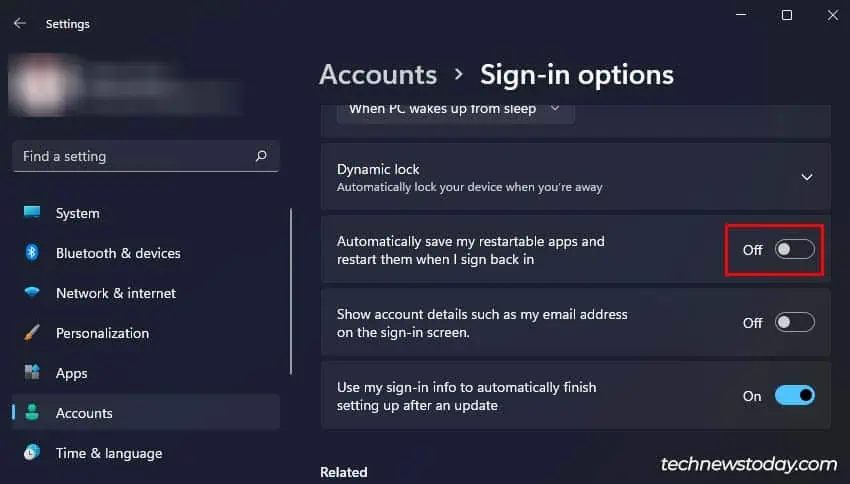
- Navigate to Accounts > Sign-in options.
- Scroll down and tpggle off the Automatically Save my Restartable Apps and Restart them when I sign back in option.

Keep Your System Free from Malware
Malware is malicious software that is intentionally designed to infect, damage, steal data, or gain unauthorized access to a computer. There are different types of malware like viruses, adware, spyware, and more.
If your computer has been infected by such malware, your computer might slow down and experience lags and freezes. Furthermore, malware is inherently dangerous to your device and privacy.
So, you can try running a full scan on your computer using the default Windows antivirus Windows Security.
- Open Settings.
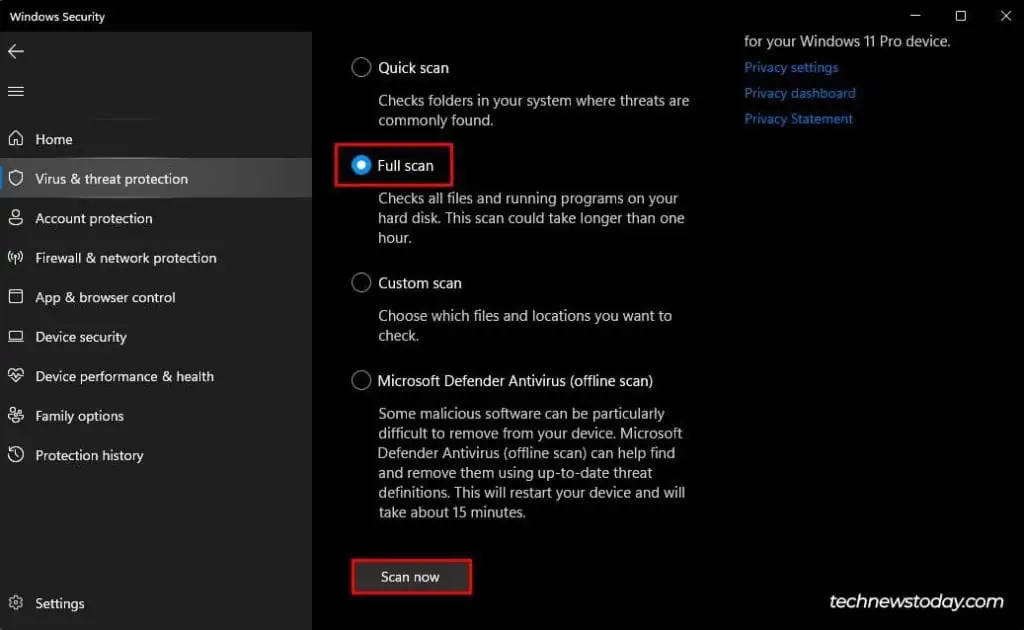
- Go to Privacy & security > Windows Security, and click on Virus & threat protection.

- Scroll down and click on Scan options.
- Select Full scan and click on Scan now.

Switch to Windows Security
Third-party antivirus software is one of the main factors that can cause your PC to slow down. This is because anti-virus software usually consumes a lot of system resources.
On the other hand, the default Windows antivirus, Windows Security, is more than enough for malware protection if you take basic online precautions. So, you can switch to Windows Security to make your PC faster.
Use a Windows Debloater
Your Windows 11 comes with a plethora of applications pre-installed by Microsoft. These applications are called bloatware, and they can hog up your system resources and cause your PC to slow down. So, you can delete them to make your computer faster.
However, while some of these applications can be deleted by conventional methods, some need a little extra work. You can check out our other article on how you can delete such bloatware or use a third-party application to easily remove them.
Disable Animations and Visual Effects
Windows 11 has a feature called animations that makes navigating the graphic interface very smooth. Whenever you click on start and the menu pops up from below, or when you click on notifications and it slides in from the left, all of this rendering is made possible by the animations feature.
However, as you’ve guessed, this feature also consumes some of your system resources. If you want to optimize your PC on the cost of your graphic interface looking a bit choppy, you can disable this feature.
- Open Settings.
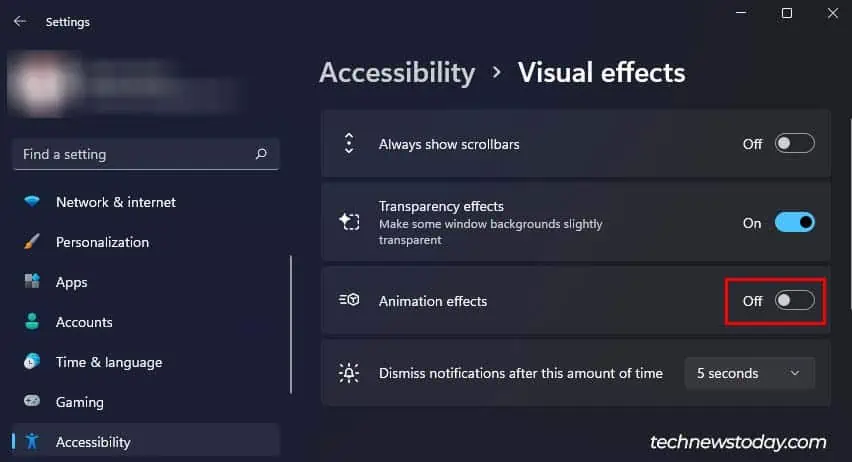
- Navigate to Accessibility > Visual effects.
- Toggle off Animation effects.

Additionally, you can also configure your visual effect settings for best performance to maximize the performance of your PC.
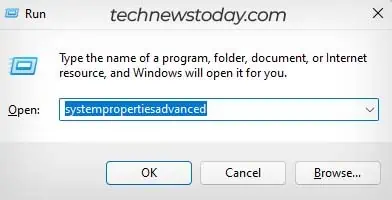
- Press Windows + R hotkey to open Run dialog box.
- Type
Systempropertiesadvancedand press Enter.
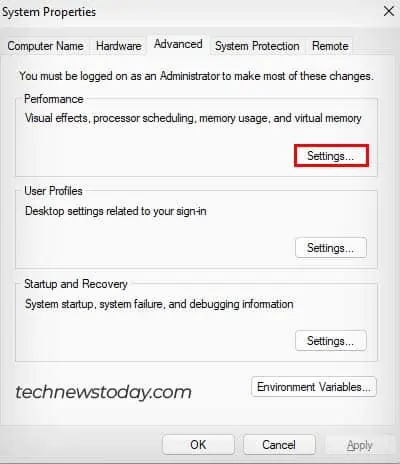
- Under Performance, click on Settings.

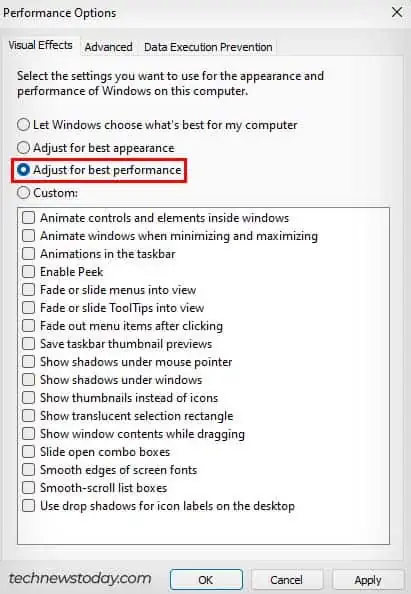
- Select Adjust for best performance.

- Click Apply and OK.
Pick a Resource Friendly Browser
Your PC performance is also affected by the browser you often use. If you use a very demanding browser to surf the internet, your computer will have to dedicate more of your system resources to keep the browser running.
While this won’t affect you much if you have a powerful PC, it can tremendously slow down low-end computers. So, you can pick a more resource-friendly browser like chrome or Microsoft Edge.
Defragment Storage Drives
If you have a hard disk as the OS drive of your Windows 11, and you do not want to upgrade to SSD, you can defragment the hard disk to optimize it.
Defragmentation is basically rearranging the data on your hard drive in an organized and contiguous manner. This makes the data retrieval process from your hard drive much faster and increases your PC performance.
If you want to know more about the defragmentation process and how to do it, you can check out our other article.
Enable Storage Sense
You can also enable the storage sense setting to keep your Windows 11 PC running smoothly. While this setting doesn’t have immediate effects on your PC performance, enabling it can be massively helpful in the long run.
Storage sense basically frees up space on your drive by periodically cleaning your drive and clearing items that you don’t need anymore. This is quite important as Windows will need free space in your OS drive to keep it running smoothly.
- Open Settings application.
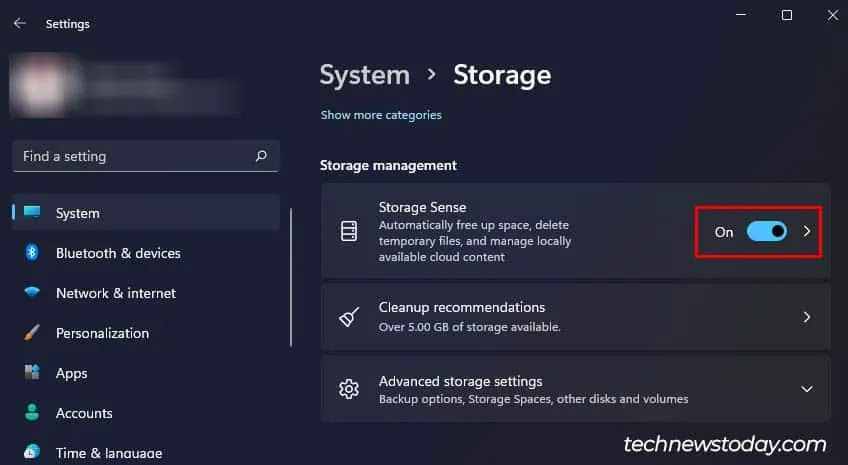
- Go to System > Storage.
- Scroll down and toggle on Storage Sense.

If your OS drive is already considerably full and you’re experiencing massive lag, you can check out our other article on clearing out the OS drive.
Turn Off Search Indexing
Your Windows 11 naturally catalogs every file that is added, modified, or deleted on your computer. This is called search indexing, and it helps you easily find your intended file by searching for it.
Now, as you’ve guessed, this feature will consume your system resources and it can slow down your PC. However, this depends a lot on your activity. If you rarely add or modify files to your PC, it won’t consume much of your system resources and it also won’t slow your PC down.
If you do add and modify a lot of files on your PC, you can disable this feature to make your PC faster.
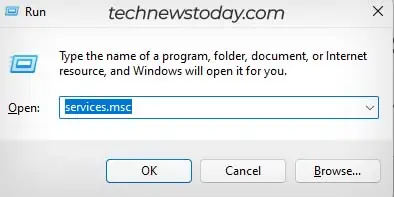
- Press Windows + R to open Run dialog box.
- Type
services.mscand press Enter to open Windows Services.
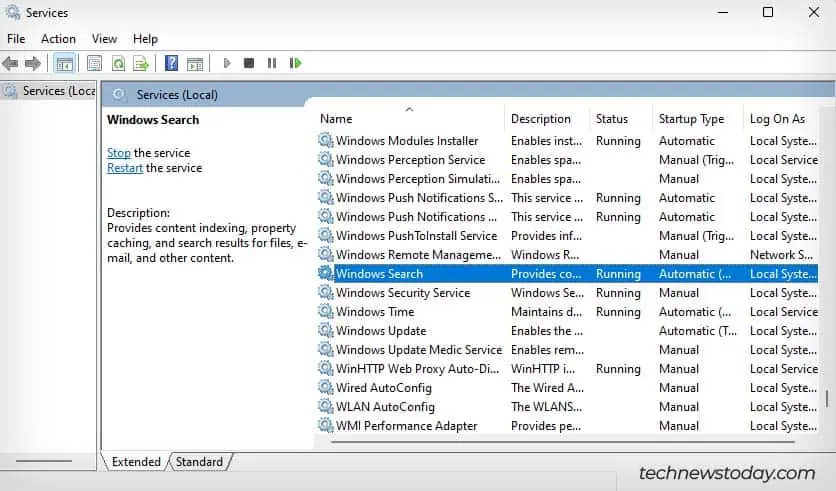
- Locate the Windows Search service and double-click on it.

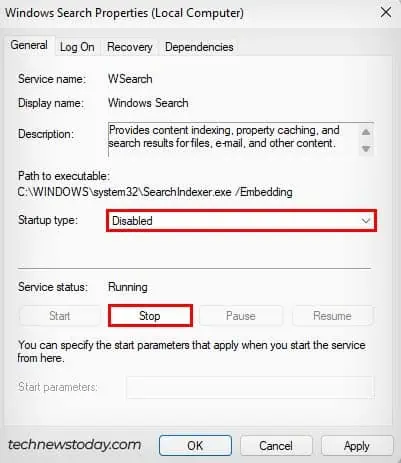
- Next to Startup type, select Disabled from the drop-down menu.

- Click on Stop.
- Click Apply and OK.
Set High Performance Power Plan
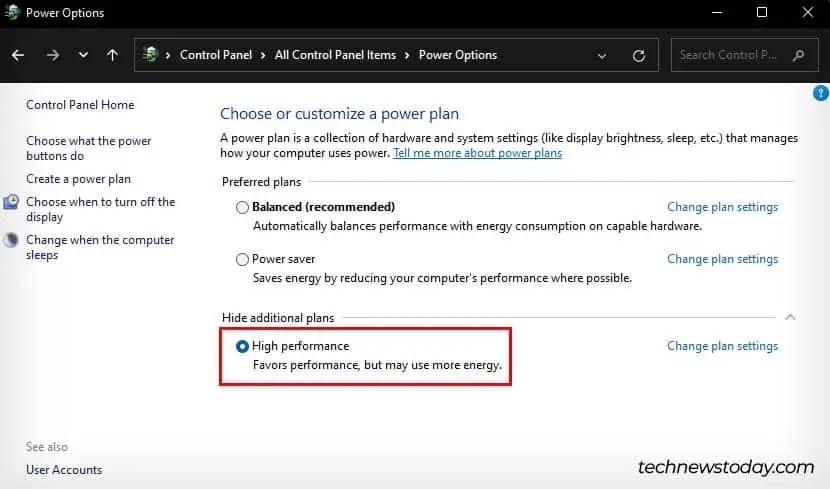
Your currently set power plan will also affect how smoothly your PC will run, as Balanced or Power Saver modes will not deliver the maximum amount of power to your CPU. This means that your processor is not running at its full capacity.
When you set the High Performance power plan, your processor is receiving the max amount of power it can handle, and it is running at full speed. This will naturally make your Windows 11 faster.
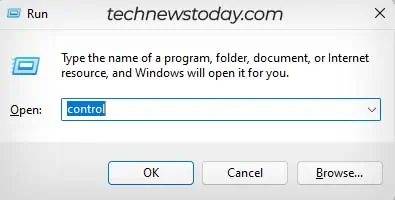
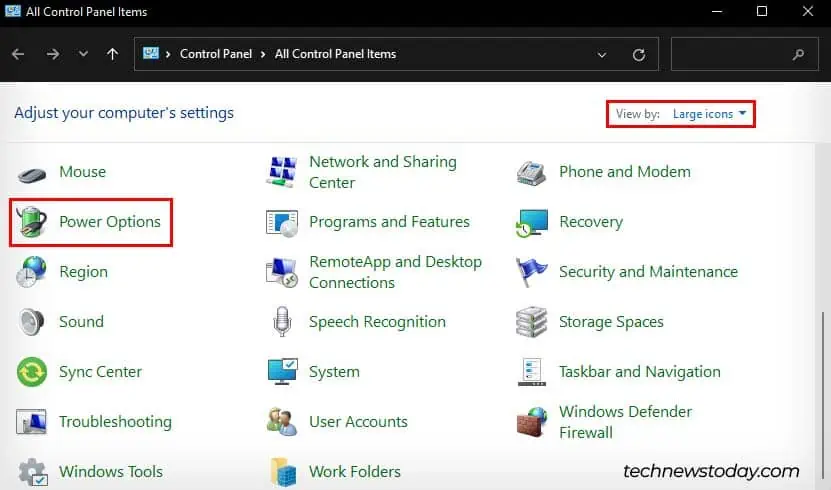
- Launch Run Utility using Windows + R buttons.
- Type
controland press Enter to open the Control Panel.
- Next to View by, make sure it is set to Large icons.
- Click on Power Options.

- Select the High performance option. (if you don’t see the High performance option, click on Show additional plans.)

Reset Windows 11
Lastly, if your PC is running extremely slow, you can consider resetting your Windows 11. This will clean reinstall Windows 11 on your computer and increase its performance. However, if you have important data on your OS drive, you might want to back it up first as a Windows reset will delete all of it.
Anyway, let’s see how you can reset your Windows 11.
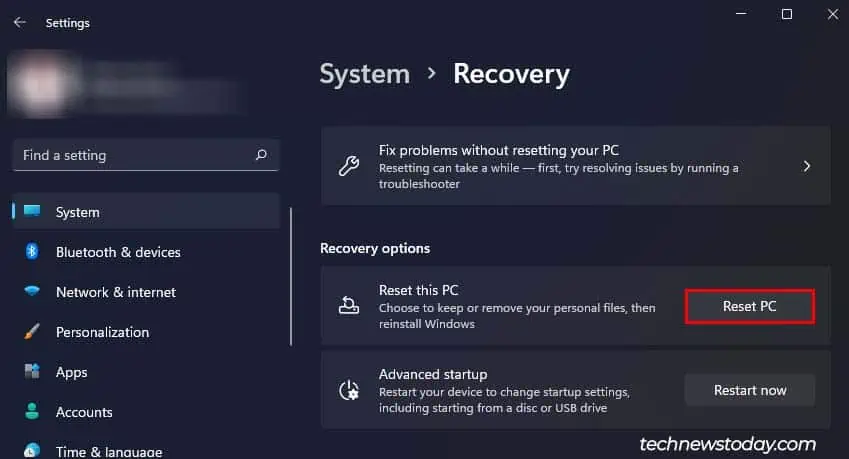
- Open Settings.
- Go to System > Recovery.
- Next to Reset this PC, click on Reset PC.

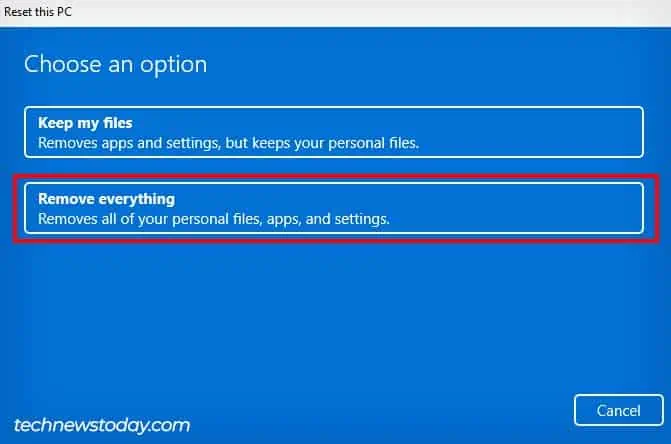
- You can choose from either Keep my files or Remove everything. (Selecting Keep my files will only save data from your user profile files.)
- Click on Remove everything. (If you have important files in your OS drive, make sure it is backed up first.)

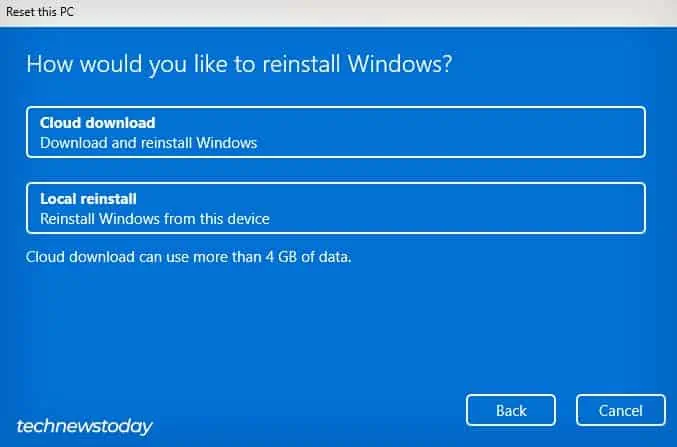
- Now, choose from either Cloud download or Local reinstall. (Cloud download will also install the latest updates while Local reinstall is faster.)

- Select Reset to start the process.
- After the reset finishes, configure your Windows.

