
The DISM command tool is a powerful Windows tool that can edit or repair Windows image files. If you are having issues with your system, you can run the DISM command to try and fix such errors. You can use the command prompt or the Windows Powershell to run DISM commands and fix your system.
However, some errors can completely make your PC unusable, restricting you from booting into Windows. In that case, you will have to boot into the Windows Recovery Environment and run the DISM commands from there.
How to Run DISM Commands to Repair Windows?
DISM stands for Deployment Image Servicing and Management. Although DISM has a variety of uses, this tool is commonly used to fix a malfunctioning Windows system. This is a command exclusive tool that needs to be run from the command prompt or the Powershell.
Using Command Prompt
To fix your Windows system, the DISM command is generally followed by switches that represent the target image, which can be either /Online or /Image. The /Online switch will select your current running operating system as a target to fix, whereas /Image will allow you to specify another Windows image.
There is one mainstream command which we will use to repair Windows. There are a couple of other commands as well, which you can use to check for errors and repairability before repairing it.
The general syntax to fix a Windows image is:
DISM [target image] /Cleanup-Image [servicing_option] [servicing_parameter]
[target-image]: Target of the image you want to repair.[servicing_option]: Type of service.[servicing_parameter]: To include any exclusive parameters.
Online DISM
An online Windows image is the image that is currently in use to run the Operating system. When doing an online DISM with no servicing parameters, it takes files from previously downloaded Windows update components. However, if these update components are corrupt, it will download them again, which requires an internet connection.
But in case you don’t have internet to re-download the corrupt update components, you can also specify another Image as the source. You can create and insert a Windows installation media and use it as the source.
Follow these steps to learn how to run an online DISM:
- Press Win + R.
- Type
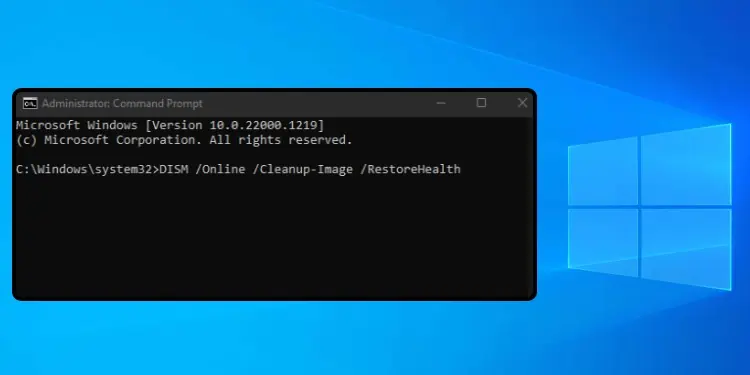
cmdand press Ctrl + Shift + Enter to run it with elevated privileges. - Type the following commands and execute them individually:
DISM /Online /Cleanup-Image /CheckHealth: To quickly check the image for errors.DISM /Online /Cleanup-Image /ScanHealth: To check for any corruption and repairability of the image.DISM /Online /Cleanup-Image /RestoreHealth: To repair any errors or issues encountered.

To use a specific Windows image as a source, use the following command:
DISM /Online /Cleanup-Image /RestoreHealth /source: <drive_letter>\sources\install /LimitAccess
Here, replace <drive_letter> with the letter of the drive containing the source image.
Offline DISM
While online DISM targets the current operating system, offline DISM targets a specific Windows image. You will have to specify the path to the partition that holds your operating system as the target image.
However, Offline DISM specifically requires a .wim file as the source of repair. You can use the .wim in installation media, ISO file, or Windows Image File Format from different PC as a source for repair.
If you’re able to boot into your system, you can open the command prompt by following the above steps instead of booting into Windows RE.
- Force restart your PC three times to boot into the Windows RE.
- Go to Troubleshoot > Advanced option > Command prompt.
- Type
notepad.exeand press Enter. - Go to File and click on Save as.
- You can check the drive letter and path of your ‘source /target images’ from the save as window to use with the commands. The drive letters of your source and target image will be changed in the recovery environment.
The source.wimfile is usually located in the sources folder, which you can check and confirm from this window as well. - Type the following command and execute it:
DISM /Image:<target-drive-letter> /Cleanup-Image /RestoreHealth /source:<source-path> /limitaccess
Here, replace<target-drive-letter>with the drive letter of the image you want to repair and<source-path>with the path to the Image file. - For instance:
DISM /Image:C:\ /Cleanup-Image /RestoreHealth /source:D:\sources\install.wim /limitaccess
This command will fix the image in C: drive by using the.wimfile in D: drive. In some cases, there may also be a.esdfile instead of the.wimfile. This file is usually located in the sources folder of the installation media.
Replacing/RestoreHealthwith/Scanhealthor/Checkhealthwill run the respective commands.


Additional Commands
You can also add special parameters to the DISM command. Adding parameters will execute the DISM command and the added parameter simultaneously. Here are a couple of parameters to consider:
/Quiet: Disables progress information and only outputs error messages./NoRestart: Prevents your PC from rebooting.
If you want to learn about even more commands, you can check Microsoft’s official website for them.
Using PowerShell
Windows Powershell is another command line tool on your Windows PC. Although the Command prompt is common while running DISM commands, you can also use Powershell to run them. However, the commands for PowerShell are different from the command prompt. Follow these steps to run DISM commands from the PowerShell:
- Press Win + X and click on Windows PowerShell(Admin).
- Type the following commands and execute them one at a time:
Repair-WindowsImage -Online -ScanHealth -Source <image_path> -LimitAccessRepair-WindowsImage -Online -CheckHealth -Source <image_path> -LimitAccessRepair-WindowsImage -Online -RestoreHealth -Source <image_path> -LimitAccess
Replace<image_path>with the directory of the source image. Or remove the-Source <image_path> -LimitAccesscommand to use the default source.

To run the DISM on an offline image, replace -Online with the -path “<drive-letter>\offline\Mount”.
Using Batch File
A batch file is an executable file that can run commands directly. They have a .bat extension and can be created by using text editor software. You can save this file in an easily accessible location and launch it whenever you have to run the DISM commands. Here are the steps to do it:
- Right-click on your desktop.
- Go to New > Text document.
- Copy and paste the following commands into the text file.
@ECHO OFF
DISM /Online /Cleanup-Image /CheckHealth
DISM /Online /Cleanup-Image /ScanHealth
DISM /Online /Cleanup-Image /RestoreHealth 
- Click on File and select save as.
- Input any name you like and end it with
.batextension. - Navigate to your preferred location and press save.

Launch the file by double-clicking it whenever you need to run the DISM command.