Do you have a monitor that supports 144 Hz, but you’re still not getting the smoothness you expect? This is probably because of some settings or wire faults.
But you don’t need to worry, as certain tweaks can easily help you set your monitor to 144 Hz. In this article, you will learn the step-by-step process of how to do it on Windows 11.
Windows 11 has dedicated display settings that can help configure the right refresh rate for your PC. However, this won’t be possible if you’re using an unsupportive cable or your monitor isn’t compatible with a higher refresh rate.
In this section, we provide a simple guide on how to set the monitor to 144 Hz from Windows Display Settings.
Check if Your Monitor Supports 144 Hz Refresh Rate
The first step is to find out if your monitor supports 144 Hz. If it doesn’t, you will have to get a new monitor compatible with the high refresh rate.
Here’s how you can check whether your display device supports 144 Hz on Windows 11:
- Open Settings from Start Menu and navigate to System.
- Next, click on the Display tab to configure your display settings.

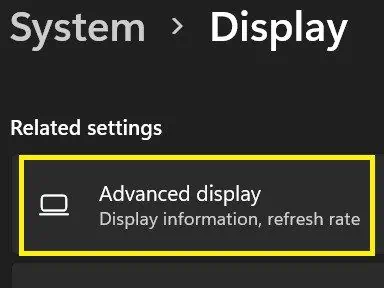
- Under Related Settings, choose Advanced Display.

- Now, select the right display device from the drop-down.

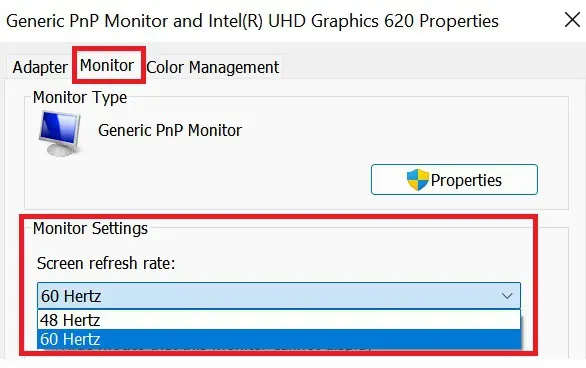
- Then, tap on the Display adapter properties for Display [Number]. This opens the Generic PnP Monitor.

- Click on the Monitor tab and tap on the Screen refresh rate drop-down. Here, you will see the list of all the refresh rates supported by your monitor.

If you do not see 144 Hz, it’s because your screen doesn’t support this refresh rate. But, if you bought a monitor that actually supports 144 Hz, some other issues might prevent you from setting the refresh rate.
Use the Right Cables that Support 144 Hz
Even if your monitor supports 144 Hz, some outdated cables may not support it. Hence, the second step to consider is checking whether your wires support 144 Hz or not.
Well, we are all familiar with HDMI cables, and most of us use them to connect our displays. However, if you’re using HDMI 1.3 or previous versions, you cannot set your monitor to 144 Hz.
If you’re looking for detailed information to find out if HDMI supports 144 Hz, you can check out our other post.
Moreover, you can use DisplayPort 1.2 or dual-link DVI cables as they both support 144 Hz. Unfortunately, the older VGA cables are incompatible with the refresh rate we seek.
Tweak Display Settings
The final step is to make changes to the display settings. Go through the guide below to learn how you can do just that:
- Right-click on the desktop area and select Display Settings.
- Under System, go to Display and choose Advanced Display.
- Navigate to Choose a refresh rate and select 144 Hz from the drop-down. Alternatively, you can open the Display adapter properties and select the refresh rate the same way we explained in Step 1.

Set Monitor to 144 Hz Using Graphics Card Controllers
If you have installed a dedicated graphics card like NVIDIA GeForce RTX 2060, you get an in-built control panel where you can tweak various settings.
However, if you use an integrated graphics card like AMD Ryzen 4000 U, certain software is available to make changes on your monitor.
Well, you can visit our other blog post if you’re keen to know the difference between integrated and dedicated graphics cards.
In this section, we will cover how to set your monitor to 144 Hz using both AMD software and NVIDIA Control Panel.
Through NVIDIA Control Panel
NVIDIA Control Panel is available by default if you use an NVIDIA graphics card. This tool helps configure all the driver functionalities, including improving your refresh rate.
Follow these basic steps for setting the monitor to 144 Hz using the NVIDIA Control Panel:
- Visit your desktop and right-click anywhere on the screen.
- Choose NVIDIA Control Panel to launch the graphics card settings.
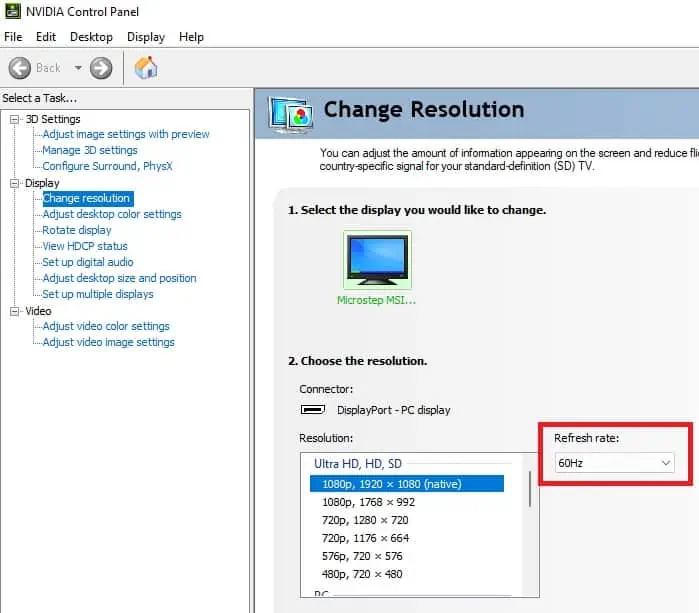
- On the left panel, click on the Change resolution option under Display.
- Now, on the right side, find the refresh rate. Then, expand the drop-down menu and choose 144 Hz.

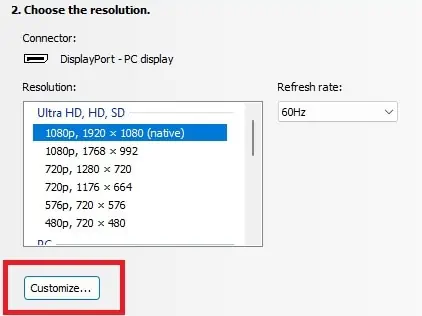
On some monitors, you may not see the high refresh rates. In such cases, you can create a custom resolution only if your monitor supports 144 Hz and if you are using the right wires:
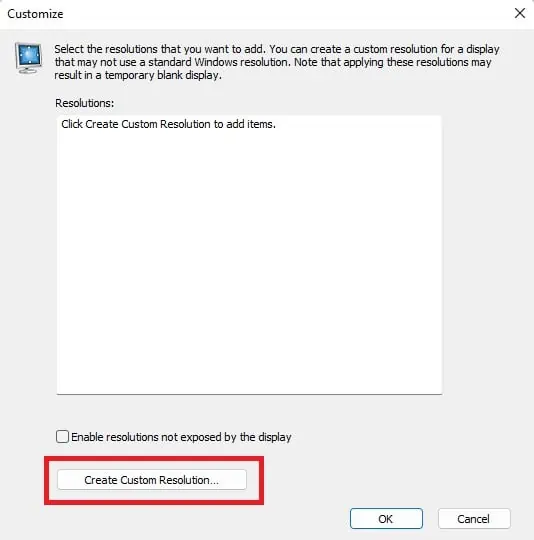
- Click on the Customize button under Change Resolution.

- Next, select Create Custom Resolution.

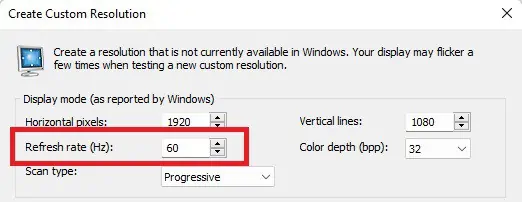
- Under Refresh Rate (Hz), directly input 144.

- Then, tap on Test.
- Now, the system asks you if you want to save your settings. So, click on Yes.
For some reason, the NVIDIA Control Panel may be missing from your PC. In such a case, read our other article to learn how to fix this issue.
Through AMD Catalyst Control Center
Like NVIDIA, AMD also has its own tools to configure the driver settings. Depending on your GPU, you can use either AMD Radeon Software or Catalyst Control Center.
Here’s how you can navigate the software to set the monitor to 144 Hz on AMD Catalyst Control Center:
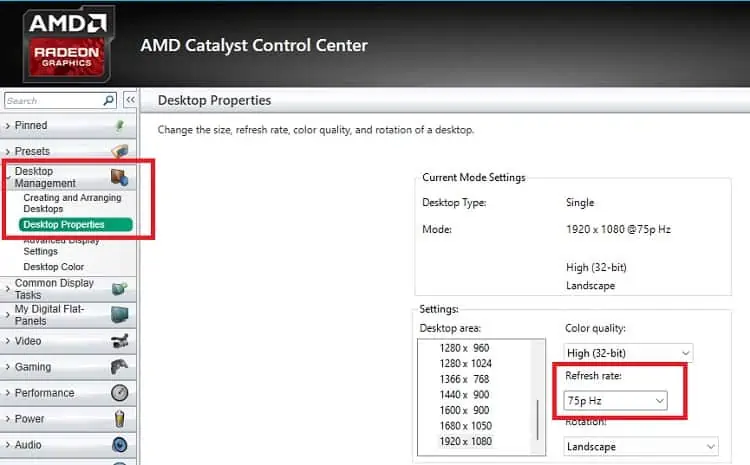
- Right-click anywhere on the desktop screen and choose AMD Catalyst Control Center.
- Once the tool is launched, expand the Desktop Management drop-down from the left panel.
- Then, choose Desktop Properties.
- Now, in the Refresh Rate (Hz) table, input the value 144.

- Finally, click on create, and your monitor will set to 144 Hz.


