
Try using Strikethrough Shortcut in Word to make reviewing and editing easy for all of your documents.
- For a single strike, go for the ribbon bar shortcut by pressing the
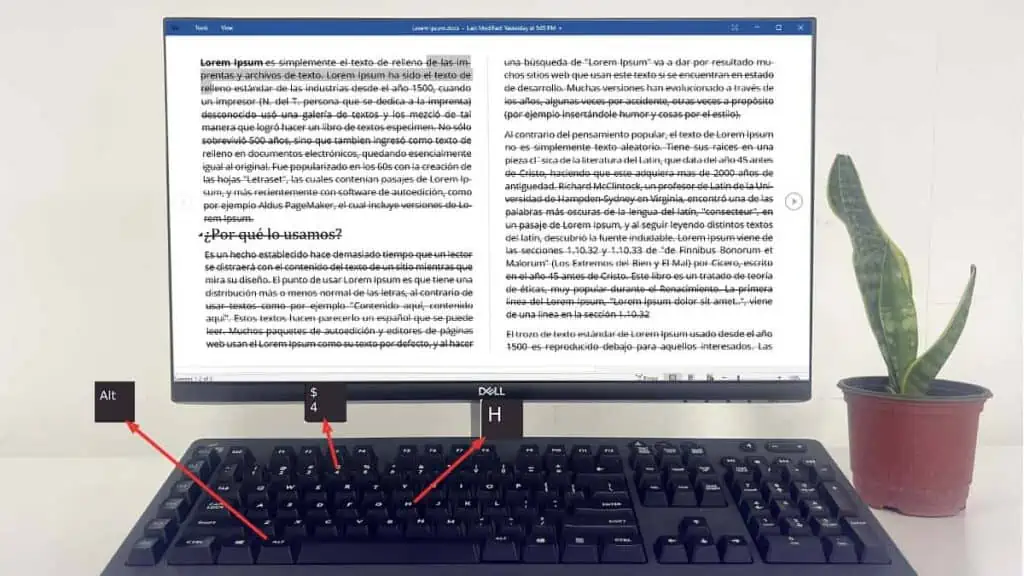
Alt,H, and4keys sequentially. - Alternatively, use the Font dialog shortcut and press
Alt+Ktogether for single orAlt+Lfor double strikethrough.
Using Ribbon Bar Shortcut
Since the Home tab in the menu ribbon has the strikethrough option, you can use the shortcut keys to access it.
- Launch the Word document.
- Select the text.
- Press the Alt, H, and 4 keys sequentially on your keyboard.

- Strikethrough will appear on the selected text.

Through the Font Dialog Shortcut
You can also use the strikethrough feature in the Font dialog for both single or double strikethrough in the desired text.
- Open the Word file.
- Tap
Ctrl+Dto open the Font dialog box. - Click
Alt+Kfor a single strike. - For a double strike, press the
Alt+Lkeys together. - Press Enter. Strikes will appear in the selected text.


Generate a Custom Shortcut
You can generate a custom shortcut to use the Strikethrough feature in Word.
- Launch Word.
- Click on the Home tab and go to the Font section.
- Right-click on the Strikethrough icon.
- Choose Customize the Ribbon.
- Hover over to Keyboard shortcuts at the bottom left corner. Tap on Customize.
- Scroll down the categories and select Home Tab. Then, choose Strikethrough in Commands.
- Input the shortcut key of your choice in the Press new shortcut key box.
- Expand the Save changes in option and choose Normal.dotm.
- Tap on Assign and then Close button.
- Select OK. Your custom shortcut key is ready to use.


Add Strikethrough Feature in Quick Access Toolbar
Alternatively, users can add the strikethrough feature in the Quick Access Toolbar to use it easily.
- Open MS Word.
- Go to the Home tab.
- Right-click the Strikethrough option.
- Select Add to Quick Access Toolbar.

The feature will appear on the top-left corner of your window below the ribbon.
How to Strikethrough in Word App?
If you are editing your document in a Word application for mobile devices, the shortcut features aren’t available. However, you can use the Strikethrough icon in the Home tab.
- Launch the Word app.
- Click to open the document.
- Select the text to strikethrough.
- Tap on Edit.
- Expand the drop-down menu on the bottom right.
- On the Home tab, click on the Strikethrough icon.
- Choose the Done mark.


