
If you see misspelled words while typing, it is most likely that spell check is not working in Word.
Before trying any other fix, check if the spell-check setting is turned on. You can also scan the spelling manually or force recheck spelling in urgent situations.
For error-free writing, always remember to set your preferred language as a default.
However, if you type in multiple languages, set your preferred proofing language and enable automatic detection.
Ensure Spell Check is Turned On
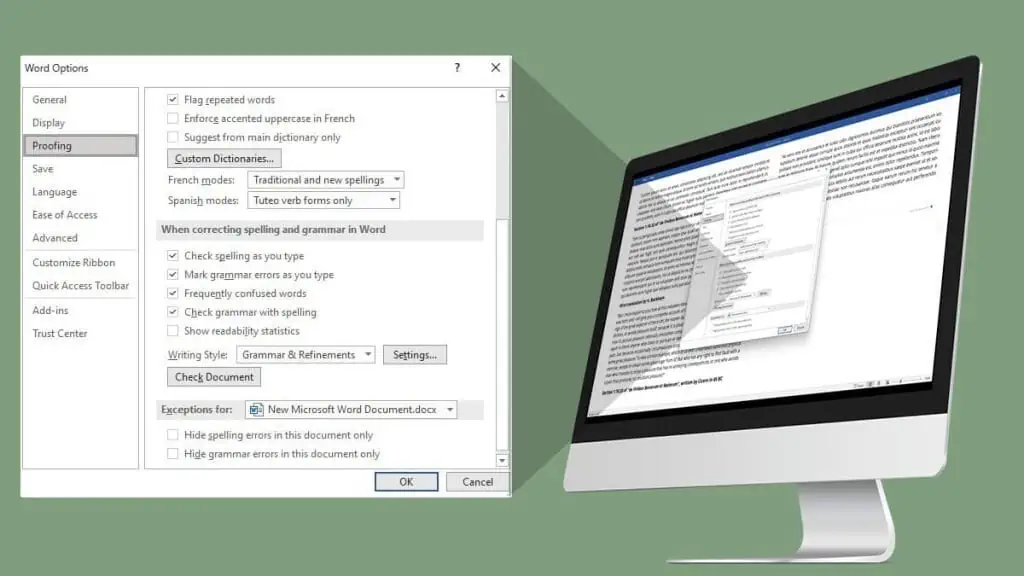
Since Word allows you to turn on/off the spell checker for desired documents, ensure spell check is turned on before trying any fixes.
- Go to the File tab.

- Click on Options.
- Select Proofing.
- Tick on Check spelling as you type.
- Uncheck all options in the Exceptions for section.
- Choose OK.


Manually Check the Spelling
You can also manually check the spelling of your desired document or a selected paragraph.
- Launch Word and open the document.
- Go to the Review tab on the toolbar.
- Select Spelling & Grammar.
- Word will highlight the incorrect spellings.

Force Recheck Spelling
In case you skipped or ignored spell check previously, you can force a recheck. Since it resets the spell checker, this fixes the issues when the spell check isn’t working properly.
- Open the particular document.
- Click on the File tab.
- Select Options.
- Go to Proofing and choose Recheck Document.
- Tap Yes on the warning message.
- On a new dialog, Click OK.
- Go back to the document and turn on the Spelling Check.


Change Default Proofing Language
Sometimes, when the language you use isn’t set as a default proofing language, the spell checker might not work correctly.
In that case, you can change your default proofing language to the one that you often use.
- Go to the Review tab.
- Select Language and click on Set Proofing Language.
- Scroll through the Language dialog and choose the desired language.
- Uncheck the Do not check spelling or grammar box.
- Choose Set as Default.
- Click OK.


Set as Proofing Language
If you often use multiple languages to type in Word, spell checker won’t work if proofing isn’t enabled for that particular language.
Select language preferences for such situations or set it as proofing language as above.
- Expand the Review tab and click on Language.
- Select Language Preferences.
- On Office authoring languages and proofing, tap on Add a Language.
- Choose the preferred language and select Add. Then, tap OK.
- Go to Set the Office Language Preferences if the preferred language is unavailable. Select Install additional display languages from Office.com.
- Choose the desired language on Add an Authoring Language and click on Install.
- Click Download on a Microsoft Office browser page. Install the language pack.
- The language will appear in the list.


Check if the Proofing Available button appears next to it. Or else you will have to install a proofing tool for the language.
Enable Detect Language Automatically
If you type your document in multiple languages, you need to enable automatic language detection to enable spell checker.
- Click on the Review tab and go to the Language section.
- Select Language and tap on Set Proofing Language.
- On the new dialog, choose Detect language automatically.
- Click on OK.


Allow Speller Add-in for Preferred Language
A disabled add-in for a particular language speller may be a reason why spell check isn’t working. Follow these steps to enable it:
- Go to the File tab and click on Options.
- Select Add-Ins.
- Hover over to Word Options and expand Manage.
- Choose Disabled items and tap on Go.
- On a new dialog, scroll through the Select the ones you wish to re-enable.
- Find the add-in for the desired language and select it.
- Click on Enable and choose Close.
- Tap OK.


When none of the fixes can make spell checker responsive in Word, you can take help from Word plug-ins like Grammarly.