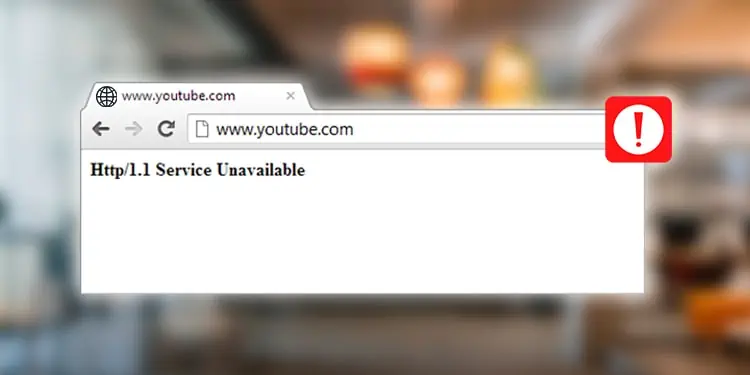
The ‘http/1.1 service unavailable’ error occurs when your computer is not connecting to the backend of the website. This error prevents you from accessing the website entirely. It can be because your computer’s or the website’s network settings are not configured properly.
In some cases, simply giving it some time can be an effective solution. However, there are some solutions you can try from your end to make sure the error is not related to your PC. Stick with us to know more about how you can fix this issue.
Possible Causes of the Error
The ‘service unavailable’ error is usually server related and appears when there are more traffic requests than the server can handle. Apart from this, there are also other probable causes for this issue.
- Bad DNS configuration
- Malware and virus
- Poor internet connection
- Wrong date and time
- Conflicting web browser cache
How to Fix the “http/1.1 Service Unavailable” Error?
If it is a server-side issue, it’ll probably get resolved on its own after some time. When all the traffic is dealt with and the server load decreases, the web page will be back to normal. As such, the first few fixes detail what you can do to fix it on the backend, whereas the rest detail what you can do as a normal user.
Fix WordPress Service Unavailable Error
The issue usually automatically resolves with time after the website traffic becomes normal. This may also occur if your web server can’t communicate with the PHP scripts properly.
Try disabling the scripts one at a time until you find the unresponsive script. You can use the FTP client to change the settings. Here’s another solution you can try to solve the issue :
Deactivate Conflicting WordPress Plugins
Some plugins can cause conflict with the website. You can disable them by following these steps.
- Open the WordPress root folder and look for the public directory.
- Search and click on the wp-content directory.
- It will contain a folder named ‘Plugins.’
- You can either change the name of this folder to disable all plugins at once. Or you can also go into this folder and rename individual plugins.
This will cause the server to not recognize the plugin at all. Try renaming them to something easily recognizable.
Check Application Crash Logs
The HTTP error may happen if the server itself has crashed and cannot take any requests. You can check your application and system’s logs in the Event Viewer program to check the cause of that crash.
Normally, the most probable cause is a highly busy website. The default maximum requests queue is 1000. If the server reaches this capacity, it will show users a ‘service unavailable’ error.
Troubleshoot Netscaler Reachability
If you’re facing this error when accessing the Unified Gateway, the following steps will be helpful:
- The first step is to include a service. Then Add storefront server to it.
- Use multiple monitors like the tcp-default or icmp to test for possible connection and port issues.
- Allow the Storefront IP through the firewall for port 443.
- Go to storefront settings and Match the port and protocol with the Unified Gateway configuration.
- Input this expression in the content switch policy of Unified Gateway if it’s missing.
HTTP.REQ.URL.PATH.SET_TEXT_MODE(IGNORECASE).STARTSWITH("/Citrix/STORE_NAME")
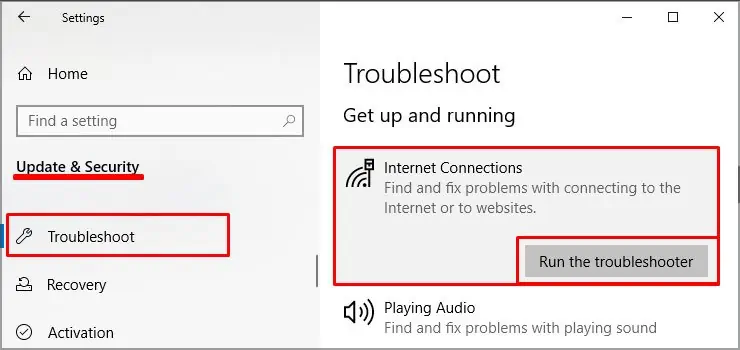
Run Windows Troubleshooter
The windows troubleshooter can pinpoint a problem and fix the issue automatically. It is divided into specific categories of the computer so you can easily figure out the issue.
- Press Win + I to go to settings.
- Click on Update & Security.
- Click troubleshoot on the left panel and then go to ‘Additional troubleshooters.’
- Navigate to Internet Connections and click on Run the troubleshooter.

- It will start detecting problems and notify you to fix them if any issues are found.
Reset Network Stack
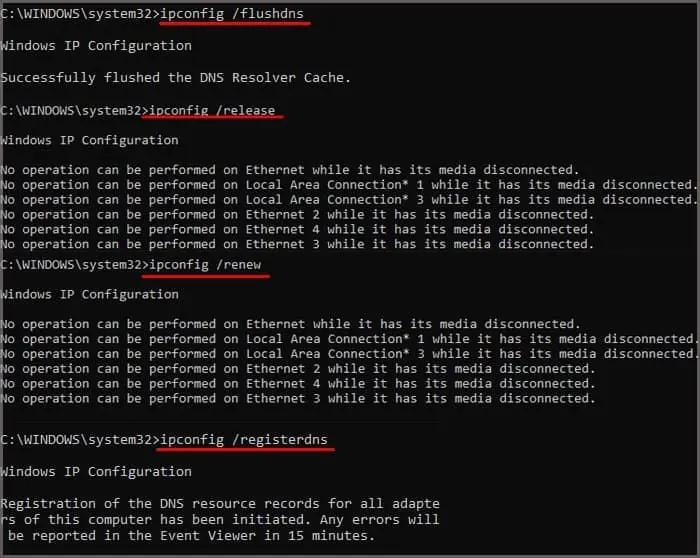
You can also try resetting your computer network stack to overcome this issue. The network stack includes your computer system’s DNS cache, IP subnet mask, and IP protocol settings. You can clear your computer’s network stack by following these steps:
- Press Win + R, type
cmdand press Enter. - Type these commands and Press Enter after each line of code:
ipconfig /flushdnsipconfig /releaseipconfig /renewipconfig /registerdns
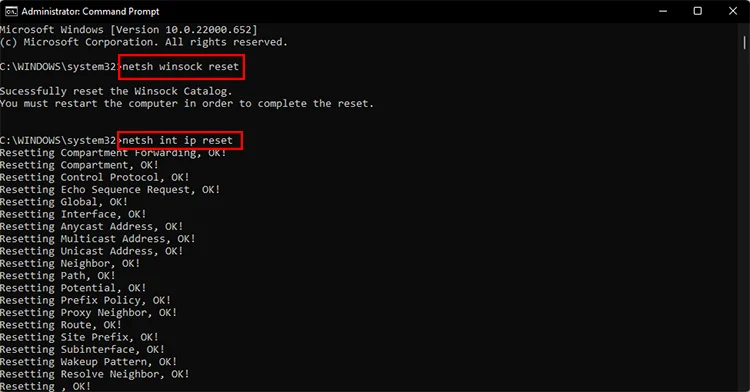
- Now enter the following commands and press Enter after each line of commands.
netsh winsock resetnetsh int ip reset
- Restart your computer.
Clear Browser Cache
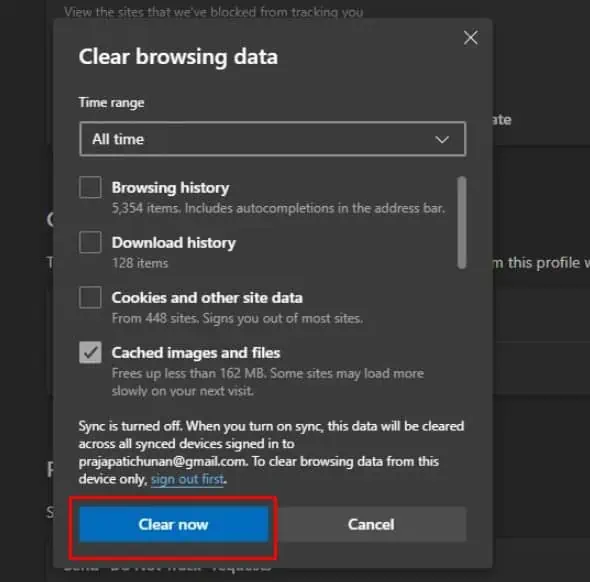
Your internet browser saves cache files of websites so it can load that website faster in the future. If any browser has made changes, the old cache files cause conflict, resulting in a dysfunctioning website. Clearing caches are generally a good idea as the browser will generate caches again when necessary. Clearing caches are different for every browser, but the general way is very similar.
- Open your browser and go to Settings.
- Navigate to the Privacy section.
- Look for the Browsing data section and click on Clear browsing data.

- Tick on Cached files and click Clear now.
Clear SSL Cache
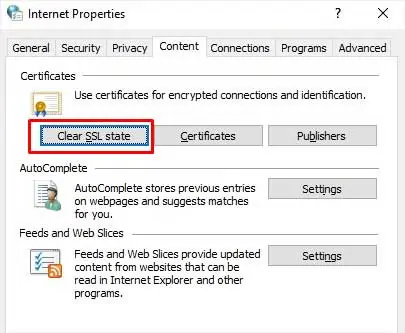
The SSL certificates are responsible for protecting any data that is being exchanged in a network. It prevents data theft and prying from an unauthorized party. Incorrect SSL certificates can also cause issues with connecting to the internet. You can try clearing SSL caches to fix any possibilities.
- Go to the windows search bar and search for Internet Options.
- Navigate to Content.
- Click on Clear SSL state.

Change DNS settings
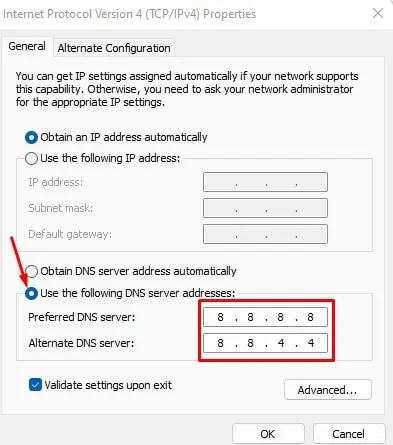
Changing your default DNS settings can also solve this error. These steps will guide you on how to clear your default DNS settings.
- Right-click on the Network icon in the system tray and click on Open Network and Internet settings.
- Click on Change Adapter Settings.
- Right-click on your Current Internet connection type (LAN or WIFI) and click Properties.
- Navigate to Internet Protocol Version 4(TCP/IPv4) and click on Properties. Careful not to click on the tickbox in front of it.
- Click on ‘Use the following DNS server automatically.’
- Type the following IP Address:
- Preferred DNS server: 8.8.8.8
- Alternate DNS server: 8.8.4.4

- Press on ok to save and exit.
- Restart your PC.
Scan for Viruses and Malware
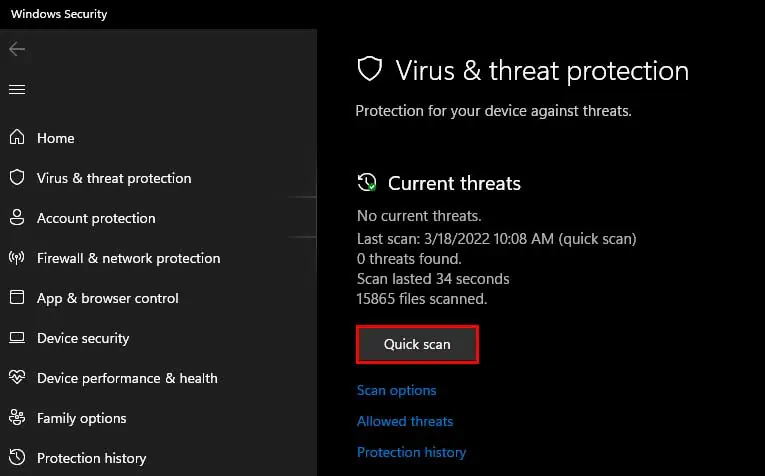
Windows has a built-in antivirus software called Window defender to tackle viruses and malware. Here’s how you scan for threats on your computer using Windows defender:
- Press Windows key + I to open settings.
- Go to Update and security > Windows Security.
- Click on Virus & Threat protection.
- You can click on Quick scan to scan for the most common viruses.

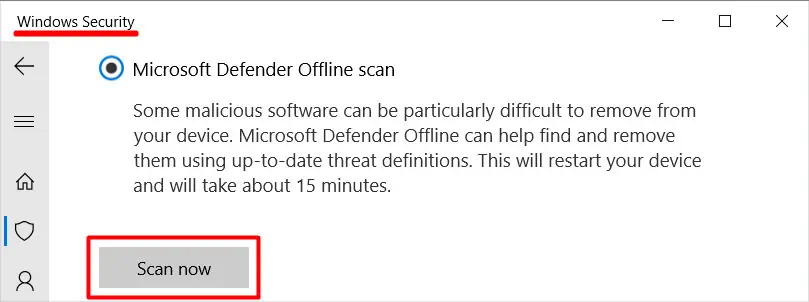
- However, if you want a more thorough scan of your computer, click on Scan options and choose ‘Microsoft Defender Offline Scan’ and Click on ‘scan now.’

- Restart your device.
You can also choose the ‘Full scan’ to do a complete scan of your system. It takes some time to complete and may even extend depending on your hard drive’s size.
Change Date and Time
A mismatched or incorrect date and time is one of the most common causes of internet connectivity issues.
You can change your computer’s date and time by following these steps:
- Right-click on the date/time indicator in the taskbar and click ‘Adjust date/time.’
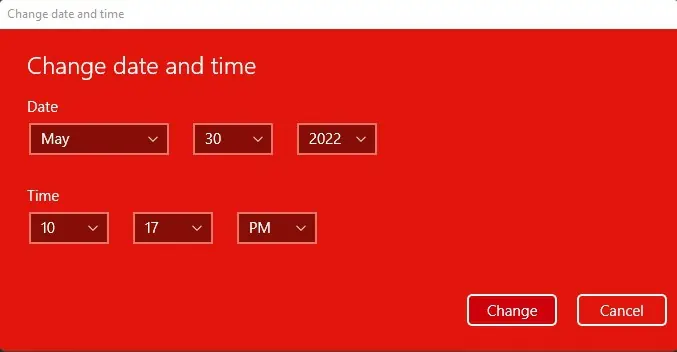
- Click on Change.
- Set the current date and time and click ‘Change.’

You can also auto-set the date and time of your computer by turning on the ‘Set time automatically.’ However, if your date and time settings are reset every time you restart your PC, you need to replace your CMOS battery.

