
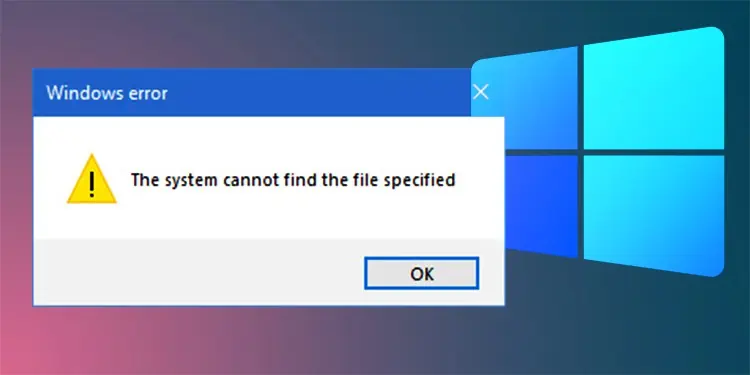
The System Cannot Find the File Specified is an error that can appear when the file, you or the program you’re using is trying to access, is either corrupt or missing.
Some quick fixes for the error is to check if the files you’re trying to access exist in the device or not. Checking the permission of the files and folders and simply restarting your device can also help solve the issue.
What Causes The System Cannot Find the File Specified
This is one of the more common errors that users can encounter while using Windows as there are a lot of scenarios in which the issue can appear. The following reasons may cause the specified error
- Corrupt or missing system files
- Missing application files and folders
- Corrupt device drivers
- Error while backing up data
- Incorrect user settings and configurations
- Windows Update issues
- Faulty storage drive sector
How to Solve “The System Cannot Find the File Specified” Error?
This is an error that can occur in multiple scenarios and use cases while the system is trying to access specific files during operation and fails to locate or retrieve them. The cannot find file specified error can appear on following circumstances:
- While performing windows updates
- Executing certain applications
- Corrupt or missing drivers
- While operating with files
Issues during Windows update, like error 0x80070002, corrupt system files due to storage issues, damaged application files and malfunctioning device drivers can cause the “Cannot find the file specified” error to appear.
Here in this article, are the solutions listed for the error “The System Cannot Find the File Specified” . If the error is appearing because of or during the above mentioned causes, you can perform the following fixes.
Perform a SFC and DISM Scan
First, we’ll try and find if the issue is because of a corrupt or missing system file. A SFC (System File Checker) scans, fixes and restores corrupt and missing files of the operating system whereas a DISM scan is used to restore the corrupt Windows image file. To perform a DISM and SFC scan
- Press the Windows key + R to open Run

- Type
cmdand press the Ctrl + Shift + Enter keys together to open command prompt with elevated access - On the console, type
dism.exe /Online /Cleanup-image /Restorehealthto run the image repair scan - Now, type
sfc /scannowto start the SFC scan and wait until the process completes - After the scan, if the corrupted files are fixed, restart your device otherwise delete and reinstall the corrupt or missing files.


CHKDSK Scan
If the error appears while trying to access any file or folder in a particular storage device, perform CHKDSK (Check Disk) command. This scans the storage device for any file errors or bad sectors and attempts to fix them.
- Open Run by pressing Windows key + R
- Type
cmdand press Ctrl + Shift + Enter keys together to open command prompt with elevated access - In the console, type
chkdsk <specify disk>: /f /rto scan the storage to fix any bad sectors and repair any corrupt files [eg: chkdsk E: /f /r] - If the drive is not specified, the command will scan the directory it currently is in
- After the scan completes, restart your device and check if the error still appears

Update Windows
If the system scan cannot restore or fix the necessary files, a Windows update usually resolves the issue by repairing and restoring any missing files from your device. To update Windows
- Open Settings by pressing the Windows key + I and click on the Windows update tab on left
- If an update is available, click on the Download & Install option
- If any updates are not available, click on the Check for updates button
- Additionally, you can also look for updates in the Optional updates section by selecting Advanced Options
- After the update completes, check if the issue is solved


Microsoft Update Troubleshooter
If the error appears because of a Windows update, trying to find and fix the problem from the Windows troubleshooter usually helps solve the issue. If not, it will suggest solutions that may be the probable cause for the error to appear. To run the update troubleshooter:
- Open Settings
- From the System tab, scroll down and click on Troubleshoot
- Click on Other Troubleshooters
- Click on the Run button on Windows Update
- Let the process complete and perform fixes as suggested


Delete Software Distribution Folder
Sometimes due to corrupt files in the SoftwareDistribution folder, Windows update can fail to install in the device causing the error to appear. To solve this, you will need to remove the update files and the old Windows image file by deleting the SoftwareDistribution folder.
Firstly, you will also need to disable some Windows update components and delete the catroot2 folder. To perform these steps,
- Press the Windows key + E to open the File Explorer
- Now, navigate to
C:\Windows\SoftwareDistributionand delete the folder - Again, search
C:\Windows\SoftwareDistribution.oldand delete/rename the folder if present. - Restart your device and check if the error appears again while trying to update Windows.
- Similarly, navigate to
C:/windows/system32and delete the catroot2 folder also.


Repair/Reinstall the Application
Note: This method is applicable for supported applications only
If Windows update is not the issue and the error code is appearing while launching applications, repairing the application from Settings and if that does not work, resetting them may help solve the problem.
To repair the installed application,
- Open Settings and click on the Apps tab
- Select Apps & features and in the App list section, search for the application you wish to repair
- After locating the application, click on the vertical dotted menu of the application and select Advanced options
- Scroll down and in the Reset section, select Repair to start the process.
- Let the process complete and then launch the application again
- If repairing does not work, Reset the application to restore its functionality
- Press on the confirmation popup again to proceed


Note: Make a backup of any important files and data before uninstalling.
In some instances, if the repair and reset options do not work, then uninstalling or forcefully removing and then reinstalling the application may fix the issue. To uninstall the application in your device
- Open Settings and click on the Apps tab
- Click on Apps & Features and scroll down or search for the application you wish to uninstall
- Click on the dotted menu and select Uninstall from the drop down menu
- You can also uninstall the application from the application interface itself or the uninstaller that is included in the application folder
- After uninstalling the application, reinstall it and check if the error still persists.

Check System Log
Sometimes, the error may appear because of corrupted or malfunctioning device drivers. To fix the error, check the system log and verify if the drivers are missing or absent. After verifying, installing the missing drivers again may help solve the issue. To do this:
- Open file explorer and navigate to
C:/Windows/infdirectory - In the directory, search for
setupapi.devorsetupapi.dev.logfile and open it - Now, open the search tool by pressing Ctrl key + F and type cannot find the file. Press the Enter key
- After finding the missing file/s, copy and paste them on the address bar of the INF folder to navigate there
- After confirming that the drivers are missing, reinstall them and reboot the system

Update Device Drivers
Corrupt or malfunctioning drivers may cause the error to appear. In these cases, updating the device drivers can help solve the The System Cannot Find the File Specified error. To update the device drivers
- Open Run and type
devmgmt.mscto open Device Manager - Search for the corrupt driver. Sometimes the drivers have a yellow sign beside it to denote errors or corruption
- Right click on the driver and click on Update driver
- On the next prompt select Search automatically for drivers and let the process finish
- Restart your device and check if the error still appears in the device


Turn Off Controlled Folder Access
Some users have reported that while installing device drivers or accessing sensitive files, ransomware protection and controlled folder access are causing the error to appear. Both of these settings are part of Windows Security that may be causing conflict or false errors. To disable the settings
- Open Run, type
windowsdefender:in the dialogue box and press the Enter key - Now, click on Virus and Threat tab and scroll down to Ransomware protection
- Click on Manage ransomware protection and toggle the Controlled folder access to Off
- Try reinstalling the device drivers or accessing the files and see if the error still appears


Partition Storage Drive
Another method for this error to fix is to format and partition the disk again. Make note that the files in the storage will be removed during the process. Therefore, make a backup of it before proceeding. To remove the files and partition the drives again
- Open command prompt with elevated access
- Now, on the console, to enter the disk partition and list the available volumes in your disk, type
diskpartand press the Enter keylist diskand press the Enter key
Make sure that the disk shown here is properly connected and healthy. If not, power off the device and check for connections. - If the device is shown, proceed to select the disk and firstly clean it to create a partition. Now, enter the commands
select diskand press the Enter key
[eg: select disk 0]cleanand press the Enter key - Now, type
create partition primaryand press the Enter key - After creating the partition, format the disk and name it
format fs=ntfs label=drive nameand press the Enter key
[eg: format fs=ntfs label= Applications] - Wait until the process completes and see if the error appears


System Restore
Note: Make sure that all programs are closed and any unsaved work is saved before proceeding. The process cannot be interrupted and any attempt may corrupt system files. Connect a charger if performing on a laptop.
A system restore reverts the recent alterations made to the system to a previous stable state by undoing changes made by the user. To perform a system restore firstly make sure that your device has the restore option enabled and a previous snapshot of the operating system.
- Open Run and type
rstrui.exeto open the System Restore Window - Select the type of restore you want to perform and then click on Next
- If you selected the Choose a different restore point option, select the restore point from the list
- After selecting and clicking on Next, click on Finish to proceed with the restore
- On the confirmation, press Yes to continue with the operation. Your device will restart during the process.


Reset Device
Note: This method removes all the installed programs and reinstalls Windows on your device. Backing up files, folders as well as any necessary data in an external storage while connected to a charger (laptops and portable devices) is highly recommended.
The final solution for this error appearing is to reset your device entirely. This process reinstalls Windows and removes all installed applications and programs. You can either choose to keep your personal files and folders or remove them entirely. To reset your device:
- Open the Windows Advanced boot options by holding the Shift key and clicking on the Restart button from the power menu
- In the boot menu, Select Troubleshoot
- Now, click on Reset this PC
- Now, choose if you want to keep your files or remove them
- Follow the onscreen prompts and wait until the process finishes and boots you to a login screen


