
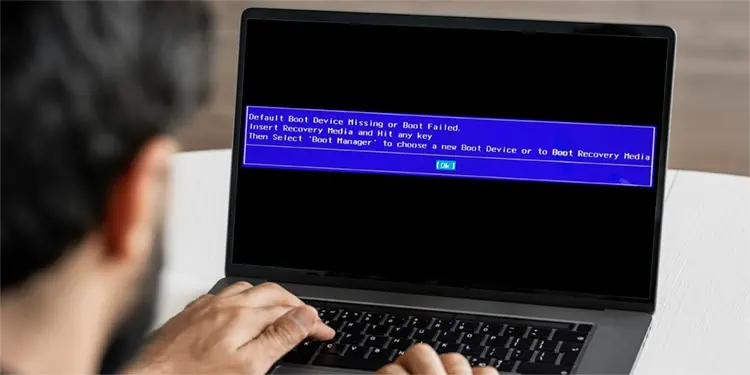
Default Boot Device Missing or Boot Failed is a boot error that happens when Windows fails to detect a boot device after powering on. This may happen due to misconfigured, corrupt or a damaged boot drive.
Simple fixes include restarting the device again, reseating the boot drive and reattaching any loose or disconnected cables. Additionally, replacing/repairing any damaged or faulty components or removing any bootable peripherals can also help fix the issue.
To fix the Default Boot Device Missing or Boot Failed error, check if the boot media is detected on BIOS. If any boot media cannot be found, you will need to inspect the hardware for any issues.
Check and Replace Hardware
Components such as the boot storage media, cables or the memory may be unplugged, damaged or have malfunctioning components. you will need to inspect each element carefully and fix or replace them.
- Turn off your device and remove all power cords from it

- If on desktop, remove any residual power by pressing the power button for at least 10 seconds
- Now, carefully remove the side panel to get access to the internals of the computer
- Check for any disconnected, misaligned or damaged wires
- If problems are found, reconnect them properly or replace them
- Check the memory and the storage for the same problems
- Reseat, repair or replace if any damages are found


For laptops,
- Power off your device and remove the battery
- If the device has an internal battery, remove the back panel and disconnect the battery from the motherboard
- Remove any residual power by pressing the power button for at least 10 seconds
- Once inside, check for the same issues described above and reseat, replace or repair the affected components


Change BIOS Settings
The first thing we’ll be doing is to manage the BIOS settings. If by any chance the BIOS settings like the date/time and the Legacy/UEFI boot mode are changed or modified, the system may be unable to boot.
- Turn off your device and reboot it
- Before the logo splash screen appears, repeatedly press the BIOS key (Function keys or Del key) and enter the BIOS
BIOS Date/Time Settings
Sometimes, due to incorrect date and time settings in BIOS, the device may throw this error. It could happen due to reasons such as misconfigured settings, problems with the CMOS battery, CMOS connection issues or the battery becoming old.
- On the BIOS, search for the System date and System time setting
- Change the values to the current date and time values
- Save the changes by pressing F10 or Y/N keys while exiting
- Reboot your device normally

Change Boot Mode
Changing the Boot mode from UEFI to Legacy can sometimes help your device detect the boot drive. As sometimes UEFI boot mode can be incompatible with the device. To change the boot mode.
- Search for the Advanced Boot Options or Boot in the BIOS
- Locate the Boot mode menu and change the boot mode from UEFI to Legacy
- Save and apply changes
- Reboot your device normally

Note: We recommend users to first create a bootable recovery media as the following solutions require it to boot into the Windows recovery environment and perform fixes.
Change Boot Order
The next solution is now to change the boot order from the BIOS. If the primary boot partition has been changed or is reset from the BIOS, this error could appear. To fix this, resetting the boot order or changing the boot partition cloud help solve the issue.
- Open the BIOS and search for the Boot option
- From the list, select the primary boot device or one of the devices that has the OS installed
- Save and exit the BIOS
- Restart your device and check if the device boots normally

Automatic Repair
If changing the boot order did not work, the error could be appearing because of corrupt system files. To fix, you will need to perform repairs from the Windows Recovery Environment (WinRE). The Automatic Repair function detects and troubleshoots any startup errors.
- Download the media creation tool and create a recovery media
- Power off your device and insert the recovery media
- Before the Windows/manufacturer logo appears, repeatedly press the boot key (varies according to model, refer to product documentation or support website)
- On the boot menu, select the recovery media as the boot drive
- Inside, select the keyboard and language preference
- Now, click on
Troubleshoot> Advanced options> Startup repair - Next, click on Restart and let the process complete

Additionally, if this method does not work, you can try and reset the PC while retaining all the personal data on your device. Resetting the PC will however, remove all the system and hardware configurations.
Change Storage Controller Mode
Note: Changing the storage controller mode from IDE/AHCI to RAID will cause loss of data. Make sure to backup or clone the disk to a separate storage media before attempting.
Another cause that might be triggering this error could be due to misconfigured storage controller settings. To fix this, you will need to change the storage controller setting from the BIOS
- On the BIOS, search for settings labelled SATA control, Configure SATA or similar
- Select the partition method and change it from IDE to AHCI or vice versa
- Save the changes and reboot your device normally

Enable Boot Partition
Note: This fix is only applicable for devices supporting Legacy boot mode
If the boot partition has been deactivated, this can cause your device to fail to boot. To fix this, you will need to re-enable the boot partition from disabled to active in the command prompt.
- Boot your device to the Windows recovery environment by using the recovery media
- Select the keyboard and language settings
- Now go to
Troubleshoot> Advanced options> Command prompt - On the command console type the following and press the Enter key after each command
DiskpartList diskSelect disk 0[in place of 0 enter the disk number listed]List partitionSelect partition 1[in place of 1, place the appropriate partition where Windows is installed]Active - Remove the installation media and restart your device normally


Fix Boot Sector
Incase of a corrupt boot sector, you will need to rebuild it from command prompt to solve the issue. To do this, first boot to the Windows Recovery Environment. Depending on the type of partition, MBR or GPT, you can use two methods to fix the boot sector
For drives having MBR partition
- Open Command prompt in the Windows recovery environment
- Type the following command press the Enter key after each line
bootrec /FixMBRbootrec /FixBootbootrec /Scanosbootrec /Rebuildbcd
To repair drives having GPT partition
- Type the following in command prompt and press Enter after each line
DiskpartList vol - From the list, select the volume labelled as System and assign a new, unused letter to the volume by entering this command
Sel vol 4Assign letter = K:Exit - Now, type the following and replace the assigned letter with the one you used
cd /d K:\EFI\Microsoft\Boot\ - If you encounter an error, try these commands instead
cd /d K:\Boot\cd /d K:\ESD\Windows\EFI\Microsoft\Boot\ - After successfully executing the command, type the following commands again
bcdboot C:\Windows /s K: /f UEFIren BCD BCD.backupBcdboot C:\Windows /s K: /f ALLexit


Close the command prompt window and restart your device to see if the issue has been resolved
Reinstall Windows
Note: you will need a storage device with a capacity of at least 8GB, internet connection and a working PC to perform this fix.
The final software fix is to reinstall Windows using the recovery media. This process installs a fresh copy of Windows in the device. This essentially eliminates any software issues related to the boot drive.
- First, create a bootable recovery media and insert it on your affected device. Make sure that the device is powered off
- Start the affected device and boot into the BIOS
- Change the boot priority to the recovery media and press Enter
- On the Windows Setup screen, follow the on-screen prompts
- Let the process complete and boot the device normally
- If the device fails to boot or is stuck in a boot loop, you may need to change the boot priority from the recovery media to Windows Boot Manager

