
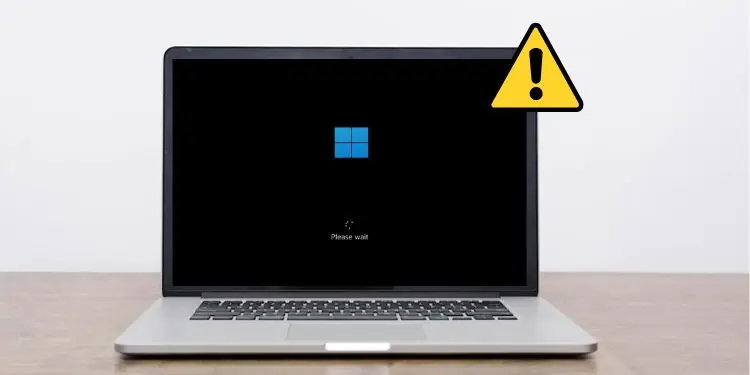
You’ve probably updated your operating system to fix errors or get hands-on with the latest features. But what if Windows won’t boot after an update?
If you’re facing such an issue, it’s mainly due to a bug in the installation file or your system isn’t compatible with the latest update. Moreover, corrupted MBR or drivers can also stop the PC from booting.
Regardless of any cause, this article will guide you with the ten easy techniques to fix Windows that’s not booting after a recent update.
Why is Windows Not Booting After an Update?
Several Windows users have encountered different problems after updating their computers. Well, there are times when your PC becomes laggy, has slow booting issues, triggers kernel panic errors, and many more. Hence, we recommend performing a system restore if you encounter difficulties after updating your OS.
Likewise, a few users have complained that their Windows won’t boot. Indeed, this can happen due to a plethora of reasons, and it’s difficult to determine the exact problem.
- Corrupted or incompatible Windows update file
- Startup errors
- Corrupted boot sector (MBR)
- Corrupted Windows OS files and drivers
- Pending XML files
How to Fix Windows Won’t Boot After Update
If your computer isn’t starting, is stuck in the black screen, or frequently triggers BSOD errors after the startup, you can try the general fixes before moving on with the major ones.
Firstly, we suggest forcibly shutting down your PC and rebooting it. This will remove the unwanted temporary files that could prevent Windows from starting.
If that doesn’t work, force shut down your PC again. Then, unplug all the USB devices (keyboard, mouse, speakers, headphones) and power on your computer. This way, Windows doesn’t have to test whether the peripherals are properly functioning and will likely boot.
Now, if neither of the aforementioned methods fixed the startup problem, you can move on with the ten fixes below.
Uninstall the Latest Update
Well, Windows is probably not booting after the recent update, mainly because your PC doesn’t support the latest installation file. Furthermore, there may be bugs within the update that have corrupted essential Windows files.
Hence, the best way to eliminate this problem is by uninstalling the update file from the Windows Recovery Environment:
- Firstly, force shut down your Windows PC or laptop.
- Next, turn on the computer and forcibly shut it down again. Generally, doing this three times will start the automatic repair.
- Now, select Advanced options to enter the recovery console.

- Under Choose an option window, switch to the Troubleshoot option.
- Then, click on Advanced options.
- Here, choose the Uninstall Updates option to remove recently installed quality or feature Windows updates.
- Now, first, select the Uninstall latest quality update option, and confirm it by tapping the Uninstall latest quality update button.
- Upon restarting, Windows should boot normally. Otherwise, navigate to the recovery environment and open the Uninstall updates option again.
- This time, press Uninstall latest feature update, and click on the Uninstall feature update button to confirm.
- Once your PC restarts, Windows should boot and take you to the login screen.


Use Startup Repair to Fix Startup Problems
The corrupted update file has probably created startup issues if Windows isn’t booting even after uninstalling the latest update. Luckily, there’s an option to repair this using a tool within the recovery console.
Basically, the Startup Repair tool looks into the possible bugs and errors stopping Windows from booting. Kindly follow the below steps to learn how you can fix this:
- In the recovery console, move to Troubleshoot > Advanced options.
- Then, tap on the Startup Repair option.
- Now, you’ll be taken to a black screen with the message ‘Diagnosing your PC’.
- Wait until the repair tool checks and attempts to fix possible disk errors. This can take about an hour.
- If the repair is successful, your PC boots into Windows with no error. Otherwise, you’ll get the message ‘Startup couldn’t repair your PC’.


Fix System Files Using SFC and DISM
Another reason Windows isn’t booting is probably due to corrupted system files. Fortunately, the Windows System File Checker (SFC) utility can help you resolve this. Here’s how you can run this command on Windows RE:
- From the Choose an Option screen, select Troubleshoot > Advanced options.
- Next, from the list of tools, launch Command Prompt.
- Now, you can run the below code to run the SFC utility:
sfc /scannow - Press Enter, and this will start the system scan process.
- After a few minutes, you should get the ‘Windows Resource Protection found corrupt files and successfully repaired them’ message.
- Now, restart your computer, and you should be able to boot into Windows.


However, if the SFC command didn’t work out for you, try the Deployment Image Servicing and Management (DISM) utility. This will repair the corrupted Windows image, which could be preventing your PC from starting:
- Open Command Prompt from Advanced options in the recovery console.
- Now, run the below command and wait until the operation is completed successfully:
Dism /Cleanup-Mountpoints - Again, run the SFC command, and the system errors should be repaired this time.
- Finally, navigate back to the Choose an option screen, and here, select Continue to boot Windows successfully.


Rebuild MBR
In an MBR partitioned HDD or SDD, only one of the sections consists of the OS to be booted. Hence, if this partition gets corrupted due to a recent update, Windows will probably not boot.
Thus, we recommend repairing or rebuilding the MBR (Master Boot Record) so that it identifies where the boot sector is located and how Windows is loaded into the RAM before the startup:
- First of all, get into the recovery window and open the Command Prompt, as discussed in the previous method.
- Here, run the below MBR commands individually to fix the corrupted boot sector:
bootrec.exe /FixMbrbootrec.exe /FixBootbootrec.exe /ScanOsbootrec.exe /RebuildBcd - Finally, restart your computer, and Windows should boot normally.

Delete Pending XML Files
With pending XML files, Windows can go through an endless loop of updates. Indeed, this can prevent Windows from booting, and you’ll likely see the update screen all the time.
Hence, if you’re also experiencing a similar problem, here’s how you can delete the cleanup.xml and pending.xml files from the Windows RE:
- Go to Troubleshoot > Advanced options > Command Prompt.
- Once the CMD window launches, run the below commands to remove the cleanup.xml file:
del C:\windows\winsxs\cleanup.xml - Now, type Y and hit enter to confirm your action.
- Again, run the following command to remove the pending.xml:
del C:\windows\winsxs\pending.xml - In the Are you sure (Y/N)? prompt, press Y to confirm the deletion.
- Once these files are deleted, restart your computer to boot into Windows.


Start PC in Safe Mode
Sometimes, Windows can’t boot due to other issues rather than the basic system files and drivers. To check this, we suggest booting into safe mode and finding possible errors:
- From the Windows recovery console, switch to Troubleshoot > Advanced options.
- Then, choose Startup Settings to change Windows startup behavior.
- Now, press the F5 key to start your PC in safe mode with networking.
- Your computer should boot into safe mode. Here, you can run SFC, DISM, and MBR commands to fix the startup problem. Also, we recommend deleting the pending XML files if possible.


Update Device Drivers in Safe Mode
Indeed, corrupted Windows drivers are another major problem that can prevent Windows from booting. Usually, after an update, these drivers are automatically updated. However, if this doesn’t happen, there’s a possibility that they won’t be updated. In such a case, you can check and update each driver in safe mode:
- Search and launch the Device Manager application from the instant search option on the taskbar.
- Generally, faulty drivers have an exclamation sign. So, you can right-click on each of them and pick Update driver.
- Next, select the first option – Search automatically for drivers. This ensures that the latest drivers are installed on your Windows-based PC.
- Finally, press the Close button and restart your computer. If the problem was due to the device drivers, Windows should boot this time.


Restore Windows
The next option is to perform a system restore. This way, you’ll be taken to the state when Windows used to boot without any issues. Please go through the below guide on how to do just that:
- Enter the Windows RE as discussed earlier.
- Secondly, switch to Troubleshoot > Advanced options.
- Here, find and select the System Restore utility.
- Once the System Restore window launches, log in to your account for administrative purposes.
- Usually, Windows automatically stores a restore point so you can navigate back anytime you face any problem. So, simply choose the Automatic Restore Point and press the Next button.
- Now, click on the Finish button and wait until your computer restarts. Now, you should be able to boot into Windows.


Reset Your Windows-based PC
If none of the above fixes helped you boot into Windows, we suggest resetting your computer. This way, you can keep your personal files but reset everything else to default. Please follow the below instructions on how you can do so:
- Navigate to the recovery window and go to Troubleshoot.
- Here, select the first choice – Reset this PC.
- Next, tap the Cloud Download option.
- Then, choose Fully Clean the drive to recycle Windows.
- Now, proceed with the on-screen instructions and complete the process.
- Once you’re logged in to Windows, restart your PC, and your system should boot normally.


Clean Install Windows
If Windows doesn’t boot even after resetting the PC, the final option is to clean install the operating system. This way, you’ll resolve every problem and, additionally, improve the computer’s overall performance.
Well, installing Windows is relatively easy. To do it properly, here’s our other article on how you can install Windows 11 using USB. After the clean installation, Windows should boot normally.