
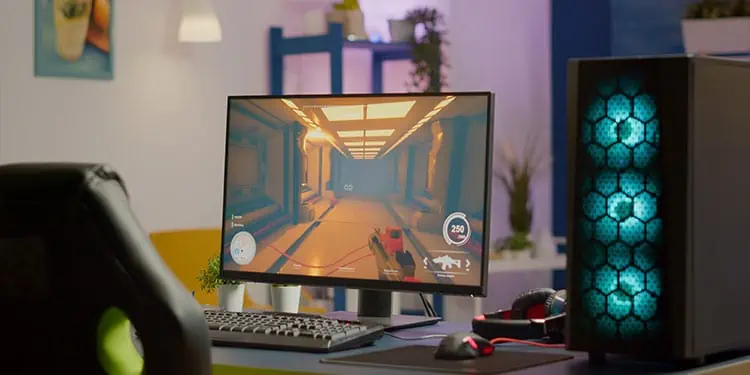
“Frames win games” is a term employed by many manufacturers to market their high end computer parts to consumers. Turns out that this phrase is actually true in many regards. High frame rates provide smoother gameplay, faster response time and an overall richer experience for the user.
Frames are the single image from a sequence of images that form part of an animation in videos or games. FPS (Frames Per Second) is the number of new images that are displayed per second on the monitor. The faster the framerate, the quicker the flow of new information and the quicker the response time of the user.
What Determines FPS?
Both hardware and software play an equal role to determine the frames your device can output. Different applications require different amounts of system resources to run smoothly.
If the hardware is inadequate or not maintained properly, you will experience a drop in performance due to the system overheating or due to the hardware’s inability to process incoming data fast enough.
Likewise, if a software is not optimised for the hardware, it can hog resources and slow down the system which will stutter or crash applications and games. This can completely ruin the experience and make the user frustrated with their system.
Luckily, there are several software and hardware tweaks you can apply that can help your system gain a boost in performance.
How to Get More FPS on PC?
Some basic methods to increase the frame-rate include closing any background processes or fiddling with the in-game settings. To make the most drastic improvements in your system, upgrading or swapping older components with newer and faster ones is the most effective solution.
However, purchasing expensive computer parts or lowering the graphics settings of the games to improve performance may not be the most viable solution for every user. To solve this, we’ve started with a few simple solutions that can help improve the performance of your system.
Windows Game Mode
Game Mode is a feature of Windows OS that optimises and increases the performance of a device by investing more system resources into the games than it would normally do.
This redirection of resources gives a boost to the performance of the system and increases frame rates in the games you play, providing a much smoother experience.
To enable this feature:
- Press the Windows key + I to open Settings and click on the Gaming tab

- Click on Game mode
- Toggle on the Game Mode switch
- Now, click on Graphics tab below and select Change default graphics settings
- Inside the Graphics menu, toggle on the Hardware-accelerated GPU scheduling
- Restart your device after making changes


Disable Startup and Background Apps
Startup apps are applications that automatically start after you boot and log into your device. These applications take up system resources like CPU and memory to operate which can cause the system to not run optimally.
Disabling them during startup frees up resources that can be otherwise used in the applications you’re currently using. To disable startup and background apps:
- Press the Ctrl + Shift + Esc keys together to open Task Manager and click on the Startup tab
- From the list, right-click on the application and select Disable
- The apps will now be disabled


Background apps are services that run on your device that perform activities like backup and processing information for apps without being launched. Background apps also help launch apps faster on your device. These apps however, take up resources in the device. To disable background apps:
- Press the Windows key + I to open Settings
- Click on the Apps tab and select Apps & Features
- Scroll down and click on the dotted button beside the app to select Advanced options
- Inside, scroll down to Background apps permissions section
- Now, click on the drop-down menu and select Never


Change Power Plan
Power plan determines the amount of power your device consumes while in use. It manages various software and hardware components of your device and enables or disables them automatically when not in use.
When the power is low, the Power plan feature makes the device consume less energy which decreases performance. To make your device operate at a constant rate,
- Press the Windows key + R to open Run
- Type
controland press the Enter key to open Control panel - Click on Hardware and Sound and on the new page, click on Power Options
- On the Choose or customize a power plan section, click on Change plan settings
- In the next page, click on Change advanced power settings
- In the new window, click on the drop down menu and click on High Performance
- Click on Apply and OK to save changes


Note: Changing your device’s power plan can cause the battery life to decrease in portable devices.
Change In-Game Settings
Games nowadays have settings and features that allow users to change the quality and enable or disable some features that affect the overall performance.
Disabling features that enhance the game visually can increase the performance and deliver a smoother experience while playing. To disable features
- Launch the game and open the in-game settings
- From there, search for settings labelled Display, Graphics or Performance
- Change the resolution, disable or change any visual settings like V-sync, Shadows, Anti-aliasing or Particle/Visual effects to low
- If you play the game in windowed mode, set it to Borderless Fullscreen. This setting makes Windows OS prioritize the application you are currently in, making the application run more smoothly


GPU Settings
If you have a dedicated graphics card in your device, changing the settings that improves performance can increase the frames the GPU delivers on your system. Other settings like disabling Anti-aliasing and tweaking the Power settings can increase the amount of performance the GPU can deliver in your system.
To change these settings
For Nvidia GPUs
- Press the Windows key + S button to open Search
- Type nvidia control panel on the search bar and press Enter
- On the left side of the navigation pane, double-click on 3D Settings to expand it
- Click on Adjust Image Settings with Preview and drag the slider accordingly to favour Performance or Quality
- Now, click on Manage 3D settings and from the Global Settings tab, click on the drop down menu and select High-performance NVIDIA processor. Take note that this setting will consume more power even when your device is idle
- From the list below you can choose and manage the 3D settings accordingly and apply it globally to your device.
- To make changes application wise, click on the Program Settings tab and from the drop down menu, select the application. If the app is not listed, click on the Add button to include in the setting.
- After selecting the application, click on the graphics processor menu and select High-performance NVIDIA processor
- To further enhance the performance, you can choose to specify individual setting for the application from the list


If your device has Geforce experience installed, you can perform additional settings to change the GPU settings of your device. To do this
- Open Windows Search and type Geforce Experience
- Click on the gear icon to go to Geforce settings
- In the General tab, toggle Whisper mode off and drag the slider as per your preference in the Battery Boost section if it is available


For AMD graphics
- Right-click on the Desktop and select AMD Radeon Software
- Click on the Performance tab and select on the Tuning tab below. Accept the End User Licence Agreement to proceed
- On Global Tuning, if the Tuning Control setting is set to automatic, click on Manual and from there change the properties of the GPU as required.
- Now, click on the gear icon and select the Graphics tab
- You can choose preset profiles from the Graphics Profile to change the GPU performance as per your needs
- To further fine-tune the GPU, you can toggle the switches to enable or disable features that enhance the performance of the GPU
- After modifying, if available, click on Apply Changes to save the settings


Note: These settings do not apply to AMD GPUs that are older than R7 260 Series or systems that do not support AMD Radeon Software.
Decrease Screen Resolution
If your system has a high resolution display, the graphics card has to sacrifice performance to match the quality of the display. Decreasing the native screen resolution can boost the performance of the graphics card by needing to process less data and increase the framerate of the games you play.
To decrease the display resolution
- Open Settings, click on the System tab and select Display
- Scroll down to find Display Resolution in the Scale & layout section
- Click on the drop-down menu and select the preferable resolution for your device
- After selecting, a confirmation window will appear. Click on Keep changes to save the changes you made


Overclock Hardware Components
Another method to increase the frame-rate of your games is to overclock the processor/memory/graphics card of your device. Overclocking increases the processing speed of the components by providing more power and increasing their clock frequency.
There are several methods by which you can overclock the processor, memory and the GPU of your device. Before proceeding, make sure that the components support overclocking by checking the model of the components on your system and searching online.
Note: Overclocking the processor, memory and graphic modules can cause unwanted behaviour and system instability.
- Perform a stress test on the system to determine if it can handle overclocking by using a benchmarking software
- From your device, access the BIOS and search for overclocking settings in Advance or related labels. You can choose to automatically or manually overclock the processor here.
- If you want to manually increase the clock frequency of the CPU, make sure to gradually increase it and check every time for system stability.
- To overclock the memory modules, enable the XMP/DOCP/EOCP setting from the BIOS
- To overclock the graphics card, applications such as MSI Afterburner and ASUS’s Armoury Crate can be used to tweak and manage the GPU clock frequencies
- You can also overclock the components from various first-party applications available


Make sure to proceed gradually while overclocking the components. Provide sufficient cooling as overclocking draws more power and generates more heat, which can throttle and reduce the lifespan of the system. Make sure that the power supply of your device has enough rating to provide sufficient power to overclock the components.
Update Drivers
Besides addressing hardware issues, updating device drivers can increase the performance by adding new features and optimising the components to run more efficiently. To update the drivers from Device Manager
- Open Run, type
devmgmt.mscand press Enter to open the Device Manager - Search for the related driver components and right-click on them to select Update Drivers
- On the next window, choose whether to automatically or manually update the drivers
- Restart your device after the process is complete


You can also manually update the drivers of your device from your device manufacturer’s support application or support page.
Cooling
If the performance of your laptop or desktop decreases significantly after sometime or during heavy usage, then the insufficient cooling solution might be causing your system to not reach its fullest potential.
By preventing overheating, the system can increase its performance significantly making the core components such as the CPU, GPU and the memory to run at an optimal temperature. To optimise
- Place your system in an area that allows sufficient ventilation and airflow
- Turn off your system and remove the side panels to access the internals
- Clean off any built-up dust and dirt from the fans and the vents
- If the thermal paste hasn’t been changed in 2-3 years, re-paste the CPU


Increasing the speed (rpm) of the fans in your device also helps in enhancing the cooling capability of your system. This can be done from the BIOS or third-party applications that can allow you to customise the cooling profile for the system.
Upgrade Parts
The last solution would be to upgrade the system components. The CPU, RAM and GPU can be upgraded to increase the performance of your system significantly. Newer components are much faster and are more suited to handle tasks that require more power.
If you play games that are graphically intensive, into content creation and graphic rendering, upgrading the graphics card of your device should be prioritised. If your task are more into physics simulation, upgrading the CPU of your system should be prioritised.