
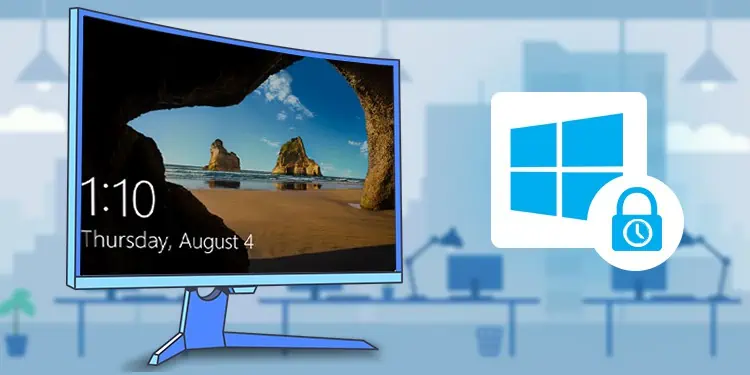
A lock screen helps protect your computer from intruders while you are busy doing some other work. However, it can be inconvenient if your lock screen appears too fast or too slow.
In some cases, you can set a longer timeout if you are tired of entering your password so frequently. Or you would want to lock your desktop as soon as you leave the PC. Either way, you can set the lock screen time in Windows as per your preference.
How to Change Lock Screen Timeout in Windows?
Changing lock screen timeout in Windows is a pretty easy job. You simply need to tweak some settings in the control panel or Windows built-in Settings, and you are ready to set your desired time for the lock screen to appear.
Here, We have listed the best 3 possible methods to change timeout settings for the lock screen. Let’s dive straight into them.
Using Control Panel
Control Panel is a compact component integrated into Windows that lets you configure almost every setting on your computer. Not to mention, it also enables you to change the power settings.
You can follow the steps below to change the lock screen timeout from the control panel easily:
- Hit Windows + R keys.
- In the text field, type
controlthen hit Enter key. It will open Control Panel. - While on Control Panel, select the Hardware and Sound menu. If you don’t see the option, select Category next to View by drop-down.
- Choose Power options.
- Under preferred plans, click Change plan settings beside your currently active power plan.
 10")
- Under Turn off the display drop-down, select your desired time, and click Save changes. If you are on a laptop, you also need to select a time to turn off the display while it is on battery and power.
- You can also use advanced settings and change the screen timeout. For that, click Change advanced power settings on Edit Plan Settings window.
- In the next popup, scroll down to find Display and double-click over it to expand the menu.
- Again double-click over Turn off display after > Settings(Minutes).
- Enter time in minutes in the text field.
- Click Apply and then OK button to save the changes.
 10")
 11")
 12")
Using Settings
The next method is using the Windows settings. If you can not navigate through the control panel, Setting is an easy go-to option for you to make changes in your system.
Follow these steps to change the timeout period for your lock screen:
- Press Windows + I at the same time on your keyboard. You can also right-click the Start button and select Settings.
- On the Settings window, select Power from the right section.
- Then choose Screen and sleep. It will show you two drop-downs once you click it.
- In When plugged in, turn off my screen after drop-down, select the time you wish to set, and you are done.
 13")
Using Command Prompt
Command Prompt is a text-based interpreter which makes changes in the GUI mode from commands entered in CLI mode. You can also use it to make changes to timeout settings. The powercfg command is used for this purpose. It handles all the configurable settings related to power in Windows.
Here’s how to use this command:
- Hit Windows + R and then type
cmdin the text field. - Press Ctrl + Shift + Enter simultaneously.
- In the UAC popup, click Yes. A command window will open.
- Now, copy and paste the below command and press Enter.
powercfg.exe /setacvalueindex SCHEME_CURRENT SUB_VIDEO VIDEOIDLE “180”
Here, I have set the timeout to 3 minutes, which is equivalent to 180 seconds. Please replace 180 with your desired time. - After the command executes, next paste this command
powercfg.exe /setactive SCHEME_CURRENTand hit Enter key.
 14")
- If you are on a laptop, you also need to specify a timeout period while on battery. Again, execute both commands but replace
acwithdcin the former command. i.e. writesetdcvalueindexin place ofsetacvalueindex
Tip: You can also specify how longer the lock screen will appear before your display turns off completely. For that, replace VIDEOIDLE in step 4 with VIDEOCONLOCK and execute the command.
How to Fix Unable to Change Lock Screen Timeout?
The methods discussed above should help you change the lock screen timeout in your Windows. However, some users have reported that the above methods have not yielded the best result for them. In such case, you need to perform further troubleshooting steps in order to change the lock screen timeout.
Reset Your Power Plan
Resetting your power plan often fixes the problem. Making changes to your PC, like setting it for high performance or best optimized for power, can also change the timeout settings. Or, some apps, mostly games, can change power settings for the best outcome.
In such a case, you can try resetting the power plan and then make changes to the timeout. Here’s how:
- Open Control Panel and navigate to Hardware and Sound > Power Options.
- Besides your preferred plan, click Change plan settings.
- On the next window, click Restore default settings for this plan.
- Click Yes in the confirmation popup, and you are done.
- Now, follow the discussed methods to change timeout. You should not face a problem now.
 15")
 16")
Use System File Checker
As experts in Microsoft’s official forum suggested, you can also use an SFC tool to troubleshoot this issue. Missing or corrupted system files can be the reason why the changes are not being applied to your system.
Here’re the steps:
- Open the Command Prompt with administrator privileges.
- Type
SFC /scannow. Then hit the Enter key. - Let it run the scan and fix the corrupted files.
 17")
Run a Power Troubleshooter
The next thing you can do is run the power troubleshooter. It will fix if any issues are found on your power settings and then let you make changes to the timeout period for your lock screen.
Follow the steps below:
- Hit Windows + I key.
- On the Settings window, click System from the left section and Troubleshoot from the right.
- Click Other troubleshooters.
- Under Other section, click Run besides Power. It will start detecting and fixing issues that are preventing you from making timeout changes.
 18")