
Without a doubt, multiple monitors are advantageous over a single screen as they make our work easy, fast, and effective. However, hooking up two, three, or more displays can become challenging if done inaccurately.
Whether you’re an avid gamer seeking a better visual experience or a software developer trying to run numerous applications, you’ve probably wanted a multi-monitor setup. But hooking them up can be much more complex than connecting a single display.
You’ll need to check the devices’ compatibility, adopt a feasible method to join monitors, adjust their position, and tweak projection settings. Regarding the same, here’s a step-by-step guide to help you connect multiple monitors.
Check Compatibility
 1")
It’s essential to check the compatibility before determining the number of screens you can hook up. Connecting dual monitors is much easier and more feasible than a triple, quad, or more.
While there’s no limit to the number of screens you can hook up, you should consider the number of ports available on your mainboard and graphics cards. For example, some motherboards can come with one or even more monitor ports, depending on the iGPU and the manufacturer.
Also, if you plan to connect in a daisy-chain fashion, note that you require monitors with both input and output DisplayPort 1.2 or Thunderbolt ports. Additionally, these interfaces should support the MST (Multi-Stream Transport) feature.
For using a wireless connection, you require a Miracast-compatible monitor. Along with that, your computer should support Wi-Fi. If nothing works for you, kindly use a wireless transmitter and receiver kit to cast or extend your display.
Enable Multi Display in BIOS [Optional]
Although motherboards have integrated graphics as a part of the unit, most users prefer adding a discrete GPU to their setup. This way, ports on both graphics cards can be utilized for connecting multiple monitors. However, they will likely not work unless you enable the multi-display setting in BIOS.
Below is a quick demonstration of how to turn on Intel’s IGD Multi-Monitor setting on an MSI motherboard:
- First, connect your computer to any monitor and start the system.
- Now, get into the MSI BIOS using the dedicated key (Esc) before the operating system boots up.
 2")
If you have a different motherboard, kindly refer to the internet to find the BIOS key. - Next, navigate to Settings.
- Then, choose Advanced.
- Hare, select Integrated Graphics Configuration.
- Find the IGD Multi-Monitor setting and enable it.
 2")
 3")
 4")
 5")
 6")
Position Your Monitors
Adjusting the monitors in the correct position helps maintain ergonomics. While arranging the screens entirely depends on your comfort, we highly recommend keeping the primary monitor in the center.
In a dual-monitor setup, you should prefer keeping the primary screen in front of you. Then, place the other display on its adjacent right or left. For a better understanding, have a look at the figure below on how we have set up dual monitors.
 7")
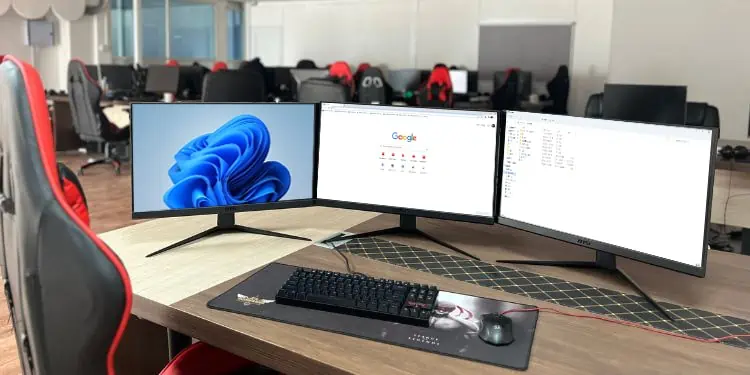
Similarly, in a triple-monitor setup, you can place the primary display in the center with the other two to its adjacent left and right. While this setting is excellent, the best ergonomic option would be slightly tilting the screens towards you, as demonstrated in the figure. Note that this requires a slightly bigger desk space.
 8")
While regular users are happy with dual or triple monitor setups, four or more monitors can benefit those seeking a tremendous amount of screen space. To learn more, here’s a detailed guide to positioning and connecting four monitors for a quad setup. You can join even five or more screens in a similar way.
Additional Tip: One difficulty we all face when connecting multiple displays is the need for more desk space. To solve this, try mounting your monitors, which lets you adjust the angle, height, and position quite easily. In fact, you can mount as many monitors as you want if you have the appropriate VESA mount adapters.
Connect the Monitors
Once you’ve appropriately arranged the monitors, it’s time to hook them up. There are different techniques to do it, and this section guides you through each of them in detail.
Direct Port Connection
This is probably the best and most reliable method of connecting multiple monitors. All you require are adequate ports on the motherboard or graphics card.
Before moving forward, decide the type of monitor connection you’re going to use. This could be HDMI, VGA, DisplayPort, DVI, USB-C, or any other of your choice. Interestingly, you can even use a different interface for each connection.
For demonstration purposes, we have relied on HDMI and DisplayPort in this article. Nonetheless, the steps for other interfaces should also be similar:
- First of all, power each monitor with its respective power cable.
- Next, gather the required number of data cables as per your need. While you’re at it, we recommend using shorter ones as this cuts down the chances of interference.
- Then, plug the HDMI or DisplayPort cable into one of the output ports of the motherboard or graphics card. For demonstration, we’ve used an HDMI interface.
- Connect the other end to your primary monitor’s input port.
- Now, take another data cable and plug it into the other output port of the motherboard or graphics card.
- Now, plug the other end into the secondary monitor.
- Repeat the process for all the other monitors on your setup.
 9")
 10")
 11")
Daisy Chaining
Another useful method to set up multiple monitors is daisy chaining. It simply means hooking up the displays to one another sequentially. This helps keep the cables organized, and you do not have to rely solely on the motherboard or graphics card ports.
In the chain, all your monitors should have DisplayPort or Thunderbolt ports with MST enabled, except for the last one. Once you’ve checked the compatibility, kindly go through the following steps on daisy chaining multiple monitors:
- First, press the OSD (On-Screen Display) button to launch your monitor settings.
- Here, find and select the MST setting, which should be under the System option.
- Ensure that it is enabled. You may need to press Yes if a confirmation prompt pops up.
- Again, open the OSD menu. This time, find and turn on the Displayport 1.2 option.
- Now, plug the dedicated power cables into all your monitors. Ensure that they have sufficient power.
- Take a Thunderbolt or DisplayPort cable (prefer using shorter ones) and connect it to the output port on your PC.
- Then, join the other end of your primary monitor’s input port.
- Next, take another Thunderbolt or DisplayPort cable and connect it to the output port of the primary display. Join the other end of your secondary monitor’s input port.
- Repeat the process for other monitors.
 12")
 13")
Using Docking Station or USB Hub
A docking station is an excellent tool that lets you extend the number of ports on your laptop or desktop computer. This can come in handy if your motherboard or graphics card doesn’t have sufficient interfaces to connect multiple monitors.
Similarly, a high-end USB Hub with HDMI and DisplayPort interfaces can also be utilized. An HDMI Splitter is also a popular choice, but this can’t be used for extending your display.
Kindly proceed with the below instructions on how to use a USB Hub or Docking Station for setting up multiple monitors:
- First, ensure that all the monitors and the device are getting sufficient power.
- Now, connect your docking station to the PC using USB-C (3.1 or higher) or a Thunderbolt cable.
- Next, plug in each data cable to the device’s output port.
- Take the other end of each cable and plug them into the input ports of all the monitors.
- Finally, start your PC to confirm that the monitors are connected successfully.
 14")
 15")
Wireless Connection
If your monitor supports Mircast, you do not have to worry about cables and ports. Instead, you can easily set up a dual monitor system using a wireless connection. This technique is extremely popular among laptop users who use it as an external display.
However, if you’re planning to use two monitors, you’ll need to set up your primary display first. Once that’s done, follow the below guide to connect another monitor wirelessly:
- Press Windows + I to open the Settings app and navigate to the Apps section.
- Next, go to Optional Features.
- Then, press the View features button in the ‘Add an optional feature’ field.
- Find and install the Wireless Display feature.
If this was already installed, it should be available in the Installed features section. - Now, choose the Bluetooth & devices tab from the left part of the window.
- Press the Add device button.
- Once the Add a device window opens up, choose Wireless display and dock.
- Wait until your computer finds the secondary monitor. If found, select the device, and follow the on-screen instructions to complete the connection.
 16")
 17")
 18")
 19")
 20")
Adjust Projection Settings
After your monitors are connected, the settings are synced automatically to the last configuration. However, you might want to tweak the projection settings, depending on whether you’re trying to mirror the primary screen’s content or extend the display. Here’s how you can achieve this:
- First, directly press Windows + P to open the Projection settings.
- Then, select Duplicate if you wish to mirror the content on all monitors.
Otherwise, pick the Extend option. - The screen should flash for a second, confirming that your settings have changed.
 21")
 22")
Note: If you’re using different monitor models, you may need to tweak the refresh rate, screen resolution, and others so that the settings sync well. Else, you might get stuck with the black screen or related display issues.