
Are you fed up with Wi-Fi not reaching the furthest corner of your house? Do you want to have broad Wi-Fi coverage at your place?
Your WiFi may not reach every nook and corner of your house. Even if it does, the connection may not be strong enough. However, you do not have to settle for the router’s default range.
With the right equipment and certain tweaks, you can extend a Wi-Fi range. And, we’ve gathered almost all the methods you can try to help you with the process.
How to Extend Wi-Fi Range?
Repositioning the router can always be a valuable option. 2.4 GHz provides a better range, so you can also try switching the frequency. Likely, you can use an additional router or a Wi-Fi extender.
To know more about the fixes and their process, you can check the methods below.
Reposition the Router

It’s worth remembering that Wi-Fi signals travel easier through open space. So if you place your Wi-Fi router behind a TV, inside the cupboard, or desk drawer, refrain from doing that. It will only obstruct the signal and make it weak. Avoid any form of a physical barrier as much as possible.
Likely, position the router in a central location. Doing so will allow the wireless signal to broadcast across all directions.
Moreover, placing the router in an elevated area can further help extend the Wi-Fi range. It can align with devices and get fewer obstructions.
So, place your router in an elevated centralized location free from obstructions.
Try Using Additional Router

One of the easiest methods to extend the Wi-Fi range is to add an extra router. Using the ethernet cable, you can connect an additional router to the main router. Insert one end of the ethernet cable to the main router’s LAN port and plug the other end of the cable into the new router’s LAN port.
Doing so will help you extend your Wi-Fi coverage. When you connect an extra router, it creates a specific subnetwork and covers a new area. In addition, it will have a separate SSID and password. Thus, you will need to switch from one network to another for better network strength.
Install Powerline Adapter

Using powerline adaptors to extend your Wi-Fi range can also be helpful. A powerline adaptor provides internet to your computer via the home’s power outlet. Your device can connect right to the router through the ethernet cable.
Using a powerline adaptor is easy and hassle-free. I have gathered the example of the TP-Link Adapter to showcase the process of installing a powerline adapter:
- First, connect one adaptor (Base unit) to the power outlet nearby the router.
- Plug in one end of the ethernet cable to the router and another to the adaptor.
- Plug in the other adaptor (Remote unit) in the power socket of your desired room. You need to pair the remote and base units. On the base unit, press the pair button for a quick second. Repeat the same with the remote unit. Then the Powerline signal will be lit.
- Connect the ethernet cable to the adaptor and connect it with your device.
Switch Frequency
Nowadays, most routers come with two frequencies: 2.4 GHz and 5 GHz bands. There is a belief among people that higher is better as it provides faster speeds. But, it is not entirely true.
The 5GHz band provides signals at a higher frequency; hence, internet speed is faster. But the downside of higher frequency is that it gives a shorter range. Also, it is unable to infiltrate obstacles such as walls and ceilings.
On the other hand, the 2.4GHz band is good at piercing obstacles and offers wide coverage. But, it comes with the downside of slower speed.
If the Wi-Fi frequency bands are not using the same SSID (Service Set Identifier) network name, you will see two Wi-Fi names with frequency bands at the end. For example: “my_wifi_is_2.4G”, “my_wifi_is_5G”, etc.
You need to connect to the 2.4GHz to get broad Wi-Fi coverage.
In case your router displays an integrated 2.4GHz and 5GHz bands, follow the steps to split frequency bands:
- Press Windows key + R to open Run.
- Type
cmd - On the command prompt, type
ipconfigand press Enter. - Note down the IP address next to Default Gateway.

- On your computer or phone, open the web browser and type the Default gateway IP address.
- Enter your Admin username and Admin password and select Login. You can find them on the sticker at the bottom or back of the router.
- Select Advanced Settings.
- Under Wireless, choose Wireless signal.
- Check the Enable 2.4 GHz and Enable 5 GHz. Then, scroll down and select Apply changes.
- After this, choose Security.
- Change the SSID name of both 2.4 and 5 GHz bands and add 2G and 5G at the end of their respective name fields.
- Now scroll down and under Wireless radio, check Both 2.4 GHz and 5 GHz options.
- Select Apply changes.


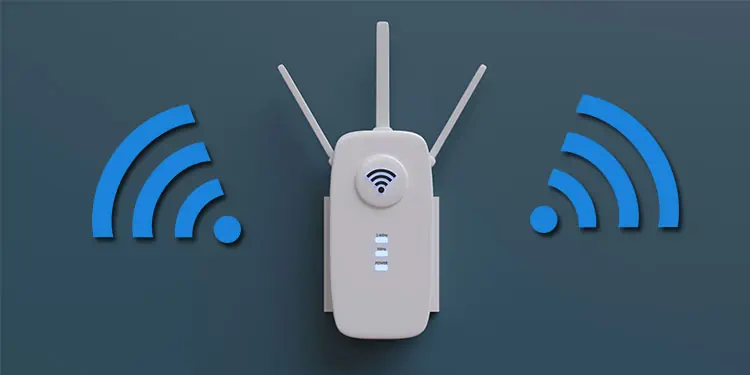
Use A Wi-Fi Extender

Wi-Fi extenders are commonly referred to as Repeaters or Boosters. They pick the original signal from the main router and rebroadcast it. It is helpful to extend the range of the Wi-Fi.
The extenders are quite handy to eliminate the Wi-Fi dead zones.
Through extenders, you can get a boost in your connection range. Besides, they are advantageous in many ways. For example, they come at a low price, and the installation process is simple.
Here’s the Installation process:
- Plug the extender into the power socket.
- Click the wireless utility and choose the SSID name and type the password. It can be found on the Wi-Fi configuration card.
- On the web browser on the computer, and log in through http://dlinkap.local.
- Enter the credentials and log in.
- Select Setup Wizard.
- Then hit Next.
- Choose Select this option if you want to set up your network manually and click Next.
- Click the Wi-Fi you want to link with your extender. Then hit on the Select option.
- Type the Wi-Fi password and select Next.
- On the screen, you will see an auto-generated SSID and password for your extender. If you want to change them, type your desired SSID and password. Then hit Next. A summary page displaying the network details will appear. You can save this for future use.
- Select the Save option.


Install a Mesh Network

The routers from your ISP (Internet Service Providers) are for standard-sized homes. Unfortunately, a limited range and various obstructions hinder the network performance.
If you install a Mesh network system, it works like a tree. The main Mesh router acts as the trunk and other slave routers as the branches, spreading the network throughout your home.
In a Mesh system, the nodes intercommunicate among themselves. The node automatically reroutes from one end to another. When you move across your home, your device will connect to the closer node. It makes the transition of the network seamless and provides a strong signal.
There is no need to change the network since all the networks are of the same SSID and password.
For reference, today, I have brought you the way to set up a TP-Link Whole Home Mesh Wi-Fi:
- First, download the TP-Link Deco Application on your phone.
- After that, you need to log in using your TP-Link ID. You can register it through the app if you don’t have one.
- Next, connect the Deco to the power adapter. Plug it into the power socket. Wait for the signal to flash blue.
- First, disconnect the power from the router. Then, insert an Ethernet cable into the router.
- Connect the Ethernet cable to the Deco and turn on the router.
- From the app on your phone, choose the Deco model.
- Follow the on-screen instructions and connect to the internet. The LED pulse will be blue upon successful activation.
- Select Settings on your phone and connect your phone to the device’s Wi-Fi.
- Now, the Deco app searches your Deco and connects with it. The LED pulse will be solid blue after it is connected.
- Pick the place you want to put the Deco.
- Follow the on-screen instructions and fill in the necessary details.
- Set up your Wi-Fi network. Set up the name and password. Now, join the new Wi-Fi.
- When Deco is online, the LED pulse will be solid white.
- To add more Decos, plug in the additional Deco units.
- On the app, select the new device and the home layout. Follow the on-screen instructions.
- The Deco app will scan for the new Deco units. When connected, the LED pulse will be solid blue.
- Select the place you want to keep the Deco units.
- After successful connection, the LED on Deco units will turn solid white.
- Place the Deco units as per your preference in your home.


Update the Firmware of the Router
When you update the router’s firmware, it fixes bugs, provides security updates, and boosts performance. Along with that, it helps to get the best range the router has to offer.
The steps that I am going to discuss are generated regarding the TP-Link router:
- Enter the router IP address on the web browser on your computer.
- Login with your Admin username and Admin password.
- On the top-right corner, you will see Model No., copy it.
- Open a new tab, and type Download Firmware for Model No. (Paste the Model No.), and press Enter.
- Click the link with your official router website.
- Scroll and select Firmware to download the latest firmware.
- The download will automatically start. Once the file is downloaded, extract it.
- Again, go back to the Router’s webpage and choose System Tools.
- Then press Firmware Upgrade.
- Select the Choose File option and choose the extracted bin file.
- Now select Upgrade.
- When prompted, press OK. After a while, a message with a successful upgrade will show on the screen. After the update, you may consider rebooting the router.


