Hard reset is the process of resetting the hardware settings and preferences to factory defaults. This process is different from a factory reset as it will reset both the hardware and software settings of the system.
You may need to hard reset a Lenovo laptop if it experiences issues with the hardware like crashing or components not working. This process can also be used to reset any hardware changes made through the software.
Using Power Button
The first method to hard reset your Lenovo laptop is by completely shutting down your device by removing all sources of power and booting it again. This process allows for any affected hardware component to reset its process and work normally after a reboot.
- First unplug the charger from the laptop

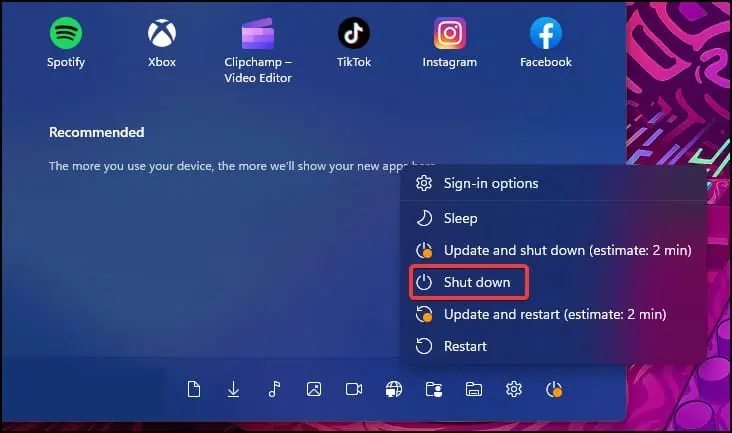
- If the device is responding, shut down the device normally

- If the device is not responding, try pressing the power button 3-5 seconds and then forcefully shutting down the device

- After the device shuts down, remove the battery and then keep pressing the power button for about 20 seconds to remove any residual power
- Now, re-insert the battery and then boot your laptop again
- See if the hardware components are functioning normally
If your device has a non user removable battery, insert a pin in the emergency reset pinhole of your Lenovo laptop and after 10 seconds, remove the pin. Try powering on your device and see if the hardware is functioning normally.
Using BIOS Settings
Another method to reset hardware components of your Lenovo laptop is to set the BIOS settings to default. If you have made hardware changes in the BIOS such as overclocking or XMP profiling, these changes may be causing conflict in the system processes.
There are several ways by which you can reset the BIOS on your laptop. The steps to hard reset your Lenovo laptop BIOS are explained here
From BIOS Interface
Resetting the BIOS can restore the hardware to default factory settings. To reset the BIOS values to default from the interface
- If the device is on, restart it and then repeatedly press the BIOS key
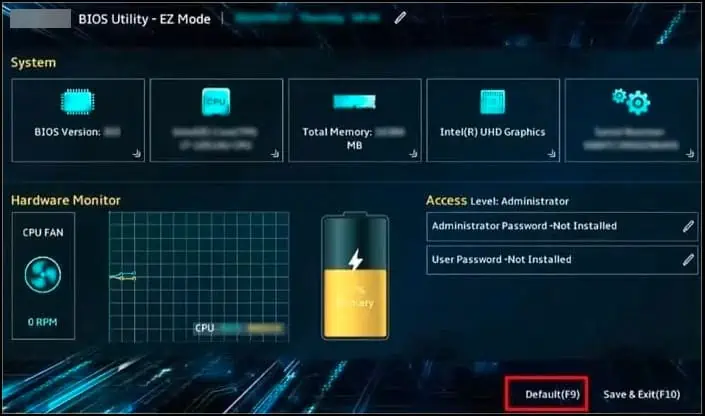
- Once you enter the BIOS interface, search for settings labeled Configurations, Defaults etc.
- Now, search for settings labeled Load Optimized defaults, Defaults or Set Defaults

- Press the corresponding key and then exit the BIOS
- Boot your device normally and check if the hardware is reset
With Motherboard Jumper
Note: When jumping the CMOS battery, make sure you are grounded properly and remove the charger/battery from the device.
Depending on the model of your laptop, you can also use a jumper to short circuit the CMOS reset pins to revert the BIOS back to its default settings. To perform a CMOS reset through the motherboard jumpers
- Unplug the charger and shut down your device
- Remove the back panel to get access to the motherboard of your laptop

- On the motherboard PCB, look for label CMOS or CLRTC

- Refer to the device manual for detailed location and configuration of the jumper pins
- Generally, the jumpers are set at position 1-2. To change the circuit, change the orientation to 2-3 and wait for sometime
- Move the jumpers back to their default position and then boot your device
Removing CMOS Battery
If the jumper pins are not present, you can remove the CMOS battery from the laptop to reset the BIOS settings. The CMOS battery is used to power the BIOS firmware during bootup. By removing the CMOS, date & time and the user settings of BIOS are reset.
- Power off your laptop and remove the back cover
- Now, unplug the battery from the motherboard (internal battery) or remove it from the device (external battery)
- Search for the CMOS battery. It is usually a coin cell battery
- Now, carefully remove or unplug the CMOS battery and wait for 5-10 minutes
- Remove any leftover charges from the device by pressing the power button for 30 seconds
- Reinsert the battery and power on your laptop
- During bootup, you may need to set the date and time settings of the BIOS again


