Tech News Today
  • Hardware
    • Motherboards
    • CPUs
    • Graphic Cards
    • RAM
    • SSDs
    • Computer Cases
    • Monitors
    • Peripherals
    • Power Supply Unit
    • PC Builds
    • Computer Tips
  • Software
  • Operating System
    • Windows
    • Mac
    • Linux
  • Gaming
  • Mobile
  • Console
  • More
    • Internet
    • Networking
    • Security
    • Buyer’s Guide
    • Gadgets
    • Laptops
    • Reviews
    • How To
    • News
Facebook Twitter Instagram
Tech News Today
  • Hardware
    • Motherboards
    • CPUs
    • Graphic Cards
    • RAM
    • SSDs
    • Computer Cases
    • Monitors
    • Peripherals
    • Power Supply Unit
    • PC Builds
    • Computer Tips
  • Software
  • Operating System
    • Windows
    • Mac
    • Linux
  • Gaming
  • Mobile
  • Console
  • More
    • Internet
    • Networking
    • Security
    • Buyer’s Guide
    • Gadgets
    • Laptops
    • Reviews
    • How To
    • News
Tech News Today
Home » Printer

How to Print Large Images on Multiple Pages? 4 Best Ways

Deependra PangeniBy Deependra PangeniJune 26, 2023
how-to-print-large-images-on-multiple-pages

The printers used in our home and office are generally designed to support standard paper sizes like A4, Letter, and Legal.

While these sizes are perfect for small images, it can be challenging to include every detail of a large image in such papers. When you print a high-resolution image on smaller sheets, the image will shrink and lose its actual quality in the printout.

In this article, I will discuss a few workarounds that will help split and print your large image into multiple pages without losing its actual quality.

Note: Printing a low resolution image on multiple sheets makes your printout look pixelated. Always get a high-resolution copy of the image if you want to print it on multiple pages.

Table of Contents

  • Using Paint
  • Using Adobe Photoshop
  • Using Adobe Acrobat Reader
  • Using Microsoft Excel

Using Paint

Using the Paint is the easiest way to split large images into multiple pages. Here’re the steps you need to follow.

  1. Launch the Paint application on your computer.
    launch paint
  2. Click File > Open from the menu bar of the Paint window.
    open-file-in-paint
  3. Browse to the location of the image you want to print and open it.
  4. Now go to File > Print > Page setup.
    page-setup-option-in-paint
  5. Specify the basic print setting like paper size, source, and orientation.
    paper-size-source-and-orientation
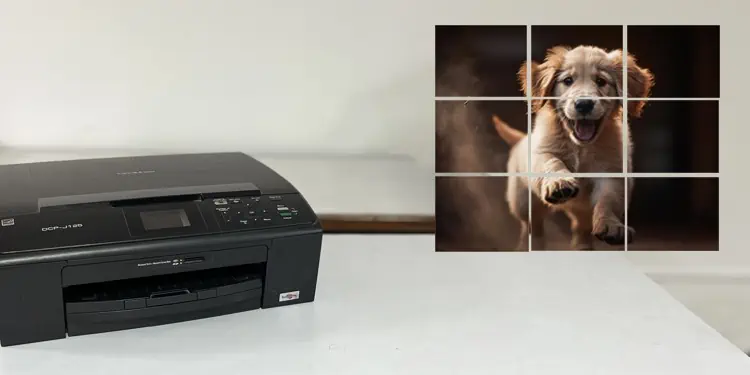
  6. In the Fit to field, specify the number of pages you want your image to be printed on. For example, you can use 2 by 2 pages for printing a single image on 4 pages, 3 by 3 pages for printing it on 9 pages, and so on.
    fit-to-2-by-2-page-and-print
  7. Once you set the scaling for your image, click OK.
  8. Then go to File > Print > Print preview to see what your printout will look like.
    print-preview-in-paint
  9. Close the preview.
    close-preview-in-paint
  10. Hit the Ctrl + P shortcut.
  11. You can directly choose your printer and click the Print button to get the printout. However, I suggest you first print the image from the virtual printer of your computer. It will further give you a precise view of how the images will look after printing.
  12. For this, choose Microsoft Print to PDF > Print.
    print-from-microsoft-print-to-pdf-in-paint
  13. Save the PDF file and open it.
    save-pdf-from-paint
  14. In my case, the original image will be printed into 4 pages as shown below.
  15. To print it, again hit Ctrl + P shortcut, choose your printer > Print.
    print-multiple-images-from-paint
  16. Once the pages are printed, assemble them.

Using Adobe Photoshop

If you are a Photoshop user, you can also use the integrated Slice tool to generate multiple images out of a single image. The slice tool lets you divide your image horizontally and vertically into slices and print them.

  1. Launch Adobe Photoshop on your PC.
    launch adobe photoshop on pc
  2. Click File > Open from the menu bar.
    open-file-in-photoshop
  3. Choose your image file.
  4. Right-click the Crop icon on the tool palette of the Photoshop window.
  5. Choose Slice Tool.
    slice tool option
  6. Right-click over the image and tap the Divide Slice option.
    divide slice option
  7. Check the box next to these options.
    divide horizontally and vertically into
  8. Specify how many slices you want to make out of your image. You will also see the preview of how the image will look after slicing. Click OK.
    specify slices
  9. Press the Alt + Ctrl + Shift + S shortcut to save the sliced images.
  10. Click Save.
  11. Choose a location and click Save.
  12. Navigate to that folder and print the images one after another.
    multiple images generated by photoshop

Using Adobe Acrobat Reader

Adobe Acrobat Reader integrates a dedicated Poster function that allows users to change the scale value of the image and generate multiple images from a single large image.

Since Acrobat Reader does not support image files, you should first convert your image file into a PDF file.

  1. Open the image you want to print and hit Ctrl + P.
  2. Choose Microsoft Print to PDF under Printer drop-down.
    make-pdf-file-for-acrobat
  3. Specify orientation, paper size and other print settings to suit your needs.
  4. Click Print. It will now save the image as a PDF file.
  5. Now launch Acrobat Reader.
    launch adobe acrobat
  6. Go to Menu > Open and open the PDF file you just created.
    open file in acrobat
  7. Press the Ctrl + P shortcut.
  8. Once the Print window launches, click the Poster tab under Page Sizing & Handling section.
    poster-tab-in-acrobat
  9. Acrobat will initially splice your image by itself. In my case, the image is split into 2 pages.
    acrobat-by-default-splices-images
  10. Increase the Tile Scale value and click the image preview area to know how the image will look after splicing. I recommend you increase the value by 50% each time.
    set-tile-scale-and-click-print-preview-area
  11. Choose your printer and click Print.
    print-from-acrobat

Using Microsoft Excel

Next, you can use the Microsoft Excel application that comes bundled with the Microsoft Office package to generate multiple images from a large image.

  1. Open Excel.
    open excel
  2. Create a blank workbook.
    create-blank-workbook
  3. Go to the Page Layout menu and check the Print option under Gridlines.
    print-option-under-guidelines
  4. Uncheck it again.
  5. Hold the Ctrl key on your keyboard and scroll the mouse out to view the gridlines precisely.
    view-gridlines-in-excel
  6. Now go to Insert > Pictures > This Device.
    insert-pictures-this-device
  7. Choose the image to print.
  8. Position the image correctly inside the line breaks. In my case, I have inserted the image into eight line breaks, so the image will be sliced into eight images.
    image-divided-in-excel
  9. Once you are all set, press Ctrl and P keys together.
  10. Choose your printer, adjust print settings and click the Print button.
Note: You can also use online wall art generators like Rasterbator to print large images on multiple pages.
how-to
Deependra Pangeni
  • Twitter
  • LinkedIn

Meet Deependra Pangeni, A professional Computer Engineer who has been writing about technology for many years. He is also involved in different robotic projects and loves tinkering with circuit boards. He is always researching new ways to improve the website's user experience and make it easy for people to find the information they need. At TechNewsToday he mainly deals with how-to and fixes contents for a range of TV and TV products like remotes, cables and streaming devices. Along with the TV, he also specializes in hardware and software troubleshooting for printers and Windows. Deependra's passion for simplifying complex technical information for non-technical audiences is evident in his work and he is dedicated to producing high-quality content that is easy to understand. When he is not working, he enjoys gathering with his friends, partying and traveling. He is also an active member of the technical community groups and regularly participates in tech meetups. You can contact him at deepen@technewstoday.com

Related Posts

printer-not-printing

How to Fix a Printer That’s Not Printing

September 20, 2023
how-to-print-without-a-printer

How to Print Without a Printer

September 18, 2023
printer-keeps-going-offline

How to Fix Your Printer That Keeps Going Offline

September 16, 2023
how-to-connect-printer-to-wifi

How to Connect Printer to Wi-Fi

July 17, 2023
printer-printing-lines

Why is My Printer Printing Lines? 5 Ways to Fix It

July 12, 2023
How-to-Unclog-a-Printer-Head

How to Unclog a Printer Head

July 7, 2023
Add A Comment

Leave A Reply Cancel Reply

Latest Posts
how to turn off hardware acceleration

How to Turn Off Hardware Acceleration

September 22, 2023
motherboard chipset

Understanding Motherboard Chipset and Its Importance

September 20, 2023
Naval-Warfare-Games

Best Naval Warfare Games

September 18, 2023
You may also like
printer-not-printing

How to Fix a Printer That’s Not Printing

September 20, 2023
Share Location With Friends and Family

Share Location With Friends and Family (iPhone and Android)

September 18, 2023
how-to-print-without-a-printer

How to Print Without a Printer

September 18, 2023
Recommended
Cookie Clicker Garden Guide

Cookie Clicker Garden Guide to Unlocking Every Seed

September 26, 2021
monitor no signal

Computer Turns On But Monitor Says No Signal (9 Ways To Fix)

November 10, 2022
Facebook Twitter Pinterest
  • Home
  • About Us
  • Our Team
  • Editorial Guidelines
  • Privacy Policy
  • Affiliate Disclosure
© 2023 TechNewsToday, editor@technewstoday.com | Tech Central Pvt. Ltd.

Type above and press Enter to search. Press Esc to cancel.