Remote Desktop Connection is the default feature on Windows devices that allows you to remotely control it using another device. During a remote session, the computer gets logged out, and all control is given to the client device.
It is useful if you want to access or control your remote computer while doing any other tasks at your home or office.
Below, I have provided all the steps you need to initiate and use Remote Desktop Connection for LAN and WAN access.
The client device through which you want to access the remote server does not have any such limitations. In fact, you can use non-Windows OS as well.
Please note that only Steps 1, 4, and 5 are necessary if you wish to access the computers on the same LAN.
Step 1: Enable Remote Desktop Connection
The first thing you need to do is enable Remote Desktop Connection (RDC) on the computer which you wish to access remotely.
You can enable RDC through Windows Settings, the System Properties dialog box, or directly by changing the relevant registry entry.
Through Windows Settings
- Press Windows + I to open Windows.
- Go to System > Remote Desktop. You can also use the Run command
ms-settings:remotedesktopto get to the Remote Desktop settings directly. - Toggle On Remote Desktop.
 1")
 1")
From System Properties
- Open Run by pressing Windows key + R.
- Type
systempropertiesremoteand press Enter to go to the Remote tab on System Properties. - Check Allow remote connections to this computer and click OK.
 2")
Using Registry Editor
- Open Run.
- Type
regeditand press Enter to open the Registry Editor. - Navigate to
Computer\HKEY_LOCAL_MACHINE\SYSTEM\CurrentControlSet\Control\Terminal Server - Double-click on fDenyTSConnections and set its Value data to
0. Click OK.
 3")
You can also use the following commands on the respective command-line tools with admin privileges to make same registry changes.
On Command Prompt
- Open Run.
- Type
cmdand press Ctrl + Shift + Enter to open the Elevated Command Prompt. - Enter the command
reg add "HKEY_LOCAL_MACHINE\SYSTEM\CurrentControlSet\Control\Terminal Server" /v fDenyTSConnections /t REG_DWORD /d 0 /f
 4")
On PowerShell
- Open Run.
- Type
powershelland press Ctrl + Shift + Enter to open the Elevated Windows PowerShell. - Type
Set-ItemProperty -Path 'HKLM:\System\CurrentControlSet\Control\Terminal Server' -name "fDenyTSConnections" -value 0and press Enter.
 5")
Step 2: Enable Port Forwarding for Remote Desktop on Router
Your router will restrict any direct access to your device from an external network. So, you won’t be able to initiate a remote connection from another network by default. To facilitate this process, you must enable such access through port forwarding.
Also, you will need to specify the IP address for port forwarding access. However, your network’s DHCP can assign a new IP to you at any time.
There are many things you can do in this case, but the easiest is to set up a static IP on the computer. After that, you can begin setting up port forwarding.
Warning: Enabling port forwarding can open up your network to the Internet, which introduces security vulnerabilities. So, you should have a strong password on your computer for your protection.
You can also use a VPN to prevent having to enable port forwarding. It will create a secure channel for communication between the remote server and the client device.
Create Static IP
- Open Run.
- Type
cmdand press Enter to open the Command Prompt. - Enter the command
ipconfig. Then, note down the Default Gateway of your network (Ethernet or Wi-Fi). - Open Run again.
- Type
ncpa.cpland press Enter to open Network Connections. - Right-click on the network that you use (Ethernet or Wi-Fi) and select Properties.
- Double-click on Internet Protocol Version 4 (TCP/IPv4).
- Enable Use the following IP address.
- Set the Default gateway to the same address you got from Command Prompt.
- Then on the IP address, enter the same first three numbers as the Default gateway.
- Then, type any number between 1 and 254 in the last part.
- Check Use the following DNS server addresses.
- Enter
8.8.8.8and8.8.4.4to specify Google’s public DNS or1.1.1.1and1.0.0.1to specify Cloudflare’s public DNS. Google’s DNS is faster but Cloudflare’s is more secure, so pick one according to your requirement. - Click OK > OK.
- If you can’t connect to the internet, change the fourth number on the IP address to any other value between 1 and 254. Keep doing so until the internet works.
 6")
 7")
 8")
Set up Port Forwarding
- Open a Web Browser.
- Type the Default gateway address you got from the Command Prompt on the address bar and press Enter. It should lead you to the router’s portal login.
- Enter the username and password to log in to the portal.
- Look for the Port Forwarding or Virtual Server section. I recommend searching official sources if you can’t find the section. But for some common routers,
- ASUS: WAN > Virtual Server/Port Forwarding
- Linksys: Apps & Games > Single Port Forwarding
- Netgear: Advanced Setup > Port Forwarding/Port Triggering/Ports – Custom Services
- TP-Link: Forwarding > Virtual Services
- Then, Add a port forwarding request while entering the following values:
- IP Address – The static IP you specified earlier
- Type or Protocol – Both TCP and UDP
- Port – 3389 (for both UDP and TCP)
- Make sure to enable port forwarding if you find any separate options. Then, save the changes.
 9")
 10")
 11")
If you need to set up port forwarding for multiple computers, you can use some other ports like 3388, 3391, 3392, 3393, and so on for the extra computers.
But you’ll need to specify the port number after the IP address while connecting from the remote client device.
Step 3: Enable Remote Desktop on Firewall
This step may not be necessary for all situations, but I still recommend you perform it if you want to access the computer with another device in another network. Doing so will prevent any potential attempts by the remote computer’s firewall to block the connection.
- Open Run on the server computer you want to access with another device.
- Type
firewall.cplto open Windows Defender Firewall. - Select Allow an app or feature through Windows Defender Firewall.
- Click on Change Settings.
- Search for Remote Desktop and tick the checkbox right before the option as well as the network types.
- Click OK.
 12")
 13")
You can also use the following commands on the Elevated Command Prompt or PowerShell to perform the same task
- Command Prompt
netsh advfirewall firewall set rule group="remote desktop" new enable=Yes - Windows PowerShell
Enable-NetFirewallRule -DisplayGroup "Remote Desktop"
Step 4: Check Remote Desktop Service
The Remote Desktop Service must run on a Windows computer if you wish to connect to it remotely from any other computer. This remains true regardless of whether the computer is on the same or different network.
- Open Run on the remote computer that you wish to connect to.
- Type
services.mscand press Enter. - Look for and double-click on Remote Desktop Services.
- Make sure the Startup type is Manual and click Apply. Select Start if the Service status says Stopped.
- Then, make sure not to turn off the computer and check the computer name and IP again to make sure you are entering the correct values.
 14")
Step 5: Connect to the Computer from Another Device
Now you can finally attempt to connect the remote computer from your device. You can use a Windows computer or an Android or iPhone device for this purpose.
Also, if you want to connect to the remote server from another network, you need to use your public IP address.
On the remote device, Google search for What is my IP? on the internet to find the public IP address. It is different from the private IP you used in port forwarding.
Also, depending on your ISP, your public IP can be static (will remain unchanged) or dynamic (will change after a certain time).
If it is static, there’s no issue. Otherwise, you will need to regularly check the public IP in case it changes.
Using PC
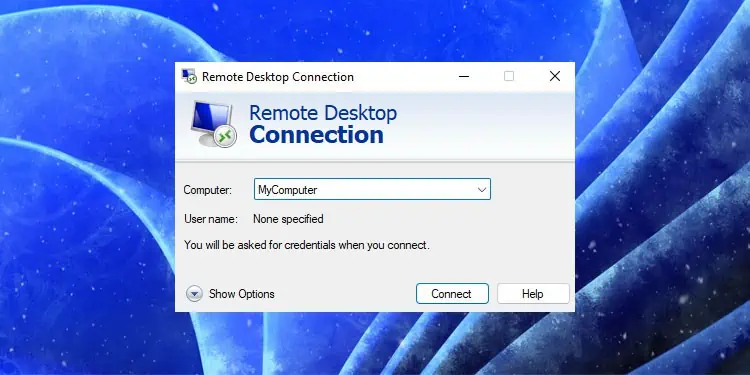
Windows usually have the Remote Desktop Connections client by default. You should be able to open it using the Run dialog box.
If you can’t, you need to download the Remote Desktop app from Microsoft Store and then use it. But it will be a different app compared to the default Windows program, which works similarly to the mobile app version.
- Open Run by pressing Win + R.
- Type
mstscand press Enter to open Remote Desktop Connection. You can also search for and open this app. - Click on Show options.
- If you need to specify which resources you want to use in this remote session, you can change the options inside the Local Resources tab. For instance, you can allow access to your local drives if you want to transfer files between your and the remote computer.
- Then, on the General tab, enter the computer name or the IP address next to Computer and the user account beside User name.
- I actually recommend using the IP as the program will need to resolve the computer name to the IP anyway. You can prevent all potential issues with the resolution process by directly entering the IP.
If you are connecting to a computer on another network, you need to use its public IP address anyway. - Also, while connecting to a computer on another network, you will need to specify the forwarded port number if you set any other port than the default 3389.
For E.g.,103.192.16.157:3390where 3390 is the non-default port Remote Desktop port number. - Click Connect.
- Select Connect again if you get any prompts.
- Then, enter the remote computer’s user account’s password and click OK.
- Confirm your choice if you get any prompts. You can also tick the checkbox in the window if you want to avoid this prompt next time onwards.
- The remote computer will be logged out, and you will be able to control that computer now. Also, you can’t get back to your own Windows system without ending the remote session by clicking on the Cross (X) icon and confirming your choice.
- Also, if you want to access your local drives, you will find it inside the Network > tsclient on the File Explorer.
 15")
 16")
 17")
 18")
Using Android or iOS
Other systems do not have the Remote Desktop app by default. So, you need to download and install it manually before you can connect to the computer.
- Open Play Store or App Store and search for Remote Desktop by Microsoft.
- Download this app and then open it.
- Tap on + and select Add PC.
- Select the computer, specify all options according to your need and tap on Connect.
- Enter the user account name and password and follow the on-screen instructions to initiate the remote session.
- From next time, you can just tap on the computer name inside the app to initiate the remote connection.
 19")
 20")