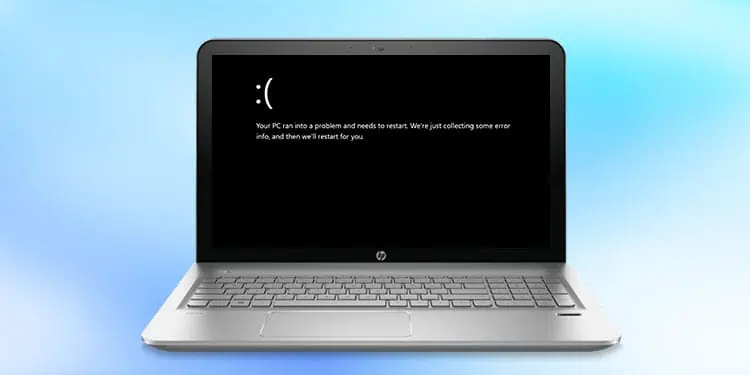
The black screen of Death on HP is mostly triggered by bugs in the operating system and the drivers. For most of the HP users experiencing this problem, the black screen of death occurs after signing into the Windows. It is seen that on older builds of Windows, the process explorer fails to startup normally.
Generally, the issue gets fixed after restarting windows explorer and the display drivers. There also are other technical solutions for the Black screen of death on HP devices which we will address in this article.
How To Fix Black Screen Of Death On HP Laptop
The first thing to do is check the monitor’s connectivity. If you are experiencing a total screen blackout, ensure that the cables are connected well. Connect a spare cable or even try out a different monitor and see if the issue can be seen across a different display unit.
If there seem to be no issues with the Display unit or the cables, the next thing to do is to refresh the Display drivers.
To restart the video drivers, press Ctrl + Win + Shift + B. This might solve the issue if the frozen drivers are triggering the black screen.
Restart Explorer
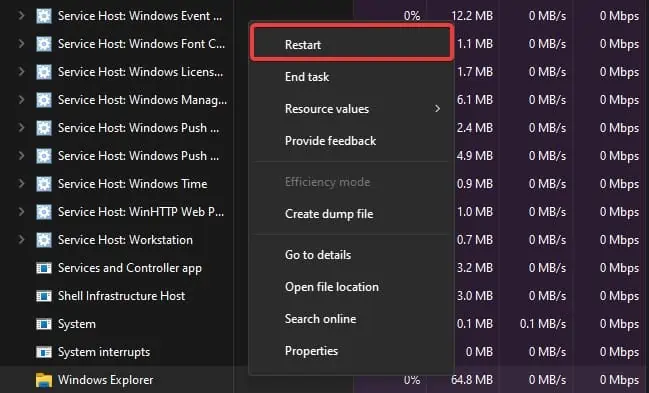
If the issue started after you logged in to Windows, it is possible that Windows explorer did not start properly. You can restart the explorer’s process and see if this helps resolve the issue.
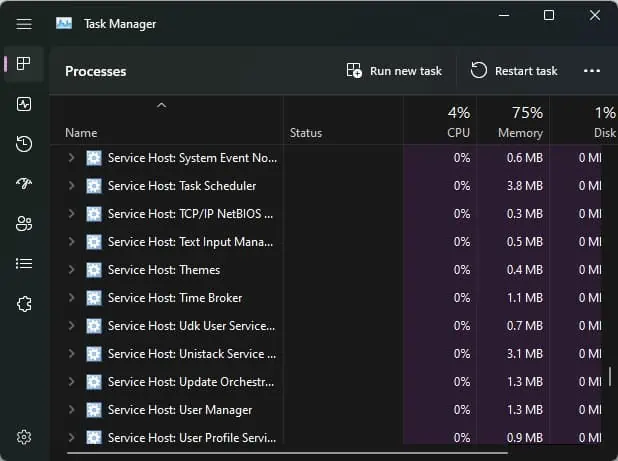
- Open the Task Manager by pressing Ctrl + Shift + Esc.

- Go to the Processes tab.
- Search for Windows Explorer and right-click on it

- Select the Restart option.
Disable Fast Startup
The Fast startup feature on most Windows devices is enabled by default to reduce the overall system startup time. This feature creates an image of the kernel processes and loads it on the startup.
This bypasses the initialization phase, leading to black screen issues like this one.
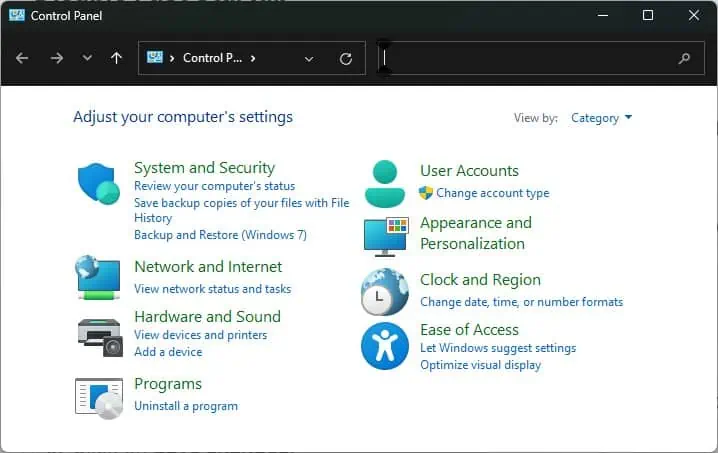
- Press Windows Key + R, type
control, and hit enter to open the Control Panel.
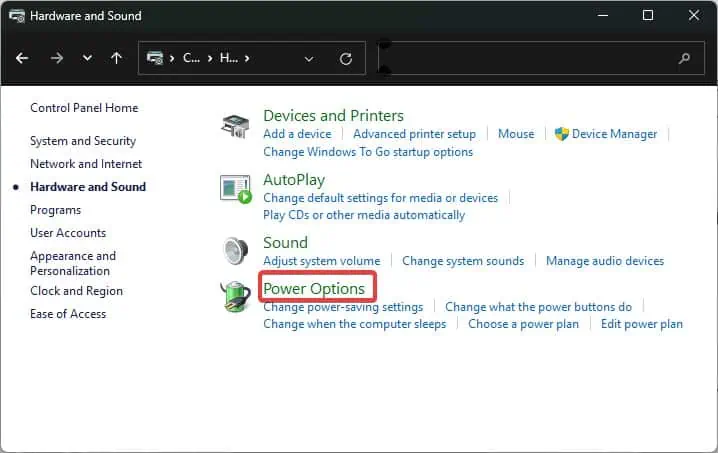
- Go to Hardware and Sound > Power Options.

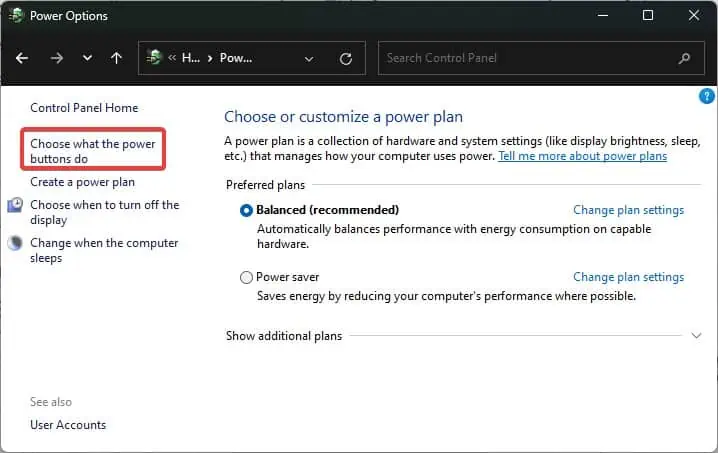
- From the left panel, click on Choose what the power buttons do.

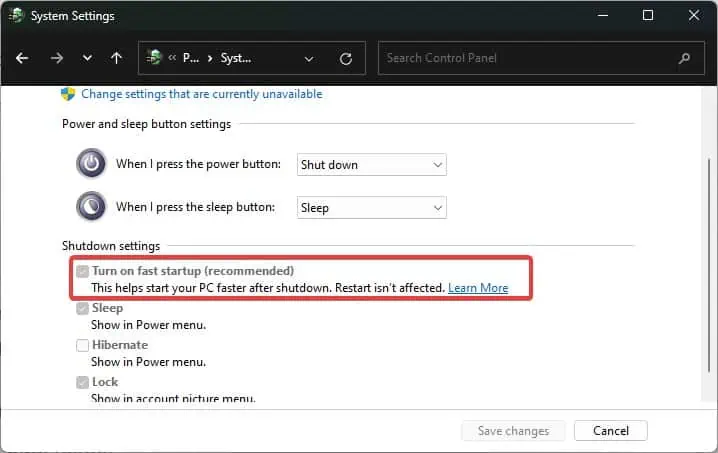
- Under the Shutdown settings, uncheck the Turn on Fast Startup option.

- Click on Save changes.
- Restart the computer and see if this solves the issue.
Boot into Safe Mode
On safe mode, Windows runs with minimal drivers and configurations. If the issues have been triggered by some additionally installed programs and drivers, running the system on safe mode can make it work normally.
- Click on the Restart button while holding down the Shift key.
- When the system restarts, you enter the Recovery Environment.
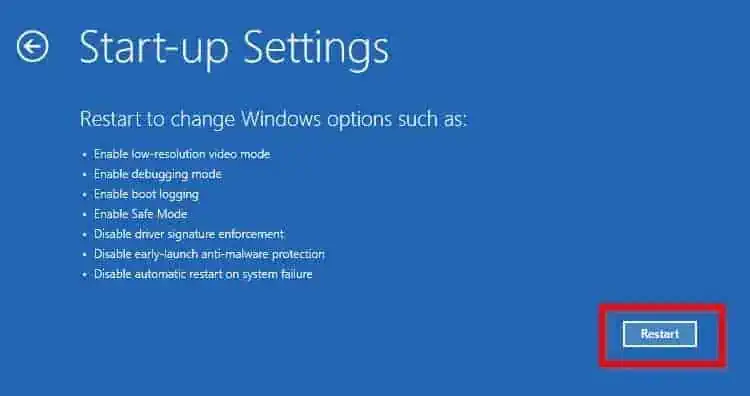
- Go to Troubleshoot > Advanced options > Startup Settings.
- Click on Restart.

- Once the computer restarts, press F4 or 4 key to enter the safe mode.
If you cannot see the login screen, force restart the computer by pressing the power button repeatedly three times.
After the cycle is complete, the system enters the Windows recovery environment. From thereon, you can navigate to the Safe mode following the steps suggested above.
Update the Graphic Drivers
Updating can fix the bugs and corruption in those drivers. The problem you are experiencing is very common because of faulty drivers. The driver manufacturer or Microsoft roll out stable releases to fix such bugs on the driver.
That’s why it is recommended to keep the drivers up to date to remain free from such issues.
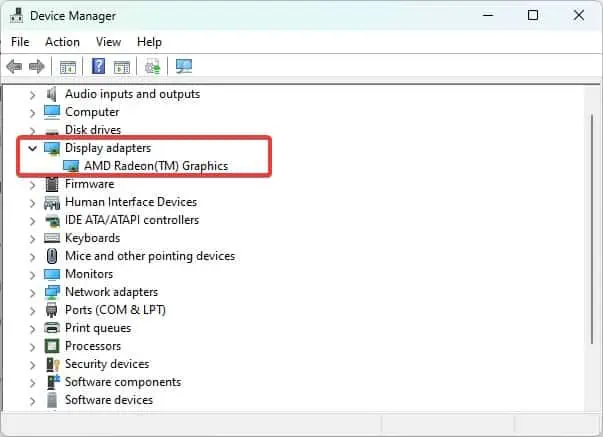
- Press Windows Key + X, and open the Device Manager.

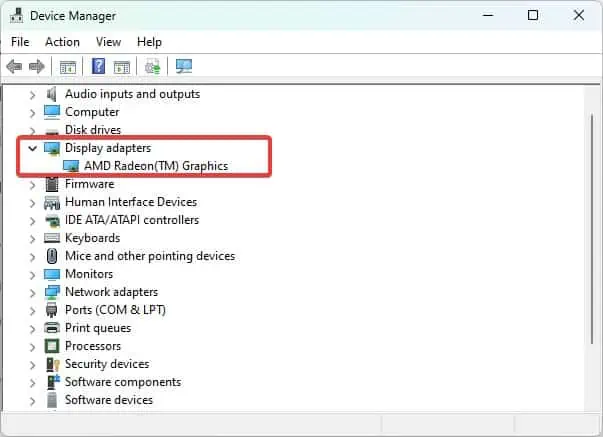
- Click on the Display Adapters to expand the list of devices under it.
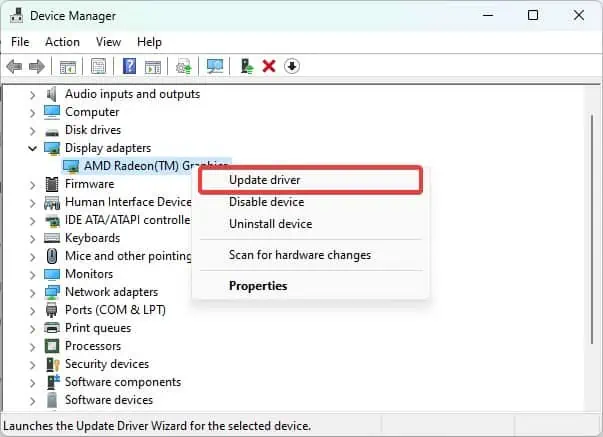
- Right-click on the Graphic Card and select the Update Driver option.

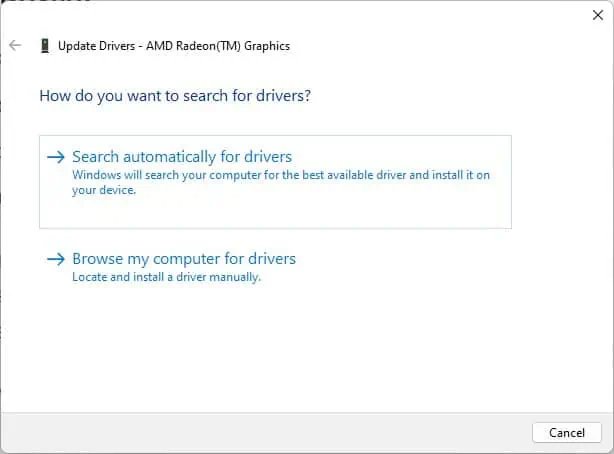
- Choose the option Search Automatically for Drivers and follow the prompt.

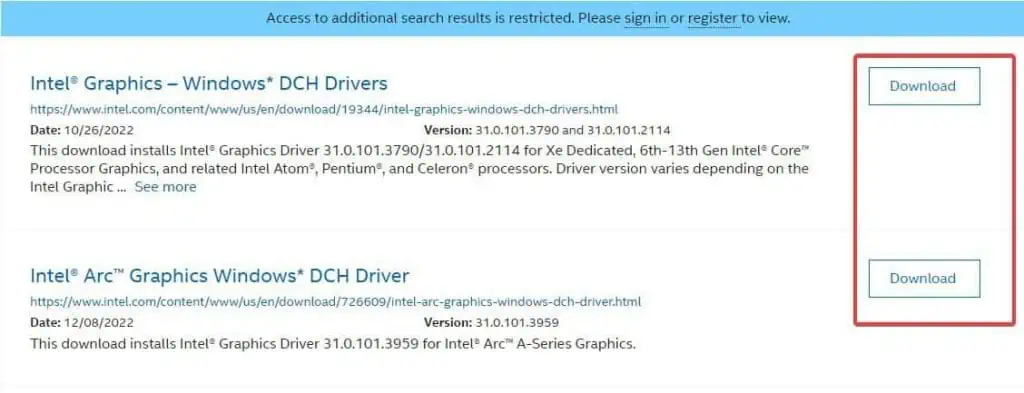
You can even update the graphic drivers by downloading them from the website of the Graphic card Manufacturer. To download and update the intel-based graphic drivers, follow these steps.
- Go to Intel’s Driver download centre .
- Go to Graphics.

- Select the graphic driver from the list and click on the download button.

- Go to the Download directory and install the driver.
Roll back the display driver
Usually, when users randomly experience such display driver issues, it is mainly related to the problems in the display driver. The display drivers can malfunction because of the bugs in the update or incompatible configuration changes made to it.
Rolling back the display driver will revert the drivers to their previous functioning state. Perform these steps while you are logged into the Safe mode for rolling back the display drivers.
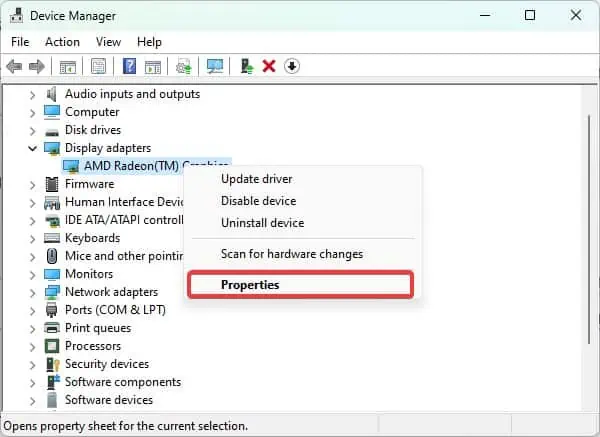
- Press Windows Key + X and open the Device Manager.

- Click on the Display Adapters to expand the list of adapters under it.
- Right-click on the Devices and select Properties.

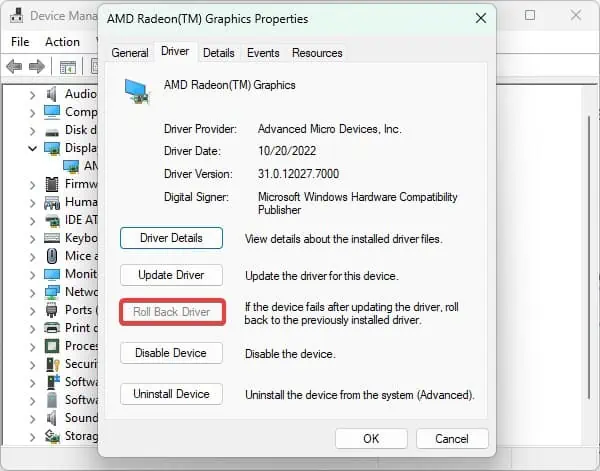
- Go to the Drivers tab.

- Select Rollback drivers and follow the prompts to revert the Display driver.
Uninstall the Windows Update
Black Screen of Death on HP devices can also occur after having installed a Windows update. For instance, after the Windows Update builds 1709, some users have reported experiencing such black screen issues. You can uninstall such updates and then see if the black screen gets resolved.
If you can log in to Windows normally and access the settings, use this method to delete the Windows updates.
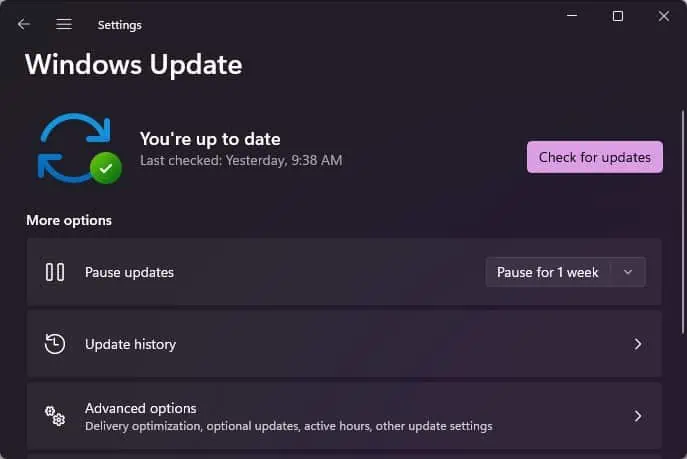
- Press Windows Key + I to open Settings.
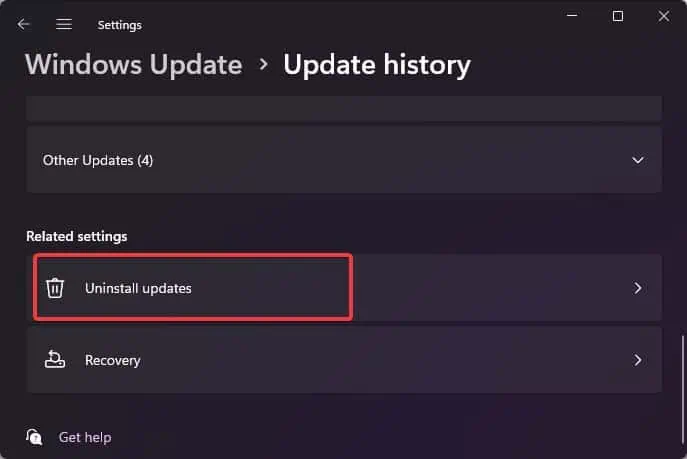
- Go to Windows Update > Update History.

- Navigate to Uninstall Updates.

- Select the recently installed update package and uninstall it.
You can delete the Windows update from the Recovery environment if you are not able to log in to the Windows.
- Boot into the Recovery Environment.
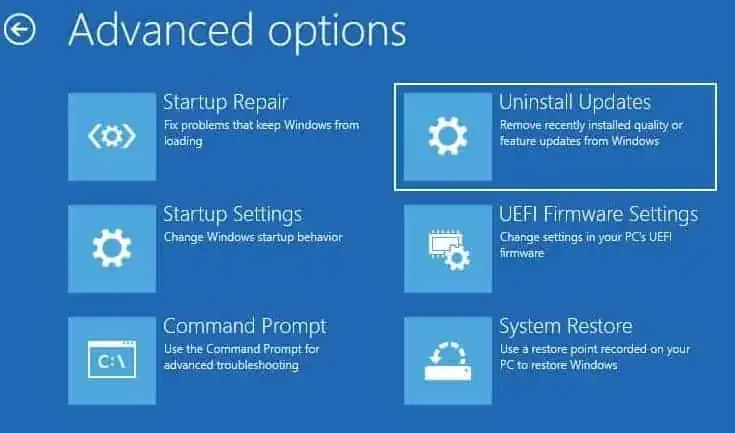
- Go to Advanced Options > Troubleshoot > Advanced options > Uninstall Updates.

- Select Uninstall Latest quality update and follow the on-screen instructions.
Perform System Restore
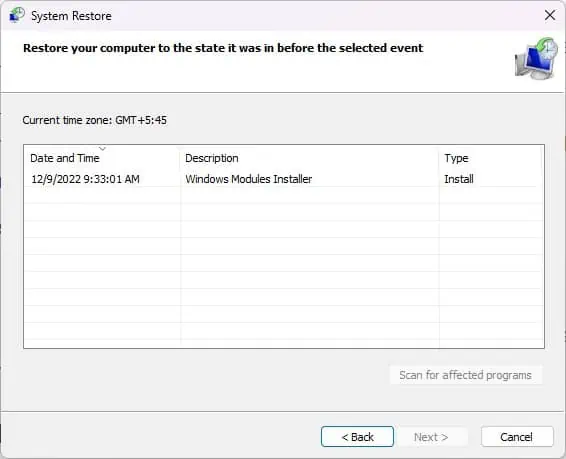
If the black screen issues have started recently, you can also even perform the system restore to revert the system to the previous functional state. You can use the restore utility from the Recovery environment or even by booting into the safe mode.
- Go to the Windows Recovery Environment.
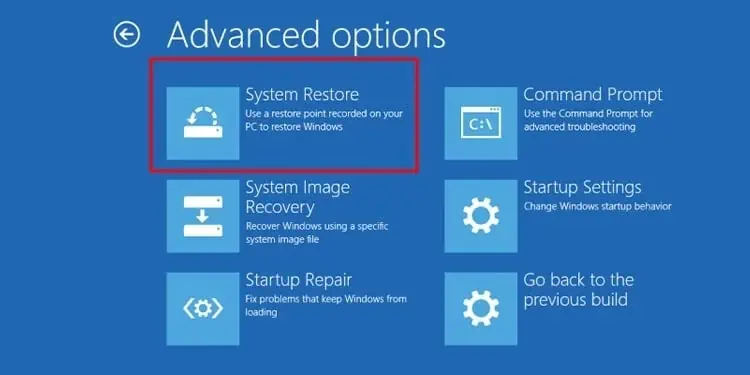
- Go to Advanced Options > Troubleshoot > Advanced options > System restore.

- Select System Restore.
- Follow the Prompts from the utility and revert the system back to the restore point.
If you are able to log in to Windows ( From the Safe mode or normally), you can perform a system restore without booting into the Windows RE.
- Press the Windows key + R, type
rstrui.exe, and hit enter to launch the system restore utility.
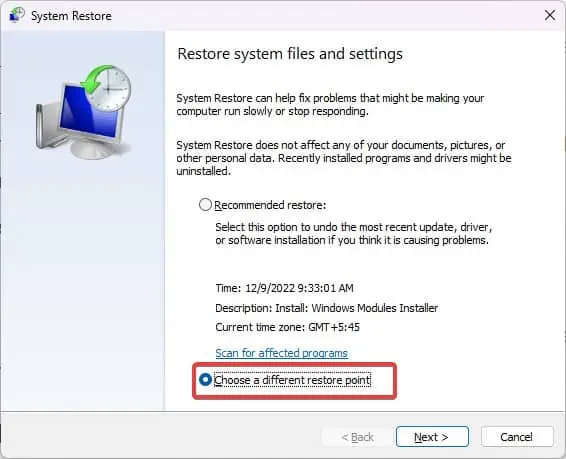
- Select Choose a different restore point and click on Next.

- Select the desired restore point and follow the prompt.
Note: You must have created a restore point prior to the occurrence of the black screen issue in order to make it work for you.
Perform In-place Repair
If none of the above-suggested fixes work, the last resort is to perform the in-place repair. This process repairs the issue with Windows without affecting any of the files and configurations on your device.
- Download the Windows ISO file that matches your current Windows build.
- Mount the ISO to a virtual drive.
- Open the mounted Windows drive.
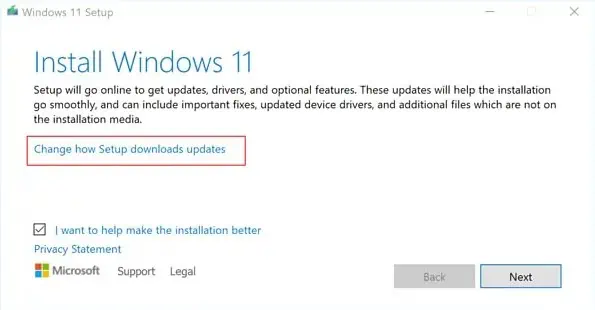
- Run the
setup.exefile. - Click on Change how Windows Setup downloads updates.

- Follow the prompts and click on the Install button at last.
For even better results, you can clean and reinstall the Windows too. Even after this, if the issue persists, you must visit the HP service center for a resolve.

