
Until recently, if you wanted to use SSH on Windows, you’d need to rely on third-party clients like PuTTY or install SSH server packages from similar sources.
However, the April 2018 update (version 1803) introduced OpenSSH as a built-in feature. As long as you’re running supported Windows versions, you can install the OpenSSH client and server components as optional features.
As such, we’ll cover the prerequisites, full steps to install OpenSSH using various methods, and how to get started with it in this article.
How to Install OpenSSH
Before you begin, you’ll want to ensure the following requirements are met:
- Windows Server 2019 or later / Windows 10 build 1809 or later
- PowerShell 5.1 or later
- Your account is a member of the Administrators group
Optional Features (GUI)
The easiest way to install OpenSSH on Windows is from the Optional Features page in Windows Settings.
- Press Win + I and go to Apps > Optional Features.
- Click on View features in the Add an optional feature section.

- Select OpenSSH Client and OpenSSH Server from the list and press Next > Install.
- After the components are installed, press Win + R, type
services.msc, and press Enter. - Locate the OpenSSH SSH Server and OpenSSH Authentication Agent services here.
- Double-click them and start these services. If you want, you can also change the startup type to Automatic. Save the changes afterward.
- Next, press Win + R, type
wf.msc, and press Enter. - In the Inbound Rules section, ensure the OpenSSH SSH Server (sshd) rule is enabled.
- The basic setup is complete. Check the Get Started with OpenSSH section for further steps. You can also follow the same steps to uninstall OpenSSH if required.


PowerShell
If you want to be more efficient, you can also perform the same steps as above in an elevated PowerShell window.
- Press Win + R, type
powershell, and press CTRL + Shift + Enter. - First, ensure that the OpenSSH components are available:
Get-WindowsCapability -Online | Where-Object Name -like 'OpenSSH*' - Next, install the OpenSSH client and server components:
Add-WindowsCapability -Online -Name OpenSSH.Client~~~~0.0.1.0Add-WindowsCapability -Online -Name OpenSSH.Server~~~~0.0.1.0 - Start the sshd and ssh-agent services and change their startup type to Automatic as such:
Set-Service -Name sshd -StartupType 'Automatic' -Status RunningSet-Service -Name ssh-agent -StartupType 'Automatic' -Status Running


- Next, configure the necessary Windows firewall rule for SSH traffic:
New-NetFirewallRule -Name 'OpenSSH-Server-In-TCP' -DisplayName 'OpenSSH Server (sshd)' -Enabled True -Direction Inbound -Protocol TCP -Action Allow -LocalPort 22 - Now that the setup is complete, you can start using SSH. Refer to the get started with OpenSSH section if you need help with this.
- Also, if you want to uninstall the OpenSSH components, here are the necessary commands:
Remove-WindowsCapability -Online -Name OpenSSH.Client~~~~0.0.1.0Remove-WindowsCapability -Online -Name OpenSSH.Server~~~~0.0.1.0


GitHub (MSI)
If you downloaded the OpenSSH package from GitHub, you can install the components using the MSI Installer with msiexec /i <path to openssh.msi>.
- For instance, if the file is in your current directory, use
msiexec /i openssh.msi - If the file is in, let’s say, your downloads folder, use
msiexec /i C:\users\anup\downloads\openssh.msi - To uninstall OpenSSH, use
msiexec /x <path to openssh.msi> - Let’s say the installer is in the current directory, and you want to install or remove certain components only. You can use the following commands as required:
msiexec /i openssh.msi ADDLOCAL=Clientmsiexec /i openssh.msi ADDLOCAL=Servermsiexec /i openssh.msi REMOVE=Clientmsiexec /i openssh.msi REMOVE=Server
After installing the components, follow these steps to update the system PATH variable:
- Press Win + R, type
systempropertiesadvanced, and press Enter. - Click on Environment Variables. In the System variables section, select Path and click on Edit.
- Check for
%systemroot%\System32\opensshhere. If it isn’t present, click on New and add it to the list. Do note that this is the default installation path. If you installed OpenSSH on a different path, change the value accordingly for this step. - Press Ok > Ok to save the changes.


Now, you can run Get-Service -Name ssh* in PowerShell to verify that the components were installed properly. If you also need to start the required services or open ports, please refer to either of the earlier sections for the steps.
Finally, if you want to use other methods like Winget or Chocolatey, we recommend checking out the OpenSSH wiki on GitHub. In addition to install instructions, it also has various usage examples and manuals that you might find useful.
OpenSSH Server Configuration
By default, the OpenSSH server (sshd) in Windows reads the configuration data from %programdata%\ssh\sshd_config. Numerous configuration options are listed in this file, but as the Windows implementation of OpenSSH is still fairly new, only certain configurations are supported at present.
We’ve listed some commonly made configuration changes below for reference. We recommend checking the OpenSSH server configuration guide from Microsoft or the one on GitHub for the full list of options. Also, don’t forget to restart the sshd service to apply any changes made.
- Uncomment the Port line and change the value if you want to change the SSH port. You’ll also need to add a firewall rule to allow inbound traffic on said port.
- Change the ListenAddress from 0.0.0.0 to something else if you only want to listen to a specific IP address. Add multiple ListenAddress lines in the same manner if you want to listen to multiple IP Addresses.
- Change GSSAPIAuthentication to yes if you want to use Kerberos authentication.
- Add the AllowGroups, AllowUsers, DenyGroups, and DenyUsers directives to control which groups and users can access the SSH server.
- If working with domain users and groups, check the following examples for format reference:
DenyUsers tnt\admin@192.168.10.17DenyUsers tnt\*AllowGroups tnt\sshclients tnt\serveradmins - If dealing with workgroup users and groups, check these examples instead:
AllowUsers anup@192.168.10.17AllowGroups sshclients
- If working with domain users and groups, check the following examples for format reference:
- Finally, you can use the following command in PowerShell to set the default OpenSSH shell to PowerShell instead of command prompt:
New-ItemProperty -Path "HKLM:\SOFTWARE\OpenSSH" -Name DefaultShell -Value "C:\Windows\System32\WindowsPowerShell\v1.0\powershell.exe" -PropertyType String -Force


Get Started With OpenSSH
You can use any of the methods listed above to set up another Windows system as an OpenSSH client, server, or both. And if you’re new to SSH, here are some basic steps to get started:
- First, press Win + R, type
sysdm.cpl, and press Enter. - Check if you’re a Workgroup or Domain user here.
- Press Win + R, type
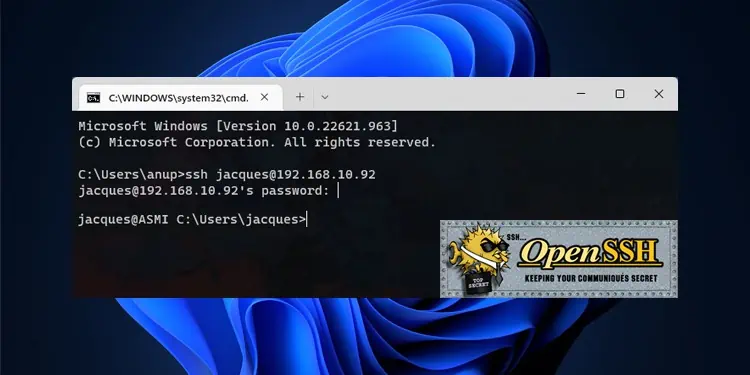
powershell, and press Enter. - If you’re a workgroup user, enter the following command and skip to Step 6:
ssh user@host - If you’re a domain user, enter any of the following commands:
ssh -l user@domain hostssh domain\user@hostssh user@domain@hostssh user@host


- On the first login, you’ll have to confirm that the host is trusted. If you enter Yes, the host will be added to the list of known hosts.
- Now, input the host account’s password and press Enter.

Password-based authentication is generally fine, but ideally, you should use even more secure authentication methods like Kerberos and SSH keys. For Kerberos, follow the steps listed below:
- On the domain-joined server, navigate to
%programdata%\ssh\. - Open the sshd_config file with a text editor.
- Uncomment the GSSAPIAuthentication line, set it to yes, and save the changes.
- In Powershell, use the following commands to restart the sshd service and apply the changes from above:
net stop sshdnet start sshd - Now, on the Windows client that’s logged in as a Domain user, enter
ssh -K hostname.


Authenticate With SSH Key
When connecting across domains, password-based authentication isn’t recommended as its vulnerable to brute forcing. Instead, you should use public key authentication. This uses cryptographic algorithms to generate one public and one private key file.
A user’s public key is stored on the SSH server, and it’s compared with the client-side private key for authentication. As long as the private key is protected properly, this authentication method is much more secure.
You’ll need to generate the key pair on the client system, create an authorized keys file on the server, and store the client’s public key in this file. To do this, start with the following steps on the server system:
- Press Win + R, type
powershell, and press CTRL + Shift + Enter. - Create the administrators_authorized_keys file.
- For users in the Administrators group:
New-Item -Type File -Path C:\ProgramData\ssh\administrators_authorized_keys - For standard users:
New-Item -Type File -Path C:\Users\username\.ssh\administrators_authorized_keys
- For users in the Administrators group:
- In our case, we created the file using an Administrator account. If you’re using a standard account, change the file path accordingly in the rest of the commands.
- Set the access permissions for the keys file with:
get-acl C:\ProgramData\ssh\ssh_host_dsa_key | set-acl C:\ProgramData\ssh\administrators_authorized_keys
Now, launch an Elevated PowerShell window on the client system and follow these steps:
- Use
cd ~/.sshto get to the .ssh directory and generate the key pair withssh-keygen. - When prompted for the file location, press Enter to use the default value :
C:\Users\username\.ssh\ - Add a passphrase for your private key if you want to further improve its security.
- Now, change the user and host values and run the commands shown below. It will append the client’s public key to the authorized keys file on the server.
$public_key = Get-Content ~/.ssh/id_rsa.pubssh user@host "'$($public_key)' | Out-File C:\ProgramData\ssh\administrators_authorized_keys -Encoding UTF8 -Append"
- Enter your password to approve the operation. Now, you’ll be able to connect using public key authentication.


Troubleshooting Common Errors
SSH Errors like Port 22 Connection Refused, or Connection Timed Out are pretty common. If you followed the steps from this article, basic steps like ensuring the SSH services are running, restarting them, allowing SSH traffic through the firewall, adding SSH to system PATH, etc., will already be covered.
In addition to these, here are some more troubleshooting steps worth trying:
- First, make sure the steps mentioned above are done on the remote system as well.
- Retry and make sure you entered the correct credentials.
- Use the host’s IP address instead of the hostname. If this works, resolve DNS problems by flushing the cache or using a different server.
- Ping the host to ensure there’s no packet loss.
- Check the SSH port and ListenAddress in the server’s sshd_config file.
- Use verbose flags (
ssh -vorssh -vvv) to get more details on what’s going wrong.