
It can be a serious hardware issue if your TV plays sound but displays no picture. Since the display module and sound module process separately on the TV, it is common for a TV to act that way.
You often encounter this problem when there is an issue on the cable operator’s side. However, you may also have a bad backlight or a T-Con board. Nonetheless, you may also experience the issue when you have poor cable connections or a damaged display panel.
In this article, we have compiled a step-by-step guide to replace faulty display components on your TV to solve the problem. So, keep reading!
How to Fix No Picture on TV but Has Sound?
Fixing a TV with no picture but sound should not be problematic as long as there is no issue with the TV’s hardware. Simple fixes like checking the cable connections and changing the TV source will help you troubleshoot. Otherwise, you need to dig deeper and dive into hardware fixes.
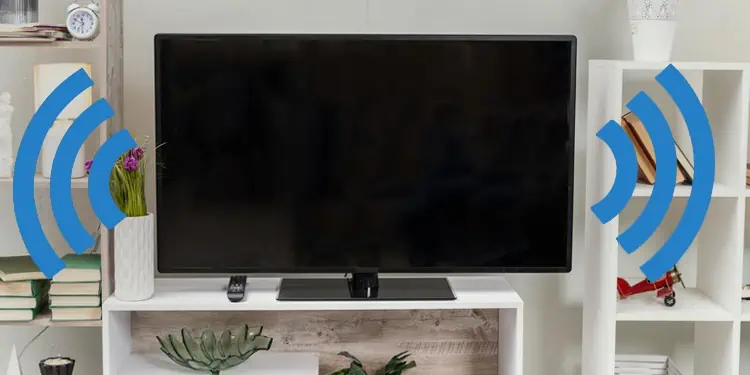
Change TV Channel or Source
Since the issue mainly lies on the cable operator’s side, you should first check if you are facing the same problem on other TV channels as well. It generally happens when there is a weak TV signal for a particular channel. So, change the TV channel and see if the problem persists. Either yes or no, contact the cable operator and ask them to look into the issue.

Likewise, the cable device, i.e., a set-top box, can also be problematic. Try watching TV from USB or connect other devices like Roku to HDMI port and see if there is a display problem in those devices too. You can also connect a PC to your TV via HDMI to know whether it is a fault in the TV hardware or an issue on the source device.
Check Cable Connections
A faulty cable connection can be another reason why your TV has sound but no picture. The issue primarily arises if your TV utilizes an RCA cable. On TVs that use RCA cables, there are three RCA connectors: Red, White, and Yellow. Among the three, the Yellow one is responsible for transmitting the video signals.

Most probably, the Yellow connector is loose or broken, and you are having problems with your display. Please unplug and re-plug the cable to see if it solves the problem. If not, you can also get a replacement RCA cable and connect it.
Troubleshooting Hardware Issues
Since we already discussed the issue as more of a hardware problem than software, there are a few hardware parts on your TV that you need to inspect. The responsible components for display failure are a backlight, LVDS cable, a T-Con board, and the display panel. Here, we will be discussing steps to replace each of the components.
Replacing Backlight Inverter
A backlight inverter is a component on LCD TVs that supplies power to Cold Cathode Fluorescent Lamps (CCFL) on the TV and acts as a light source. When it fails, the display panel can not get light to produce images, and you encounter no picture issue.
Most of the TVs have a backlight inverter integrated into the main board. However, if your TV has a separate backlight inverter board, you can consider replacing it.
- Open up the rear panel of your TV. Use a screwdriver or unscrew tool for that purpose.

- Get a new backlight inverter board compatible with your TV from the market.
- Locate the inverter board. It is connected to the power supply board and is generally located at one corner of the TV chassis.
- Unplug and re-plug all the cables connected to the inverter board.
- Also, re-plug the power supply cable that connects the power supply board with backlight inverter board. Check if replugging solves the problem. If not, you need to replace the board.
- Gently remove all the cables connected to the inverter board; otherwise, you may end up breaking them.
- Unscrew the inverter board and fit new board into proper position.
- Tighten the board with screws and re-plug the cables.


Replacing LED Strips
LED TVs utilize LED strips to produce images on the screen. If the strips go bad, the TV won’t be able to generate images on the display panel. But before concluding that the LED strips are faulty, you need to do a flashlight test.
- Place your TV on a firm surface, so the back panel faces you.
- Then open the back panel of your TV by unscrewing the fasteners.
- Turn off all the lights in your room.
- Power on the TV. Be careful not to touch any electronic components on the TV else you might get electrocuted.
- Inspect if the LED strips are glowing. You will see LED lights shining if the strips are working.


However, if not, you need to replace the LED strips on your TV.
- First, turn off your TV and remove its rear panel. You will see all the electronic components on your TV, like the main board, power supply board, and T-Con board.
- Unplug ribbon cable from the T-Con board.
- Now flip your TV and remove the bezels. You can use a pry stick to remove the bezels.
- Remove the tapes that stick display panel to the chassis and get the display panel off the TV. You can remove it with your hands or use a suction cup. Be careful if you are using your hands.
- Remove filter frame.
- Then remove diffusion layers from chassis. Please use tape to keep the diffusion layers together. Else, you might get into problems while reinserting them.
- Now remove tabs that are holding the reflector sheet.
- Remove the reflector sheet then you will see the LED strips.
- Disconnect the power cable that is plugged into the LED strips.
- Take off strips from chassis. If two strips are connected together from the middle, first take them apart and remove them from the chassis.
- Then bring replacement strips and align them the same way the old strips were.
- Connect the power cable to LED strips.
- Put back the reflector sheet.
- Fix the sheet with tabs.
- Please bring back the diffusion layers and install them properly. If you used tapes to keep the layers together, remove them.
- Reinstall filter frame back.
- Properly align the display panel on the chassis and reinstall the bezels.
- Reconnect the ribbon cable to T-Con board.
- Reinstall the rear panel and tighten it using screws.


Replacing a Bad LVDS Cable
LVDS is a 31 or 51-pin cable used to connect main board of your TV with T-Con board. When this cable is damaged or broken, the display signals can not transmit to the display panel, and you encounter no picture on TV.

- Purchase a compatible LVDS cable. You can visit a nearby TV store to purchase it. Make sure you know the TV model when you go to buy the cable.
- Now dismantle your TV by removing all the screws that tighten the rear panel with the chassis of the TV.
- Find the LVDS cable. To find the LVDS cable, you first need to remove the cover that shields T-Con board.
- Unplug and re-plug the LVDS cable once from main board as well as T-Con board. It should fix if the cable is loose.
- However, if it’s broken, you need to replace it. Remove the cable from T-Con and main board.
- Now bring the new LVDS and connect its both ends to the board, one on the main board and another on the T-Con.
- Shield T-Con board with its panel that you removed previously.
- Re-assemble the rear panel and power on your TV. If faulty LVDS prevented the display on your TV, it would start working again.
Replacing a Bad T-Con Board
T-Con board is the most essential part of the display module on your TV. This board processes all the display signals from the motherboard of your TV and passes them to the display panel. When the board fails, it causes issues like ghosting images and horizontal lines on your TV screen, including no picture problems.

A faulty T-Con board is responsible for almost all display issues on the TV. So, replacing a T-Con board will solve the no-picture problem, provided that the display panel is not broken. Let’s see how to replace the T-Con board.
- Get a replacement T-Con board from the market.
- Remove all the screws on the TV’s back panel to unfasten the panel from main body of your TV.
- Remove the T-Con board’s cover.
- Pull out the ribbon cables as well as LVDS connector from T-Con board.
- Remove the screws that tighten T-Con board to the chassis.
- Remove the old board and fit the new board in proper position.
- Tighten the new board with the help of screws.
- Plug the LVDS and ribbon cable back into the new T-Con.
- Install the T-Con cover and tighten it.
- Put rear panel back, and you are all set.


Replacing a Display Panel

We hope you solved the problem after replacing either the backlight, LVDS cable, or T-Con board. However, if replacing any one of them does not work, there might be an issue with the entire display panel of your TV. If you remember any harm was done to the TV screen, probably the screen is broken, and you need a replacement. Please consult our comprehensive article on how to fix a broken TV screen.