Page Frame Number (PFN) list is a database that tracks the allocation of memory used by processes. This way, your system can check for available memory locations to allocate new processes.
Corruption of this list disables your PC from properly running system processes, thereby causing a Blue Screen of Death (BSOD) error.
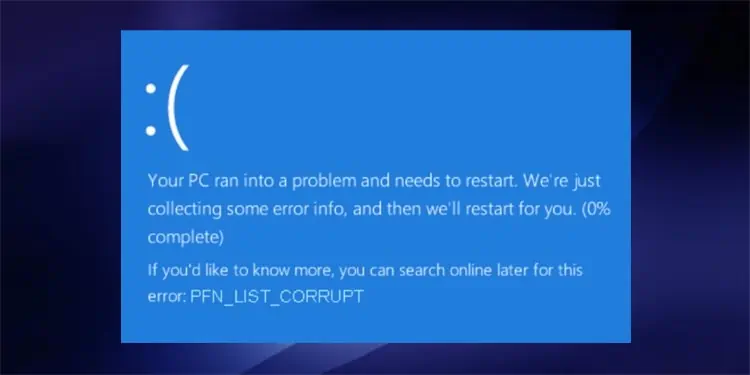
In this article, we explain the reasons for the PFN_LIST_CORRUPT BSOD error and possible solutions.
How Does PFN List Get Corrupted on Windows 10
There are a few reasons possible for the PFN list to get corrupted. Some of them are as follows:
- Damage to RAM
- Defective or outdated drivers
- System file corruption
- Overclocked memory
How to Fix PFN List Corruption on Windows 10
The most common causes for PFN list corruption include drivers and physical memory errors. So troubleshooting for such is certain to fix this issue.
Please find the methods to fix corruption in the Page Frame Number List below. We recommend following these methods in the mentioned order.
Fix System Errors With DISM and SFC
Deployment Image Servicing and Management and System File Checker scan and fix system file errors. They might fix this error if corrupt system files are the underlying reasons. Follow these directions to run these tools:
- Type
cmdon the Run tool (Windows + R). Then press Ctrl + Shift + Enter to launch the Elevated Command Prompt. - Paste the following commands and execute each by pressing Enter.
dism /online /cleanup-image /restorehealth
sfc /scannow
Check for Disk Errors
This error can also occur due to bad sectors or logical file errors in the system drive. Running the CHKDSK tool will likely fix this issue. Please follow the steps below:
- Open the Elevated Command Prompt.
- Type
chkdsk C: /f /r /xand press Enter.

Update Windows OS
Operating System Updates include fixes for many preexisting bugs. It is best to keep your system fully updated to avoid system problems. You may be able to fix the PFN_LIST_CORRUPT error after updating Windows. Here’s how you can do so:
- Press Windows + I to open Settings and go to Update & Security.
- Here, check for any available updates. Click on Install now or Download if they are available.

Disable Overclocking of CPU
Overclocking your CPU can cause many memory issues. It might be one of the reasons for the PFN_LIST_CORRUPT error.
The standard method to disable overclocking is to restore BIOS to the default settings. Here are the steps to do so:
- Click on Restart inside the Power icon while pressing Shift to enter the Windows Recovery Environment.
- Then, go to Troubleshoot > Advanced Options > UEFI Firmware Settings and select Restart.
- Restore your UEFI settings to default.


You’ll most likely find shortcuts or buttons for restoring to default on the UEFI settings screen. If not, don’t hesitate to get in touch with the manufacturer.
Check Faulty RAM
A faulty RAM is one of the most common reasons for this error. PFN list contains information about virtual and physical memory allocation states. So, a defective physical memory device, i.e., RAM, can cause this list to become corrupt.
Follow the instructions below to check for RAM defects:
- Open the run tool and enter
mdschedto run Windows Memory Diagnostic. - Select Restart now and check for problems.
- Wait for the result message after the reboot. It may take a lot of time.

The error message may be due to RAM or the motherboard slot. Test by using separate RAM sticks on different slots, and run this program to check for faulty hardware. Then replace the defective device to fix the issue.
You can also download and use other memory testing software if the Memory Diagnostics detects the error but fails to narrow down the cause.
Check Minidump File
A system crash creates a minidump file in the C:\Windows\Minidump directory. You can use a debugger to open and analyze the minidump file to find out the cause for the crash.
Follow the instructions below to use the minidump file to determine the cause for the error:
- First, you need to install the Windows debugger. Go to the official Windows SDK download website and click on DOWNLOAD THE ISO.
- Mount the ISO file on your PC and launch WinSDKSetup.
- Follow the on-screen instructions while keeping the steps below on your mind.
- Choose to install the software development kit on your computer.
- Only check the Debugging Tools for Windows for features you want to install.
- After installing the debugger, open the Elevated Command Prompt.
- Enter the following commands:
cd\Program Files (x86)\Windows Kits\Debuggers\x64\
windbg.exe -IA - Now, search for and run WinDbg as administrator.
- Press Ctrl + S on the WinDbg program.
- Paste
SRV*C:\SymCache*http://msdl.microsoft.com/download/symbolsin the Symbol path and choose Ok. - Now, click on File > Save Workspace.
- Then, go to
C:\Windows\Minidumpand open the minidump file created due to the system crash. Please be patient while WinDbg is loading the kernel symbols. - After the loading completes, locate and click on !analyze -y on the WinDbg command interface. Again, please wait for the analysis.
- After the analysis, search for MODULE_NAME and probably caused by to determine the cause.
- Search the internet for more information on the file responsible for the error. Then, remove, uninstall or reinstall the related programs.
Update Available Drivers
Software error in faulty drivers is also a major reason for memory corruption. You can update all your available drivers or select problematic ones by analyzing the minidump file to resolve this issue. Follow the steps below to update your drivers:
- Open the run tool and enter devmgmt.msc to launch the Device Manager.
- Expand the device category.
- Right-click on the device and select Update driver.
- Pick Search automatically for drivers

Reinstall or Rollback Drivers
If your drivers are fully updated, you can try reinstalling them to solve errors in the driver software. Follow these instructions to do so:
- Open the Device Manager and expand the device category.
- Right-click on your device and choose Uninstall device. Select Uninstall again.
- Restart your PC. Your system automatically detects and installs any missing drivers.
If reinstalling proves useless, try rolling back to the last version. Also, make sure to use this method if you start encountering the PFN error after driver updates. Here’s how to rollback the drivers:
- Launch the Device Manager and expand the device category.
- Double-click on it and go to the Driver tab.
- Select Rollback Driver.
Run Driver Verifier
Driver Verifier performs various tests on your drivers to detect bugs and failures. You can carry out this test on multiple drivers at once. But it is recommended to only test the non-Microsoft drivers.
- Enter verifier on run command to open the Driver Verifier Manager.
- Here, select Create custom settings (for code developers) and hit Next.
- Check everything except Randomized Low Resource Simulations. Also, don’t check Concurrency stress test and DDI compliance for Windows 8. Now, click on Next.
- Here, select all drivers except those provided by Microsoft.
- Click on Next and then Finish.
- Restart your PC and use your system normally.
- Wait for your PC to crash. It will crash after about 24-72 hrs.
- After rebooting, check the minidump file created due to the system crash using.

Uninstall Recent Windows Update
There may be unresolved bugs in a new system update. If you encountered this error after a system update, please uninstall it. Then, check if the issue resolves. If it doesn’t, you can install the update again anyway.
Here are the steps to uninstall the most recent Windows update:
- Go to Settings > Update & Security > View update history > Uninstall updates.
- Scroll down to find the Microsoft Windows section and search for the most recent update.
- Double-click on it and confirm with Yes to uninstall the update.

Scan for Malware
Malware programs are responsible for numerous system problems. It is always recommended to keep your system protected from any external threats. Please make sure to enable real-time protection and even cloud-based protection on a reliable antivirus.
Perform a full system scan or even a boot-time scan with your antivirus program whenever you encounter a BSOD error. Errors due to malware will likely get fixed after removing them.
Run Blue Screen Troubleshooter
Older versions of Windows (before Windows 10 version 1809) also have a Blue Screen Troubleshooter. Follow these steps to run this tool:
- Open file explorer and paste
Control Panel\All Control Panel Items\Troubleshooting\on the address bar. - Locate View all on the left sidebar and click on it.
- Look for Blue Screen, right-click on it and select Run as administrator.
- Follow the on-screen instructions.
System Restore
System Restore is a tool to revert the system to a restore point. This way, you can remove all system errors if you have an appropriate restore point. Follow these directions to perform a system restore:
- Enter
rstruion the Run command (Windows + R). It will launch the System Restore tool. - Click on Next and select the restore point.
- There is also an option to Scan for affected programs.
- Click on Next and follow the instructions.
Update BIOS/UEFI
Errors in the system configuration of your BIOS/UEFI settings may also cause many BSOD errors. There may also be a discrepancy between your motherboard and your UEFI. This scenario is likely if you are used to replacing old hardware. You can try updating your BIOS or UEFI if you encounter this error. Please execute the following steps:
- Enter
msinfo32in the Run tool to launch System Information. - Here, look for your BIOS Version/Date and download the latest BIOS for your device from the official website.
- Extract it and copy its contents to a USB drive.
- Restart your computer while keeping the USB connected to your PC.
- Enter and update your BIOS/UEFI.
- After updating the bios, reset its settings to the default configuration.
Reset Your PC
You can try resetting your PC as the last resort to solve the PFN_LIST_CORRUPT error. Windows has a simple interface to reset your PC to factory settings. It is also possible to use the Command Prompt to do so.
The normal method to perform a system reset is as follows:
- Go to Start > Settings > Update & Recovery > Recovery.
- Under Reset this PC, select Get started.
- Follow the on-screen instructions.
Check and Replace Hardware
If resetting your system still does not solve this issue, faulty hardware is likely responsible. You can only replace the hardware device with a functioning one. Please seek expert help to check and replace defective parts of your PC.