
If you have forgotten your user or administrator password, the only possible way to recover is by resetting the BIOS. Even though you can’t access the firmware interface for manually loading the factory settings, clearing the CMOS should suffice.
This may involve pressing the dedicated CLEAR CMOS button, removing the CMOS battery, or even shorting the relevant 2-pin/3-pin headers. It solely depends on what your manufacturer recommends.
While these methods generally work for motherboards, I had to use a backdoor password in one of my new laptops. In case that doesn’t work out for you, try your manufacturer-recommend method, third-party solution, or reprogram the BIOS.
For various circumstances, I have accumulated relevant ways in this guide that should help you reset the BIOS password.
Use the Clear CMOS Button

For most motherboards, clearing the CMOS should reset all your BIOS settings, including the User/Administrator password. If you already rock a high-end motherboard, it should come with a dedicated clear CMOS button.
While the general steps remain identical, they might vary slightly depending on the CMOS button location:
- Turn off your PC and remove the power cord.
- Next, locate the CMOS button (alongside other ports in the I/O panel or the system board itself).
- Now, press it and wait for some time (depending on the motherboard model).
- Power on your computer and your BIOS reset should complete. You will no longer be asked to enter the system password in the next boot.
- Hit the dedicated key (Del or F2) to enter the BIOS interface and load the optimized defaults.
Reseat CMOS Battery
If your motherboard doesn’t have a CLEAR CMOS button, it certainly includes a CMOS battery (which also applies to most laptops). It’s not at all difficult to find it–just look for a coin-shaped cell.
The location could be near the processor, between the PCIe slots, or even next to the front panel headers. In some boards (especially with Mini-ITX), the CMOS battery could be vertically mounted. I’ve also encountered some motherboards that have hidden the cell underneath the heatsinks.
If you’re finding it hard to locate, check your user manual first for quick navigation. Then, follow the general instructions below.
- Shut down your computer, disconnect it from the power supply, and open the PC’s chassis.
- Next, locate your CMOS battery, which varies on every motherboard model.
- Before proceeding, press and hold the power button for about 10 to 15 seconds to drain the capacitors. It’s also a good idea to ground yourself before touching any motherboard part (including the CMOS battery).
- If you have an ATX motherboard, it should come with an onboard battery, and here’s how to remove it:

- Press the dedicated lock in the opposite direction applying a little more pressure. You can do this with your finger or utilize an anti-static tool.
- After the battery pops out, wait for at least 10 to 15 minutes (as prescribed in your laptop or motherboard’s user manual).
- Check the positive side of the battery before reseating it.
- However, if you have a Mini-ITX board, it comes with a plug, and the battery wrapped with plastic (in some cases). Here’s what you need to do:
- Disconnect it from the dedicated header (no need to remove the battery).
- Wait for about 15 minutes.
- Reconnect the plug.
- Start your PC and use the dedicated key to get to the BIOS Setup page. Now, you can boot into the BIOS or the OS without entering any password.


Clear RTC RAM by Shorting the Headers
While the above two methods should usually work, some manufacturers rather recommend shorting the 2-pin or 3-pin headers. For this reason, they have labeled them CLRPWD, PASSWD, etc.
In fact, modern laptops might not come with a removable CMOS battery at all. So, the only possible way to clear the NVRAM data is by using the ‘shorting’ technique. Let me guide you with the simple steps involved here:
- First, open up your motherboard or laptop’s user manual to know whether it has a 2-pin or 3-pin header.
If you don’t see CLRPWD or PASSWD, it might be labeled CLEAR, CLEAR CMOS, JCMOS1, CLR, CLRTC, etc. - If you have a 2-pin header,
- It might not come with a jumper cap. So, you need to use a flat-headed screwdriver/metal object.
- Touch the two pins for a few seconds to about a minute (depending on your motherboard/laptop model).
- For systems with a 3-pin header,
- It generally comes with a jumper cap inserted in the first two pins (called the ‘normal’ position).
- Remove it and insert the cap into the adjacent two pins (called the ‘clear CMOS’ position). This position may vary depending on the motherboard model.
- Leave it there for at least 15 minutes (or as indicated in your user manual).
- Then, switch back to the default/normal position.
- Once the CMOS is cleared, start your PC and this should take you to the BIOS screen.
- Load the optimized defaults, save, and reboot the computer.


Try Laptop Backdoor Password
While clearing the RTC RAM should work for most motherboards, modern laptops now store the BIOS password and the related configuration separately. While clearing CMOS will reset the firmware settings, it won’t have any effects on the password.
If the earlier methods didn’t work out, you’ll need to use master/backdoor passwords to bypass the prompt. These are going to be different based on the BIOS manufacturer (AWARD / AMI / PHOENIX / IBM APTIVA / BIOSTAR / DELL / etc.).

After attempting the password more than thrice, you will meet with some forms of errors. For instance, if you’re stuck in the ‘System Disabled [error_code]’, utilize the BIOS-PW website. Enter the on-screen code here and you will get a list of passwords that might work.
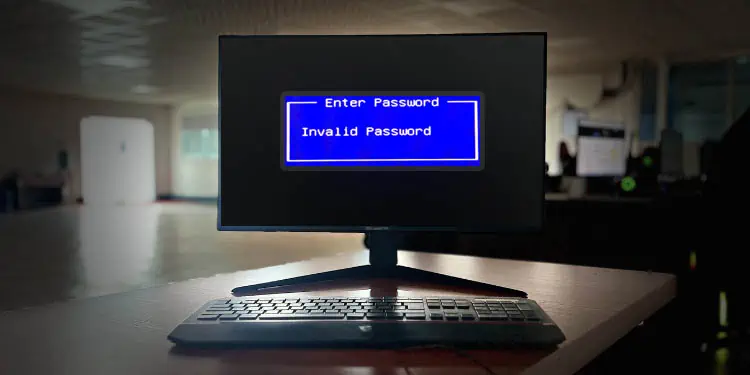
However, not all systems provide an error code and instead display the ‘Invalid password’ message. In that case, you need to hit and trial with the provided default passwords. You should find this in the manufacturer’s official documentation.
Try Manufacturer-Recommended Solution
Some BIOS and laptop manufacturers even offer dedicated solutions to break through the system password screen.
- For instance, on my old Lenovo laptop with IBM Aptiva, I can easily clear the BIOS information by holding down both mouse buttons during the boot.
- Likewise, in some DELL laptops, you can try turning on the NUM, CAPS, and SCROLL locks. Then, press Alt + E, Alt + F, and Alt + W in succession. This should reset the BIOS.
- In some Toshiba laptops and desktops, holding the left Shift key during the boot should do the trick. Alternatively, you can insert their (recommended) ‘BIOS-clearing dongle’ in the printer port when starting the computer.
- Likewise, other manufacturers might provide you with dedicated reverse engineering utilities to reset BIOS configuration. A popular example is HP’s BIOS Configuration Utility (BCU).
- Some BIOS support the ‘keyboard buffer overloading’ technique as well. This involves hitting the Esc key more than 100 times on the password screen, which eventually bypasses the prompt.
- If nothing helps, I suggest contacting your manufacturer. They should provide you with a working passcode (if possible). However, the product should have been purchased using your ownership information.
- The manufacturer might even let you know if the forgotten BIOS password is unrecoverable. If that’s the case, they’ll likely request you to send your device for repair or for complete motherboard replacement. Do note that this will not be covered by your warranty and you might need to fork out additional costs.
Use MS-DOS and Third-Party Solutions
If you have forgotten only the Administrator password and are able to log into the system, you can try different software-based solutions.
For instance, you may boot using a bootable MS-DOS flash drive and execute the following commands after the computer boots up:
debug
o 70 2E
o 71 FF
quit
Also, you can make use of third-party apps (like CmosPwd and CMOS De-Animator) that let you clear the NVRAM data from the Windows platform.
Caution: The next three solutions involve intense hardware troubleshooting and may void the warranty if anything goes wrong. So, only opt for them as your final solution (after contacting your manufacturer).
Short the EEPROM Chip
This method involves locating the EEPROM chip and shorting the SCL and SDA pins. It’s a way to trick the prompt to accept the empty BIOS password field.
However, timing is the key here! If you short the pins too fast (before the PC starts), you might face boot issues. In case you do it a little late, the process won’t work and you’ll get the same error message as earlier.

- Disassemble your laptop and locate the EEPROM chip (SOP, TSSOP, TMSOP-8, SNT-8A, WLP, etc.) on the mainboard. It might even be located on the keyboard side (in older models).
- Note the number of pins. Generally, it’s 8 but some even come with a 5-pin SOT-23 package.
- While you’re at it, check the circle to understand the pins’ numbering. The SLC and SDA pins should be on pins 5 and 6.
- Depending on whether your BIOS is Legacy or UEFI, the process slightly differs. For Legacy BIOS, short the pins when you’re in the password prompt and hit Enter. And for UEFI users, short them as soon as you power the system.
- Retry the process until you are successful.
- Once you’re able to get to the BIOS Settings window, load the optimized defaults, and save changes.
Use SPI CH341A Mini Programmer
Unlike the previous method, this is a much more technical approach and I only suggest performing the action if you know what you’re doing. You’ll have to prepare the current BIOS dump on a CH341A Mini Programmer drive. Along with that, you need a SOIC8 Clip.
- Use another computer to copy the
.binfile to the mini programmer drive. - Ensure your laptop is turned off. Both the battery and power cable should also be disconnected.
- Connect one end of the clip to the BIOS chip and another to the CH341A drive.
- Finally, use the mini programmer to write the BIOS code into your SLC chip. This should reprogram the BIOS.
Replace the BIOS Chip
The last sort option would be the complete replacement of your BIOS chip. If it’s slotted onto the motherboard, you can get dedicated chip pullers (or use a pair of tweezers) to remove and replace the chip effortlessly (only if you have proper hardware knowledge).
However, if your BIOS chip is soldered on the board, it’s going to be a costlier option and might be arduous, even for professionals. If you’re not ready for that, the only possible way I see is to replace your motherboard.