Unrestricted internet access for children is more harmful than good, as it can expose them to inappropriate and harmful content. This is why Windows comes with default options to set up parental controls.
It does so by allowing parents to create family accounts for the children where it is possible to specify certain options, such as:
- Blocking inappropriate content on the internet.
- Restricting the use of certain apps and games based on age.
- Controlling screen time for Windows or Xbox devices.
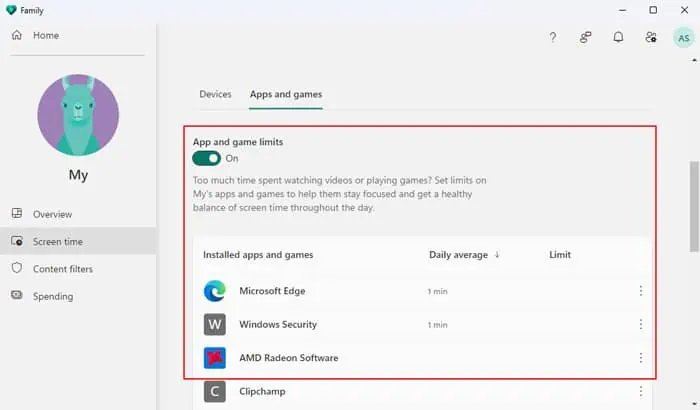
- Limiting screen time for individual apps.
All these options help promote online safety for children while also preventing overindulgence in the digital world.
Step 1: Add Your Child as a Family User
Both you and the child need to have a Microsoft account to be able to set up parental controls on Windows. So, if you have a local admin account, you need to switch to a Microsoft one.
If your child already has an online Microsoft account, you can add them directly as family members. Windows will automatically check the age and treat the account as a child account. If not, you can also create and add it through the Account Settings.
- First, sign in to your Microsoft account on Windows.
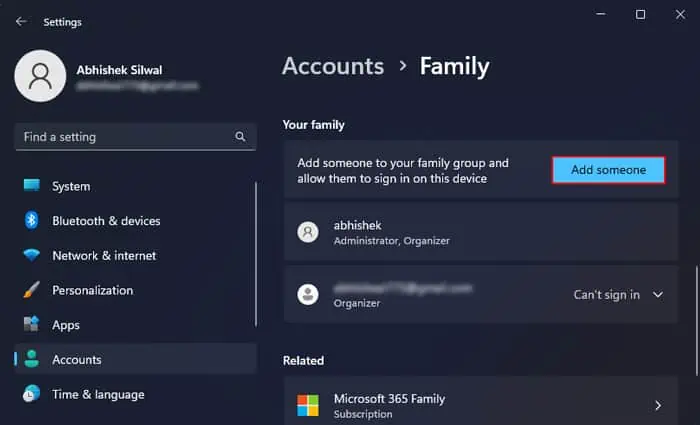
- Go to Accounts > Family or Family & other users.
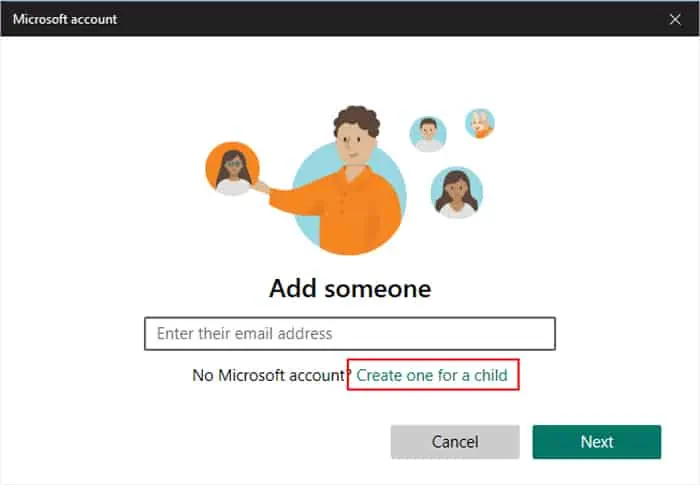
- Click on Add someone under Your family.

- If your child already has a Microsoft account,
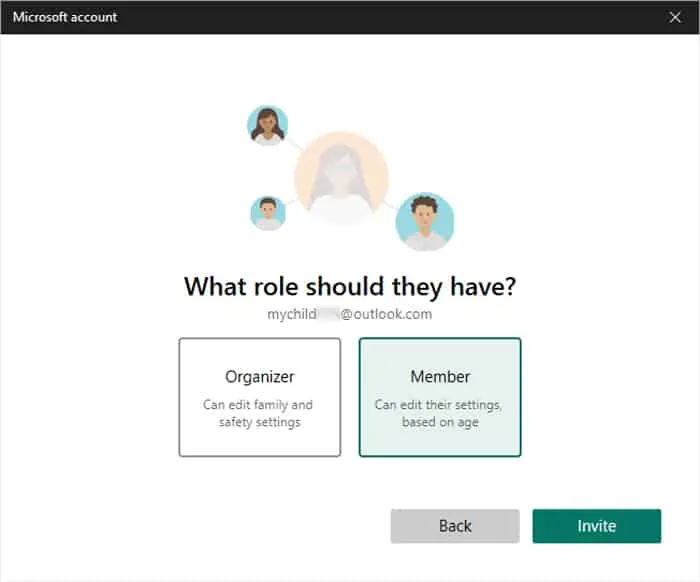
- Type the account ID and click Next.
- Select Member and click Invite.

- Open a web browser and log in to the child’s online Microsoft account.
- Open the invitation email from Microsoft Family Safety and click Accept Invitation.
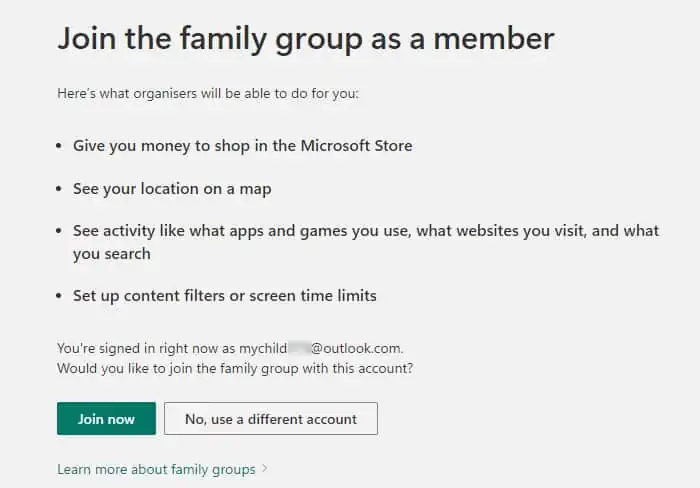
- On the new tab, select Join now.

- Select Next.
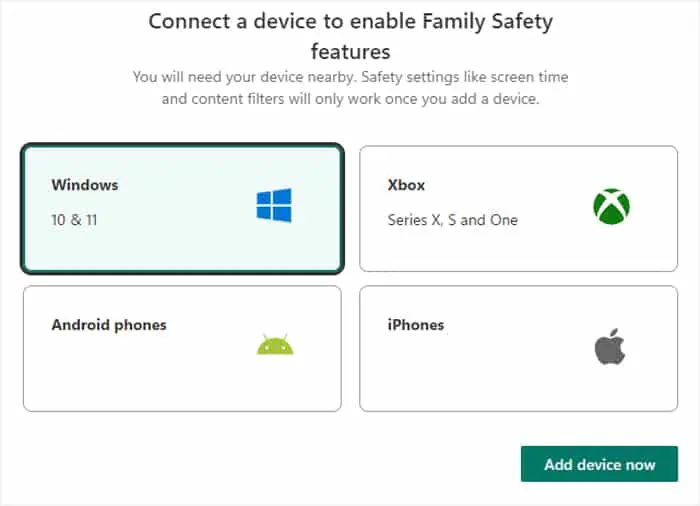
- Check Windows and click Add device now > I’ve added my device.

- If your child doesn’t have their own Microsoft account,
- Click on Create one for a child.

- Enter an email address and select Next.
- Enter a password and click Next. You can’t leave it empty.
- Enter the First and Last name of your child and click Next.
- Specify the country and date of birth and hit Next > Close.
- Click on Create one for a child.
Also, keep in mind that you should not change your children’s accounts to administrators as doing so may conflict with the parental control settings.
Step 2: Log into the Child’s Account and Restart
Some parental features are not available before you or your child has logged in to their account at least once. So, it’s best to have them do so or do so yourself first. After that, get back to your account, and you can move on to setting up parental controls.
Step 3: Manage Parental Control Settings
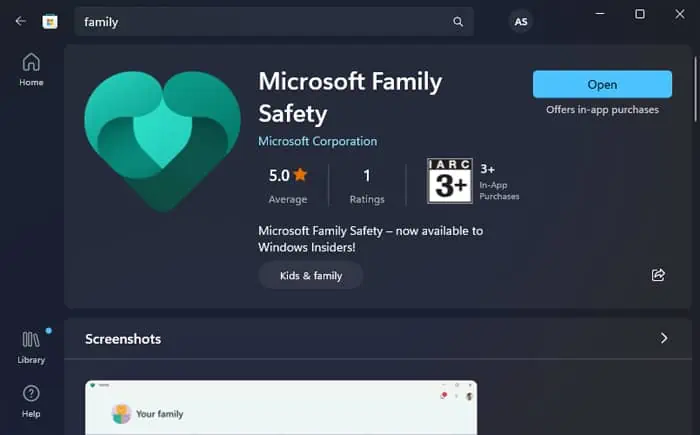
First, you need to get to the Parental Control Settings. You can do so by installing the Family app from Microsoft Store.
- Go back to your Account > Family or Family & other users settings.
- Expand Microsoft Family and select Open Family app.
- It will open the app if you have already downloaded it. Otherwise, it will load the Family or Microsoft Family Safety app inside Microsoft Store. In the latter case, click Get and then Open.

- Sign in with your Microsoft account if necessary.
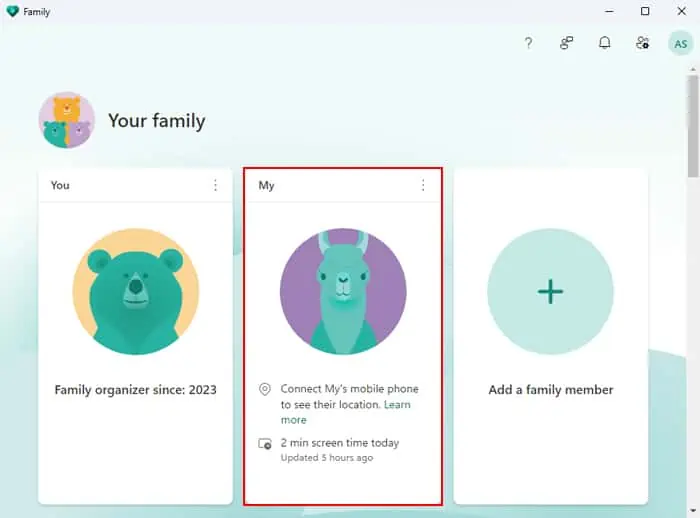
- Click on your child’s account from under Your Family.

Now, you can specify many parental control settings, which I have listed below. Make sure to check the description for each option before deciding on its configuration. You can also check the overall configuration on the Overview tab.
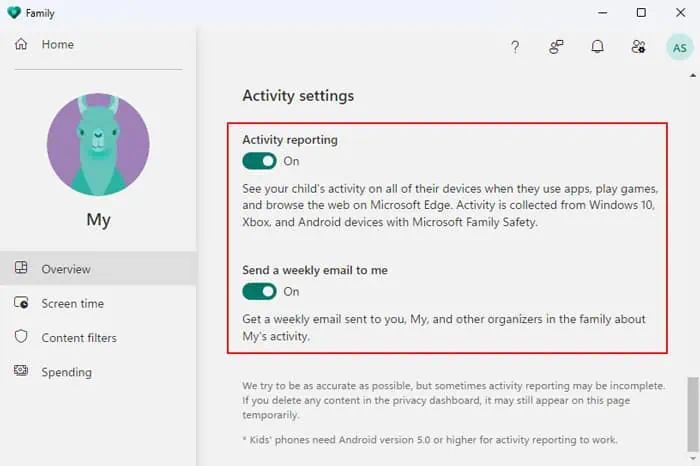
Activity Reporting
- On the Overview tab, scroll down till you get to Activity Settings.
- Check/uncheck Activity reporting and Send a weekly email to me depending on your need.

Content Filter
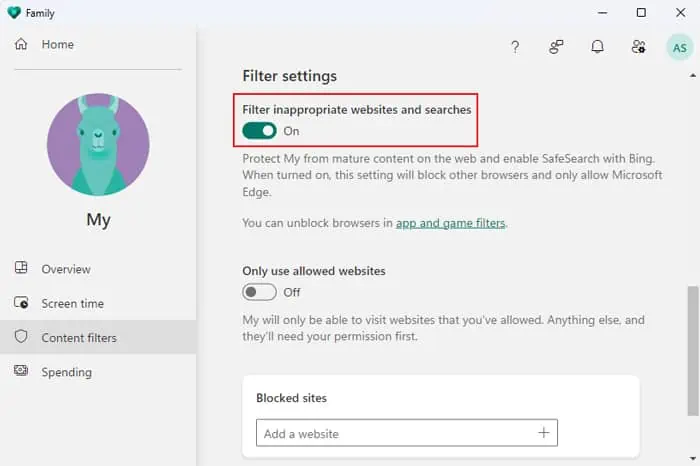
- Go to Content filters > Web and search.
- Here, enable Filter inappropriate websites and searches. It will also block the use of Private or Incognito browsing.

- You can also add websites you don’t want your child to visit inside Blocked sites.
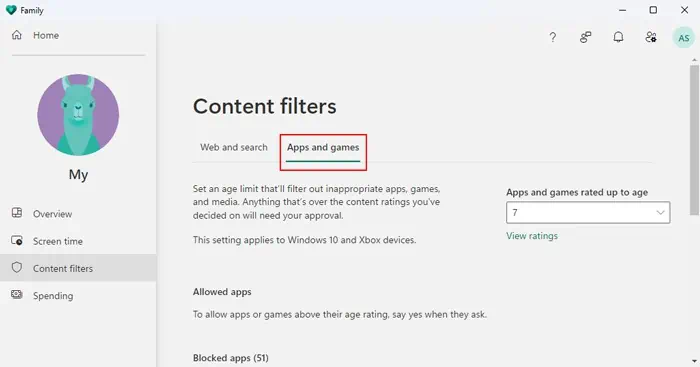
- Then, go to the Apps and games tab.

- Here, you can change the age limit for the apps as well as remove the blocked apps from the list.
Screen time (Windows and Individual Apps)
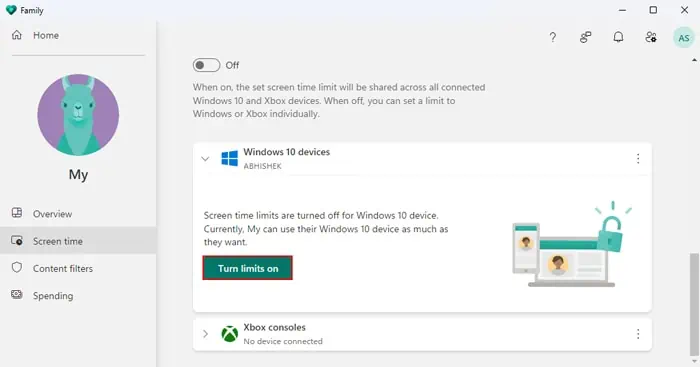
- Go to the Screen time tab.
- Click on Turn limits on from under Windows device.

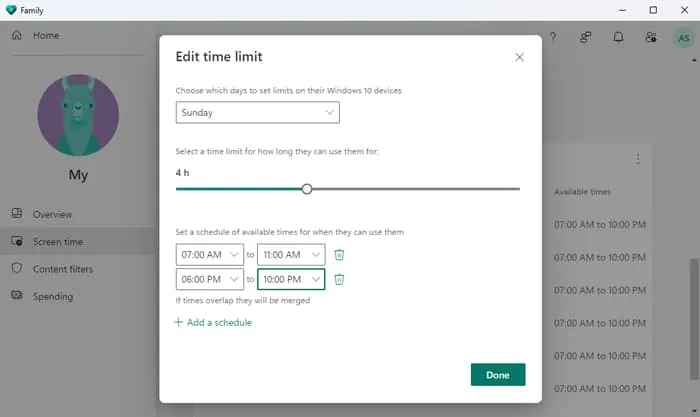
- Select each day and choose the time limit as well as the scheduled time. You can actually set the drop-down box to Everyday and have the same limit for all days.
- You can also add another range of scheduled time.
- After specifying everything, click on Done for each day.

- You can also do the same for Xbox consoles.
- Then, go to the Apps and games tab.
- Select the allowed apps where you wish to set a screen limit.

- Click on Set a limit and do the same process as above (steps 3 and 5).
Online Spending
If your country allows a Microsoft account balance, you can add the money to your child’s account so they spend it within limits. You need to go to the Spending tab to do so.
You can also link a credit card to the child’s account for online payment. To do so, you will need to log into the child’s user account, and go to Settings > Accounts > Payment options to add the credit card. After that, you can also enable the requirement for approval on every purchase from within the Family app > Spending tab.
