Virtual Machines are great options for using other Operating Systems inside your usual ones. The Virtual Machines work separately from your system, so they can’t access your files directly.
However, If you need to work on both your host computer and the guest OS, you likely need to transfer files between them. But there’s no need to worry yet. The fact that you can’t directly access the files doesn’t mean that there’s no way to transfer files between the systems.
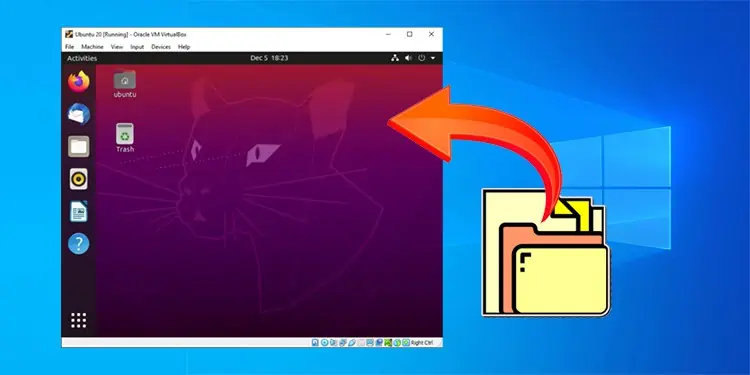
In this article, you can find multiple methods to transfer files to a Virtual Machine.
How To Transfer Files To Virtual Machine
Below are some ways to transfer files to a Virtual Machine. They provide different options for the file transfer, so read carefully and pick one according to your need:
Transfer from USB External Storage
Using a USB drive is likely the first method users think of when they want to transfer files to a Virtual Machine. It is possible, but depending on the different VM software, you need to take a few additional steps first.
On VMware Workstation
You need to enable USB controllers on VMware Workstation to use such devices. To do so,
- On VMware, go to VM > Settings > Hardware > USB Controller.
- Set USB Compatibility to the highest USB standard and enable all options.

- Click Ok.

Now, your VM can detect a USB device when the VM is active.
But your normal system stops detecting it at the same time. So, to copy files from your PC, unplug the USB device, minimize the VM, and reinsert the USB.
Similarly, to paste the files to the VM, unplug the USB device, maximize the VM, and reinsert the USB so that the VM detects it.
You can also reverse this process to transfer files from the VM to the host PC. Also, make sure to safely remove the USB device from all active VMs and the host computer before disconnecting it.
On Oracle VirtualBox
You need to have the VirtualBox Extension Pack to get support for USB devices. So make sure to install it first. Then, follow the steps below to enable access to USB devices on your Virtual Machine:
- Insert the USB drive to the PC with the VirtualBox VM.
- Open VirtualBox and install the Extension Pack if you haven’t already done so. To do so,
- Go to File > Preferences > Extensions and click + (plus).
- Navigate to the Extension pack, select it and click Open.
- Click Install and follow the on-screen instructions.
- After installing the Extension pack, right-click on your VM and select Settings > USB.
- Enable all USB Controllers.
- Click + (plus) and then navigate to the USB drive.

The device will be available whenever you launch the Virtual Machine, so you can directly use it to transfer files.
On Microsoft Hyper-V
Hyper-V has an enhanced session mode that allows redirection of local drives from your PC to a VM. You can only use this mode to not only transfer files directly from your local drive but also to enable the detection of a PnP USB device. Here are the necessary steps:
- Shut down any active Virtual Machine and open Hyper-V Manager.
- Right-click on your PC name and choose Hyper-V Settings.
- Go to Server > Enhanced Session Mode Policy.
- Check Allow enhanced session mode and click Apply.
- Go to User > Enhanced Session Mode.
- Tick Use enhanced session mode, and click Apply.
- Go to your Hyper-V Virtual Machines list.
- Right-click on the VM you want and select Start.
- After it starts running, right-click again and select Edit Session Settings.
- Click Show Options and go to Local Resources > More.
- Expand Drives and tick on the local drive you want to share.
- To enable USB detection, expand Other supported Plug and Play (PnP) devices and check Devices that I plug in later.
- Click Ok, and then go to the Display tab.
- Tick Save my settings for future connections to this virtual machine and click Connect.


The local drive you selected will always be available on the VM. And any USB you connect will show on the VM. So you can transfer files using these drives.
Copy Using Shared Clipboard
Another way to transfer files is to copy them from your host computer and paste them into the guest VM. You need to set up a shared clipboard to use this method. Most VMs also allow drag-and-drop to copy files. You can find the necessary steps to set up the shared clipboard and enable both options on different VM stations below.
On VMware Workstation
- Download VMware tools, and on VMware, go to VM > Install VMware Tools to install them.
- After installing VMware tools, go to VM > Settings > Options.
- Click Guest Isolation and tick both Enable drag and drop and Enable copy paste.
- Click Ok.

On Oracle VirtualBox
- On VirtualBox, right-click on your VM and select Settings.
- Click on General and go to the Advanced tab.
- Set the Snapshot folder to any folder you want.
- Set both Shared Clipboard and Drag’n’Drop to Bidirectional and click Ok.

On Microsoft Hyper-V
You can directly copy and paste files from a local drive or a PnP device using the enhanced session mode on Hyper-V. But if you want to use the drag-and-drop method to copy files from these drives, you also need to enable Guest Services. To enable the services,
- On Hyper-V Manager, go to Management > Integration Services for your VM.
- Check Guest services.

Create Shared Folder
You can also create a shared folder to easily transfer files to your Virtual Machine.
The shared folder will appear on your VM OS under the network location. Any files you transfer here will be available on your VM as well as your host PC.
On VMware Workstation
Follow the instructions below to create a shared folder on WMware Workstation:
- First, install VMware Tools. To do so, go to Player > Manage > Install VMware Tools on your VM session.
- After that, select Player > Manage > Virtual Machine Settings.
- Go to the Options tab and click Shared Folders.
- Check Always enabled and click Add. You can also tick Map as a network drive in Windows guests for more convenient access.
- Specify the Host path and the Name. Then, click Next.
- Tick Enable this share and click Finish.

On Oracle VirtualBox
Here’s how you can create a shared folder on Oracle VirtualBox:
- Run your VM session and install Guest Additions by going to Devices > Insert Guest Additions CD image and following the on-screen instructions.
- After installing Guest Additions, go to Machine > Settings > Shared Folders.
- Click + (plus) and specify the given options.
- Make sure to check Auto-mount and then Make permanent if you want to make the Shared folder available every time.
- Click Ok.

On Microsoft Hyper-V
To create a shared folder on Hyper-V, you need to Share a folder from your host machine and then map a network drive to the folder. First, follow these instructions to share a folder,
- Create a folder on your host system to share with the guest OS.
- Right-click on it and select Properties.
- Go to the Sharing tab and click Share.
- Click Share again and select the network discovery option according to your choice.
- Make a note of the Network Path and click Ok.

Then, open the Hyper-V VM and map a network drive to the Network Path using the steps below:
On Windows
- Open File Explorer and right-click on This PC.
- Select Map network drive or More options > Map network drive.
- Set Drive to an unused drive letter and enter the Network Path on the Folder.
- Click Finish.
On Mac
- Go to the Apple menu > System Preferences > Users & Groups.
- Select Login Items and click + (plus) on the right side.
- Find your network drive under Shared and click Add.
Mounting Virtual Disk
You can also transfer files from HDD or SSD to a VM by mounting a virtual disk with the files. The Virtual disk contains all the contents of the physical disk and acts as the hard disk of the VM. So, it will directly access the files within.
First, you must create a VHD (Virtual Hard Disk), VDI (Virtual Disk Image), or VMDK (Virtual Machine Disk) image file of the physical disk depending on the VM software you are using. Then, you need to mount it to the Virtual Machine. The file will then appear as a local disk drive (or many if the file contains more partitions).
You can directly copy it to other locations inside the VM. After you are done, unmount the virtual drive.
Transfer Through Cloud Storage
You can also transfer files to a Virtual Machine OS through cloud storage. First, upload the files to Google Drive, OneDrive, iCloud, or any cloud service. Then, download it from the VM’s web browser or cloud app.
You can also use backup software to transfer files to VM in a similar way.
Using Command-line Interface on Hyper-V
Hyper-V also offers a method to use the PowerShell CLI to transfer files to a Virtual Machine. You need to enable Guest services to use this method. So, first,
- On Hyper-V Manager, go to Management > Integration Services.
- Check Guest services.
- Then, enter the following command on PowerShell to transfer a file:
Copy-VMFile “<VM Name>” –SourcePath “<Host Machine File Path>” –DestinationPath “<Destination Path in VM>” –CreateFullPath –FileSourceHost
