
The automatic update feature, as the name suggests, automatically downloads and installs new updates in Windows. This is quite useful as newer updates contain security patches, bug fixes, and additional features. However, they aren’t always reliable as recent updates can contain bugs and security vulnerabilities of their own.
Windows updates generally come in the form of a feature and quality update. Feature updates bring massive changes to your operating system, and while they are automatically downloaded, you will need to manually install them. On the other hand, quality updates get automatically downloaded and installed, but you can choose to turn them off.
So, if you want to skip some of the updates that are known to be glitchy or avoid having to sit through an update installation in random intervals, you can try turning off the Windows automatic updates feature.
From Settings
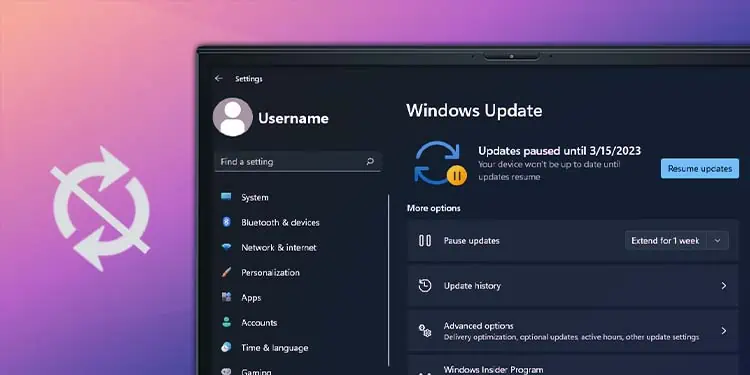
The simplest way to turn off automatic updates is from Settings. However, you can only temporarily turn off automatic updates or pause them for a certain amount of time from Settings. After the set time is up, you will need to install new updates to be able to pause it again.
While this won’t be useful if you want to permanently disable Windows updates, it can come in handy when you want to temporarily stop updates due to reasons like bugs or known vulnerabilities in the newer updates.
- Launch Settings by pressing Windows + I
- Click on the Windows Update tab in the left sidebar.
- Besides Pause updates, click on the drop-down menu to select how long you want to pause the updates for.

- You can click on the same drop-down menu to extend your pause time if you want. (You can pause your updates for up to 5 weeks at a time.)
- If you want to resume your Windows updates early, you can click on the Resume updates button.


From Windows Services
You can permanently turn off your Windows updates by disabling the Windows update service startup. This service handles the detection, download and installation of all new Windows updates on your computer.
- Press Windows + R shortcut key to open Run box.
- Type
services.mscand press Enter to open Windows Services. - Locate the Windows Update service and double-click it.
- Next to Startup type, select Disabled from the drop-down menu.
- Click on the Stop option, and select Apply and OK.


The above steps will make sure the Windows update service will not start automatically whenever your computer boots up. However, you need to make sure there are no applications like Windows update assistant on your computer that can start the Windows update service. You can uninstall Windows update assistant to prevent this from happening.
From Group Policy Editor
Another way you can permanently disable your Windows automatic updates is from the Group Policy Editor. However, this utility tool is only available for the Pro and Enterprise edition of Windows. So, this method will not be useful for users with Windows Home edition.
- Launch Run box with the Windows + R shortcut key.
- Type
gpedit.mscand press Enter to open Group Policy Editor. - Navigate to
Computer Configuration > Administrative Templates > Windows Components > Windows Update > Manage end user experience - Right-click the Configure Automatic Updates policy and select Edit.
- Select the Disabled option.
- Click Apply and OK.


After you disable this policy, Windows won’t perform automatic updates, but you will still be able to manually check for updates, and download and install them.
Additionally, you can also configure this policy to set up how your Windows automatic updates get installed or downloaded.
- Follow the above method till Step 4.
- Select the Enabled option.
- From the drop-down menu under Configure automatic updates, select how you want your automatic updates to behave. (If you want to turn off automatic updates, select 2 – Notify for download and auto install.)
- Click Apply and OK.

From Registry Editor
You can also turn off Windows automatic updates from the Registry Editor. Furthermore, unlike the Group Policy Editor, the Registry Editor can be accessed in all editions of Windows to disable automatic updates.
However, editing your Registry can have some serious consequences if done improperly. So, you should first backup your Registry
- Open Run Utility by pressing Windows + R keys.
- Type
regeditand press Enter to open Registry. - Navigate to
HKEY_LOCAL_MACHINE\SOFTWARE\Policies\Microsoft\Windows - Right-click on the Windows key, select New, and click on Key.
- Type WindowsUpdate as the new key’s name. (If the key is already present, skip these steps.)
- Right-click the WindowsUpdate key, select New, and click Key.
- Name the newly created key as AU and select it.
- Right-click on the blank area in the right panel, and select New > DWORD (32-bit) Value.
- Set the new entry’s name as NoAutoUpdate.
- Double-click on the NoAutoUpdate entry and set its value as
1. - Click Ok and exit Registry.
- Restart your computer.


Disabling automatic updates in Registry is pretty much the same as disabling it in Group Policy Editor. In fact, you can also configure how your Windows automatic updates get installed or downloaded from Registry.
- Follow the above method till step 7.
- Right-click on the blank area in the right panel, and select New > DWORD (32-bit) Value.
- Name the new entry as AUOptions.
- Double-click the AUOptions entry and set its value to one of the following options:
- Click OK and exit Registry.
- Restart your Computer.


Turn On Metered Connection
Lastly, you can use a simple and effective workaround of turning on a metered connection to stop automatic updates. The metered connection reduces the data usage of your PC, but it also ensures no updates except critical security updates are being automatically downloaded.
- Press Windows + I to launch Settings.
- Click on Network & internet from the sidebar.
- Select Wi-Fi or Ethernet depending on your network type.
- Toggle on Metered connection. (If you’re connected through Wi-Fi, you will need to click on your Wi-Fi properties first.)


Additionally, if your Windows updates are still getting downloaded over a metered connection, make sure to toggle off the Download updates over metered connection option in Settings > Windows Update > Advanced options.