Tech News Today
  • Hardware
    • Motherboards
    • CPUs
    • Graphic Cards
    • RAM
    • SSDs
    • Computer Cases
    • Monitors
    • Peripherals
    • Power Supply Unit
    • PC Builds
    • Computer Tips
  • Software
  • Operating System
    • Windows
    • Mac
    • Linux
  • Gaming
  • Mobile
  • Console
  • More
    • Internet
    • Networking
    • Security
    • Buyer’s Guide
    • Gadgets
    • Laptops
    • Reviews
    • How To
    • News
Facebook Twitter Instagram
Tech News Today
  • Hardware
    • Motherboards
    • CPUs
    • Graphic Cards
    • RAM
    • SSDs
    • Computer Cases
    • Monitors
    • Peripherals
    • Power Supply Unit
    • PC Builds
    • Computer Tips
  • Software
  • Operating System
    • Windows
    • Mac
    • Linux
  • Gaming
  • Mobile
  • Console
  • More
    • Internet
    • Networking
    • Security
    • Buyer’s Guide
    • Gadgets
    • Laptops
    • Reviews
    • How To
    • News
Tech News Today
Home » Windows

4 Ways to Delete Windows.old Folder

Abhishek SilwalBy Abhishek SilwalJune 20, 2023
Windows.old Folder

Windows will save a Windows.old folder after you upgrade or reinstall the Windows operating system. It is a backup feature that exists in case you need to restore data and settings from the previous installation.

As per Microsoft, your system will automatically delete this folder after 10 days. But since it can take up to 30 GB of space, it’s best to remove it as soon as possible if you don’t need any backup.

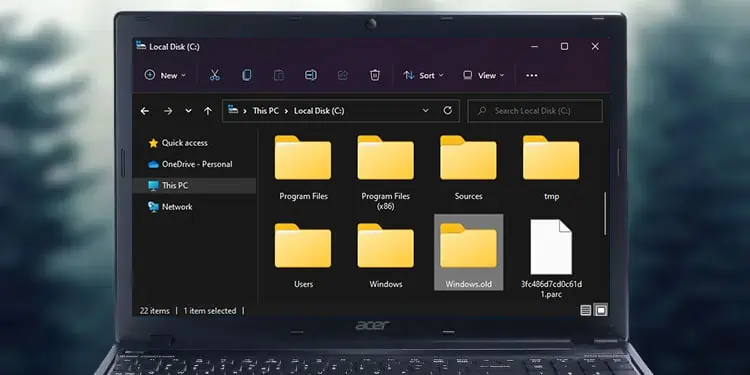
Your user account won’t have permission to delete this folder by default. So, you need to use alternate methods to remove it or change the permissions and then delete it.

Table of Contents

  • Through Windows Storage Settings
  • Using Disk Cleanup
  • Through Storage Sense
  • By Manually Taking Ownership

Through Windows Storage Settings

The easiest way to delete the Windows.old folder is through the Storage Settings on Windows. This setting lists the disk usage of different types of files. It also categorizes different kinds of temporary files occupying the disk and allows you to clear them without any issues. 

The Windows.old folder containing the previous Windows installation is included in this list, so it’s an effective way to remove the folder.

  1. Press the Windows key + I to launch Settings.
  2. Go to System and then Storage.
  3. Click Temporary files.
  4. Check Previous Windows installation(s) and choose Remove files > Continue.
    storage-temporary-files-previous-windows-installation
  5. You can also go to Storage > Cleanup recommendations > Temporary files, check Previous Windows installation(s) and select Clean up.
    storage-cleanup-recommendations-previous-windows-installation-clean-up

Using Disk Cleanup

Another way you can remove the temporary files from your system is by using the Disk Cleanup wizard. Since your system treats Windows.old as a temporary file, this utility is also able to delete this folder.

  1. Open Run by pressing Windows key + R.
  2. Type cleanmgr and press Enter to open the Disk Cleanup Wizard.
  3. Set the drop-down box to your system drive (C:) and click OK.
  4. Click Clean up system files and select the system drive again.
    disk-clean-up-system-files
  5. Check Previous Windows Installation(s) and uncheck any other options you don’t wish to remove.
    disk-cleanup-previous-windows-installation
  6. Click OK > Delete Files > Yes.

Through Storage Sense

Storage Sense is the newer alternative to the traditional Disk Cleanup Wizard and was introduced in Windows 10. Since it included some features that the storage settings itself were already providing, Microsoft removed these redundant features in Windows 11.

But in Windows 10 itself, you can use the Storage Sense feature to remove the Windows.old folder.

  1. Open Settings and go to System > Storage.
  2. Click on Configure Storage Sense or run it now.
  3. Check Delete previous versions of Windows under Free up space now.
    configure-storage-sense-delete-previous-versions-of-windows
  4. Select Clean now.

By Manually Taking Ownership

It is also possible to change the ownership and permission settings of the Windows.old folder and then delete it.

However, changing the permission of your system folder is not a good idea, as any mistakes during the process can break your system. So only try this method if the previous ones don’t help.

You can go to the Security Properties of the folder and change the ownership/permissions. But it’s actually easier to use the Command Prompt for this purpose as you’ll only need a few commands.

  1. Open Run
  2. Type cmd and press Ctrl + Shift + Enter to load the Elevated Command Prompt.
  3. Type the following commands and press Enter after each:
    • takeown /f %SystemDrive%\windows.old /a /r /d y
    • icacls %SystemDrive%\windows.old /t /grant :r administrators:F
    • rmdir %SystemDrive%\windows.old /s /q
      takeown-windows-old-admin-icacls-grant-full-access-rmdir-remove-directory

You can also copy these commands to a text editor and save it as a .bat file. Then, simply running the batch script is enough to delete the Windows.old folder whenever you want.

how-to
Abhishek Silwal
  • LinkedIn

Abhishek Silwal is an Electronics Engineer and a technical writer at TechNewsToday. He specializes in troubleshooting a wide range of computer-related issues. His educational background in Electronics Engineering has given him a solid foundation in understanding of computers. He is also proficient in several programming languages and has worked on various robotics projects. Even in his early days, he used to tinker with various computer components, both hardware, and software, to satiate his curiosity. This experience has given him a breadth of experience that goes beyond his educational qualification. Abhishek has been writing articles on dealing with varieties of technical issues and performing specific tasks, especially on a Windows machine. He strives to create comprehensive guides on fixing many system and hardware issues and help others solve their problems. You can contact him at abhisheksilwal@technewtoday.com

Related Posts

how to turn off hardware acceleration

How to Turn Off Hardware Acceleration

September 22, 2023
what happens if you turn off your computer during an update

What Happens if You Turn Off Your Computer During an Update?

September 18, 2023
How to Disable Integrated Graphics

How to Disable Integrated Graphics?

September 16, 2023
System Restore Stuck

How To Fix Windows Stuck on System Restore

September 16, 2023
startup-repair-couldn't-repair-your-pc

How To Fix “Startup Repair Couldn’t Repair Your PC”

September 13, 2023
how to free up ram

How to Free Up Memory

August 4, 2023
Add A Comment

Leave A Reply Cancel Reply

Latest Posts
how to turn off hardware acceleration

How to Turn Off Hardware Acceleration

September 22, 2023
motherboard chipset

Understanding Motherboard Chipset and Its Importance

September 20, 2023
Naval-Warfare-Games

Best Naval Warfare Games

September 18, 2023
You may also like
printer-not-printing

How to Fix a Printer That’s Not Printing

September 26, 2023
Share Location With Friends and Family

Share Location With Friends and Family (iPhone and Android)

September 18, 2023
how-to-print-without-a-printer

How to Print Without a Printer

September 18, 2023
Recommended
Cookie Clicker Garden Guide

Cookie Clicker Garden Guide to Unlocking Every Seed

September 26, 2021
monitor no signal

Computer Turns On But Monitor Says No Signal (9 Ways To Fix)

November 10, 2022
Facebook Twitter Pinterest
  • Home
  • About Us
  • Our Team
  • Editorial Guidelines
  • Privacy Policy
  • Affiliate Disclosure
© 2023 TechNewsToday, editor@technewstoday.com | Tech Central Pvt. Ltd.

Type above and press Enter to search. Press Esc to cancel.