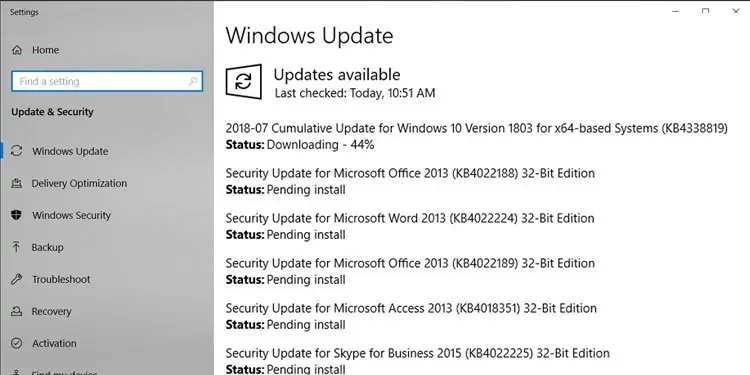
On your Update & Security section, you may have noticed your windows update pending installation.
Windows displays this update status if any of the other tasks are using the resource or if the process is waiting for the previous update to complete.
This pending installation has an impact on your system’s resource usage. Even manual restart may not solve the problem if it gets stuck every time. If you force restart a critical security update, your entire system may crash.
We’ve compiled a list of fixes for the Windows update error. Make a point of starting with the easiest ones and working your way down the list.
Windows Update Pending Install(Fixes)
Restart Windows Update from Windows Services
Windows Automatic Update occasionally gets hung up in the background. A quick restart may help to get your PC back on track. While making the change, also make sure that the startup is changed to automatic.
- Press Win + R together to open the Run window.
- Type
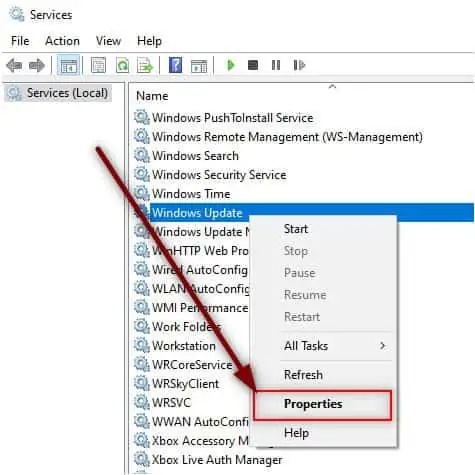
services.mscand press Enter. - Scroll down and locate Windows Update.
- Do a right-click and select Properties.

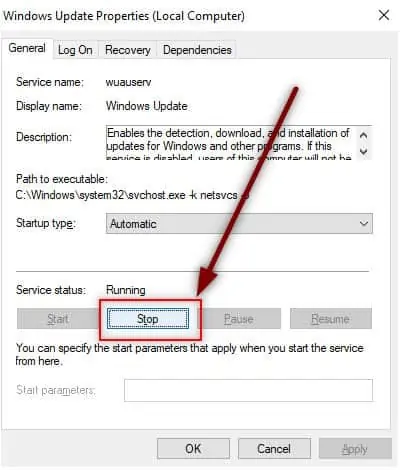
- Under Service status, select Stop.

- Wait for at least five seconds and select Start.
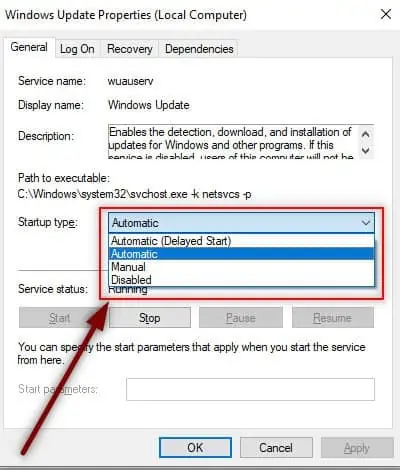
- Select Automatic from the Startup Type Dropdown box.

- Select Apply and then OK.
Run Windows Troubleshooter
If restarting does not work, it indicates a system problem. Windows troubleshooter is a great method of identifying and fixing system issues.
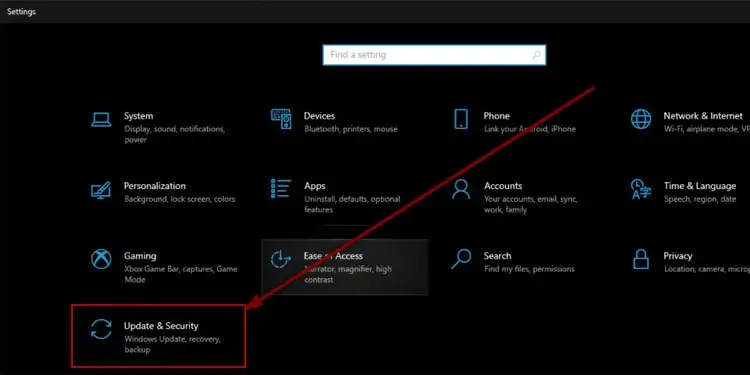
- Press Win + I together to open Settings.
- Select Update & Security.

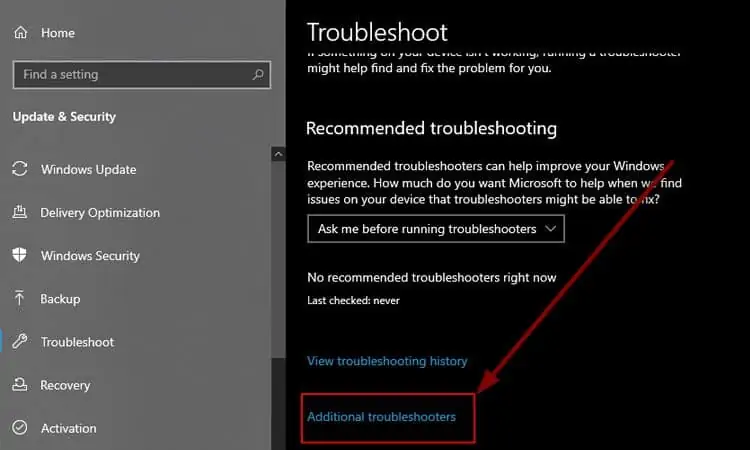
- From the left navigation pane, select Troubleshoot.
- Select Additional Troubleshooters.

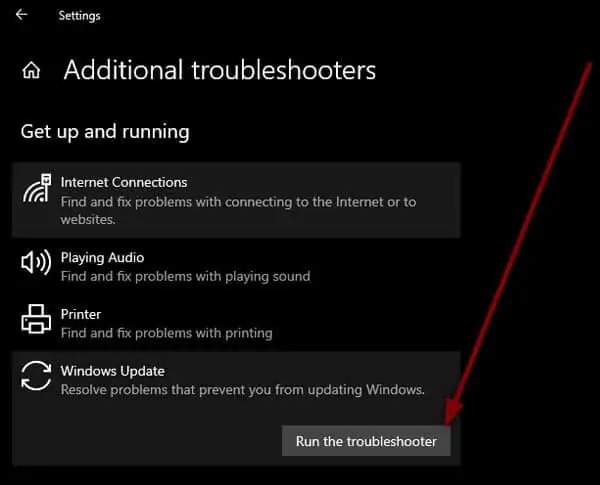
- Select Windows Update.

- Select Run the troubleshooter.

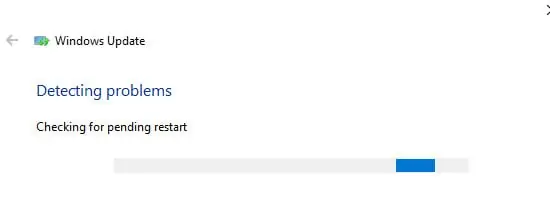
- Wait for the window to detect and fix update issues.

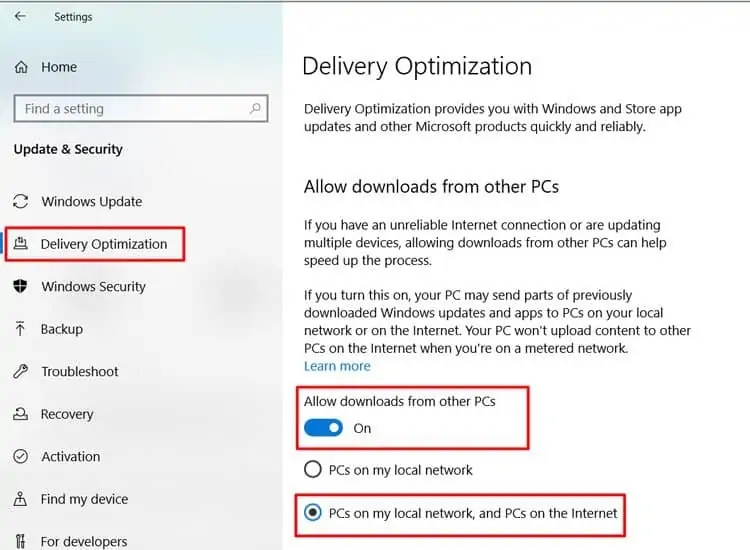
Enable P2P update delivery
- On your Update & Security.
- From the left navigation pane, select Delivery Optimization.
- Under Allow downloads from other PCs, select the toggle button to turn it on.
- Select PCs on my local network and PCs on the Internet.

Change metered connection setting
If your current network is set up as a metered connection, your PC may pause automatic updates. This is done to save data usage on your current network. Using this approach, you can either remove the metered mark or enable downloading over a metered network.
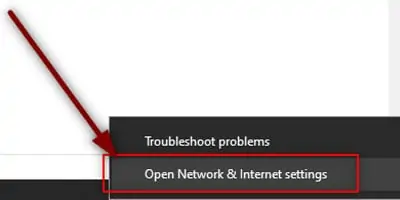
- From the system tray, do a right-click on the Network icon and Select Open Network & Internet Settings.

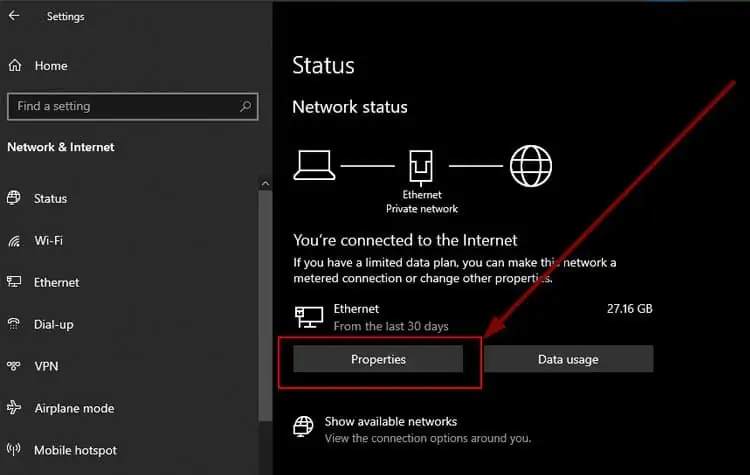
- Select Properties.

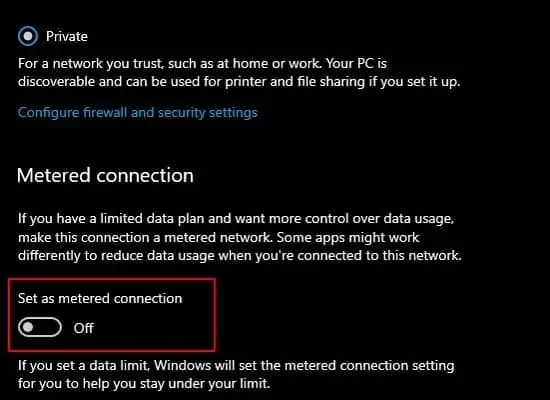
- Scroll down to the Metered connection and Make sure the following toggle button for “Set as metered connection” is turned off.

- Alternatively, press Win + I together to open Settings.
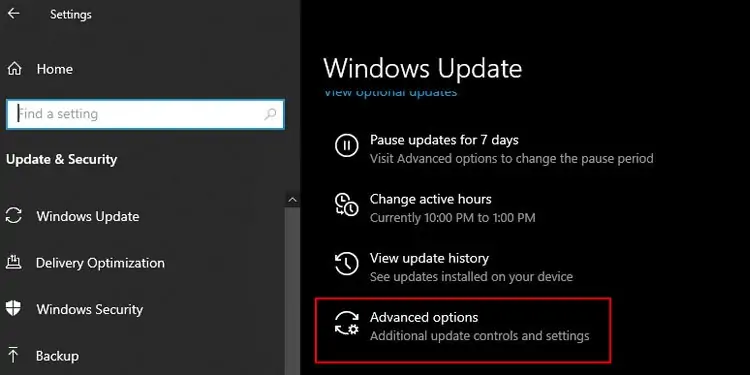
- Select Update & Security.
- Under Windows Update, select Advanced options.

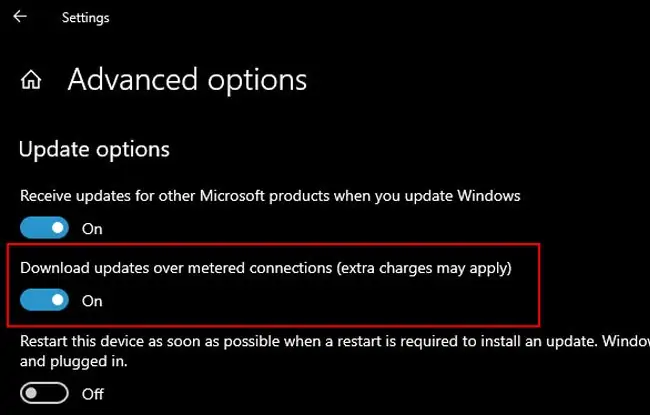
- Turn on the toggle button for “Download updates over metered connections (extra charges may apply)“.

Modify Group Policy Editor Settings
Group Policy Editor allows you to make advanced changes to your PC. If the easier methods do not work, changing a value under Group Policy may help fix the issue.
Note that if you’re running Windows 10 home edition you need to enable Group Policy first.
- Press Win + R together to open the Run window.
- Type
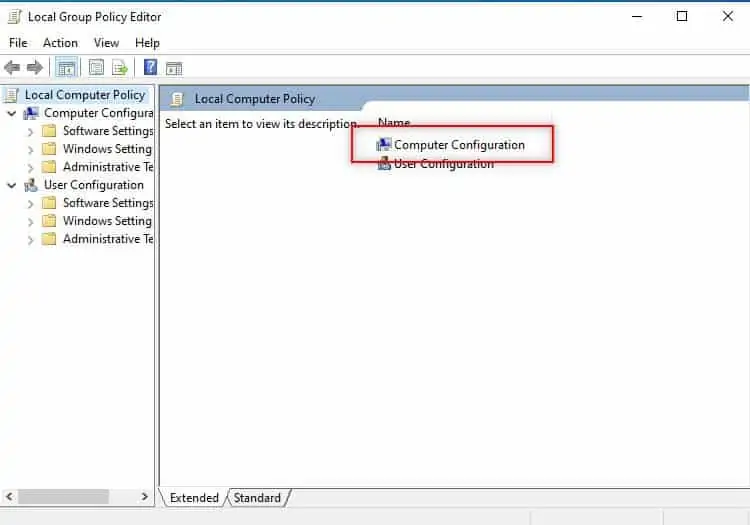
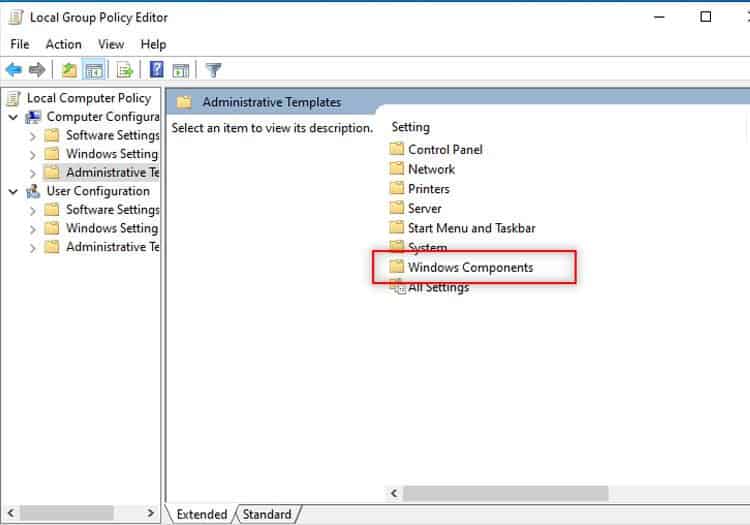
gpedit.mscand press Enter. - Open Computer Configuration.

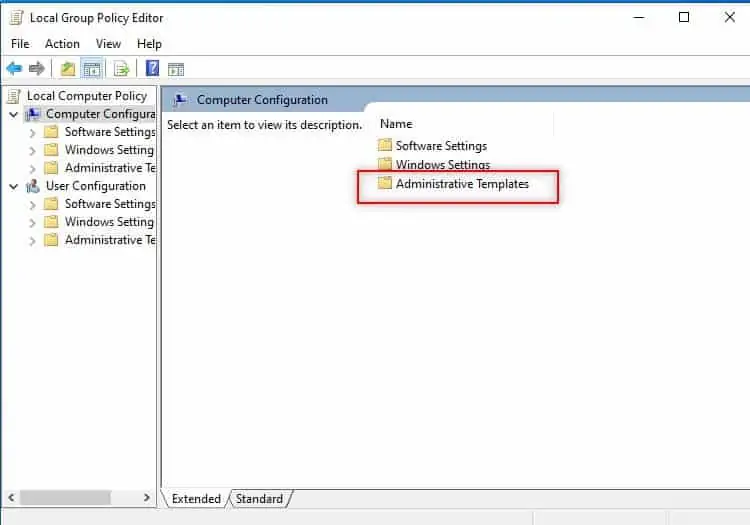
- Select Administrative Templates.

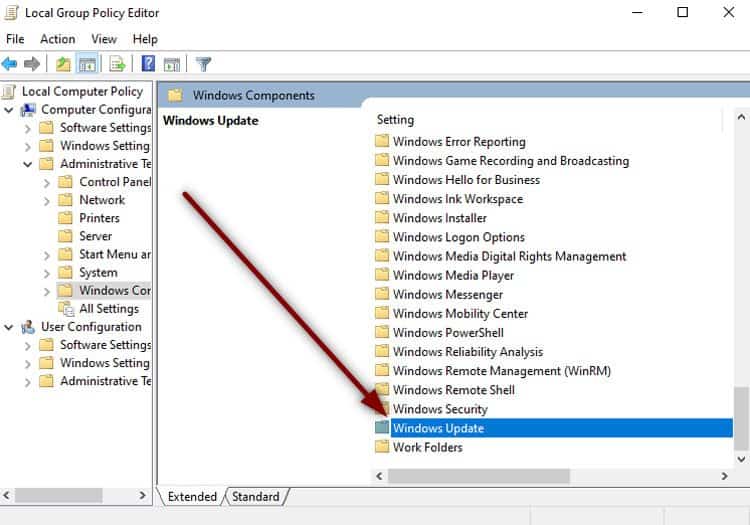
- Open Windows Components.

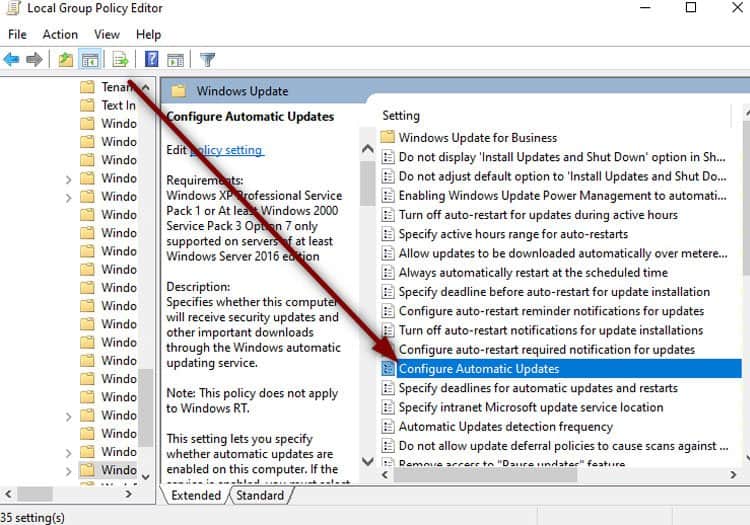
- Open Windows Update.

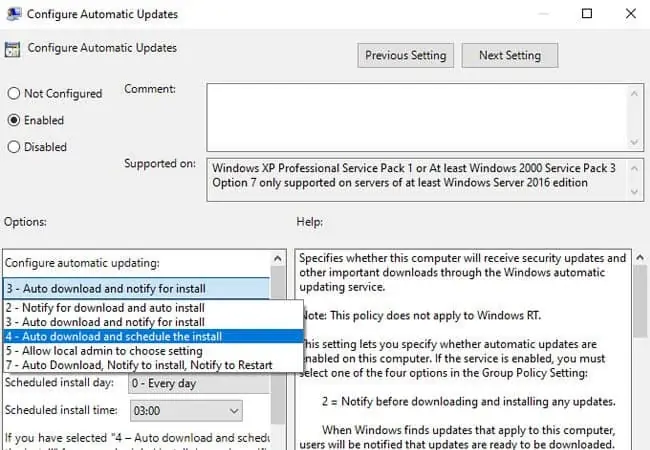
- Double-click on Configure Automatic Updates.

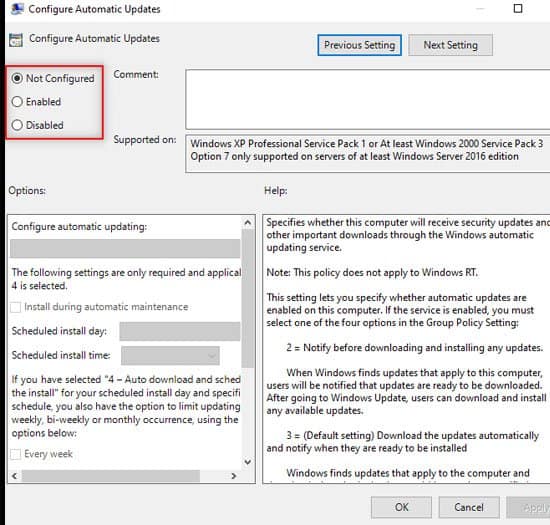
- Change the setting to Enabled.

- Under Options, select the dropdown picklist.
- Select Auto download and schedule the install.

- Press Apply and then OK.
Force a Redownload
To force a redownload, we need to get rid of currently downloaded update file. We start by cleaning up the directory where the updates get downloaded. Then, we let Windows reconfigure the updates and start downloading them again.
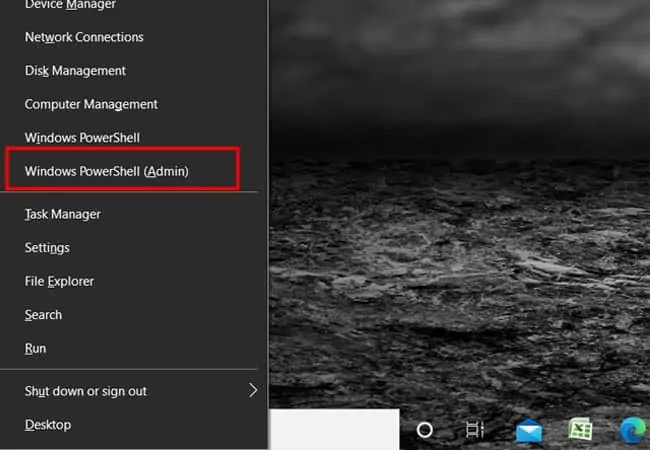
- Press Win + X together and select Windows Powershell(Admin).

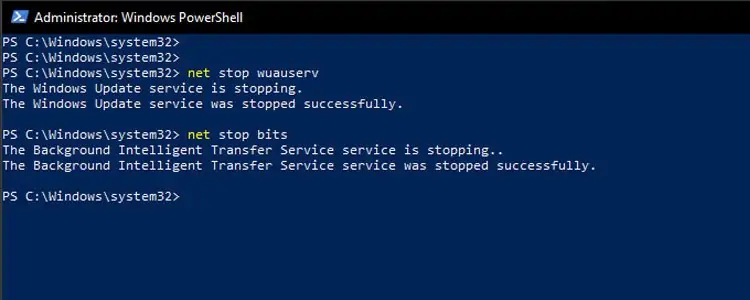
- Type the following command and press Enter
net stop wuauservnet stop bits
This command Stops Windows update service and Background Intelligent Transfer Service
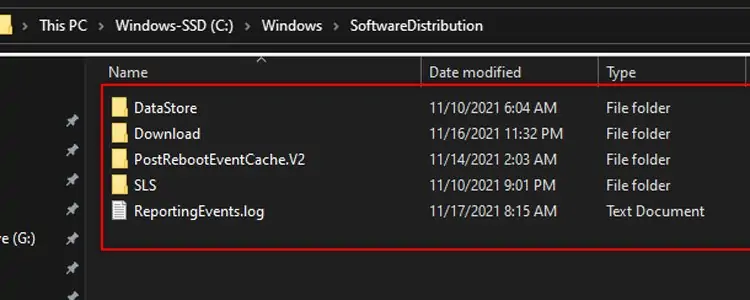
- Open Explorer and go to the following location: C:\Windows\SoftwareDistribution
- Select all files and press Shift + Delete together to delete them.

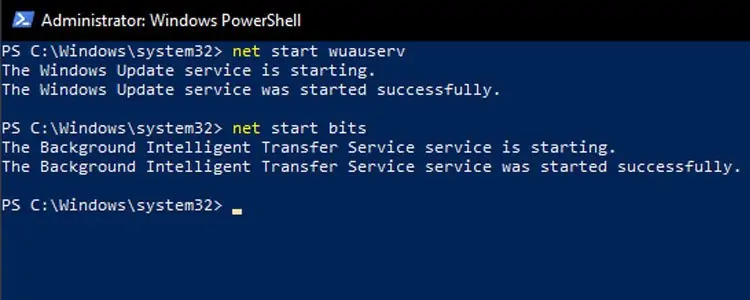
- Go back to the PowerShell and type the following commands.
Net start wuauservNet start bits
This Starts previously stopped processes

