
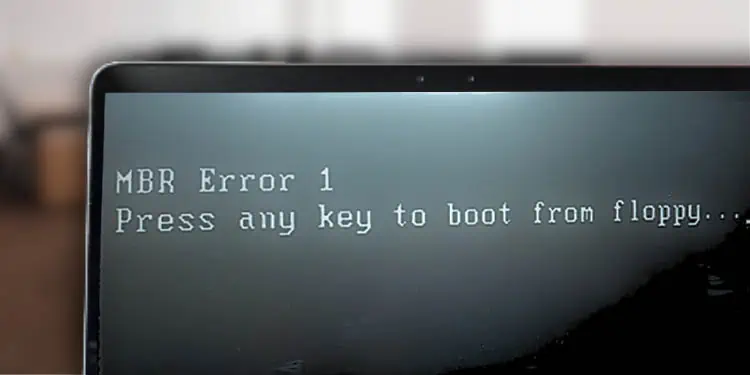
Whether you’re getting MBR Error 1, 2, 3, or multiple similar messages followed by “Press any key to boot from floppy,” it’s a clear indication that your master boot record is corrupted or damaged.
When this happens, you can’t boot into the operating system. While corrupted/failing MBR is the most generic cause, simple issues like the PC trying to boot from another drive could also trigger it.
First, Check the Storage
To start off, I recommend removing the connected external drive and rebooting the computer. Also, make sure you’ve connected your bootable drive in the appropriate slot.
In case it’s an older hard drive (with SATA), ensure connecting both its data and power cables to confirm that it’s working fine.
If these general troubleshooting tips didn’t help, proceed with the below solutions.
Override Boot Drive
If both your connected storage devices have Windows and you’re trying to boot from the latter one, it’s obvious that your PC will prioritize the first drive. In such cases, the best option would be disconnecting the other drive or simply changing the boot priority.
As per most ASUS users, the problem persists despite setting the appropriate boot order. In such a scenario, there’s a built-in option to override the boot drive, and here’s how to do it:
- Press the Restart button on your PC or force shut down your computer and start it again.
- Before the error pops up, hit the BIOS key. Usually, this is F2 in most Asus models.
- PC users can navigate to the Boot tab.

Laptop users can go to Save and Exit. - In the Boot Override section, pick your drive. For Windows computers, choose Windows Boot Manager. Now, you should be booted into Windows without encountering the MBR 1,2,3 error.


Repair Your PC Using Windows Startup Repair
Startup repair can help resolve the problem by fixing the missing or damaged MBR files. For this, you need to first start the automatic repair or use a recovery media to repair your computer.
- First, shut down your computer and restart it two to three times to start the automatic repair.
- After you get the ‘Automatic Repair couldn’t repair your PC’ message, Pick Advanced Options.
Also, you may insert a bootable USB flash drive, change the boot priority, and boot into Windows using it. Make sure you choose Repair your computer on the Windows Setup screen. - From the Windows Recovery Environment, pick Troubleshoot.
- Then, go to Advanced Options.
- From the list, choose Startup Repair and wait for your PC to start the diagnosis. This may take a while depending on what could be causing the startup/MBR problem.
- You’ll either boot into Windows or get an error message “Startup Repair couldn’t repair your PC”. In the second case, pick Advanced options and continue with the below solutions.


Repair Master Boot Record
As mentioned earlier, MBR Error 1, 2, and 3 are mainly caused when the boot record gets corrupted.
Basically, MBR stores the executable code that determines which partition holds the boot information. So, when it gets damaged, your computer won’t find the files meant to boot into Windows.
Fortunately, you can run a few commands from the command line interface that can help repair the MBR:
- In the Windows Recovery Environment, navigate to Troubleshoot. Then, from the Advanced Options screen, select Command Prompt.
- Next, choose your account and enter the right credentials to start the command-line utility.
- Once you’re in Command Prompt, identify the boot drive executing the following commands:


<your_drive>:dir

If you see the Windows directory, it’s your boot drive. Otherwise, try another drive.
- Now, run the below commands in succession to repair MBR:
bootrec /fixmbrbootrec /fixbootbootrec /nt60 sys(if the earlier command throws the error ‘Access is Denied‘)bootrec /fixbootbootrec /scanosbootrec /rebuildbcd


- Now, type
exitand hit enter to quit Command Prompt. - Again, from the Windows RE, pick Continue. You should now boot into the operating system.

If the aforementioned commands didn’t do the trick, I advise rebuilding the BCD completely. Even for this, you need to launch Command Prompt in the recovery console as earlier. Then, execute the following commands, which deal with backing up the BCD store and building a new one:
bcdedit /export <drive>:\bcdbackupattrib <drive>:\boot\bcd -s -h -rren <drive>:\boot\bcd bcd.oldbootrec /rebuildbcd

Check for Drive Failure in Another PC
If repairing the MBR didn’t help, there’s a chance that your drive has died or failed. To check this, you need to remove the HDD or SSD from your computer and install it on a compatible and working PC.
In case your drive isn’t recognized here, it’s very likely that the storage drive is dead. You might want to contact the manufacturer (if the warranty isn’t void) or take it to the nearest repair center. However, if the drive shows up and works perfectly, there may be issues within the PC.
Perform System Restore
Did you happen to make any vital changes to your computer? Often, updating Windows or any driver can bring up undesirable problems, including MBR Error 1, 2, 3, and similar messages. In such a case, performing a system restore can take your PC back to working condition:
- From the Windows Recovery Environment screen, pick Troubleshoot.
- Then, navigate to Advanced Options.
- Find and select System Restore.
- You should be asked to choose your account. Based upon that, picks yours and input the correct password.
- Once the System Restore dialogue box opens up, hit the Next button.
- You should see an automatic restore point that was created automatically when you performed a major system change, like an update of the OS or driver. Select it and click Next.
- On the final screen, press the Finish button.
- In the popup dialogue box, pick Yes to confirm that you’re performing a system restore.
- The restoration should be finalized within a few minutes. In the final prompt, hit Restart and you should be booted into Windows.


Reinstall Windows
The final solution would be reinstalling Windows to replace the damaged MBR with a new one. Since this will erase all your data, I highly advise you to first back your important files and documents.
Once you’re ready, follow the below instructions to clean install the operating system:
- Insert a bootable media and change the boot order if required.
- Pick your keyboard/input method and language. Then, hit Next.
- Next, hit the Install Now button.
- Then, enter the product key or simply go for I don’t have a product key to add it later.
- Choose the Windows OS you’re going to install and click Next.
- Read the notices and put a checkmark in the ‘I accept license terms‘ field before hitting Next.
- You may pick the Upgrade option if you want to keep the files. Otherwise, opt for Custom to clean install Windows.
- In the next screen, allocate your storage drive and hit the Apply button. Once that’s done, press Next.
- Finally, hit Finish and wait for the Windows OS to install and you shouldn’t see MBR Error 1, 2, or 3 again.


