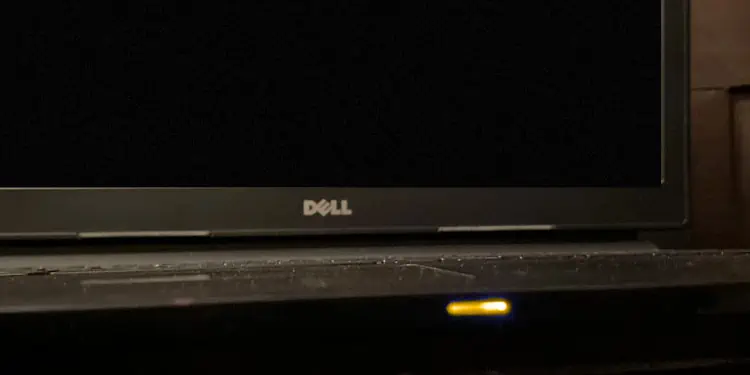
An amber or orange light on a Dell laptop usually indicates power/battery issues. While constant orange specifies a low charge, alternatively flashing amber and white means you have attached an unsupported AC adapter/battery.
To solve this, simply plug in a Dell-supported charger, and ensure the laptop is receiving enough power. If the problem persists, you might require replacing your battery or the adapter.
In other cases, an amber and white light blinks in a specific pattern. This indicates that some other components are causing the problem. Along with the flashing lights, the Dell laptop will likely experience a NO POST or NO BOOT issue.
Identify LED Blink Code
In most problematic Dell laptops, amber/orange light starts blinking followed by white ones in the front-battery LEDs. Each pattern indicates different issues, related to memory, CPU, LCD, or even BIOS. Therefore, the fixes for each problem are different.
Before doing anything else, we recommend noting the blink code first. To do so, simply examine the number of times the amber/orange light blinks (consider this as X). Then, note the number of times the white light flashes (consider this as x). Hence, the blink code will be X.x.
For example, if the Dell LED flashes amber light twice (X=2) followed by two white ones (x = 2), the blink code will be X.x = 2.2.
Once you’ve identified the pattern, check the chart below to learn about the component causing the issue. In this article, we have only focused on a few models (Inspiron, XPS, Vostro, and Latitude). Nonetheless, this should apply to other Dell laptops too.
| LED Blink Code | Affected Dell Products | Components Causing the issue | Cause |
| 1.1 | Inspiron | Trusted Platform Module (TPM) | TPM has failed |
| 1.2 | Inspiron | Flash Storage | Unrecoverable SPI Flash |
| 1.5 | Inspiron | Battery | i-Fuse failure |
| 1.6 | Inspiron | Embedded Controller (EC) | EC has failed |
| 2.1 | Inspiron, Latitude, XPS, Vostro | CPU | CPU has failed |
| 2.2 | Inspiron, Latitude, XPS, Vostro | BIOS, ROM | BIOS corruption or ROM failure |
| 2.3 | Inspiron, Latitude, XPS, Vostro | RAM | Memory is not detected |
| 2.4 | Inspiron, Latitude, XPS, Vostro | RAM | Memory failure |
| 2.5 | Inspiron, Latitude, XPS, Vostro | RAM | You’ve installed an invalid memory stick |
| 2.6 | Inspiron, Latitude, XPS, Vostro | Chipset or Motherboard | Problems with the motherboard or chipset |
| 2.7 | Inspiron, Latitude, XPS, Vostro | LCD | LCD has failed |
| 2.8 | Inspiron | LCD | LCD power rail has failed |
| 3.1 | Inspiron, Latitude, XPS, Vostro | CMOS | Issues with CMOS battery |
| 3.2 | Inspiron, Latitude, XPS, Vostro | PCI, Video Card, or Chipset | One or many of these components have failed |
| 3.3 | Inspiron, Latitude, XPS, Vostro | BIOS | Recovery image not detected |
| 3.4 | Inspiron, Latitude, XPS, Vostro | BIOS | Invalid recovery image |
| 3.5 | Inspiron, XPS, Vostro | EC | Power sequencing failure |
| 3.6 | Inspiron, XPS, Vostro | SBIOS | SBIOS has detected Flash corruption |
| 3.7 | Inspiron, XPS, Vostro | Management Engine (ME) | ME-HECI communication timeout |
Perform Power Reset
Generally, a power or forced reset fixes the laptop if it becomes unresponsive and Windows doesn’t boot up. This fixes any power issues that could be responsible for the orange/amber light problem.
In some models, you even get an emergency reset hole to reboot the Embedded Controller (EC). Simply straighten a paper clip, push it inside the hole, and hold it for at least 30 seconds to complete the reset. This should fix the 1.6 and 3.5 blink codes, caused by an EC or power sequencing failure.
If your Dell laptop doesn’t have such a feature, kindly follow the below instructions to perform a power reset manually:
- First, force shut down your laptop. All you have to do is press the power button until it powers off.

- Next, unplug the AC adapter from the charging port.

- Then, remove all external peripherals (keyboard, mouse, or others) from their respective ports.

- Also, we recommend detaching the external battery (if available).
- Your laptop still holds additional static electricity even after turning it off. So, kindly press and hold the power button for 5 to 10 seconds to remove the flea power.
- Now, wait for an additional minute before connecting the battery and AC adapter.

- Power on your Dell laptop and check if the orange light is blinking again.
Clear TPM From BIOS
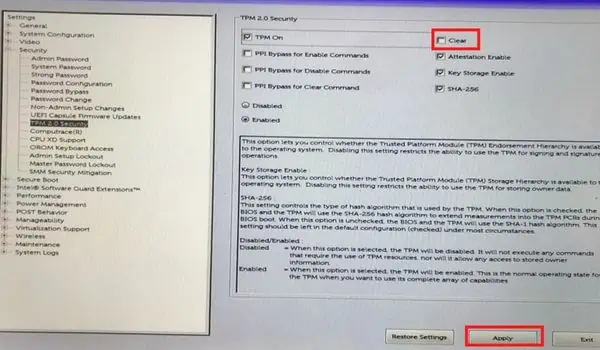
Even if the Trusted Platform Module (TPM) chip fails (blink code 1.1), you’ll still be able to access the BIOS. So, you can try resetting it to its default settings (unowned state). All you have to do is clear the TPM, and Windows will reinitialize it:
- Force shut down your computer and start it again.
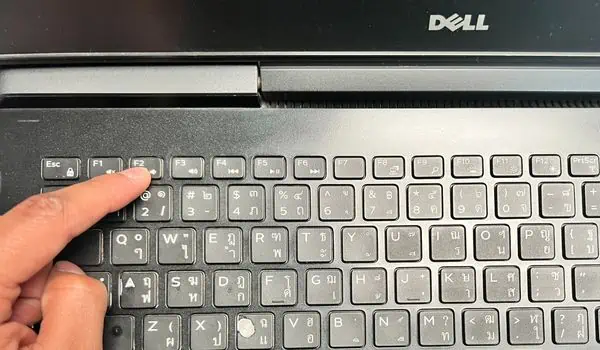
- After the Dell logo appears, press the boot key (F2, Esc, or other based on your model) to enter BIOS.

- From the left pane, expand the Security tab and go to TPM 2.0 Security.
- Move to the right side and check the Clear option.
- Now, hit the Apply button, and save the BIOS settings.

- Exit BIOS and see if the orange light persists on your Dell laptop.
Automatic Dell BIOS Recovery
In some cases, your Dell laptop may not turn on and you can’t access BIOS. This could be an indication of its corruption (2.2), problematic chipset/motherboard (2.6), failed/invalid recovery image (3.3 & 3.4), or flash corruption (1.2 & 3.6).
Fortunately, you can try the automatic BIOS recovery feature to recover the computer from a POST problem or boot failure:
- Force shut down the Dell laptop and remove the charger or AC adapter.
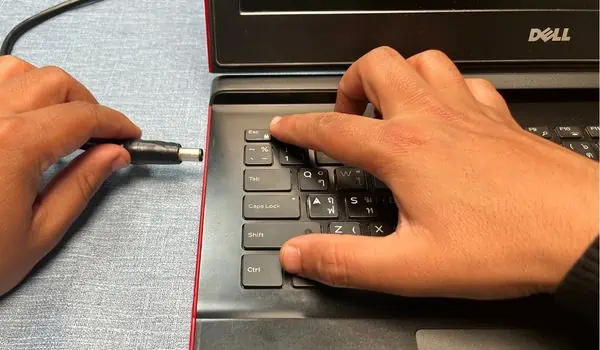
- Press and hold the Ctrl and Esc keys.
- Now, plug in the AC adapter while pressing them.

- Wait until the Dell logo appears. You may now release them.
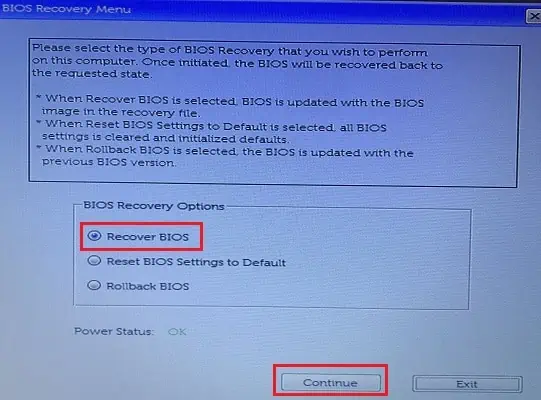
- Next, you should see the BIOS Recovery window. Here, select Recover BIOS, and hit Continue.

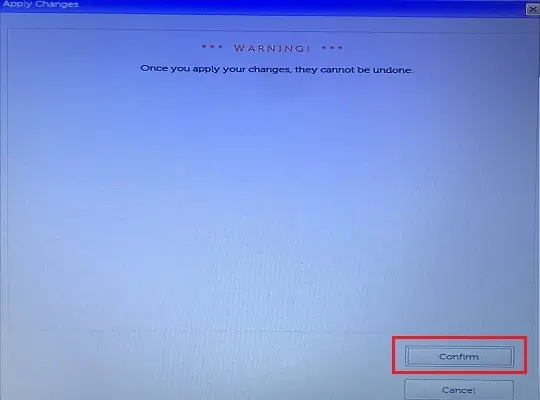
- Once the Apply Changes window pops up, click Confirm.

- Again, wait until the BIOS update is complete. Kindly do not power down the system while the progress is ongoing.
- Once the update is complete, enter the Bitlocker password and hit Enter.
- Now, your PC will restart and boot into Windows. Also, the orange light issue will likely resolve.
Invoke BIST to Identify Issues
The Built-In Self Test (BIST) is a diagnostic and repairing procedure that identifies possible issues with the system board. This helps detect issues with memory, EC, battery, flash storage, and all the other components. Also, this is applicable to all the LED blink codes. Below are the necessary steps required to perform M-BIST on your laptop:
- First of all, power down your Dell laptop completely.
- Remove the AC adapter and all the other connected external devices.
- Replug the Dell charger back into its port.
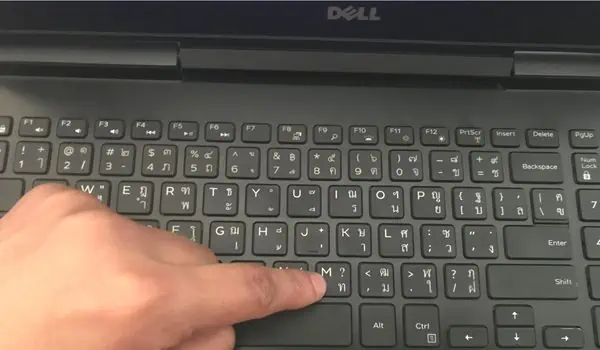
- Now, press and hold the M key on your keypad. Then, push the power button to turn on your Dell laptop.

- Check the battery status light. If it emits an orange/amber light, know that you need to replace the system board. Otherwise, there are some other issues.
If you’re experiencing the same problem after performing M-BIST, we recommend trying the LCD BIST (L-BIST) to identify possible issues with your Dell display or power rails (2.7 & 2.8):
- Turn off your laptop, remove the power connection, and disconnect all the peripherals.
- Now, reconnect the AC adapter.
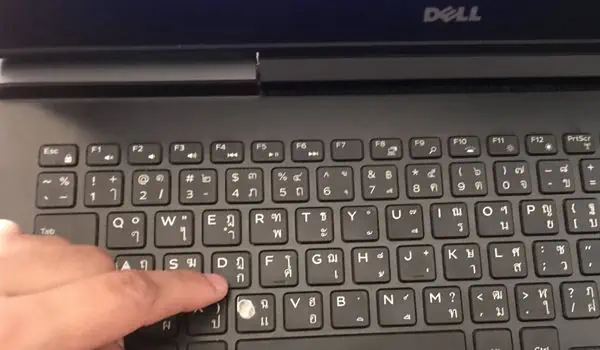
- Next, press and hold the D key and turn on the laptop.

- Keep holding D until you see different colors on the Dell screen.
- While you’re at it, inspect for possible abnormalities with your display.
- Once the LCD M-BIST is complete, you should boot into Windows. But if there’s no display, you probably have some LCD cable issues, which we will discuss further.
Try Starting Your PC in Safe Mode
Sometimes, the problem lies with your Windows OS rather than hardware faults or BIOS settings. To confirm this, we suggest starting your Dell laptop in safe mode, as described below:
- Force shut down the system and insert a Windows recovery flash drive.
- Start your PC and boot up using the recovery drive. In some models, you may require changing the boot priority first.
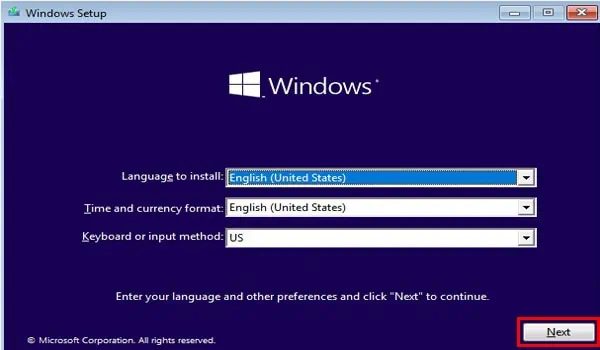
- Once you see the Windows startup screen, hit the Next button.

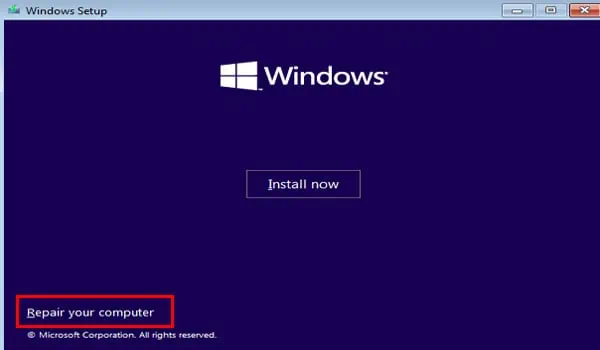
- In the installation screen, click on Repair your computer.

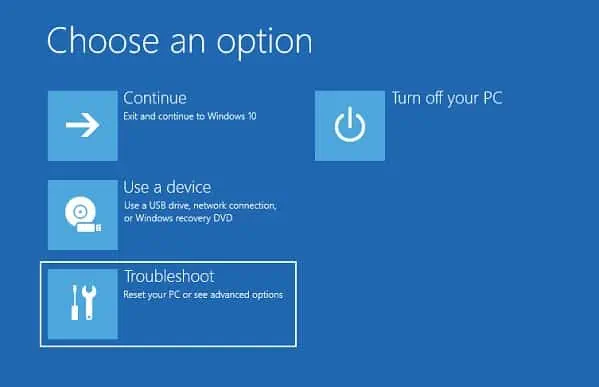
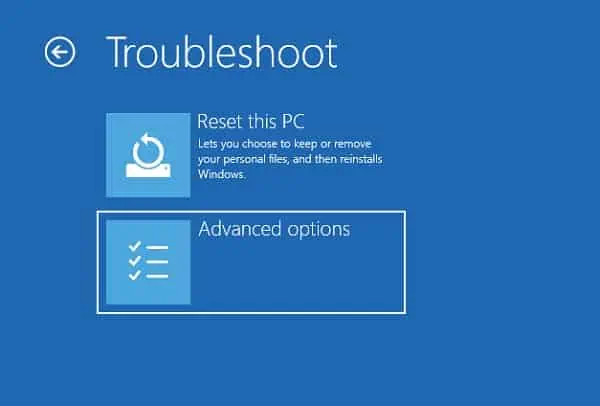
- Now, you’ll enter the Windows Recovery Environment. Here, choose Troubleshoot.

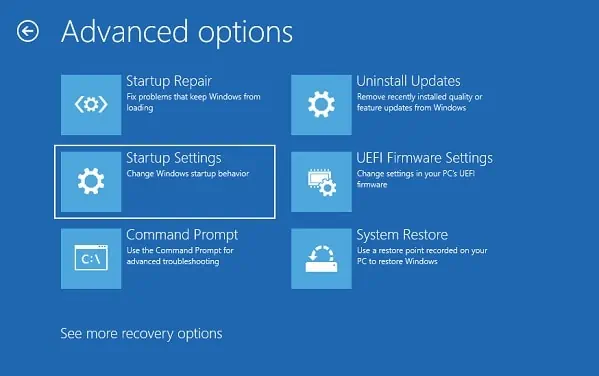
- Then, select Advanced options.

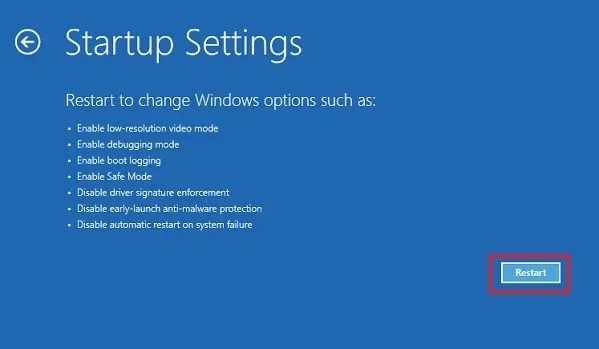
- Next, choose Startup Settings.

- Hit the Restart button.

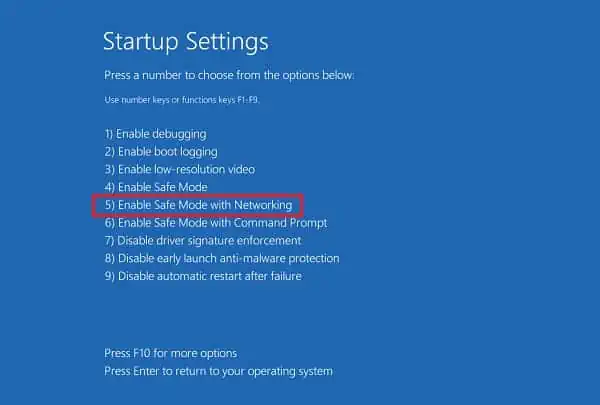
- Wait for a few moments until the Startup Settings window pops up. Press the F5 key to boot into safe mode with networking.

- After Windows boots, use your credentials to log in.

Update Troublesome Drivers
A corrupted or outdated device driver could potentially crash or cause a black screen on a Dell laptop. Therefore, we highly recommend checking issues with the TPM, PCI, and video cards (1.1, 2.6, and 3.2). If you find any issues, kindly update/reinstall them from the Safe mode:
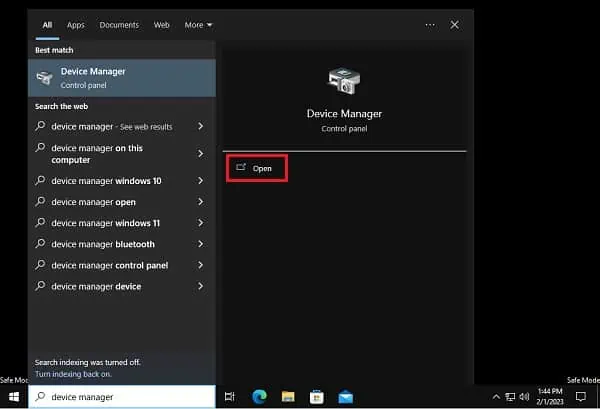
- Search for Device Manager in the Start Menu, and launch the tool.

- Here, look for troublesome drivers with a yellow exclamation mark.
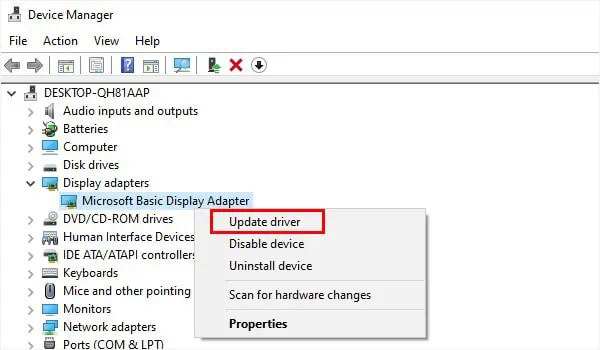
- Right-click on each driver, and pick Update driver.

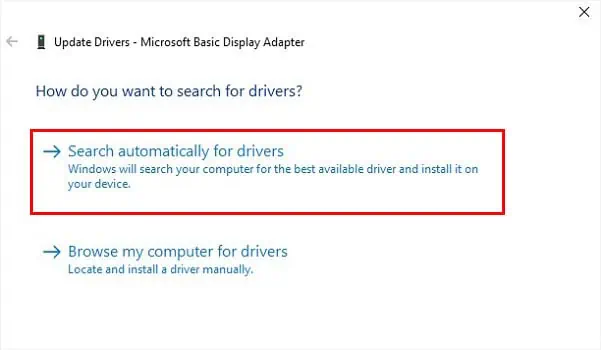
- In the new window, select Search automatically for drivers.

- Next, reboot your Dell laptop and check if the blink pattern stops, and you can boot into normal mode.
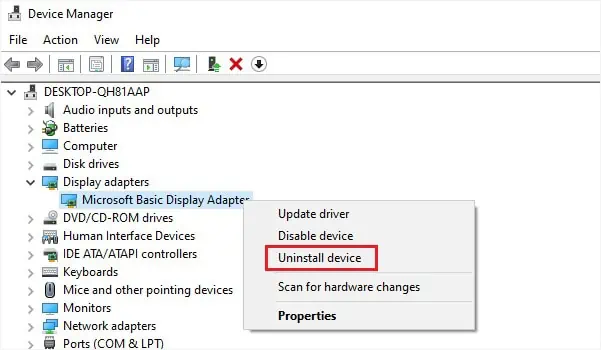
- If this doesn’t work, kindly enter the safe mode again and this time, uninstall each problematic driver.

- Restart your computer in normal mode. This should reinstall the drivers and the problem should also be resolved.
Perform Stress Test Using SupportAssist
If you’re only getting the orange/amber light occasionally, it’s best to perform a stress test using the Dell SupportAssist utility. This involves scanning your PC completely examine all the components, including the processor, memory, video cards, hard drives, device drivers, firmware, and battery.
Before moving forward, ensure you download the application from Dell’s official website. Also, do not use your laptop when the test is ongoing.
- First, close all the running apps.
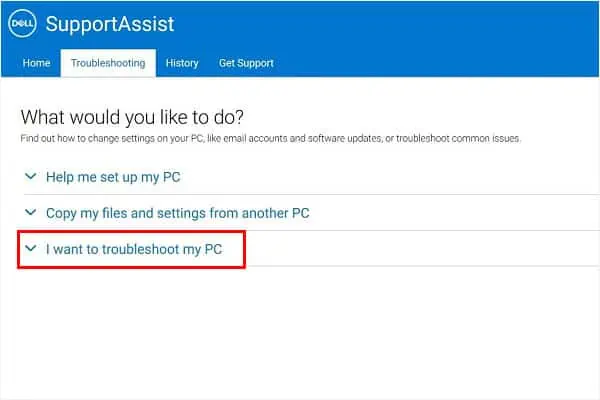
- Open the Dell SupportAssist utility and switch to the Troubleshooting tab.
- Expand the I want to troubleshoot my PC option.

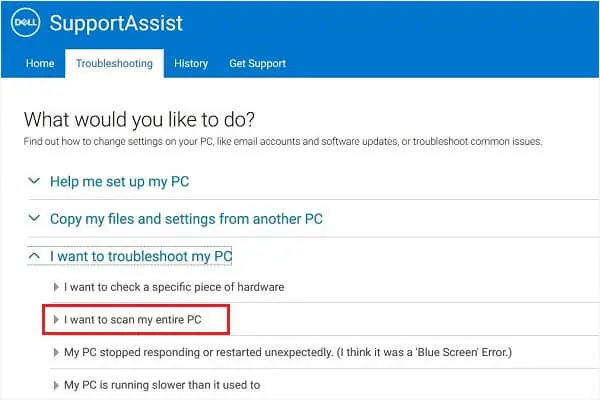
- Here, select I want to scan my entire PC.

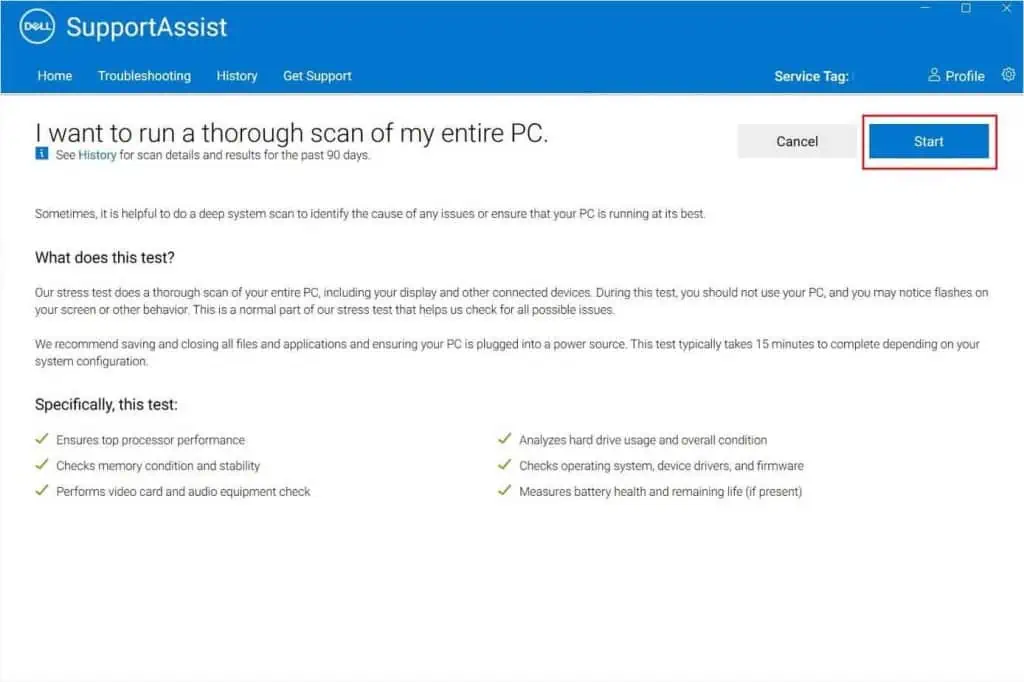
- Now, press the Start button.

- In the confirmation prompt, hit Ok.

- Now, wait for at least 15 minutes until your PC is scanned thoroughly and the problems are identified.
Update Management Engine Firmware
Your Dell laptop will notify you with the blink code 3.7 if there’s a timeout when the ME (Management Engine) is replying to a HECI message. When this happens, the Host Embedded Controller Interface (HECI) won’t be able to communicate with the ME, and thus your Windows server may not boot up.
While performing a power reset or resetting BIOS usually fixes these issues, you should consider updating the Management Engine Firmware immediately:
- Navigate to Dell’s official support page.
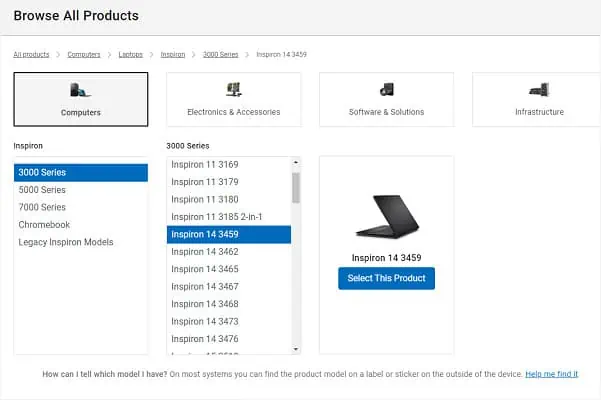
- Browse for your product or directly input the model.

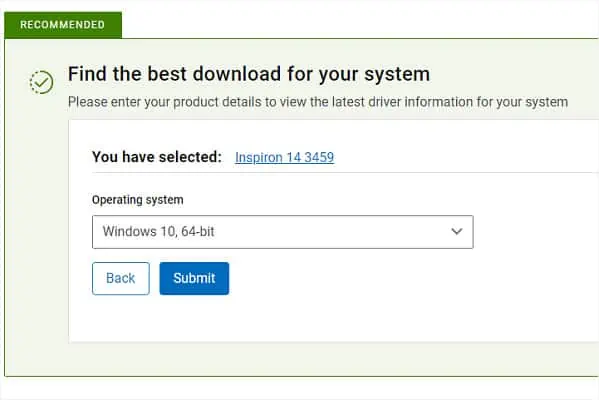
- Choose the OS you’re using and hit the Submit button.

- Now, get to the Driver & Utility tab and go to BIOS & FIRMWARE.
- Here, find and download the latest Intel ME.
- Once the zip file is downloaded, extract everything.
- Find the
.exefile and run it. - Wait for several minutes until the latest Management Engine firmware is installed on your Dell laptop.
- Finally, reboot the computer and check if the orange light persists.
Uninstall Latest Update or System Restore
If you’re still experiencing an amber/orange light, a corrupted Windows update can also be responsible for the same. In fact, some Dell users have fixed the problem by simply uninstalling the latest update. Before you begin, kindly boot the Dell laptop in safe mode.
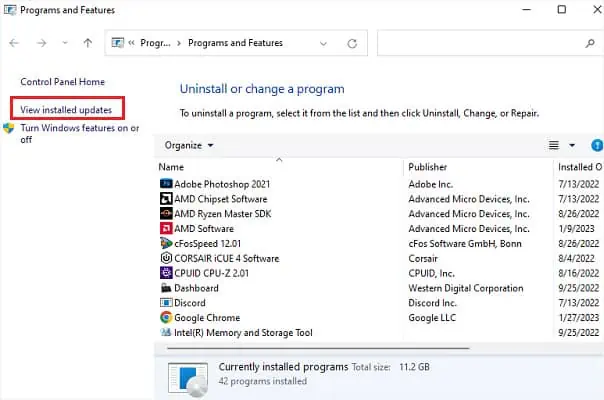
- Press Windows + R to trigger the Run utility. Here, execute the
appwiz.cplcommand to open the Uninstall or change a program list.
- From the left part of the window, select View installed updates.

- Check the Installed On field to determine the latest update, right-click on it, and choose Uninstall.

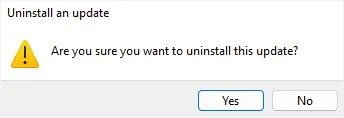
- In the Uninstall an update prompt, hit the Yes button to confirm this action.

- Now, restart your Dell laptop in normal mode and check if the problem is now resolved.
If uninstalling the latest Windows update didn’t help, we advise performing a system restore:
- Force restart your Dell laptop and boot using the bootable flash drive.
- Hit Next and click on Repair my computer in the Windows setup screen.
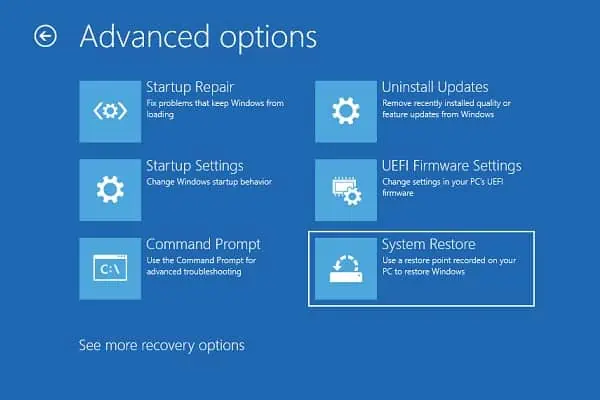
- Once you’re in the Choose an option window, go to Troubleshoot > Advanced options > System Restore.

- Now, follow the on-screen instructions to complete resetting your system to its previous state.
- Once the PC restarts, you should be able to log in to Windows.
Run Windows Memory Diagnostics
Your Dell laptop will simply show a black screen, accompanied by beep sound(s) when there’s a memory issue (2.3, 2.4, and 2.5). In some cases, you can reseat the RAM sticks, while in the worst case, you may require getting a new one.
But before doing anything, we recommend running the built-in Windows Memory Diagnostic to identify possible memory issues:
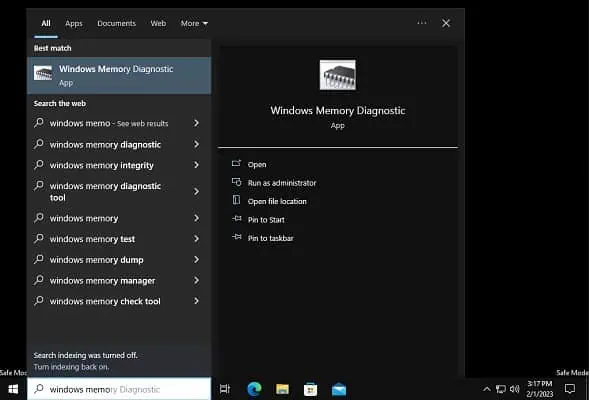
- Launch the utility from the Start Menu, as shown below.

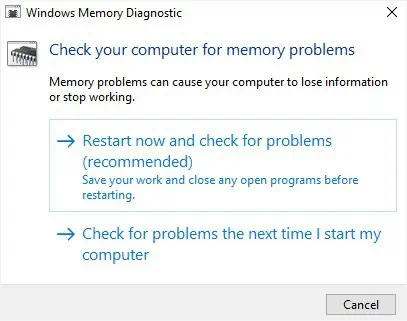
- Pick the first choice – Restart now and check for problems (recommended).

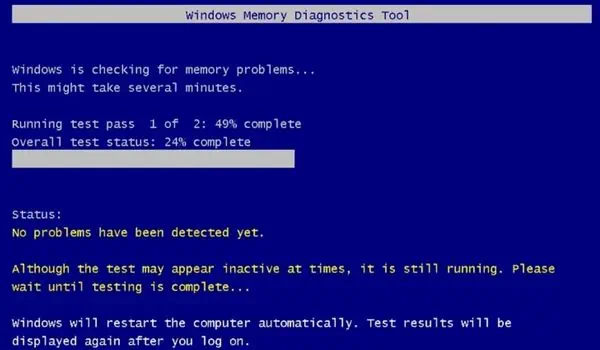
- After the laptop reboots, you’ll enter the Windows Memory Diagnostics Tool screen. Here, Windows checks for possible memory problems. Wait until both phases (1 & 2) are complete.

- If there were any memory issues, this tool should fix them. Once that’s done, you’ll be booted to Windows normally.
Reseat RAM Sticks
If you get the “Hardware problems were detected” message when running Windows Memory Diagnostic, try reseating the memory module(s). This involves removing the stick, cleaning the slots, and placing it back:
- Firstly, force shut down your Dell laptop. Also, press the power button for at least 10 seconds to discharge the capacitors.
- Next, flip your laptop to the bottom section, and remove the external battery (if available).
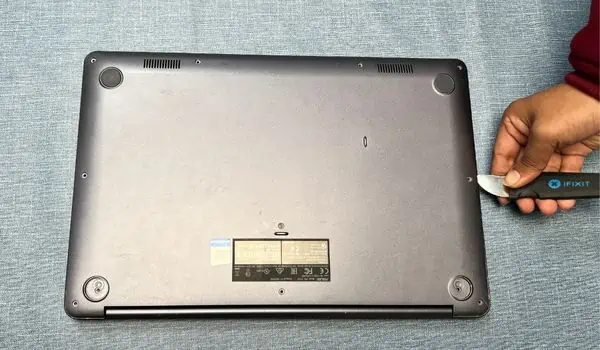
- Then, unscrew everything and remove the casing using any prying tool. If your laptop has a separate memory section, kindly pry it out.

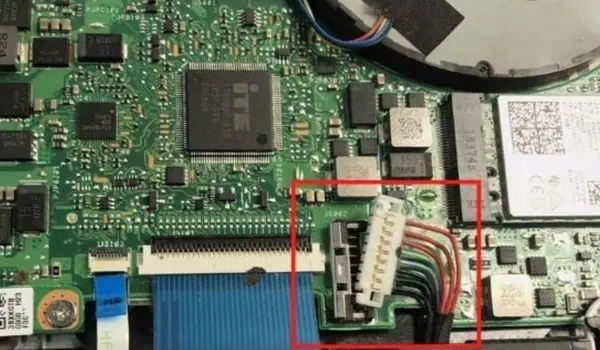
- Also, ensure to disconnect the internal battery cable (if available).

- The location of the memory module varies based on the Dell model. So, kindly use the manual or inspect yourself.
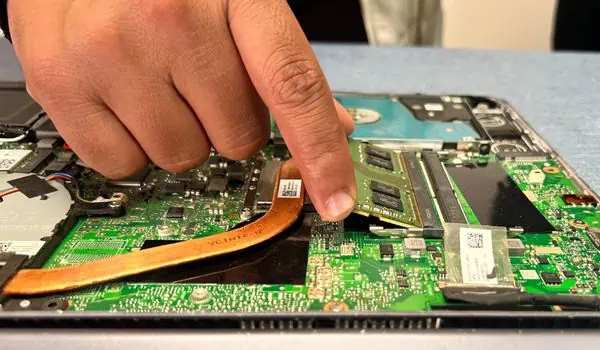
- Unclip the two ends and carefully pull the module upwards. This should remove it from its slot.

- Now, clean the slots using compressed air and the RAM stick using a clean microfiber cloth.

- Repeat these processes if you have multiple memory modules.
- Now, align and fit the RAM sticks’ notches to their respective slot and push them down. This should click the modules in place.
- Finally, fit the casing back, insert the battery, and start your Dell laptop. Check if the orange or amber light still blinks.
Reconnect LCD Cable
Your Dell laptop’s LED may show 2.6 and 2.7 blink codes if there’s a connectivity issue with the display cable. While reconnecting can often solve this problem, it may require a replacement if broken.
- Shut down the Dell laptop, and remove its bottom casing. Also, ensure you have detached the external battery or internal battery’s power connector.
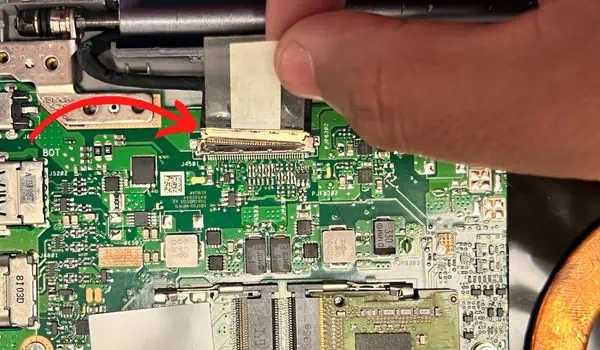
- Now, get to the display cable and disconnect it.

- Clean the slot before reconnecting the LCD cable.
- Finally, close the casing and start your Dell laptop. This should fix any LCD cable problem that could be causing the orange/amber light.
Reseat CMOS
If the CMOS battery is dying or there are other related issues (blink code 3.1), you’ll have issues booting into Windows. A simple workaround to this problem is to reseat the battery, and here’s the safe way to do it:
- Force shut down the laptop, remove the battery, and pry out its bottom case.
- Locate the CMOS battery.
- Now, place a flat-headed tool beneath the battery (a screwdriver will work) and apply little pressure to raise it upwards. This should pop it out from its slot.

- Wait for about an hour so that the battery discharges.
- Then, snap the CMOS battery back into its place. This will also reset the BIOS.
- Reassemble all your Dell laptop parts and start the system.
Reinstall Windows Using a Bootable Drive
If you can’t enter safe mode and none of the fixes helped you out, the only option is to clean install the operating system. This will fix all the Windows-related problems that could be causing the black screen. Before proceeding ahead, ensure you have at least a 16 GB USB flash drive.
- Create a USB installation media using another PC.
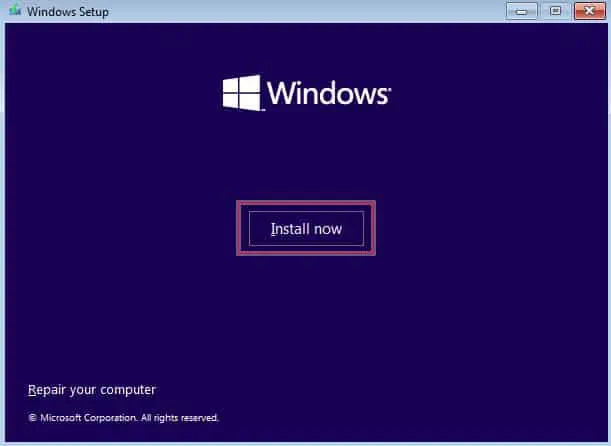
- Insert the flash drive on your Dell laptop and boot using the USB. Ensure that you configure boot priority first.
- In the Windows Setup screen, hit Next.
- Then, click on the Install button.

- Follow the on-screen instructions to finalize the Windows installation.
Replace Components
You may require upgrading the CPU or even the motherboard if the CPU has failed (2.1). Also, there can be situations when you might need to repair/replace other damaged components, like RAM sticks, CMOS, display panel/cable, etc.
Moreover, the blink code 1.5 indicates an i-Fuse failure. If that’s what you’re seeing on the LED, know it’s time to replace the battery. Also, you may require replacing your genuine Dell laptop charger if it’s not charging in any condition.
Even if replacing the components didn’t help, there are probably other issues. Therefore, the final option is to take your laptop to the nearest Dell repair center.

