
To fix the “Windows cannot connect to the printer” error, disable the RpcAuthnLevelPrivacyEnabled value in the Registry Editor. This will bypass the error screen and allow you to add the network printer again.
If that does not work, uninstall the latest security updates or add the printer using a local port.
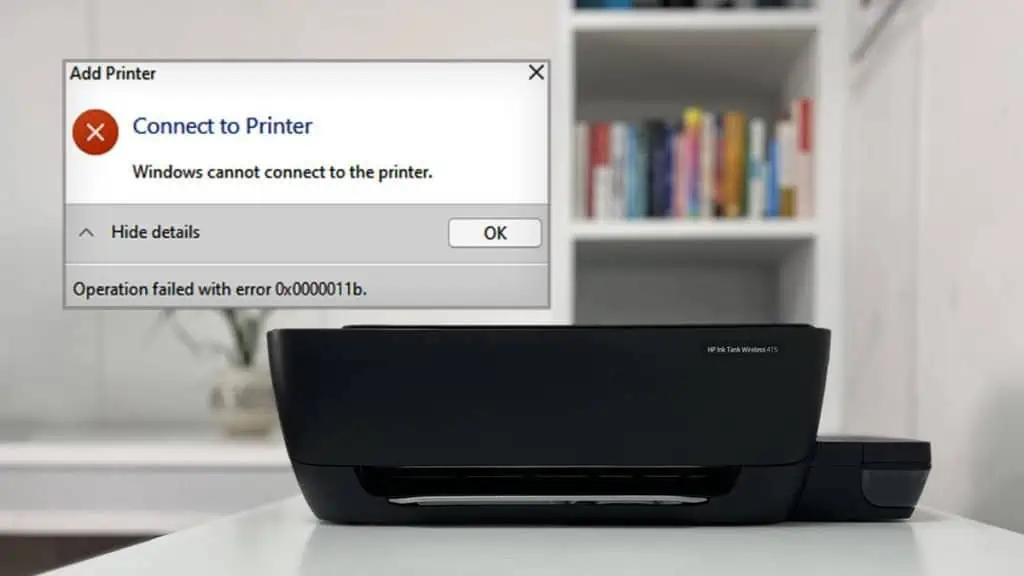
I have encountered the exact error several times here at my office while trying to add the HP Ink Tank Wireless 410 printer. So, in this article, I will discuss everything I did to resolve the problem.
Make Changes in the Registry
Before moving to the actual fix, let me quickly explain why this error occurs. Users started facing this issue back in 2021 when Microsoft released security updates to fix the PrintNightmare vulnerability (Forbes explain).
Since then, every time you try to add the shared printer, you encounter an error. More often, it is followed by the error code 0x0000011b.
Sadly, there’s no permanent patch to fix this bug to date. Yet, here’s a quick workaround that has helped thousands of users get rid of it.
- Go to the host computer (to which the printer is connected) and open the Registry Editor.

- While at it, navigate to this location.
- Select the Print folder > right-click it > New > DWORD (32-bit) Value.
- Rename the New Value #1 to
RpcAuthnLevelPrivacyEnabledand double-click it. - Make sure the Value data is 0 > click OK.
- Once you’re done with it, exit from the Registry Editor.
- Then, open the Services app.
- Scroll down to Print Spooler > right-click it > Restart.
- Finally, try adding the printer to a client computer. You won’t encounter the error now.


Uninstall Security Updates From Microsoft
If we look deeper into the issue, there are a few security updates like KB5006670, KB5005565, and KB5007186 responsible for the error.
As discussed earlier, Microsoft deployed these updates to fix the PrintNightmare vulnerability. However, it has been more of a problem.
So, you can try uninstalling these security updates from the host computer and see if that resolves the error. For that,
- Go to Control Panel > Uninstall a program.
- Choose this option.
- Uninstall the latest updates under Microsoft Windows.
- Follow the prompts and complete the process.
- Restart your computer and try adding the printer again.


Install Printer Using a Local Port
Well, I hope the two fixes discussed above have already helped you eliminate the error. If that does not work, install the printer using a local port.
I’ve been able to fix this issue whenever the code 0x00000bcb accompanies the error.
Here’s what you need to do,
- First of all, go to your printer manufacturer’s official website and download the printer driver.
- Extract the file if it is compressed/zipped.
- Then go to Settings and open Bluetooth & devices > Printers & scanners.
- Click the Add device button > Add manually.
- On the new window, select the option as shown in the image below, and click Next.
- Choose Local port > Next.
- In the port name field, type
\\Computername\Printername. For instance, my colleague ANUP is currently sharing the printer with the name OfficeHPPrinter. So it should be\\ANUP\OfficeHPPrinter. - Click Have Disk on the next window.
- Browse the driver folder and select the
.INFfile > OK. - Choose your printer model > Next. It will install the network printer successfully.


