
Whether you’re thinking of upgrading your PC or overclocking the hardware components, it’s really important to know the rated output power of a PSU.
This single piece of information basically serves a dual purpose—first, to know if every PC component is getting enough voltage, and second, to prevent unwanted system freezes and problems like power supply overheating, which ultimately helps you decide whether or not you need to replace your unit for further upgrades.
That being said, it’s not only the PSU wattage that comes into play. It’s also important to consider the form factor (dimension of the PSU), modularity, and power supply efficiency.
To identify your power supply, you can either refer to the user manual or the packaging box that the PSU came with. If that is not readily available, consider opening the side panel of your PC case and see it physically.
Before You Begin
The power supply unit does not have direct communication with the motherboard that transmits this information. To be more precise, there are no pins on the power supply connectors that help monitor the PSU. You may have a quick look at the ATX power supply pinout to learn more about it.
Now without further ado, let’s find out what power supply you have.
Original Packaging
The easiest method to know your PSU would be to see its packaging if you have not thrown it away yet.
Not only does it show the rated output power of the PSU, it includes every intricate detail like the efficiency rating, modularity, form factor, and other special features. Almost everything you need to know about your PSU.
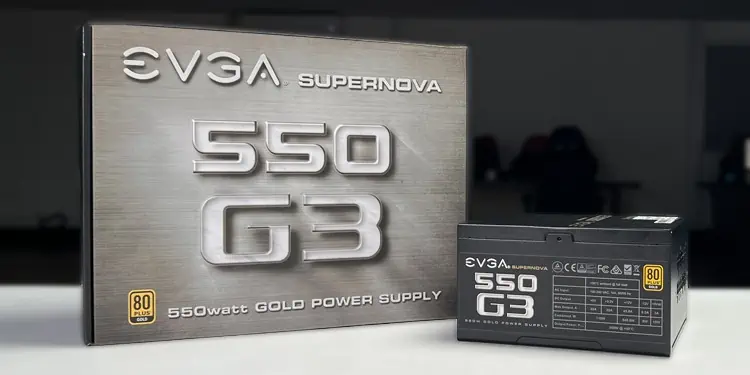
This is the packaging of my EVGA SuperNova 550 G3.

User Manual or Purchase Invoice
If you bought a custom PC from the store, you may not get the original packaging of individual components. However, there is a chance you were provided with the user manual or purchase invoice by the seller. Any or both of them will have a detailed list of components used in your system. We’ll discuss about it in later sections.
On the other hand, if you built your own PC, you must have purchased the PSU online. In that case, quickly look at the online purchase invoice to confirm the specifications.
Check the PSU Labels
If you do not have access to any of the documentation discussed earlier, the only way is to open your PC case and check the PSU labels.
Having said that, some full tower PC cases like Corsair iCUE 7000X and Micro ATX cases like Thermaltake S100 have transparent side panel/tempered glass with cutouts in the shrouds.
In such cases, you don’t need to open the side panel either. Simply get down to the bottom of your PC case, and you’ll clearly see the model name and manufacturer of the PSU. Here’s what it looks like on one of my PC cases.

It houses an EVGA Supernova 550 G3 PSU. You can now quickly Google this information to delve deep.
On the other hand, if you have an opaque PC case with no visible PSU information, get ready to detach the side panel.
Here I will be demonstrating the steps on my NZXT H700 PUBG case. You can follow similar steps for other models too.
- First, ground yourself to avoid static charges from damaging the PC components.
- Turn off your computer and remove the power cord from the PSU.
- Switch off the power supply unit.

- Remove the side panels.
- Locate the PSU compartment (generally at the bottom) and check the labels attached to the PSU. In my case, I can clearly see the manufacturer and model name of the PSU. It is an EVGA Supernova 550 G3 power supply unit. Depending upon the PSU orientation, the information might be upside down. A little effort will help you get the job done.
- You might find a few pieces of information like rated output power and the optimal temperature to achieve this output marked on the PSU itself. If you want more, quickly browse the Internet to look over its detailed specifications.


Do note that sometimes you may not be able to see any details of a PSU even after removing the side panel. Often, a few PSUs, like the Cooler Master THUNDER 500W have a specifications label only on one side.

In such cases, you must remove the entire unit from the compartment to look into the specifications. For that,
- While the side panels are still off the PC case, loosen the screws that attach PSU to the chassis.
- Remove the PSU from the compartment. If the power cables restrict you from doing it, unplug those cables too.
- Check the specifications on the PSU or Google the model name to know more about it.


Know the Power Supply of a Pre-Built PC
Now that you know how to check the PSU specifications on a custom-built PC, let’s move towards pre-built PCs.
The pre-built systems often tend to integrate the proprietary power supply that are different from the ones specified by the ATX standard. In such cases, you may have a hard time finding the actual specifications of the PSU.
If you have a similar case, I recommend you find the model name and number of your pre-built PC, quickly go to the manufacturer’s site and check the specifications.
In fact, most manufacturers do not include intricate details (like modularity and form factor) in their websites. They typically come to mention only the wattage and efficiency of the PSU.
For instance, I tried to find the PSU specs used in the ALIENWARE AURORA R16 GAMING DESKTOP, a pre-built PC from Dell. But I could not get any other details except the rated output power and efficiency.
For pre-built systems, not only finding the information is difficult, upgrading the PSU can be a hassle too. Those proprietary PSUs are not easily available in the stores for purchase. I see no option besides contacting their customer support for further assistance.