Tech News Today
  • Hardware
    • Motherboards
    • CPUs
    • Graphic Cards
    • RAM
    • SSDs
    • Computer Cases
    • Monitors
    • Peripherals
    • Power Supply Unit
    • PC Builds
    • Computer Tips
  • Software
  • Operating System
    • Windows
    • Mac
    • Linux
  • Gaming
  • Mobile
  • Console
  • More
    • Internet
    • Networking
    • Security
    • Buyer’s Guide
    • Gadgets
    • Laptops
    • Reviews
    • How To
    • News
Facebook Twitter Instagram
Tech News Today
  • Hardware
    • Motherboards
    • CPUs
    • Graphic Cards
    • RAM
    • SSDs
    • Computer Cases
    • Monitors
    • Peripherals
    • Power Supply Unit
    • PC Builds
    • Computer Tips
  • Software
  • Operating System
    • Windows
    • Mac
    • Linux
  • Gaming
  • Mobile
  • Console
  • More
    • Internet
    • Networking
    • Security
    • Buyer’s Guide
    • Gadgets
    • Laptops
    • Reviews
    • How To
    • News
Tech News Today
Home»Hardware»Printer»How to Connect Brother Printer to Wi-Fi

How to Connect Brother Printer to Wi-Fi

Deependra PangeniBy Deependra PangeniMarch 17, 2023
how-to-connect-brother-printer-to-wifi

Whether you are looking for wireless printing or want to share your Brother printer over a network, you should first connect it to Wi-Fi. However, the connection process varies depending on the model of your printer—and it may be a daunting task finding the exact steps.

Here, I have tried to ease the Wi-Fi connection process—for a wide range of Brother printer models.

Note: Before connecting the printer to Wi-Fi, you should first make sure if your printer is Wi-Fi capable. In general, your Brother printer will have a letter W in its model name (E.g., Brother HL-1210W) if it supports Wi-Fi. However, please note that there are a few exceptions to it.

Table of Contents

  • On Printers With Touch Panel
  • On Printers With Wi-Fi Button
  • On Printers With Go Button
  • On Printers Without Go Button

On Printers With Touch Panel

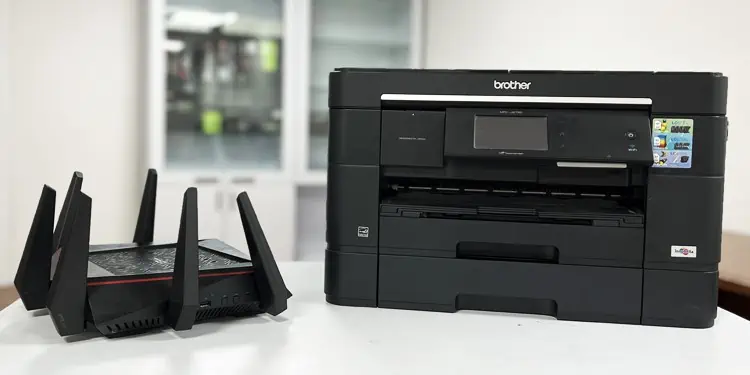
If your printer has a touch panel, you can easily use the graphical user interface to go to the Wi-Fi settings and connect it to a Wi-Fi network. Here, we will see how to connect the Brother MFC-J2720 printer to Wi-Fi.

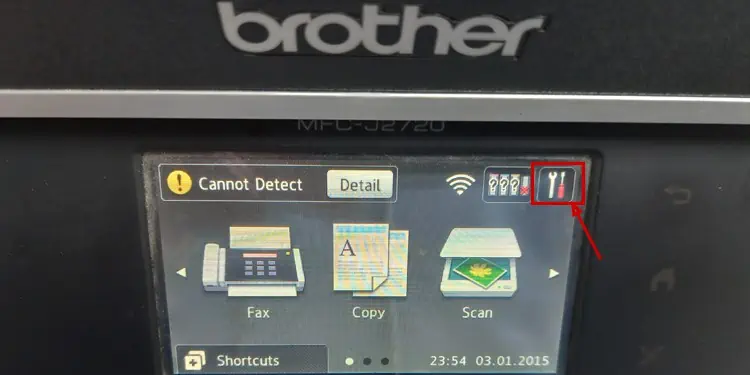
  1. Touch the gear icon (Settings) on your printer’s touch panel.
    settings-on-brother-printer
  2. Select the Wi-Fi button.
    wifi-icon-on-brother-printer
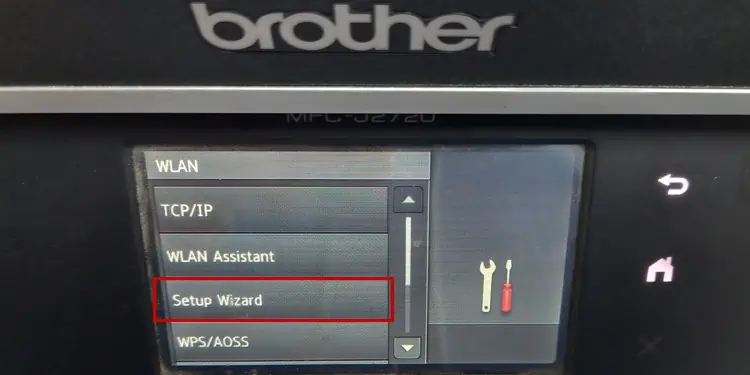
  3. Tap the Setup Wizard option.
    set-up-wizard-on-brother-printer
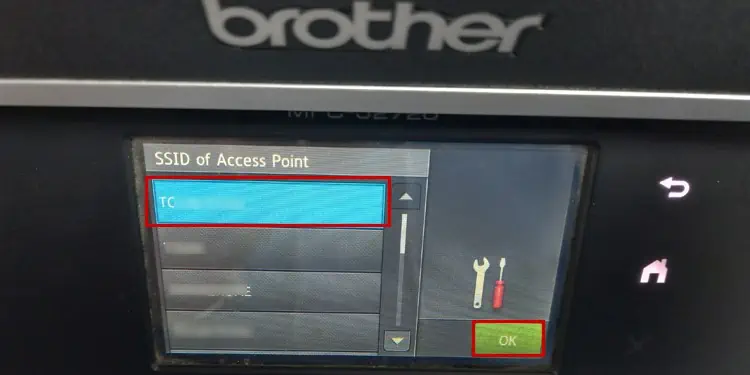
  4. Select the Wi-Fi network.
    select-wifi-name-and-click-ok
  5. Click OK.
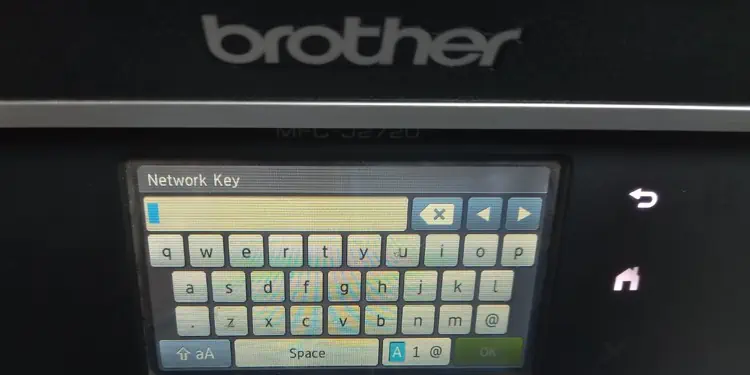
  6. Type the Wi-Fi network’s password and tap the OK button.
    enter-the-network-password

Similarly, you can also use a WPS PIN to connect such printers to Wi-Fi.

  1. Open Settings of your Brother printer.
    settings-on-brother-printer
  2. Tap Wi-Fi.
    wifi-icon-on-brother-printer
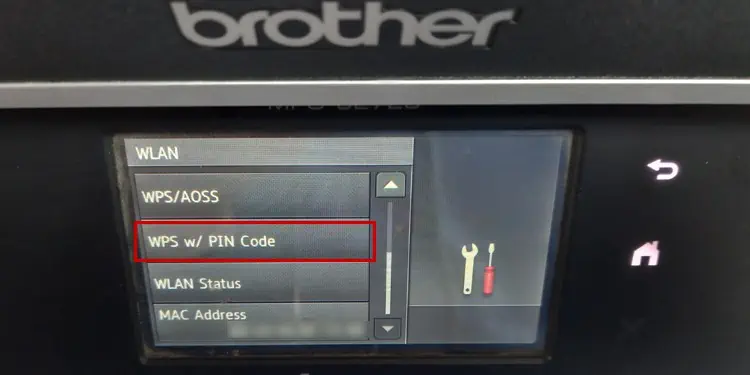
  3. Choose the WPS w/ PIN Code option.
    wps-pin-option
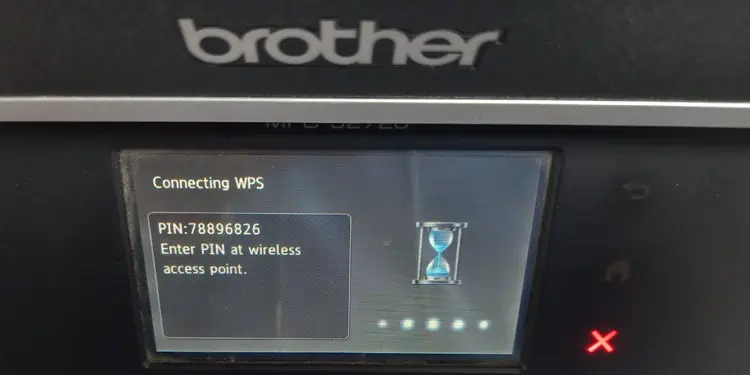
  4. You will see a WPS PIN on the display panel of your printer.
    showing-wps-pin-in-brother-printer
  5. Enter the PIN on the router’s wireless configuration page to connect the printer to Wi-Fi. The steps to add the printer using WPS PIN differ depending upon the router manufacturer. You can do a quick Google search for the entire process.

On Printers With Wi-Fi Button

If your printer has a physical Wi-Fi button with a small LCD screen, like in Brother DCP-L2520DW printer, follow these steps to connect it to Wi-Fi.

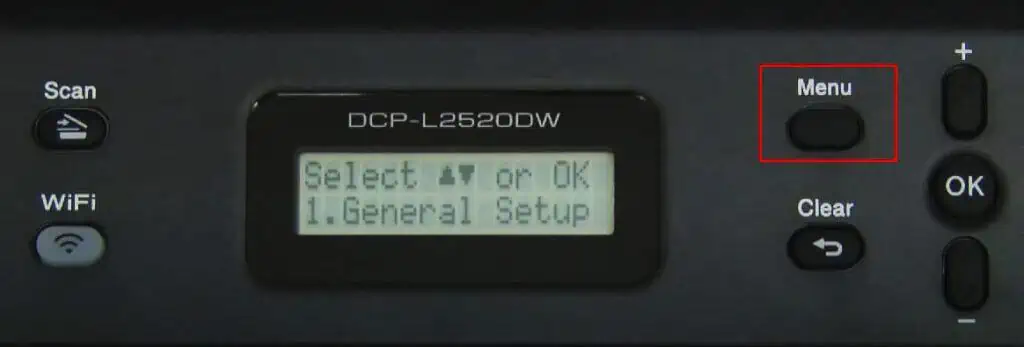
  1. Tap the Menu button on the button panel of your printer. It will show General Setup on the screen.
    menu-button-on-printer
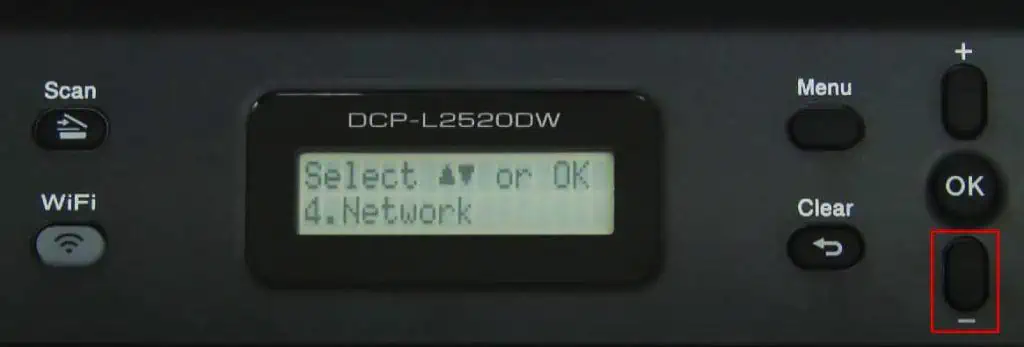
  2. Use the Down button to go to the Network option.
    down-button-on-printer-to-go-to-network
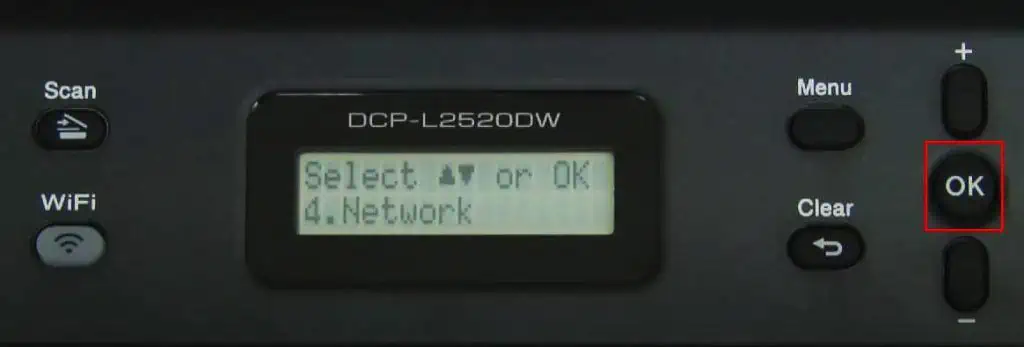
  3. Press OK.
    press-ok-on-printer
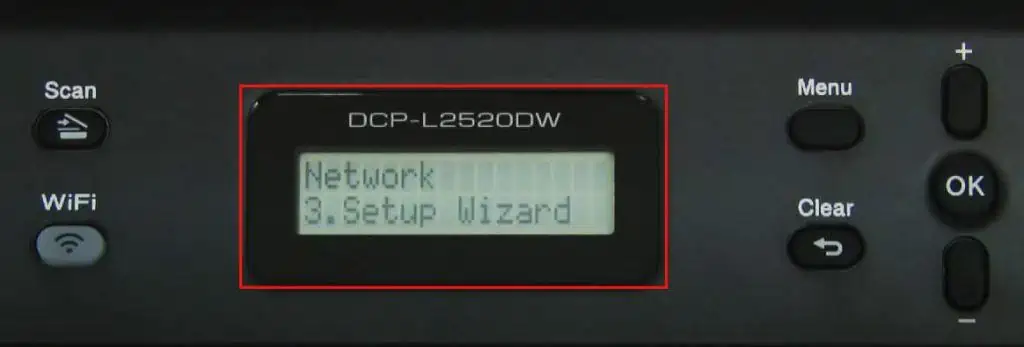
  4. Again use the Down button to go to Setup Wizard and press OK.
    setup-wizard-on-printer
  5. Press the UP Arrow button to enable the WLAN feature.
    WLAN-enable-on
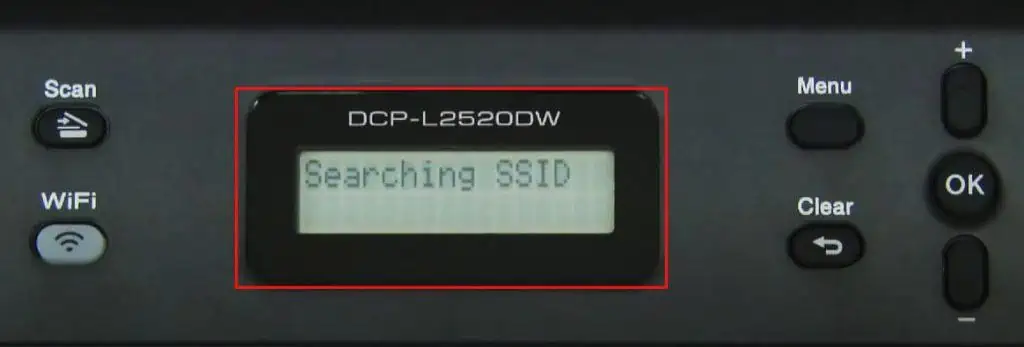
  6. It will start searching for available Wi-Fi networks.
    searching-ssid-on-printer
  7. Choose your Wi-Fi SSID.
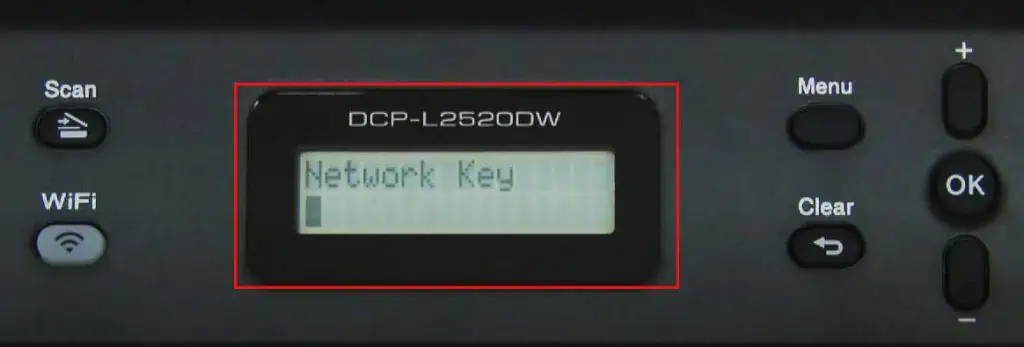
  8. Enter the Network key on the next screen. You can use the Up and Down buttons to enter the password.
    enter-network-key
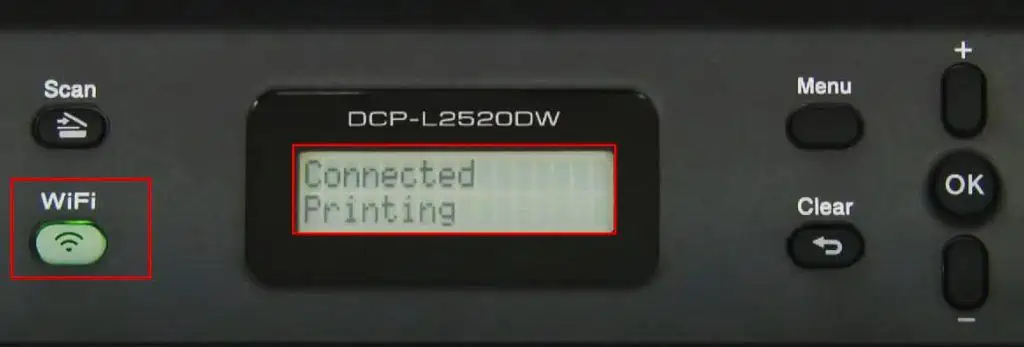
  9. Tap OK. Once the printer is connected to the network, you will see a Printing message on the display panel.
    printing-message-and-green-wifi-button
  10. The printer will eject a page with network configuration details and the Wi-Fi button on the button panel glows in green color.

On Printers With Go Button

If your Brother printer has a Go button on the button panel, you will also find a small WPS button in the back panel. You can use this button to connect the printer to a Wi-Fi network. One example of such a printer is the Brother HL-2270DW printer.

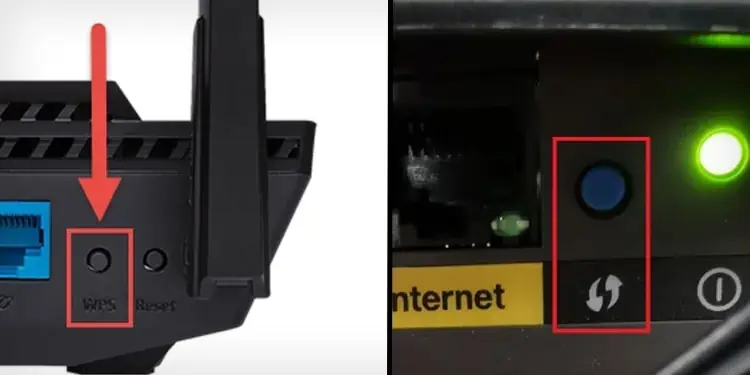
  1. First, go to the button panel of your router and press the WPS button.
    wps-button-on-the-router
  2. Keep pressing the button until the WPS indicator starts flashing.
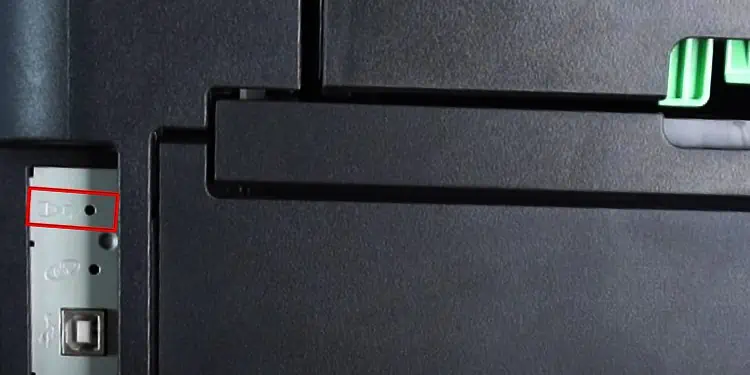
  3. Now go to the back panel of your printer and locate the hole with the Pen tip symbol.
    press-this-hole
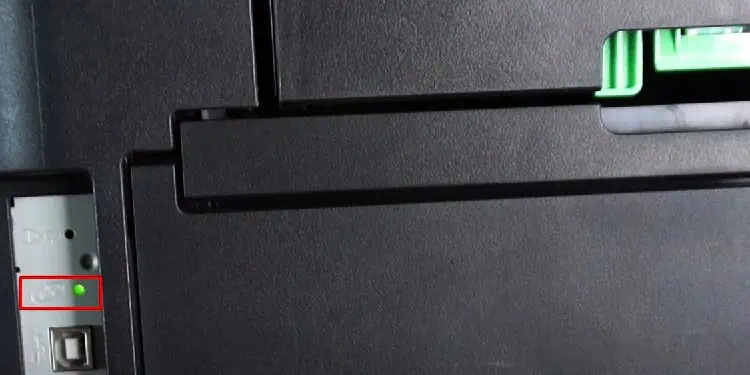
  4. Get a pen or a paperclip and press inside the hole for a few seconds. You will see a green LED blink.
    green-light-blink
  5. Then go to the front panel of your printer. You will see the Toner and Drum indicator will blink for a while.
  6. Wait till the Ready indicator glows and the printer ejects a printout with the wireless connection details.
Note: You should press the WPS hole on the printer within two minutes you pushed the WPS button on the router. You may need to press the WPS button again if the WPS indicator on the router goes off during the setup process.

On Printers Without Go Button

On such printers, you should first download the full software package for your printer from the official website of Brother and use it to connect the printer to Wi-Fi.

This method is useful if your printer (For e.g., Brother HL-1210W printer) neither has a display panel, nor a WPS button.

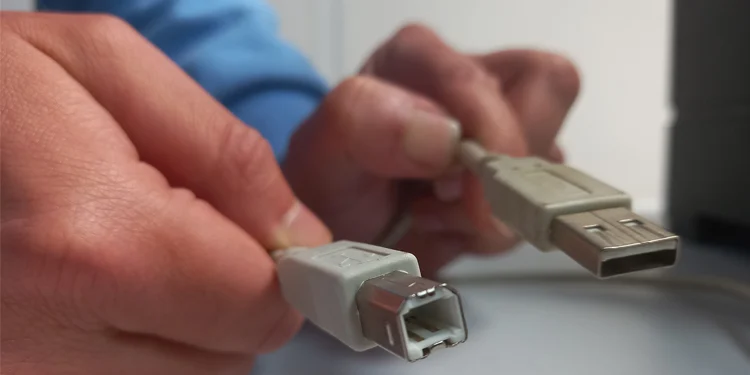
  1. Connect your Brother printer to PC using a USB cable and turn on the printer.
    usb-a-to-b-cable-used-in-printer
  2. Connect your computer to the same Wi-Fi network to which you want to connect your printer.
  3. Go to the driver download page of Brother.
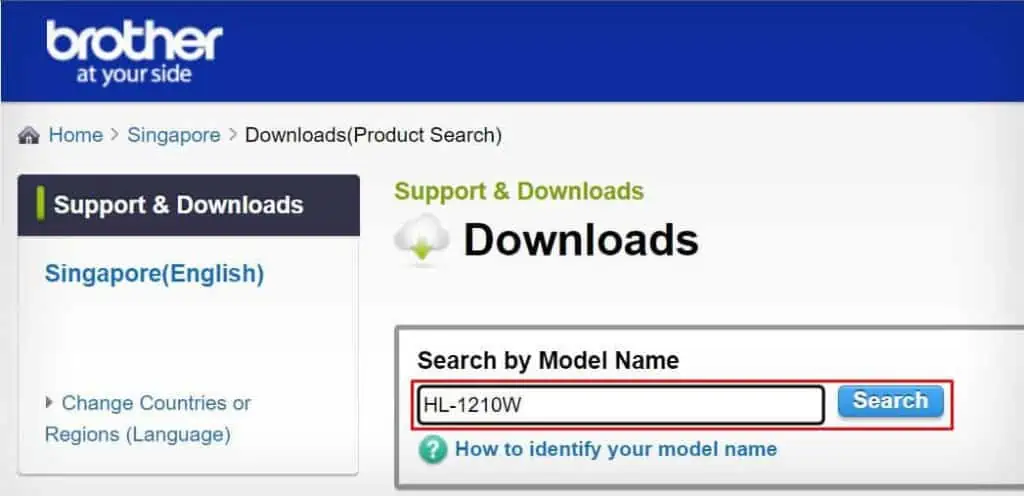
  4. Type your printer model name in the Search by Model Name field and click Search.
    search-printer-model-in-brother-website
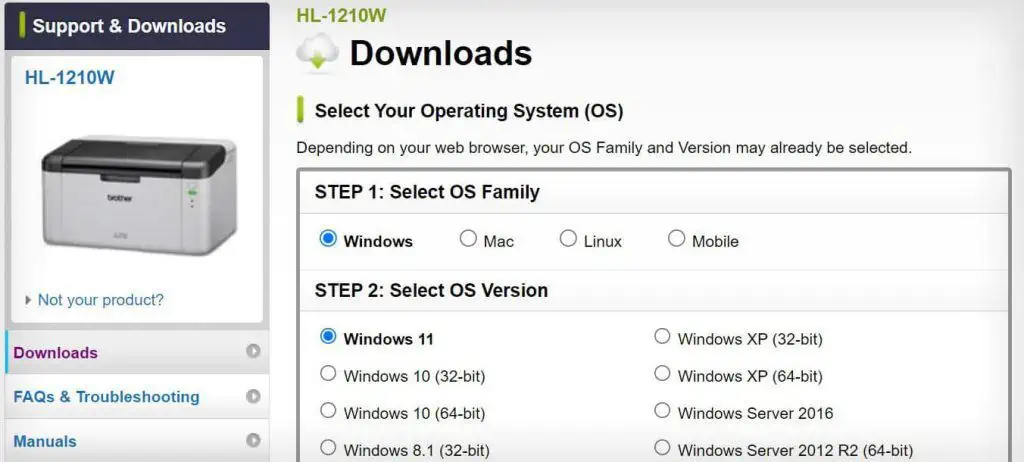
  5. Choose your computer’s operating system.
    select-os-during-download
  6. Click the OK button.
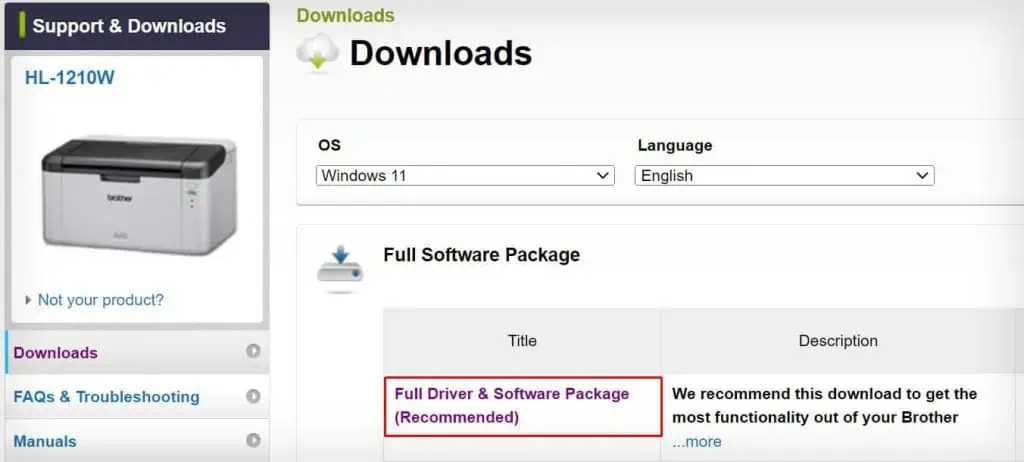
  7. Download the Full Software Package.
    download-full-software-package
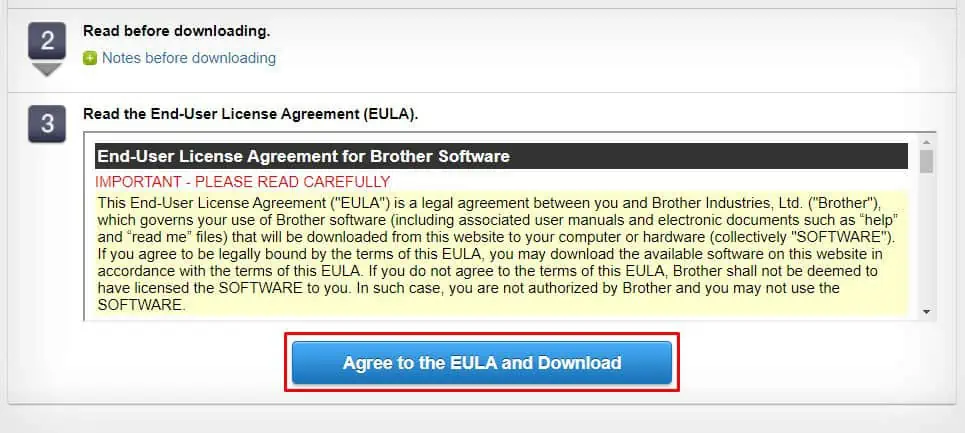
  8. Click the Agree to the EULA and Download button.
    agree-to-the-eula-and-download-button
  9. Once the download is complete, launch the downloaded .exe file.
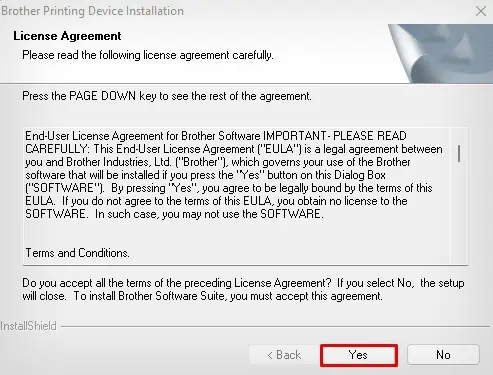
  10. Click Yes and accept the terms and conditions.
    click-yes-in-license-agreement
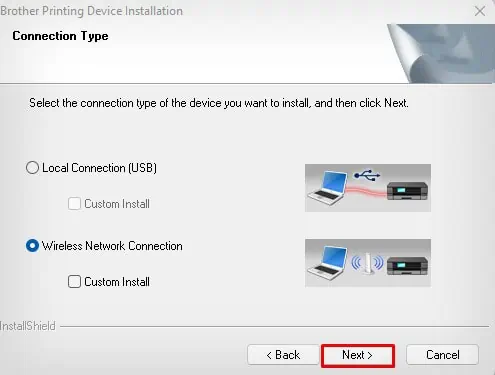
  11. Choose Wireless Network Connection.
    choose-wireless-network-connection
  12. Click Next.
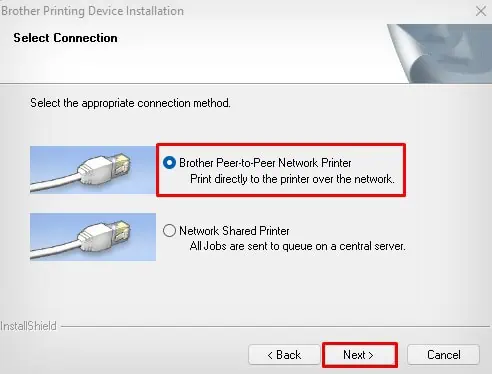
  13. Select the first option that says Brother Peer-to-Peer Network Printer.
    brother-peer-to-peer-network
  14. Click Next.
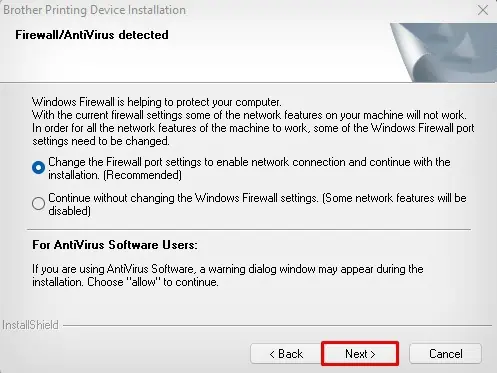
  15. Again click Next on the Firewall detected window.
    firewall-optiion
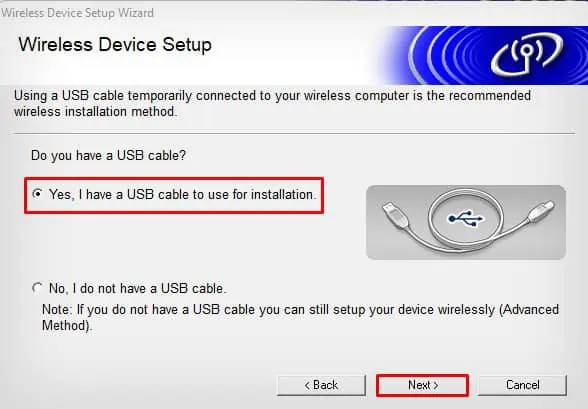
  16. Choose Yes, I have a USB cable and click Next.
    yes-i-have-a-usb-cable
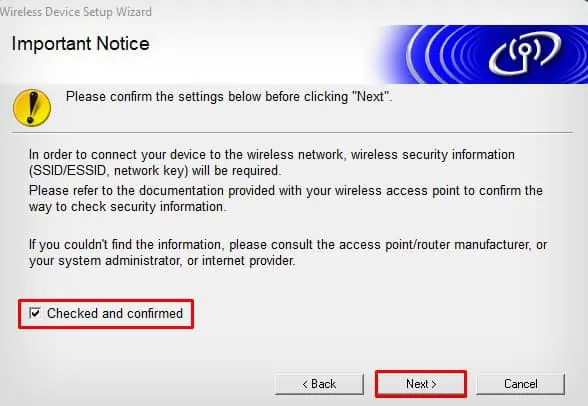
  17. It will now start searching for wireless networks. Check the box next to Checked and confirmed and click Next.
    check-and-confirm-the-wifi-setup
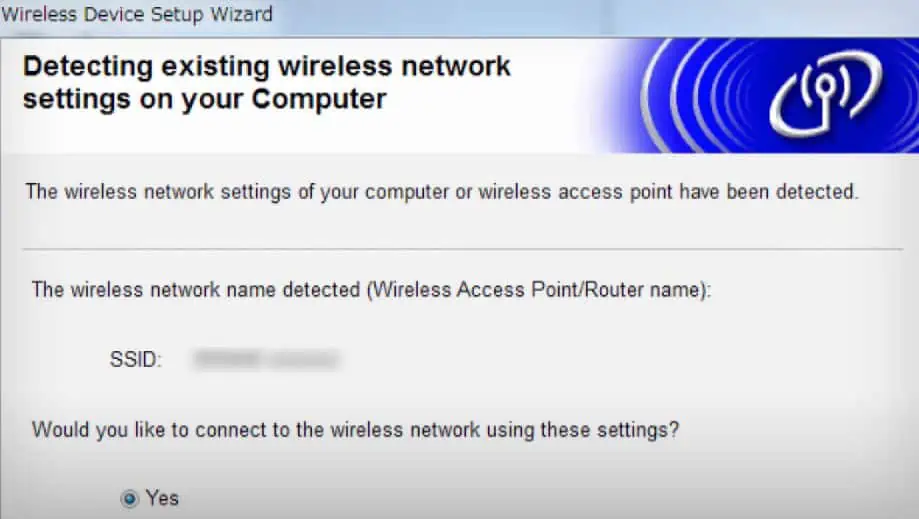
  18. The setup wizard will auto-detect the Wi-Fi network on your PC and ask you if you want to connect the printer to that Wi-Fi network.
    confirm-connecting-to-wifi-on-brother-printer
  19. Click Yes > Next.
  20. The Wi-Fi button on your printer will glow in green color once the connection is established.
how-to
Deependra Pangeni
  • Twitter
  • LinkedIn

Meet Deependra Pangeni, A professional Computer Engineer who has been writing about technology for many years. He is also involved in different robotic projects and loves tinkering with circuit boards. He is always researching new ways to improve the website's user experience and make it easy for people to find the information they need. At TechNewsToday he mainly deals with how-to and fixes contents for a range of TV and TV products like remotes, cables and streaming devices. Along with the TV, he also specializes in hardware and software troubleshooting for printers and Windows. Deependra's passion for simplifying complex technical information for non-technical audiences is evident in his work and he is dedicated to producing high-quality content that is easy to understand. When he is not working, he enjoys gathering with his friends, partying and traveling. He is also an active member of the technical community groups and regularly participates in tech meetups. You can contact him at deepen@technewstoday.com

Related Posts

hp-printer-light-flashing

Solved: HP Printer Light Flashing

March 16, 2023
hp-black-ink-not-printing

How to Fix HP Black Ink Not Printing

March 15, 2023
How-to-add-a-printer-in-Windows

How to Add a Printer in Windows

March 14, 2023
hp-printer-yellow-light

How to Fix HP Printer Yellow Light

March 12, 2023
how-to-clean-hp-printhead

How to Clean HP Printhead

March 10, 2023
enlarge-hp-printer

How to Enlarge Copy on HP Printer

March 10, 2023
Add A Comment

Leave A Reply Cancel Reply

Latest Posts
Shared GPU Memory

What is Shared GPU Memory? How is It Different From Dedicated VRAM?

March 12, 2023
c drive vs d drive

C Drive Vs D Drive – What’s the Difference?

March 12, 2023
firmware vs software

Firmware Vs Software – What’s the Difference?

March 8, 2023
You may also like
how-to-connect-brother-printer-to-wifi

How to Connect Brother Printer to Wi-Fi

March 17, 2023
my computer won't connect to wifi

Fixed: My Computer Won’t Connect to Wi-Fi

March 17, 2023
how to change windows startup sound

How to Change Windows Startup Sound

March 17, 2023
Recommended
Cookie Clicker Garden Guide

Cookie Clicker Garden Guide to Unlocking Every Seed

September 26, 2021
monitor no signal

Computer Turns On But Monitor Says No Signal (9 Ways To Fix)

November 10, 2022
Facebook Twitter Pinterest
  • Home
  • About Us
  • Our Team
  • Editorial Guidelines
  • Privacy Policy
  • Affiliate Disclosure
© 2023 TechNewsToday, editor@technewstoday.com | Tech Central Pvt. Ltd.

Type above and press Enter to search. Press Esc to cancel.