Tech News Today
  • Hardware
    • Motherboards
    • CPUs
    • Graphic Cards
    • RAM
    • SSDs
    • Computer Cases
    • Monitors
    • Peripherals
    • Power Supply Unit
    • PC Builds
    • Computer Tips
  • Software
  • Operating System
    • Windows
    • Mac
    • Linux
  • Gaming
  • Mobile
  • Console
  • More
    • Internet
    • Networking
    • Security
    • Buyer’s Guide
    • Gadgets
    • Laptops
    • Reviews
    • How To
    • News
Facebook Twitter Instagram
Tech News Today
  • Hardware
    • Motherboards
    • CPUs
    • Graphic Cards
    • RAM
    • SSDs
    • Computer Cases
    • Monitors
    • Peripherals
    • Power Supply Unit
    • PC Builds
    • Computer Tips
  • Software
  • Operating System
    • Windows
    • Mac
    • Linux
  • Gaming
  • Mobile
  • Console
  • More
    • Internet
    • Networking
    • Security
    • Buyer’s Guide
    • Gadgets
    • Laptops
    • Reviews
    • How To
    • News
Tech News Today
Home»Hardware»Printer»How to Print Envelopes on HP Printer

How to Print Envelopes on HP Printer

Deependra PangeniBy Deependra PangeniFebruary 7, 2023
how-to-print-envelopes-on-hp-printer

While we generally use a printer for printing letters and A4-sized documents, we can also print envelopes with it. HP printers (both Inkjet and Laser) support a range of paper sizes including a few sizes for envelopes.

But, before starting printing you should know how to properly insert the envelopes into the paper tray. Then, you need to make a few adjustments to the printing preferences to get the printouts.

Table of Contents

  • Step 1: Know Your Envelope Size
  • Step 2: Insert Envelope Into the Printer
    • On HP Inkjet Printers With Rear Paper Tray
    • On HP Inkjet Printers With Front Paper Tray
    • On HP LaserJet Printers With Front Paper Tray
  • Step 3: Change the Printing Preferences
  • Step 4: Start Printing
    • Through Wordpad
    • Through MS Word

Step 1: Know Your Envelope Size

You should first determine the size of the envelope you will be using. Printers with display panels generally show the paper size after inserting it into the paper tray. However, if your printer does not display the size, you should know the exact size of the envelope to print correctly without any alignment issues.

There is a range of envelope sizes supported by HP printers. You can measure the envelope and know which option to choose.

Envelope NameEnvelope Size (Shorter side x Longer side)
Envelope #104.125 inches x 9.5 inches
Envelope DL4.33 inches x 8.66 inches 
Envelope C56.4 inches x 9 inches
Envelope C64.49 inches x 6.38 inches 
No 6 ¾ Envelope3.65 inches x 6.5 inches
Envelope Monarch3.875 inches x 6.75 inches
Japanese Envelope (Chou #3)4.72 inches x 9.25 inches
Japanese Envelope (Chou #4)3.54 inches x 8.07 inches
Envelope A24.37 inches x 5.75 inches
Envelope names and their respective size

Step 2: Insert Envelope Into the Printer

Once you know the envelope size, you should now insert it into the paper tray of your printer. Depending upon the location of the paper tray, the insertion process can vary. We have discussed the process for a few printer models below.

For safety purposes, we recommend you insert only 5 envelopes at a time. Also, refrain from using low-quality and glossy envelopes. Only use standard envelopes made for printers. Similarly, do not use envelopes with windows and clasps. They may cause a paper jam on your printer or even damage it.

On HP Inkjet Printers With Rear Paper Tray

  1. Bring the envelope.
  2. Place the envelope into the paper tray such that the flap lies towards the left and the printing side of the envelope faces upwards.
    insert-envelope-in-paper-tray
  3. Shift the envelope all the way right off the paper tray.
  4. Use the paper guides to fasten the envelope. Avoid bending the envelope. Else it can result in bad print alignment.
    using-paper-guides-to-fasten-envelope

On HP Inkjet Printers With Front Paper Tray

  1. Get the envelope and insert it into the paper tray such that the printing side faces downwards and the envelope flap lies to the left.
  2. Position the paper guides of the printer to fasten the envelope.

On HP LaserJet Printers With Front Paper Tray

  1. Insert the envelope such that the flap lies to the left hand side and the printing side face upwards.
  2. Reposition the paper fasteners to maintain the position of the envelope.
Note: If you are using Laser printers, do not use envelopes with adhesives on them. The heat generated by the printer causes such envelopes to stick on the paper path and cause damage to the printer. Sometimes, it may also lead to an out of paper error message despite having papers in the paper tray.

Step 3: Change the Printing Preferences

After positioning the envelope correctly into the paper tray, it’s time to  change the paper size from the printing preferences of your HP printer. Your printer will then start to print in the selected envelope format.

  1. Hit Windows + R and type control. Press Enter key. It will open Control Panel.
    open-control-panel
  2. Click Hardware and Sound > Devices and Printers.
  3. Go under the Printers section and right-click your HP printer.
  4. Choose the Printing preferences option from the context menu.
    printing preferences of hp printer
  5. On the new printing preferences window, jump to the Paper/Quality tab.
  6. Click the drop-down under Paper Size.
    paper size in hp printer
  7. Choose your Envelope size and click OK.

Step 4: Start Printing

Now that you have set the printing preferences on your HP printer, you can start printing on the envelope. We recommend Wordpad or MS Word to print the envelopes.

Through Wordpad

  1. Launch Wordpad on your computer.
    launch wordpad on your computer
  2. Type the text and modify it the way you want it to be printed on the envelope.
    type envelope in wordpad
  3. Click File > Page setup.
  4. Choose the Paper size from the drop-down. By default, here you will see the paper size specified earlier in the printing preferences.
    choose envelope size in wordpad
  5. Then, select Landscape Orientation.
    landscape orientation in wordpad
  6. Uncheck Print Page Numbers.
  7. Specify Margins as per your preference and click OK.
    envelope margins in wordpad
  8. Now click File > Print > Print preview to know what your print will look like.
    print preview in wordpad
  9. Exit from the Print preview window.
  10. Then hit Ctrl + P shortcut.
  11. Choose your printer profile and click Print.
    print envelope from wordpad
  12. The print out looks like this.
    printed-envelope-from-wordpad

Through MS Word

  1. Launch Word on your PC and create a Blank document.
    create blank document in word
  2. Click Mailings tab on the top and choose Envelopes.
    choose mailing envelope in word
  3. Fill in the Delivery address (receiver’s address) and Return address (sender’s address) fields.
    fill sender and receiver address in word
  4. Click the Envelope icon under Preview.
    preview envelope on word
  5. Specify the Envelope size. You can also change fonts and margins from here.
    specify envelope size in word
  6. Click OK and then click the Print button.
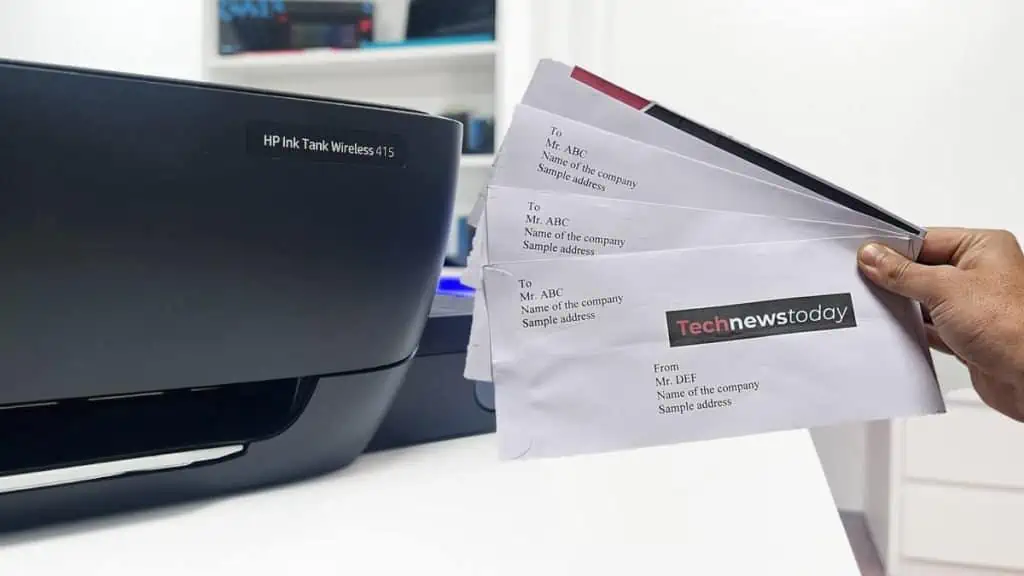
  7. The printout looks like this.
    printed-envelope-through-ms-word
how-to
Deependra Pangeni
  • Twitter
  • LinkedIn

Meet Deependra Pangeni, A professional Computer Engineer who has been writing about technology for many years. He is also involved in different robotic projects and loves tinkering with circuit boards. He is always researching new ways to improve the website's user experience and make it easy for people to find the information they need. At TechNewsToday he mainly deals with how-to and fixes contents for a range of TV and TV products like remotes, cables and streaming devices. Along with the TV, he also specializes in hardware and software troubleshooting for printers and Windows. Deependra's passion for simplifying complex technical information for non-technical audiences is evident in his work and he is dedicated to producing high-quality content that is easy to understand. When he is not working, he enjoys gathering with his friends, partying and traveling. He is also an active member of the technical community groups and regularly participates in tech meetups. You can contact him at deepen@technewstoday.com

Related Posts

how-to-clean-hp-printer-rollers

How to Clean HP Printer Rollers

March 3, 2023
how-to-clear-printer-memory-hp

5 Ways to Clear Printer Memory in HP Printer

March 2, 2023
printer-not-printing-in-color

Printer Not Printing in Color? 5 Ways to Fix It

March 1, 2023
how-to-align-hp-printer

How to Align HP Printer? 3 Best Ways

February 28, 2023
how-to-cancel-print-job-on-hp-printer

5 Ways to Cancel Print Job on HP Printer

February 27, 2023
how-to-fax-from-hp-printer

How to Fax From HP Printer

February 24, 2023
Add A Comment

Leave A Reply Cancel Reply

Latest Posts
Memory-Compression

What is Memory Compression in Windows? Should You Enable or Disable It

March 1, 2023
dism-vs-sfc-vs-chdsk

DISM, SFC, CHKDSK: What’s the Difference

February 28, 2023
bios-settings-for-gaming

Best BIOS Settings for Gaming

February 16, 2023
You may also like
how-to-clean-hp-printer-rollers

How to Clean HP Printer Rollers

March 3, 2023
keyboard input lag

9 Ways to Fix Keyboard Input Lag

March 3, 2023
keyboard key is stuck

How to Fix a Stuck Key on a Keyboard

March 3, 2023
Recommended
Cookie Clicker Garden Guide

Cookie Clicker Garden Guide to Unlocking Every Seed

September 26, 2021
monitor no signal

Computer Turns On But Monitor Says No Signal (9 Ways To Fix)

November 10, 2022
Facebook Twitter Pinterest
  • Home
  • About Us
  • Our Team
  • Editorial Guidelines
  • Privacy Policy
  • Affiliate Disclosure
© 2023 TechNewsToday, editor@technewstoday.com | Tech Central Pvt. Ltd.

Type above and press Enter to search. Press Esc to cancel.