You’ve probably tried tweaking Windows display settings once in a while. But what if you want to revert these changes? Well, Windows allows you to customize several display options, like scaling, resolution, application graphics, colors, fonts, and many more.
Exploring these settings is fun until your display becomes nasty and you wish to revert immediately.
Some users have complained that their display looked different after a recent update or while upgrading to Windows 11. Thus, if you’re looking to reset your display settings, you’re at the right place!
Can I Reset Display Settings to Default on Windows?
Technically, there’s no direct method to reset all your display settings. Hence, you’ll have to revert each display property individually.
Moreover, not every display setting has a dedicated reset option. Thus, you’ll need to set them to either recommended or know their actual configuration.
Regarding the same, we have covered the right way of re-configuring display options for every setting in this article.
How to Reset Each Display Setting on Windows 11?
Indeed, it’s a privilege that Windows lets us explore various display settings as per our needs. Well, you can set your desired theme, improve color combination, change the font, increase/decrease text size, change resolution or orientation, and perform a plethora of other actions.
However, when one has to reconfigure them, they remain puzzled and constantly check for a possible solution. Now, you do not have to worry as you can find the solution of resetting each feature to default in this section.
Color Scheme
The color scheme depends on a user’s preference. These days, dark mode is getting quite popular among most of us.
However, Windows doesn’t just limit the color scheme to light and dark modes. Interestingly, you can customize this as well. However, if you’re scratching your head to restore this setting, here’s how you can move back to the default (light) mode:
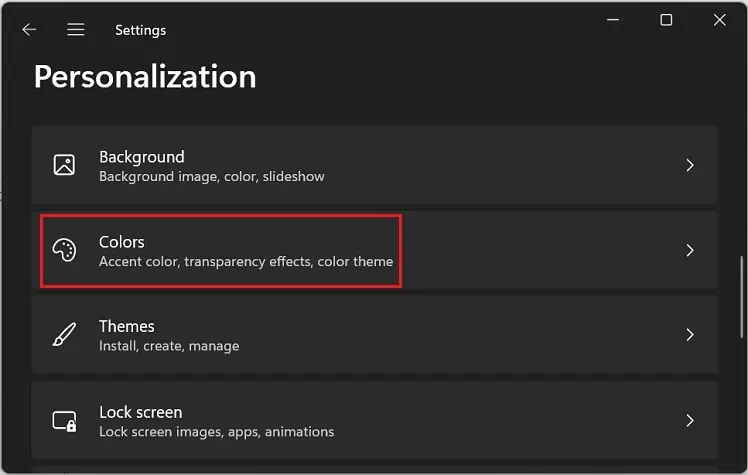
- Open Settings from the start menu and move to the Personalization tab.
- Here, select Colors.

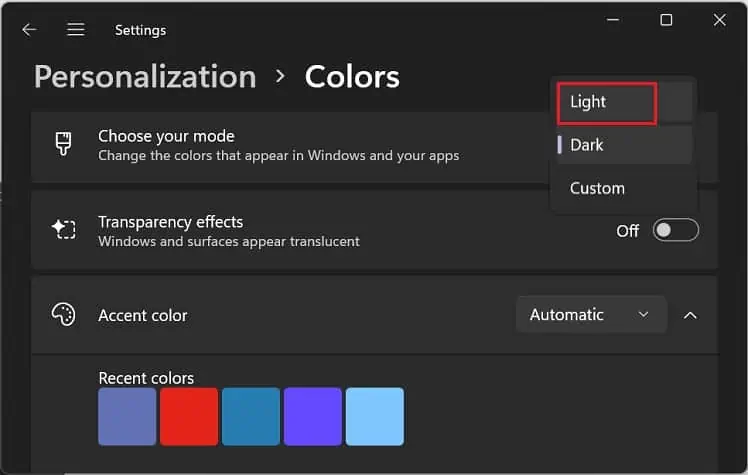
- Now, from the Choose your mode option, select Light. This will reset your display color scheme.

Display Scaling
Undoubtedly, display scaling is a helpful feature that lets you zoom your screen in or out. But, if you want to revert this back, here’s what you can do:
- Press Windows + I to start the Settings app directly.
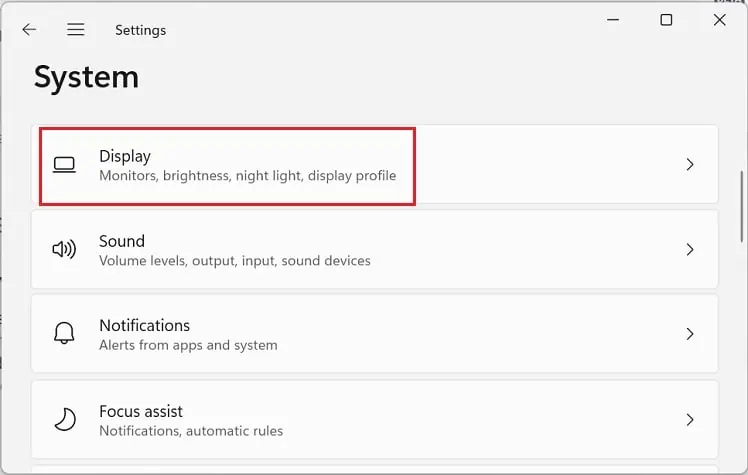
- Next, go to System > Display.

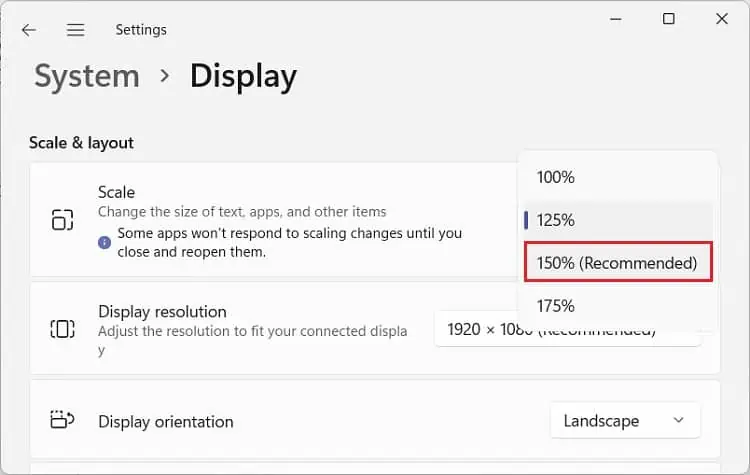
- Find the Scale option under Scale & Layout. Here, expand the drop-down and choose the recommended percentage.

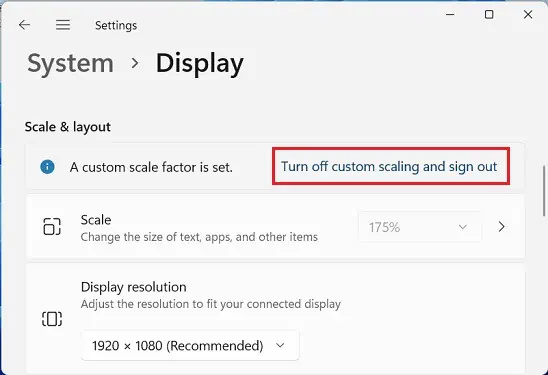
Moving on, if you’ve set a custom scaling option and you wish to revert, follow the below instructions:
- In the Display settings window, choose the Turn off custom scaling and sign out option.

- Now, your computer restarts, and after logging into Windows, you can see that the display scaling is automatically set to default.
Display Resolution
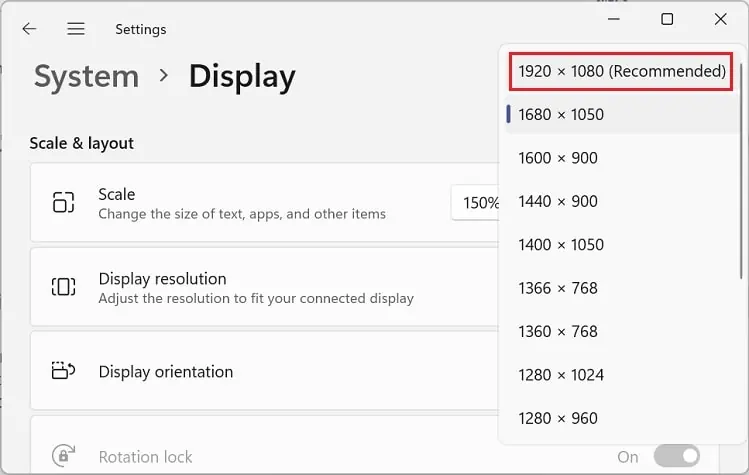
If the display resolution configuration isn’t done right, the pixels on your screen are minimized. So, we suggest using the recommended settings to avoid such an issue. Although there’s no direct way to reset the display resolution, you can choose the recommended option to set it to default:
- Firstly, open Settings > System > Display.
- Find and expand the Display resolution drop-down.
- Now, choose the recommended setting. This depends on your monitor size and the aspect ratio it supports.

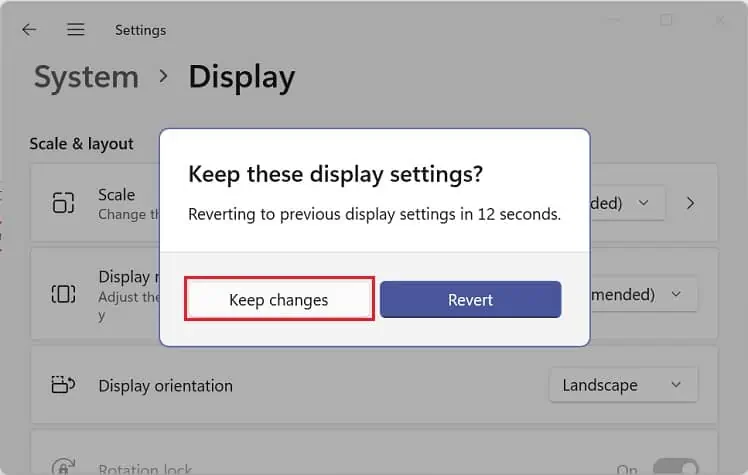
- Finally, tap the Keep Changes button.

Display Orientation
If you see your display turned upside down or sideways, it’s due to the wrong display orientation. Generally, using the Ctrl + Shift + Up arrow hotkey should reconfigure it. However, if this doesn’t work for you, follow the below instructions to make the screen upright:
- Navigate to Settings > System > Display > Scale & layout.
- Here, expand the Display orientation feature and select Landscape.

- Now, press the Keep Changes button within 15 seconds. Else, the changes will be reverted.
Color Management & Display Calibration
The Color Management feature lets you create color profiles to manage colors on your PC. Basically, this assists you in instructing your system on what colors should be shown on your screen.
Thus, if you use a sophisticated color profile, making it challenging to identify the right colors, it’s vital that you set the color management to default. In such a scenario, here’s what you need to do:
- Press Windows + R and run the
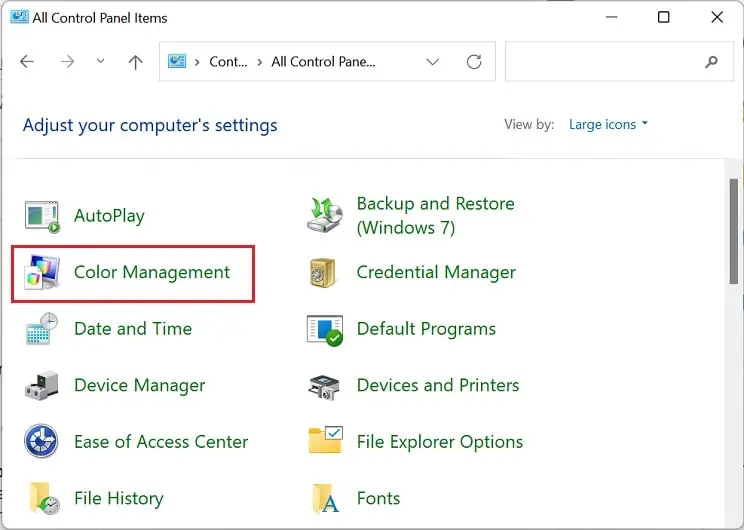
controlcommand to open Control Panel on your computer. - Next, set the View by option to Large icons.

- Then, pick Color Management.

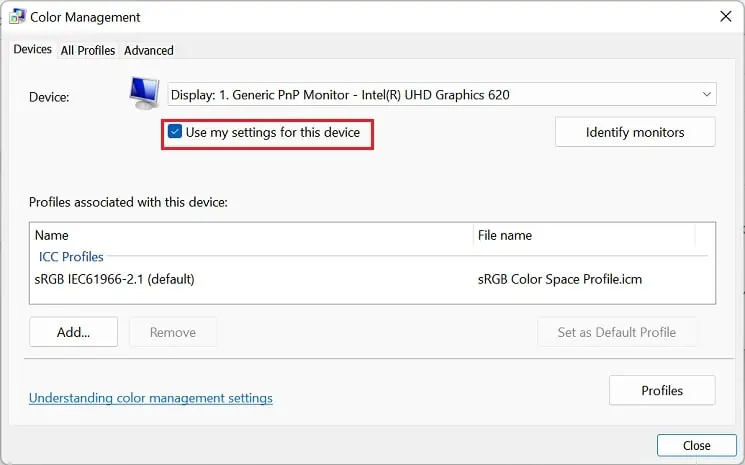
- Once the Color Management window pops up, choose your monitor.
- Now, uncheck the Use my settings for this device option. This should disable any color profile, and you should be able to see the default colors.

Undoubtedly, display calibration is essential to ensure you see the right colors on your screen. Thus, if you haven’t made the correct calibration, there’s a high chance you’ll see different colors on your images than what they should naturally look.
Moreover, wrong display color configuration can also create printing errors. Hence, if you do not want to face such an issue, we recommend using the default Windows calibration:
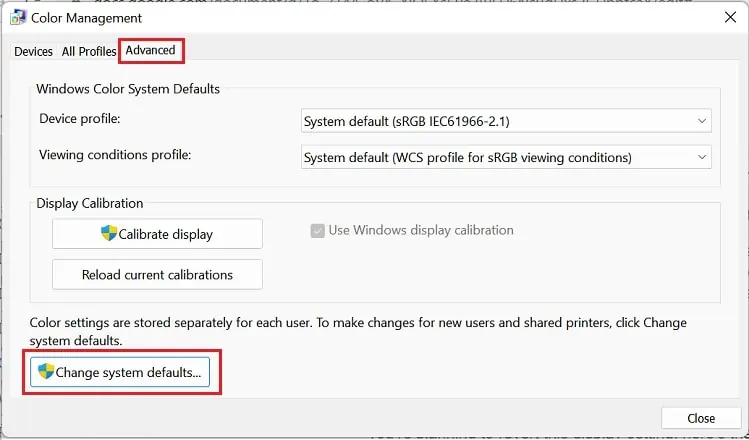
- In the Color Management window, switch to the Advanced tab.
- Here, press the Change system defaults button.

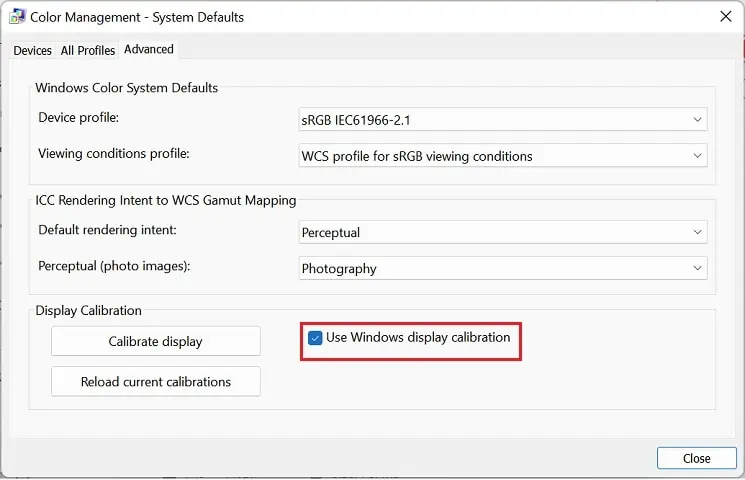
- Again, move to the Advanced tab, and under Display Calibration, check the Use Windows display calibration.

- Now, you can hit the Close button and check if your colors are back to normal.
Windows Theme
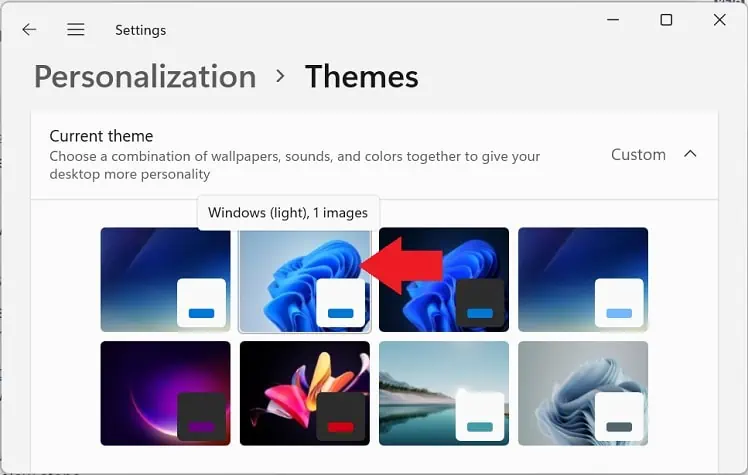
Using a custom or setting a contrasting theme improves the aesthetics of your system. But if you’re planning to revert this display setting, here’s the right way to do it:
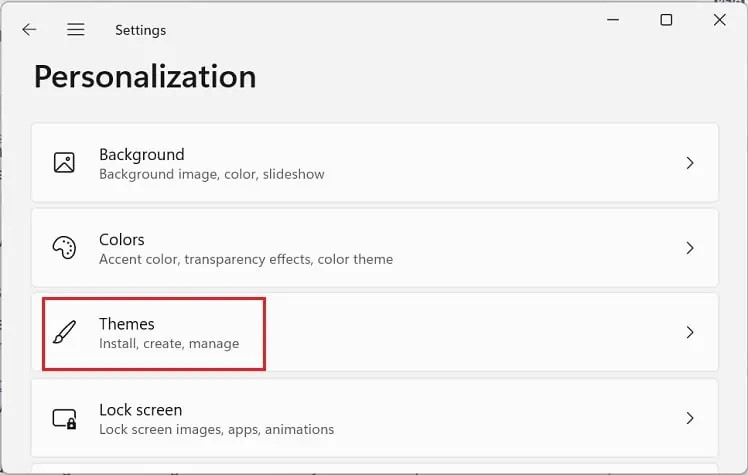
- Go to Settings > Personalization.
- Now, move to the Themes tab.

- Under the Current theme section, choose the default theme, Windows (light).

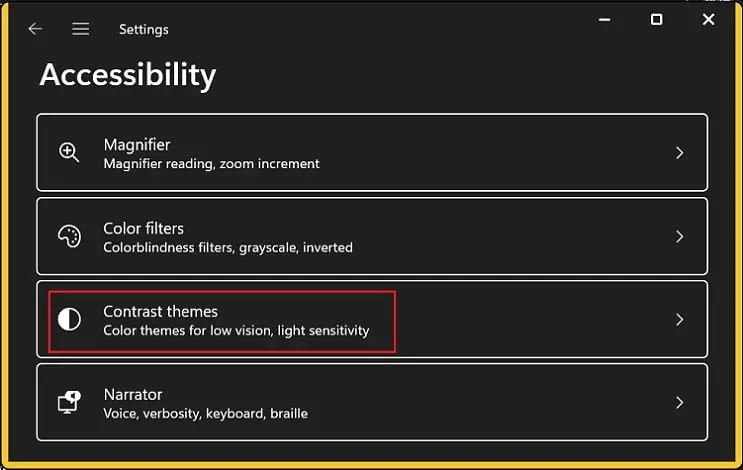
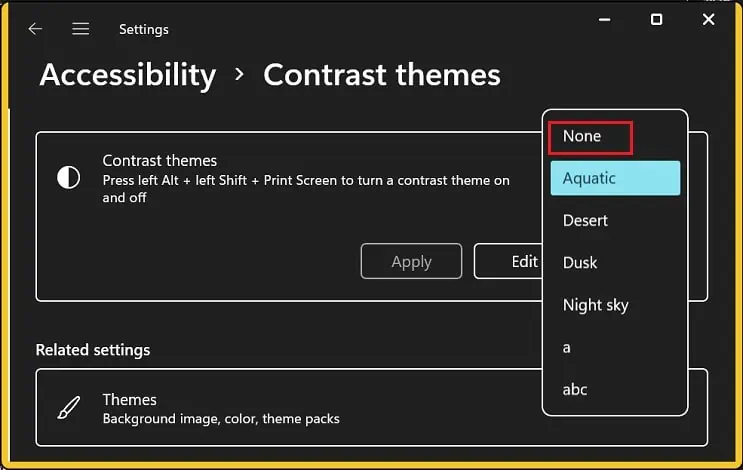
Well, you might have used a contrasting theme to make your GUI simpler. For example, if you have set the Aquatic theme and wish to revert it, follow the below steps:
- Open Settings and navigate to Accessibility.
- Under Vision, select Contrast themes.

- Now, expand the Contrast themes drop-down and choose None.

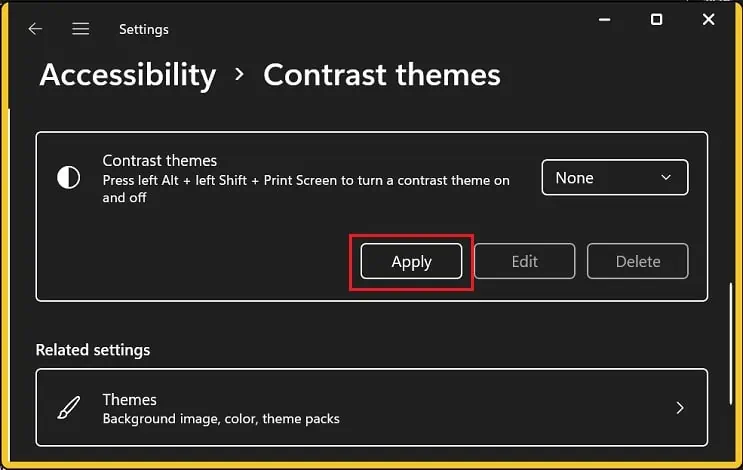
- Finally, press the Apply button and wait until the system reverts your theme to default.

Font
Well, resetting fonts in Windows 11 is relatively easy than adopting a different font style. So, you can go through the following steps to reset it:
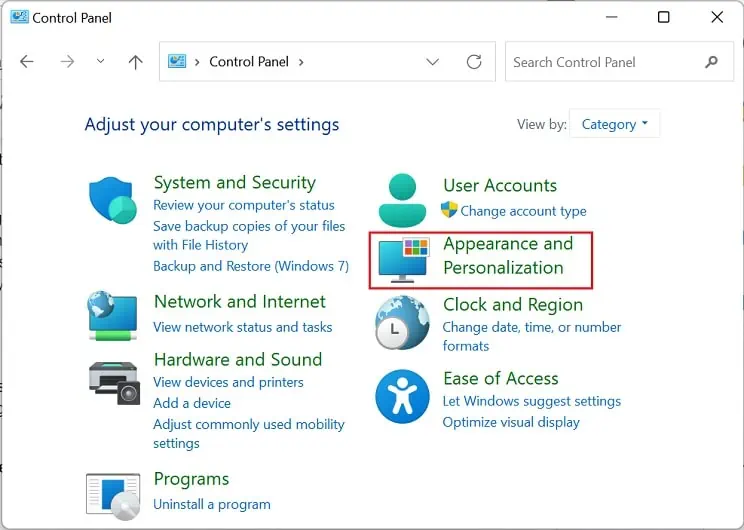
- Open Control Panel and select Appearance and Personalization.

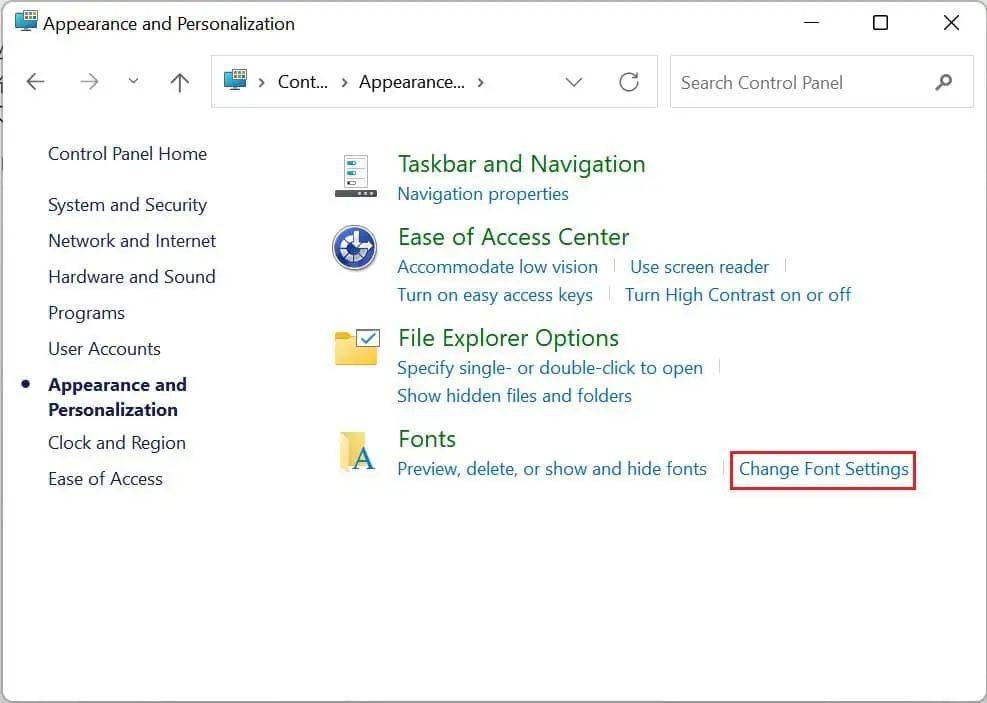
- Under Font, pick Change Font Settings.

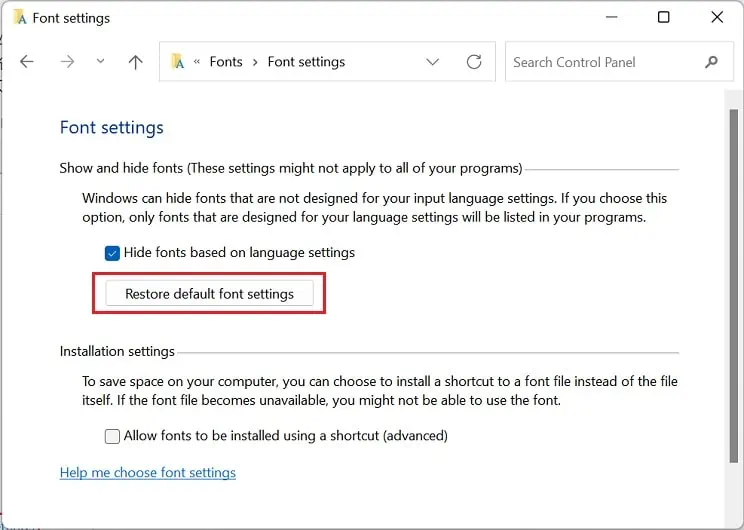
- Next, press the Restore default font settings button.

- Now, you need to restart your system, and your font should be reverted to Segoe UI Variable.
Text Color
If you’ve tweaked the system’s text color, you may encounter problems while reading or identifying the texts. In this scenario, you’ll definitely want to reset this display setting, and here’s how you can do just that:
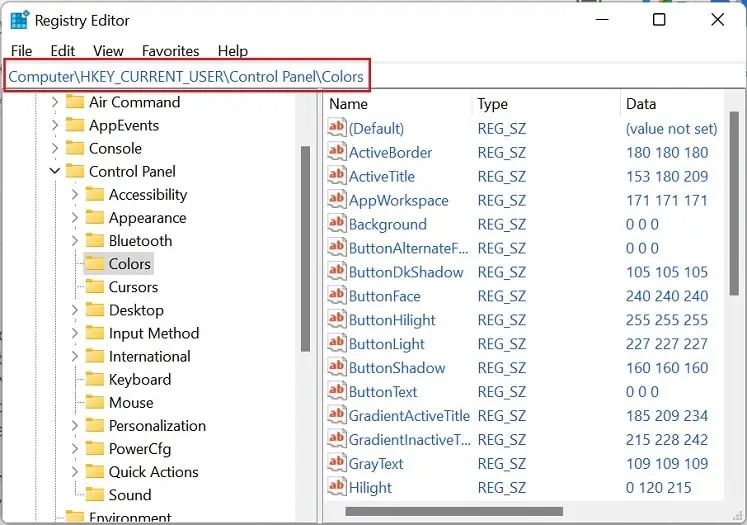
- Press the Windows key to search and launch Registry Editor.
- Now, enter the below address in the Registry address bar:
Computer\HKEY_CURRENT_USER\Control Panel\Colors
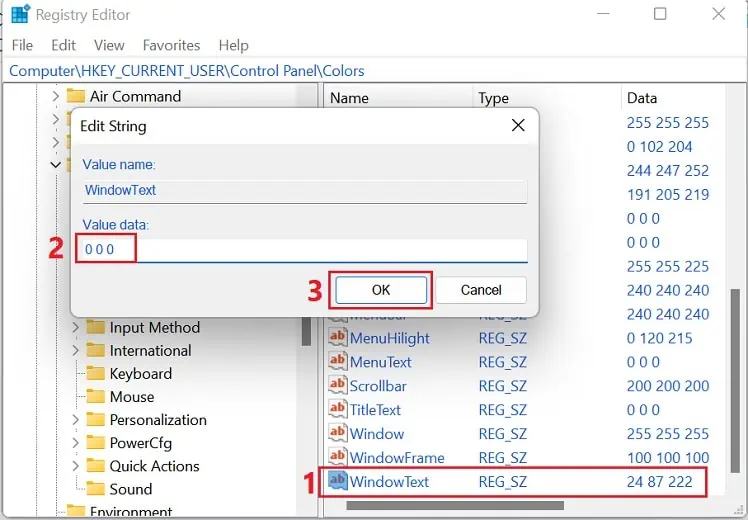
- Now, move to the right side panel, scroll down, and double-click the WindowText option.
- Here, set the Value data to
0 0 0and press Ok.
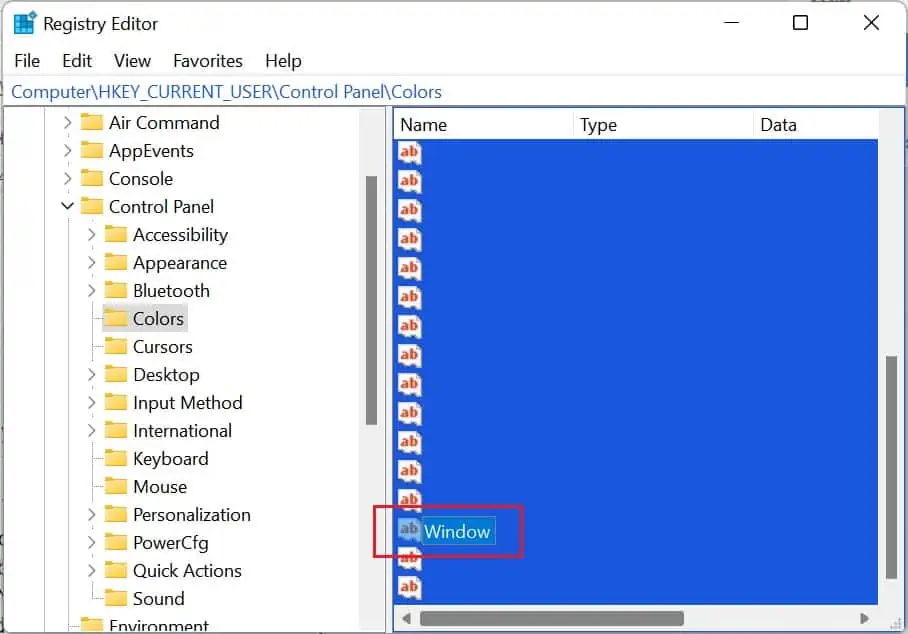
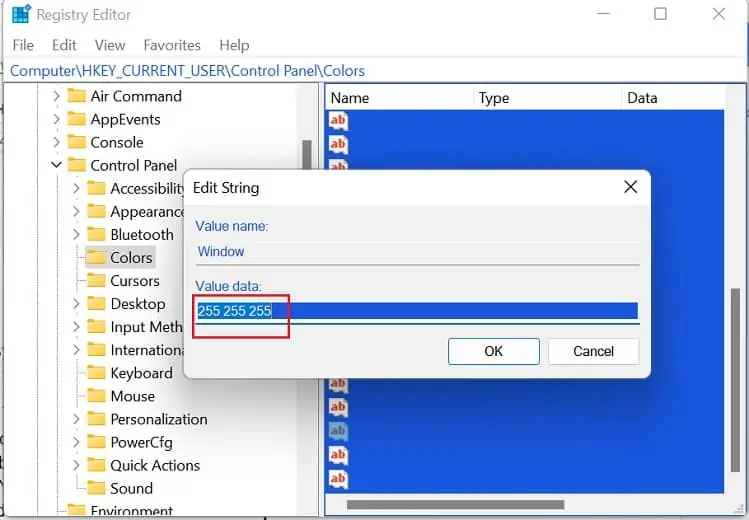
- Next, if you see texts highlighted on your system, you can double-click the Window option.

- Then, edit the Value data to
255 255 255.
- Finally, restart your PC, which should restore the text color settings to default.
Text Size
Indeed, increasing or decreasing text size is helpful depending on how far you sit from your monitor. However, you might want to revert the settings when you’re in an ideal position.
Well, there’s no direct method to reset the text size on Windows 11. Nonetheless, doing so is incredibly simple:
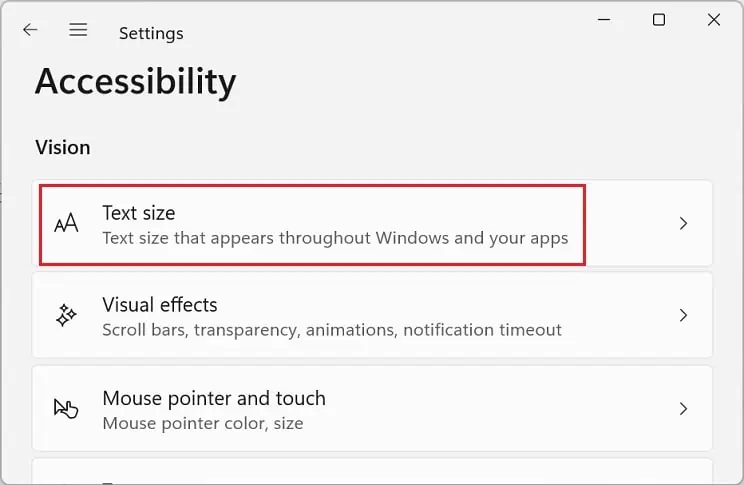
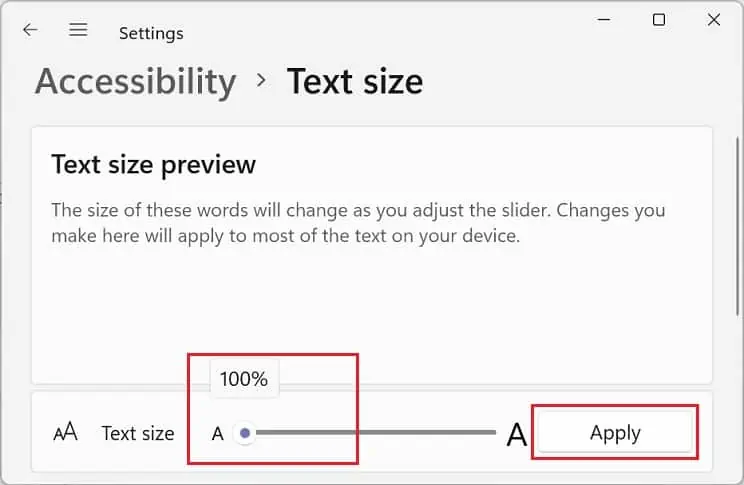
- Launch the Settings application and move to Accessibility > Text Size.

- Next, drag the Text size slider all the way to the left. This will set the text size to 100%, which is the default Windows 11 setting.

- Now, press the Apply button and wait until the blue screen with the ‘Please Wait’ message closes. You’ll notice the change immediately.

Desktop Icons
If you’ve changed the picture of a specific desktop icon, you might want to set them to default. So, if you do not remember what the icon used to look like, here’s how to restore its setting:
- Open Settings and navigate to Personalization > Themes.
- Under Related Settings, select Desktop icon settings.

- Once a new dialogue box launches, select your desired desktop icon.
- Now, find the Restore default button and press it. This should change your icon’s picture to default.

Mouse Cursor
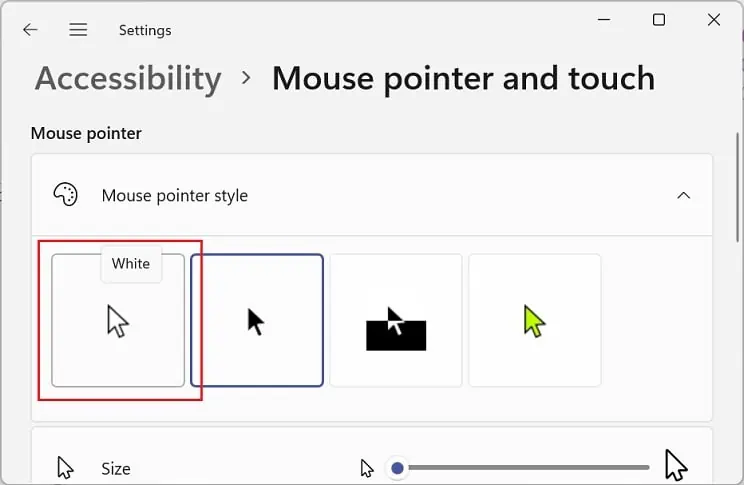
Interestingly, Windows allows you to change pointer style, and there’s a plethora of options available. However, if you want to get back to the default pointer, here’s what you need to do:
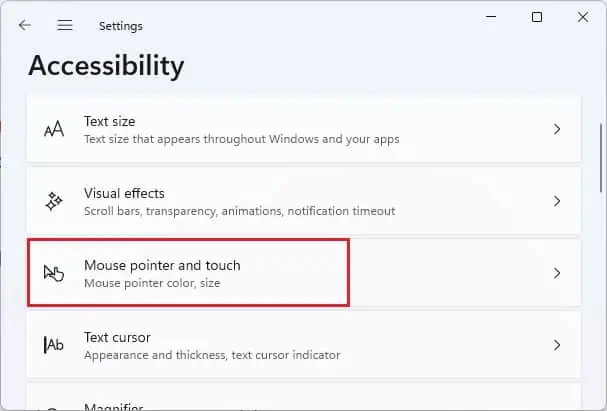
- In the Settings application, navigate to Accessibility > Mouse pointer and touch.

- Now, under the Mouse pointer block, choose the White cursor.

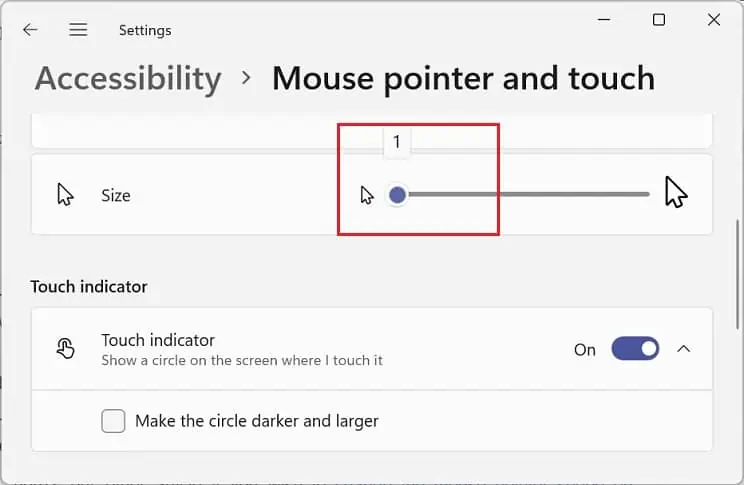
Moreover, if you think your pointer size looks a little large than what it should, you can easily set this to default:
- In the Mouse pointer and touch tab, move to the Mouse pointer block.
- Here, drag the Size slider all the way to the left. This will set it to default size (1).

Moving on, here’s our other article if you wish to change the mouse pointer speed on Windows.
Application Graphics Preference
Very few users are aware that Windows lets us change the application graphics preference. Basically, there are two options available – Power saving and High performance.
However, if you are confused regarding which one you should set, you can give priority to Windows. This way, the system automatically adopts the default configuration depending on what suits best for your PC.
Kindly go through the following guideline to learn how you can reset graphics preference for individual applications:
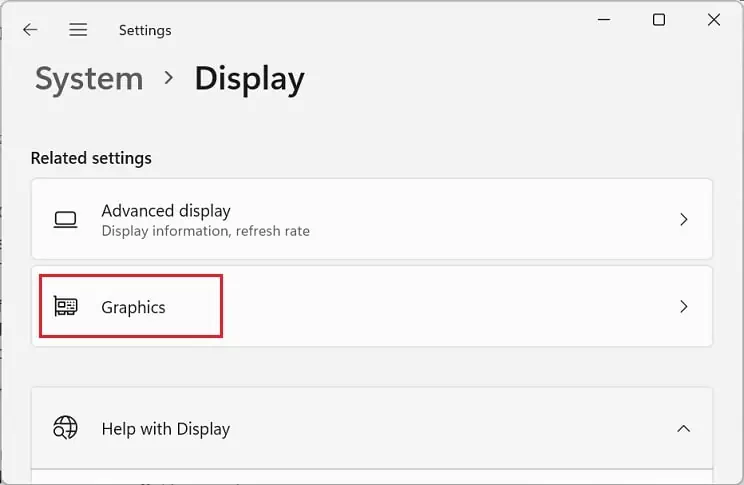
- Launch Settings and select System > Display.
- Under Related Settings, pick Graphics.

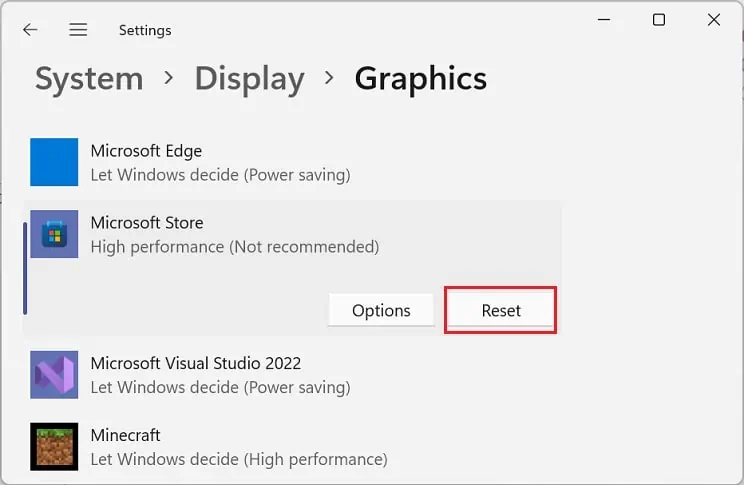
- Now, navigate to the list of applications and select a program.
- Then, press the Reset button.

Otherwise, you can choose the Options button, choose Let Windows Decide, and hit Save.
Other Settings
Apart from these settings, there are plenty of other display settings you can reset. However, you’ll likely not find a direct reset method on them. Instead, you should know about their default configuration and set them accordingly.
- Switch off the night light
- Revert screen refresh rate if you have overclocked your monitor
- Turn off transparency effects
- Set Accent color to Automatic
- Set Touch Keyboard size to 100 and theme to Default
- Manage Visual Effects from Settings > Accessibility
- Tweak the text cursor’s appearance, thickness, and indicator


