Sysprep (System Preparation Tool) is a Microsoft Command line utility which users use to prepare a generalized Windows system image for deploying, duplicating and testing the Operating System.
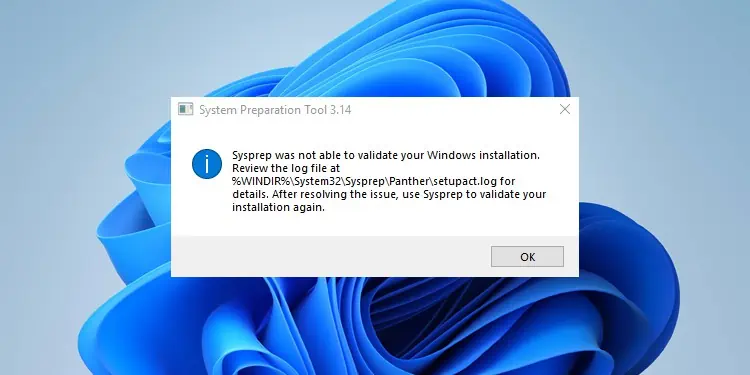
In this process, you need to generalize the Windows installing by using the command sysprep /generalize /shutdown /oobe and remove any data specific to your PC for privacy purposes. However, Sysprep can’t execute this process if it fails to validate the system and returns the “Sysprep was not able to validate your Windows installation” error message.
This issue can happen because of various reasons, which we have mentioned in this article along with their solutions.
Causes for Sysprep Was Not Able to Validate Your Windows Installation
Here are the potential causes for “Sysprep was not able to validate your Windows installation” error:
- Running Sysprep on an upgraded Windows OS.
- Device Encryption or BitLocker enabled.
- Unprovisioning UWP apps for a user.
- Presence of an active scenario such as pending system updates.
- Corrupt
Spopk.dllfile.
Fixes for Sysprep Was Not Able to Validate Your Windows Installation
First, make sure to disconnect the internet to avoid any automatic processes, such as updates while generalizing your Windows installation.
Then, apply the possible solutions we have provided below to troubleshoot your issue.
Check Log File
The Sysprep error message also shows where you can review the error log message. So, the first thing you should do is check the log file to narrow down the exact reason for the issue.
- You can open Run (Win + R) and enter
notepad %windir%\system32\Sysprep\panther\setupact.logto open this file using the notepad.
After looking through the log, move on to the corresponding solutions depending on the nature of your error.
Disable Upgrade Registry Key and Entry
Sysprep won’t be able to validate your Windows installation if you try running the processs after upgrading your system. The log should show the following or a similar error message in such a scenario:
SYSPRPspopk.dll:: Sysprep will not run on an upgraded OS. You can only run Sysprep on a custom (clean) install version of Windows.
As the message says, Microsoft doesn’t support running Sysprep on an upgraded Windows system and instead recommends users to clean install Windows first. However, you can avoid this issue by changing some registry values. Here’s how you can do so:
- Press Win + R to open Run.
- Enter
regeditto open the Registry Editor. - Navigate to
Computer\HKEY_LOCAL_MACHINE\SYSTEM\Setup\ - Delete both the Upgrade key and the Upgrade DWORD Value.

- Now, go to
Computer\HKEY_LOCAL_MACHINE\SYSTEM\Setup\Status\SysprepStatus. - Double-click on CleanupState and set its Value data to 7.

This process fools the Windows OS into believing that you have a custom install version of Windows instead of an upgraded one.
Disable BitLocker
You can’t run Sysprep when your system is encrypted. If you try to do so, the error log usually shows the error message below:
You may also get other messages, but they will contain the word BitLocker.
To resolve the issue, you need to disable the process. Here’s how you can do so:
- Open Run
- Type
cmdand press Ctrl + Shift + Enter to open the Elevated Command Prompt. - Enter the following commands:
manage-bde -status(It shows whether BitLocker is encrypting your device or not)Disable-Bitlocker –MountPoint ‘C:’

Disable TPM and PTT

Sometimes your system thinks BitLocker is enabled even when it’s actually off. So, you’ll still get the above error. It happens because sometimes the BDE goes into a waiting state when TPM is detected.
There are two ways to resolve the issue. You can either enable BitLocker and then turn it off again.
Or you can go to your BIOS and disable TPM (Trusted Platform Module), which is the device your system uses for encryption. You can usually find the option under Advanced, Security, or Trusted Computing in the BIOS or UEFI. You may also need to disable PTT (Intel Platform Trust Technology) in some devices.
Reinstall or Remove UWP App Packages
If you unprovisioned any Universal Windows Platform (UWP) app that is installed on one of your user accounts, the source files for the app won’t be present on your user profile. In such cases, Sysprep can’t validate the installation and you’ll usually find the following error message in the log file:
You need to remove the apps from the user or remove all users with unprovisioned apps to resolve such issues.
First, try re-registering the default Windows apps in case there’s some other issue with the app. To do so:
- Open Run.
- Type
powershelland press Ctrl + Shift + Enter to open the Elevated Windows PowerShell. - Enter the command:
Get-AppxPackage -AllUsers| Foreach {Add-AppxPackage -DisableDevelopmentMode -Register “$($_.InstallLocation)\AppXManifest.xml”}

Run Sysprep again and check if you still encounter the issue. If you do, you need to remove the UWP apps and their provisioning. You also need to manually remove the apps if the error log shows something like:
Here are the necessary steps:
- Open the Elevated Windows PowerShell.
- Enter the following commands:
Import-Module AppxImport-Module DismGet-AppxPackage -AllUsers | Where PublisherId -eq 8wekyb3d8bbwe | Format-List -Property PackageFullName,PackageUserInformation
- If you manually provisioned some non-UWP apps, you need to run
Get-AppxPackage -AllUsers | Format-List -Property PackageFullName,PackageUserInformation - Check all users that show Installed. If they are local accounts, remove these accounts. You can do so by using these steps:
- Open Run and enter
netplwiz. - Click on the accounts and select Remove > Yes.
- Open Run and enter
- Then, run the commands below to remove an app and its provisioning while replacing the <package name> with the app’s package name:
Remove-AppxPackage -Package \<package name>Remove-AppxProvisionedPackage -Online -PackageName <package name>
- Do so for all the apps the Sysprep’s log shows.


Complete Pending Updates and Then Pause Updates
Your can’t enable the Sysprep audit mode if there’s an active scenario such as updates. Such processes use your reserved storage, which locks your Windows OS. In this case, the log file shows an error message similar to:
To resolve the issue, you need to install all pending cumulative updates and then pause your updates. You don’t need to install the optional updates.
Make sure to install the necessary updates and restart your PC to complete all pending operations. Then, pause your updates using the instructions below:
- Open Run and enter
ms-settings:windowsupdate. - Click on Pause or Pause for x week/s button.

Disconnect your internet and try running Sysprep again.
Replace Spopk.dll File
Spopk.dll is a type of OPK Sysprep Plugin file that helps in Sysprep’s Windows installation validation. Sometimes this DLL file can become corrupt causing issues while running Sysprep.
In such cases, the log shows an error message similar to,
C:\Windows\System32\spopk.dll; dwRet = 0x975
First, remove provisioning for the store apps, then install cumulative updates or pause updates and retry running Sysprep. If you still encounter the issue, you need to replace the Spopk.dll file. Here’s how you can do so:
- Open the Elevated Command Prompt.
- Enter the following command to take ownership and change permissions for
spopk.dll:takeown /f %WinDir%\System32\spopk.dllicacls %WinDir%\System32\spopk.dll /Grant Administrators:f
- Open Run and enter
%windir%\System32to open the directory in the File Explorer. - Download the
spopk.dllfile or transfer it to the System32 folder from the same location in another computer. - Confirm if you get the prompt to replace the file.