
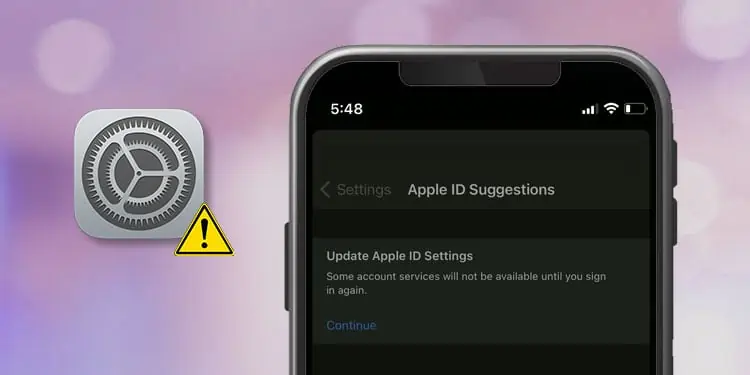
If you use iOS version 14 or higher, you may probably get a message “Update Apple ID Settings” when opening the settings menu. It means Apple cannot verify your ID, and some Apple services may not work until you update the ID settings.
But, when you try to update, your device may fail to proceed and just get stuck once you tap the continue button.
This commonly occurs if there’s a problem with Apple Server. Or, if you have entered the wrong information on your Apple ID, you will likely face this problem. However, you can resolve these through a simple reboot, or it may require re-login to your Apple ID.
Why is Apple ID Settings Update Stuck on iPhone?
There can be various causes behind the update being stuck in the middle or stop responding. Some of the common causes are mentioned below:
- Unstable internet Connection.
- Outdated iOS version.
- iCloud server outage.
- Device’s Bugs.
- Change in the Apple ID credentials.
How to Troubleshoot Apple ID Settings Update Stuck on iPhone?
This issue occurs if iCloud services are under maintenance or currently outage. So, you need to go and check the Apple System Status Page. Once you open the page, look for an iCloud account, sign in, and see whether it’s red or green.
If it’s red, that means there’s a problem in the Apple Server. In that case, you just need to wait and let the Apple team fix it. If it’s green, it can confirm that the problem is within your device or account.
After narrowing down the causes, you can move forward with the fixes mentioned below.
Force Restart Your iPhone
You should first try force restarting your device since it helps get rid of most device problems if any software glitches lead to this issue. It’s a safe and effective method that works most of the time.
When you force reboot, all your current tasks will forcibly clear from the memory and begin fresh once the device restarts.
- Press and release the Volume Up.
- Press and release the Volume Down.
- Now, keep on pressing the Side button until the screen turns off. It may take a while for the screen to turn off.

- Once the screen turns, you need to keep on pressing the Side button until the Apple logo shows on your screen.
- You can release your finger once the Apple logo appears.

Switch the Network Connection
Having an unstable internet connection can also cause such a problem. You need a stable internet connection to update the Apple ID settings. So, if your internet connection is weak, it might get stuck. For that, you can switch your network connection to cellular data. Or you can simply toggle on and off the device’s Wi-Fi and your router switch to fix the internet issues.
You can also try using other apps to see how it’s performing under the same network. If other apps are struggling too, there’s a problem with your connection. If it works well for other apps, try force closing the setting app from the background and see if you can now update the Apple ID Settings.
Re-Login your Apple ID
Sometimes the error in your Apple ID can also lead to such a blunder. If you have entered the wrong Apple ID, it’s normal to encounter such an issue. Go to your profile and check all your entered information.
If all the information is correct, but you are still unable to fix the issue, you can sign out of your Apple ID and Sign-in back after a minute doing so might aid in resolving it.
- Open Settings.
- Tap on your profile.
- Scroll down and Tap on Sign out.
- Enter your Apple ID Password. Then, Tap on Turn off.
- Click on Sign Out to confirm.
- To re-login. Tap on your Profile to sign in to your iPhone.
- Enter your Apple ID and Password.
- Tap on Next, then Continue. And follow the instructions shown on your iPhone.


Disable Find My
‘Find My’ is a very useful feature if your device gets lost or you have connected to other Apple devices like AirPods, Apple Watch, etc. However, sometimes this might be the reason behind this issue. So, try disabling the Find My feature and see if it might work. If it didn’t work, ensure to enable this feature later on.
- Open Settings.
- Tap on your profile.
- Click on Find My.
- Click on Find My iPhone and toggle it Off.
- Enter your Apple ID Password and Click on Turn off.
- Once it is turned off, Go to Update Apple ID Settings.
- Tap on Continue.
- Enter your Apple ID password and Click on Sign in.
- It might go away once you do it.


Change Apple ID Password
This is another method you can consider to tackle these issues. Changing the Apple ID password can force the update settings to stop and begin once the password is updated. Therefore, try changing the Apple ID password and see if it might work for you.
- Open Settings
- Tap on your profile.
- Tap on Password and Security.
- Click on Change Password.
- Enter your iPhone Passcode.
- Now, fill in the new password and hit Change.
- Then, select Sign out other devices or Don’t Sign out as per your preference.


Update Your iPhone
Your device can overcome such an issue if you update it to the latest version. Updating the device can help eliminate many bugs that may hinder the device from functioning properly. Once you update the iPhone, the Apple ID Settings stuck update might go away. Therefore, if the latest version is available, you should consider updating it.
- Open Settings.
- Go to General.
- Click on Software Update.
- Tap on Download and Install.
- Enter the Passcode.
- Depending on your internet connection, your iPhone may take a while to complete the process.

Erase All Content and Settings
It bothers a lot when something like an update gets stuck in the middle, and you have no control over it. Your device bugs or network connection errors can also cause the update to be stuck.
If the above methods don’t work for you, you should consider resetting your device. It takes a long time to complete the reset process, but it’s worth waiting if you want to fix this problem.
Remember that resetting will clear all the device data and files. So, before you reset, ensure to make a backup of your important files. Once you have made a backup, you can easily reset the device by following the below steps.
- Open Settings.
- Go to General, and you need to scroll down to find the Transfer or Reset iPhone option. Then, Tap on it.
- Tap on Erase All Content and Settings.
- Click on Continue.
- Enter the iPhone’s Passcode and Apple ID Password if prompted.
- Once you enter the password. Click on Turn Off.
- Tap on Erase iPhone to confirm.
- Once it is confirmed, your iPhone will be reset, and it may take a while to complete the process. So, you need to have patience.


