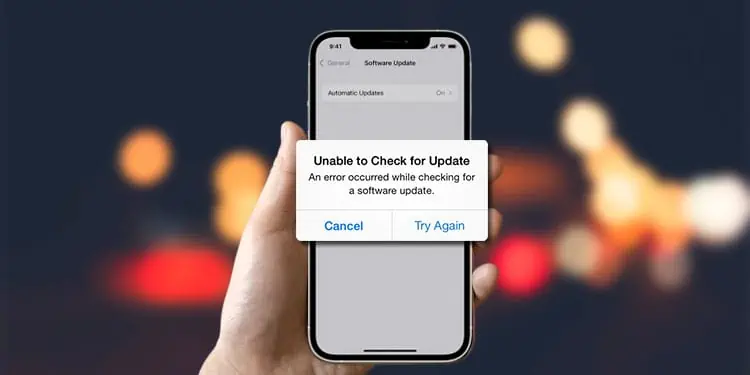
Tech News Today
  • Hardware
    • Motherboards
    • CPUs
    • Graphic Cards
    • RAM
    • SSDs
    • Computer Cases
    • Monitors
    • Peripherals
    • Power Supply Unit
    • PC Builds
    • Computer Tips
  • Software
  • Operating System
    • Windows
    • Mac
    • Linux
  • Gaming
  • Mobile
  • Console
  • More
    • Internet
    • Networking
    • Security
    • Buyer’s Guide
    • Gadgets
    • Laptops
    • Reviews
    • How To
    • News
Facebook Twitter Instagram
Tech News Today
  • Hardware
    • Motherboards
    • CPUs
    • Graphic Cards
    • RAM
    • SSDs
    • Computer Cases
    • Monitors
    • Peripherals
    • Power Supply Unit
    • PC Builds
    • Computer Tips
  • Software
  • Operating System
    • Windows
    • Mac
    • Linux
  • Gaming
  • Mobile
  • Console
  • More
    • Internet
    • Networking
    • Security
    • Buyer’s Guide
    • Gadgets
    • Laptops
    • Reviews
    • How To
    • News
Tech News Today
Home»How To»iOS»How to Fix “An Error Occurred While Checking for a Software Update”

How to Fix “An Error Occurred While Checking for a Software Update”

Jabin ManandharBy Jabin ManandharDecember 19, 2022
an-error-occurred-while-checking-for-a-software-update

The error message generally occurs while updating the iOS with a poor network connection. However, the error can arise due to various other factors.

Nevertheless, you can try a simple fix like restarting your phone to resolve your issue. If it works, great, but if it doesn’t, your problem is a little complex and requires multiple fixes.

“An Error Occurred While Checking for a Software Update” – Causes

There are various reasons why your update failed, and you are receiving the above error message. Some of the most common ones are as follows:

  • Insufficiency memory space
  • Poor network connection
  • Using a device that is incompatible with the update
  • Apple update servers not available at the moment
  • Incomplete Update

How to Fix “An Error Occurred While Checking for a Software Update”

The above error message generally pops up while trying to update the iPhone. However, it can also show up on your Apple Watch. This is because Apple Watch demands the latest version of iOS to update itself. Hence, to get rid of the error message on the Apple Watch, you first have to resolve it on the iPhone. 

Also, the Apple servers can get overcrowded when many people download the updates simultaneously. So, you can wait for some hours and try downloading the update sometime later. If you want to check which Apple services are affected specifically, you can check System Status on their site.

Check if You Are Connected to the Network 

It may sound funny, but sometimes you could forget to turn on the Wi-Fi before trying to update the device. 

On the other hand, you are connected, but the network is too slow, and it takes too long to update the device. Hence, you are getting the error message.

Therefore, you should connect to a strong network while the update process is taking place. Meanwhile, close any apps using the internet for a smoother update process.

Reset Network Settings

For an update to be successfully downloaded without an error, you should be connected to a stable internet connection. However, if you are experiencing connection issues, it can act as a roadblock to the update process. So, to resolve your network issues and the update error message,

  1. Open the Settings app.
  2. Then, navigate to General > Transfer or Reset Device.
  3. Tap on the Reset option.
  4. Now, choose the “Reset Network Settings” option.
    Reset-network-settings-iPhone
  5. The resetting process can take some time so wait until it finishes.
  6. Finally, restart your phone and see if your problem has been resolved.
Note: Many settings will get affected after this process. To learn more about it in detail, you can refer to our article on Reset Network Settings in iPhone, Android.

Free Up Memory Space

You are probably getting the update error message because there isn’t sufficient storage space on your device. Hence, you should consider freeing up some space. 

First, you can sort all the files according to their size and start deleting the larger files such as videos, audio, or other files you no longer need.

 Alternatively, if you cannot delete them, you can upload them to iCloud. Likewise, you can back up the iPhone to an external hard drive if you have one.

Delete the Previous Beta Profile

If you are still using a beta profile on your phone, you need to remove it to get the new updates. To remove the beta profile, 

  1. First of all, open the Settings app on your iPhone.
  2. Then, navigate to General > VPN & Device Management.
  3. Under the Configuration Profile, tap on iOS Beta Software Profile.
  4. Now, tap on “Remove Profile”, and a pop-up screen will appear from the bottom.
    update-error-fixed--remove-beta-profile
  5. Next, tap on Remove.
  6. Restart your device and try downloading the update again.

Update iPhone Using iTunes

If you couldn’t update your phone after getting the error message, you can use this workaround method to resolve your update issue. This involves updating your phone using iTunes. Here’s how you do it.

  1. First, you have to connect the mobile phone to a PC.
  2. Then, open iTunes on your PC and click on the little device icon next to Music.
  3. Under Summary, click on the “Check for Update” option.update-error-fixed---iphone-updated-with-itunes
  4. Lastly, click on an available update and install it by following the on-screen instructions.

Sync the Date and Time Settings

Some iPhone updates are rolled out for a specific time period. So, if your date and time settings are set incorrectly, then you could face this type of issue. To set the correct date and time,

  1. Open the Settings app.
  2. Navigate to General > Date & Time.
  3. Click to enable the Set Automatically button.
    iphone-update-error-fixed---date-and-time-set-correctly

Force Restart the Device

Suppose you are stuck with the error message and unable to restart your phone. In this case, you can force restart the device with the following steps.

  1. Press one of the volume buttons and hold it.
  2. Also, press the Power button at the same time.
  3. Release the buttons when you see the Apple logo on the screen.
Note: The steps mentioned above can vary according to the model of your iPhone.

Contact Apple Support

If none of the above methods worked for you, you still have the option to contact Apple Support. You can reach out to them on their official website and tell them about your issue. Hopefully, they will respond to you with a solution to fix your particular issue.

fix
Jabin Manandhar

Jabin is an IT Graduate. Working for almost a year as a tech writer, Jabin has covered a gamut of articles, ranging from Windows troubleshooting, Android, iOS to Internet-related issues. Besides them, he is experienced in Microsoft Office programs and has written numerous articles on Outlook, Excel, and Word. Most of his work includes resolving various Outlook issues and general software fixes. You can contact him at jabin@technewstoday.com

Related Posts

how to change background on safari

How to Change Background on Safari

February 3, 2023
how-to-clear-cache-in-safari

How to Clear Cache on Safari

January 20, 2023
iphone-not-charging

Why is my iPhone Not Charging? How to Fix it

January 22, 2023
how-to-eject-water-drop-on-apple-watch

How to Eject Water Drop on Apple Watch

January 5, 2023
how to cancel subscriptions on iphone

How to Cancel Subscriptions on iPhone

January 4, 2023
how to see deleted messages on iphone

How to See Deleted Messages on iPhone

January 3, 2023
Add A Comment

Leave A Reply Cancel Reply

Latest Posts
Best-1200W-PSU

8 Best 1200W PSUs for Extreme PC Builds in 2023

May 16, 2023
Best-1000W-PSU

10 Best 1000W PSUs in 2023

May 16, 2023
best-700w-psu

10 Best 700W PSUs for Gaming in 2023

May 14, 2023
You may also like
antimalware service executable high memory

Fix: Antimalware Service Executable High Memory

May 18, 2023
printer-printing-pink

Why is My Printer Printing Pink? 6 Ways to Fix It

May 18, 2023
how to clean usb c port

How to Clean USB-C Port Safely

May 17, 2023
Recommended
Cookie Clicker Garden Guide

Cookie Clicker Garden Guide to Unlocking Every Seed

September 26, 2021
monitor no signal

Computer Turns On But Monitor Says No Signal (9 Ways To Fix)

November 10, 2022
Facebook Twitter Pinterest
  • Home
  • About Us
  • Our Team
  • Editorial Guidelines
  • Privacy Policy
  • Affiliate Disclosure
© 2023 TechNewsToday, editor@technewstoday.com | Tech Central Pvt. Ltd.

Type above and press Enter to search. Press Esc to cancel.