
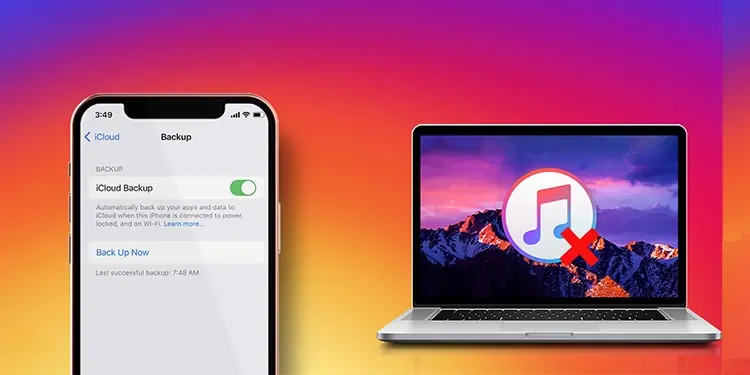
Apple is, unfortunately, discontinuing iTunes for Mac users after 18 years. The software offers extensive features including a mobile device management utility. With iTunes being one of the favorite backup services, many users are puzzled about how to connect their iPhone to their computer for backup.
If you’re stuck with a similar question, you’re in luck! In this article, we will teach you four ways to back your iPhone to your computer without iTunes.
Ways to Backup iPhone to Computer Without Using iTunes
Apart from iTunes, you can backup your iPhone to iCloud, Google Drive, through Finder, and Third-party applications. The backup process is direct for Finder, while the backup process to your computer is a bit long for the rest.
Using Finder
Apple introduced Finder as the replacement for iTunes. The creators made the process of backup simpler through Finder. Unlike the backup process on iTunes, through Finder, the steps are basic and easier to understand. Follow these instructions to back your iPhone up using Finder:
Follow these instructions to back your iPhone up using Finder:
- Use a USB cable to connect your iPhone to your Mac.
- From your menu bar, select Finder.
- Under Locations, locate your iPhone.
- Locate the General tab and select it.
- Select Backup all data from iPhone to this Mac.
- Click Backup Now.

- You can check the progress under the progress bar.

On iCloud
iCloud is Apple’s exclusive cloud-based storage space. You can connect all your devices to the same iCloud storage with the same Apple ID. It holds all types of file data such as your photos, music, documents, and so on.
You can also use iCloud to backup your data from your iPhone. After that, you can import data from your iCloud to your Mac. Follow this process to back your data up from iCloud:
- Go to your Settings on your iPhone.
- Select your Apple ID.
- Go to iCloud.
- Locate iCloud Backup and select it.
- On the new window, toggle on iCloud Backup, then go back to the previous Window.
- Toggle on the applications you want iCloud to backup.
- On your Mac, select Finder from the menu bar.
- From the sidebar, select iCloud Drive.
- Select the folders you want on your Mac and drag and drop them to a new location.


Using Google Drive
Google Drive is a cloud-based file storage and data synchronization service developed by Google. The data is synchronized between all devices that share the same Google account.
Like iCloud, you can transfer data from your iPhone to Google Drive and then import the data from your computer. Follow these instructions to backup your iPhone to your computer using Google Drive:
- Open the application for Google Drive.
- Select the hamburger menu on the left.
- Hop on to Settings.
- Go to Backup.
- For Contacts, Calendar Events, and Photos & videos, select and toggle on each.
- Select Start Backup.
- On your computer, open your browser. And navigate to www.drive.google.com
- Select the folders you want to download and select the shortcuts Shift + D.


Third-party Application
If you’re comfortable using third-party applications to back your storage up, you can use applications. Since it’s your photos and data we are talking about, make sure the app you are selecting are from a trusted source.
How to Restore iPhone Backup?
You can swiftly recover the data you’ve backed up on your iCloud, Mac/PC, Android, and iPhone. If you’ve already set up your iPhone, you must erase all of its contents to restore the backup from iCloud.
Here are the steps you need to follow to reset your iPhone
- Tap on Settings
- Navigate to General > Transfer or Reset iPhone
- Tap on Erase All Content and Settings.
To perform a backup from iCloud, you must have a good internet connection. After fulfilling the requirements, follow these instructions to recover your backed-up data to your iPhone:
- Press and hold the power key of your iPhone to turn it on.
- Follow along with the instructions until you land on the Apps & Data page.
From the list of options, select one of these:
Restore from iCloud Backup
If you have created an iCloud backup to transfer to your iPhone, select Restore from iCloud Backup. After selecting this option follow these instructions.
- To log in to iCloud, enter the credentials for your Apple ID.
- Choose a backup to recover.
- To restore your purchases, re-enter your Apple ID. You can skip this step for later.
- Wait for the backup to complete.
Restore from Mac or PC
You can transfer data from your Mac or your PC to your new iPhone. If you have backed up the data you want to recover on your Mac or PC, select Restore from Mac or PC. Follow these instructions after selecting the option:
On Mac
If your device is a Mac, follow these steps to recover your backup on iPhone:
- Connect your iPhone to your Mac with a USB cable.
- On your Mac, locate and select Finder on your menu bar.
- Under Locations on your left, select your iPhone.
- Under Backups, locate and select Restore Backup.
- Choose the relevant backup and wait for the backup to complete.

On PC
Follow these instructions to recover your Backup data from your PC to your iPhone:
- Connect your devices using a USB cable.
- Open the iTunes application on your PC.
- On the iTunes window, select the iPhone icon on the top-left corner of your screen.
- Hop on to Summary and select Restore Backup.

Transfer Directly from iPhone
If you wish to transfer all data from your previous iPhone and not a backup, you can select the option Transfer Directly from iPhone. Follow these instructions to load your data from another iPhone:
- Turn your device on and bring them closer to each other. Make sure the Bluetooth is turned on.
- On your older iPhone, you will receive a message offering to Set up New iPhone. Select Unlock to Continue and unlock your older iPhone.
- After you see an animation on your newer iPhone, place your new iPhone up to the camera and scan the animation.
- On your newer iPhone, enter the passcode of your other iPhone. This step will move information such as your Wi-Fi to your new iPhone. Set up your FaceID or skip it for later.
- On the Transfer Your Data page, select Transfer from iPhone.
- Wait for the transfer to complete.
Move Data from Android
If you have the data you want on your iPhone stored in an Android, select the Move Data from Android option. Before you begin the data transfer, plug in both of your devices to a power source and connect to a strong WiFi connection. To move your information from an android to an iPhone, follow these instructions:
- On your Android, install the Move to iOS application from Play Store and open it.
- You will receive a six or ten-digit code on your iPhone.
- Enter the code on your Move to iOS app on your Android.
- The application will ask you to connect to it’s temporary Wi-Fi network created by your iOS device.
- Select the content you want to transfer to your iPhone on your Android. Tap Continue.
- Wait for the data transfer to complete on both of your devices.

