
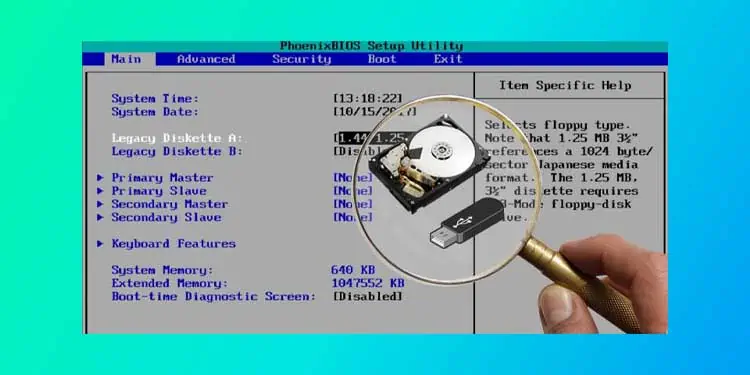
The BIOS keeps a prioritized list of disk drives attached to your system. If your boot drive/disk drive is not listed in this priority list, Windows will fail to recognize this drive.
Also, your computer needs a bootable drive to access the Operating System. It boots up using the first drive that’s identified as a bootable drive.
So, if youre installing a new disk drive (Harddrive, SSD), chances are your system will fail to start up and return back a black screen. You might even encounter a Boot Device Not Found error message on the screen.
If your boot drive is not showing up in BIOS, this guide is prepared just for you. The causes and fixes below shall help you understand and ultimately fix your issue. So, let’s get straight to the point!
Why Is My Boot Driver Not Showing Up in BIOS?
- There are plenty of factors that contribute to your boot device failing to show up on the BIOS. From a damaged boot record to physical malfunctions, here are all the possible causes for the boot driver not showing up in BIOS:
- The disk drive is not initialized
- Damaged MBR (Master Boot Record)
- Unsuitable boot sequence on BIOS
- Physical connection issues
- Bad sectors on your hard disk
- USB is not enabled in the BIOS
- Damaged disk drive
How to Fix the Boot Drive Not Showing Up in BIOS?
So, now that you have a general idea regarding the causes, we will start to work on the fixes. First of all, restart your computer and check if it resolved any issue. If it did, then that’s that.
However, if the issue still persists, follow the possible fixes that are listed below. If one doesn’t work for you, make sure to try other methods as well.
Restore BIOS to Default Settings
If your system tries to boot from an unbootable device, your OS won’t startup. Hence, to fix this issue, you have to revert the BIOS back to its default settings.
Doing so will set your system to boot from the correct disk and the OS could efficiently startup. Follow the process below to restore the BIOS settings:
- Restart your computer.
- Enter the BIOS and look for Setup Defaults.
- Click Yes when prompted.
- Press F10 to save your changes.
- Restart your computer.
Verify the Integrity of Connectors
A common cause for your boot drive not showing up in BIOS is a faulty cable and damaged USB ports. Additionally, there might be a physical defect with your motherboard connector pins as well. So, verify that there are no hardware malfunctions on your disk drive.
You can connect your device to a different system to check if it works properly or not. If it doesn’t, there might be an issue with your device altogether.
Furthermore, check if your disk drive is correctly connected to your system. Generally, two wires are used to connect a drive to your system. The first cable connects to your motherboard and the second connects to the power supply unit. So, make sure that these are firmly connected in the right order.
Update the Storage Controllers
The storage controller driver controls the storage arrays of your computer. Hence, updating it might help you with your ongoing disk drive issue. Here’s how to do so:
- Restart your PC.
- Enter the BIOS settings as mentioned above.
- Once you’re in the BIOS, go to Advanced.
- Navigate towards Onboard Devices.
Some computers have this option as Integrated Peripherals. - Change the SATA Configuration to IDE.
- Press F10 to save your changes.
- Reboot your PC
Rebuild the Damaged MBR and BCD
The MBR (Master Boot Record) is a part of your disk drive that works on the physical layer of your computer and stores information regarding the location of the operating system on your drive.
So, Windows failing to start up and the boot drive not showing up in BIOS could be a result of your damaged MBR.
Also, your system won’t be able to start up properly if the BCD (Boot Configuration Data) is damaged as well. The BCD operates on the logical layer of your computer and contains sensitive data regarding your OS and the boot parameters.
To fix the issue,
- Boot into your system using an external bootable media.
- On the prompt screen, select Repair your Computer.
- In the Windows Recovery Environment, select Troubleshoot > Advanced options. Then, select Command Prompt.
- Execute the following commands:
bootrec /FixMBRbootrec /FixBootbootrec /ScanOsbootrec /RebuildBcd - Restart your computer to check if the system boots-up normally.
If you still are facing the problem, you want to execute a more advanced process of fixing the MBR and BCD. Do let us know if the fix provided in the links does any wonder on your system.
Enable USB Device in BIOS
Another reason for your boot drive not showing up on BIOS might be because of the disabled USB ports. Your motherboard can automatically disable unused USB ports from the BIOS.
So, if that’s the case, you can re-enable these ports from the BIOS. Here are the steps to do so:
- Restart your computer.
- Enter the BIOS by tapping the correct button configuration depending on your motherboard’s manufacturer.
- Once you’re in the BIOS, go to Advanced.
- Navigate towards Onboard Devices.
Some computers have this option as Integrated Peripherals. - Go to USB Controller.
- Change this option to Enabled by using the appropriate keys.
- Press F10 to save your changes.
- Reboot your PC.

Enable USB Boot Support
Enabling USB boot support on your BIOS allows your system to startup using external disk devices such as a USB or an SD card. Here are the steps to enable USB boot support:
- Restart your computer.
- Enter the BIOS settings.
- Navigate to the Boot tab.
Here, you’ll see all your system devices listed in terms of boot priority. So, you’ll have to move USB to the top of this list using the appropriate keys.
This shall increase its boot sequence priority and your computer will be now able to start up using a USB device.
Note that if you can’t see USB on this page, it might be listed under the Hard Drive section. So, in this case, move the USB to the top of the Hard Drive section. Again, move Hard Drive to the top of the boot priority list.
Initialize Your Disk Drive
When you add a new disk drive to your system, it usually doesn’t show up in the BIOS right from the start. So, you should initialize this drive first. Initializing a disk drive formats the drive and makes it appear in the File Explorer.
Hence it will then appear in the BIOS as well. The steps below show how you can initialize your new disk.
- Press Windows key + R to open the run command box.
- Type
diskmgmt.mscand hit Enter to open disk management.
- Right-click on the disk that’s Not Initialized and click Online.
- Right-click this disk again and select Initialize.
- Select the disk partition style as per your preference.
- Right-click on the unallocated space and select New Simple Volume.
- Click Next.
- Select the size of the volume to allocate and hit Next.
- Set a drive letter and hit Next.
- Choose a file system you want to use.
- Finally, click Next and then, Finish.

Use Error Check Utility
Error check utility is used to fix bad sectors in your disk drive. A bad sector is a part of a disk drive that is damaged beyond repair. When a sector is damaged, your system fails to read that part, and hence, all information within that sector is lost.
So, your boot drive might not be showing up in the BIOS because of bad sectors within it and it can usually be fixed by using the error check utility.
Error check utility is built into Windows OS and it can be performed by following the steps shown below.
- Open This PC.
- Right-click your disk drive and select Properties.
- Go to the Tools tab.
- Click on Check that’s under Error-checking.
- When prompted, select Automatically Fix File System Errors > Scan For and Attempt Recovery of Bad Sectors.
- Finally, click Start.

Replace Your Disk Drive
If nothing works, unfortunately, your disk drive might be physically damaged. You can try and take it to a repair shop, but if it’s damaged beyond repair, the only thing you can do is to replace it completely.
Replace your disk drive and install Windows on it to finally fix your issue the hard way.
Perform a Hard Reset of Your PC
A hard reset of your system erases all the data, including your profiles and settings. It’s like reverting your system back to the state it was right off the box.
So, a hard reset might re-establish the connection between your disk drive and BIOS. The steps below show how you can perform a hard reset of your PC.
- Shut down your PC.
- Pull the power cable from the outlet.
- Now, hold the power button for about 20 seconds to dissipate the remaining electrical charge from the system.
- Plug in and turn on your system again.
- Select Start Windows normally when prompted.