
Every laptop has at least one fan that keeps the internal components cool and prevents them from overheating. Generally, this cooling device is automatically turned on when the CPU utilization is high.
Well, it’s actually good when the fan is constantly working, as it’s just regulating the system temperature. However, if it’s running continuously over a long time, this clearly indicates that the laptop is overheating and the internal components might be prone to failure.
Usually, this can happen when the airflow is blocked or due to some physical damage. As such, you may notice that the fans start making loud or buzzing noises. If you’re experiencing a similar issue, this article will guide you with simple solutions that should help you fix it.
Why is My Laptop Fan Always on?
If you regularly play high-end games or use resource-hungry apps, you’ve likely noticed that your laptop fan starts running at full speed. Well, this simply indicates that the CPU or GPU is consuming more power to load the necessary settings, producing more heat than usual.
Moreover, some users have faced a problem where their fans keep working from the startup, which really seems to be a headache. Likewise, you may also experience a situation where the fan remains on even though you’re not using any program.
- Laptop is infected with malware or bloatware
- Use of several resource-hungry apps
- Overclocked CPU or GPU
- Outdated drivers or operating system
- Lack of ventilation
- Enabled Active Cooling power setting
- Corrupted or outdated UEFI/BIOS
- Clogged vents, fans, or heatsink
- Poorly applied thermal paste
- Faulty fan or other hardware components
11 Ways to Fix Laptop Fan That’s Always on
Fixing a troublesome fan can be easy or tricky, depending on the situation. Although some users prefer turning it off, we do not recommend doing it. This is because if a fan isn’t working, the overheated components have a risk of being damaged.
Well, your laptop fan is on all the time, probably because you’ve installed too many resource-hungry applications. Thus, we suggest removing these unutilized programs.
Likewise, the CPU utilization can reach 10% or even higher when your operating system is under an update. This might cause the fan to run faster, and if the update is hung up, the fans remain on even if you’re not running any program.
Thus, you can manually update your system to fix this issue. While you’re at it, we also suggest checking and updating any corrupted device drivers (especially the GPU drivers), as they are also the prime reasons for an overheated laptop.
Until now, you’ve only explored the common solutions for fixing a troublesome laptop fan. Now, without further ado, let’s jump right into the effective techniques that should activate the fans only when necessary.
Cool Down Your Laptop
Whenever you hear your fan louder than usual, take your hand near the vents, and you’ll likely notice that the airflow is hot. Thus, the ideal solution to prevent this is to cool down your laptop.
- Firstly, we recommend staying in a cool environment when using your computer (an air-conditioned room would be perfect).
- Secondly, you can also use small fans that are meant to cool down your laptop.
- Generally, most laptops have vents on the back side, and when we place them on a non-elevated surface, the airflow likely gets blocked. Hence, it’s best to elevate it slightly or use a laptop stand.
- Lastly, you can also use cooling pads that provide a sturdier work surface. Well, these do not just regulate the device’s temperature but also help improve ergonomics and add aesthetics to your setup.
Scan For Bloatware or Malware
Moving on, if your PC is filled with bloatware or malware, it’s best to remove them using a reliable antivirus program. Fortunately, Windows users can use Microsoft Defender Antivirus, which lets you run a full scan of your computer:
- Press the start menu and search for Windows Security.
- Launch to utility and move to the Virus & threat protection section.

- Under Current Threats, click on Scan Options.
- Now, choose Full Scan and press the Scan Now button.
- Wait for a few minutes until it scans and removes possible malware from your PC.


Limit Apps and Background Processes
Another way to ensure that the fan doesn’t remain on all the time is by limiting the use of heavy applications and disabling unnecessary background processes.
Usually, any app’s CPU usage fluctuates over time. Well, it’s normal if the utilization is between 1 to 10 percent. But if this exceeds, your system will likely heat up, causing the fan speed to go higher.
Hence, we recommend disabling any apps or processes that might be running in the background without your knowledge. Kindly follow the below guide on how to do just that:
- Use the Ctrl + Shift + Esc hotkey to launch the Windows Task Manager.
- In the Processes tab, you’ll likely find three sections – Apps, Background Processes, and Windows processes. Here, check for those programs having the highest CPU usage.
- Right-click on each chosen item and select End task.

Tweak Power Settings
Usually, most laptop users prefer active cooling, which increases the fan speed for cooling down the system. Thus, if the internal components are overheating, the fans remain on all the time.
On the other hand, tweaking the power setting to passive cooling will instead slow down the processor before taking help from the fans. While doing so, you may notice that your computer becomes laggy.
Thus, if you’re fine with a slow computer and want to adopt the latter setting, here’s what you need to do on Windows 11:
- First of all, use the Instant Search feature in the Windows taskbar to launch Registry Editor.
- Here, move to the below location to enable the System Cooling Policy, which is likely absent in most Windows 11-based laptops:
HKEY_LOCAL_MACHINE\SYSTEM\CurrentControlSet\Control\Power\PowerSettings\54533251-82be-4824-96c1-47b60b740d00\94D3A615-A899-4AC5-AE2B-E4D8F634367F - Next, move to the right pane and double-click on Attributes.
- Then, edit the value to 2 and press Ok.
- Now, move to the Control Panel from the Start Menu and navigate to System and Security.
- Next, choose Power Options.
- Under ‘Plans shown on the battery meter’, select Change plan settings.
- Then, click on Change advanced power settings.
- Once the Power Options window pops up, expand the Processor power management drop-down.
- Here, expand System Cooling Policy, and set both the On Battery and Plugged In settings to Passive.
- Finally, tap the Ok button, and this should fix your problem.


Moving on, some popular manufacturers, like DELL and HP, also recommend adjusting the power mode and using the Battery saver to decrease power consumption. Basically, this will optimize the temperature of your laptop and thus prevent the fan from running continuously:
- Firstly, unplug the laptop charger.
- Next, click on the battery icon from the bottom-right corner of the Windows taskbar.
- Then, tap the Battery Saver icon to enable it.
- Now, press Windows + I, which should open Settings.
- Go to System > Power & battery.
- Under Power, expand the Power mode drop-down.
- Finally, select Best power efficiency or the Recommended option, whichever is available.


Disable High Impact Startup Apps
Although fans immediately turn on along with your laptop, it should eventually stop spinning once the system is properly up and running. However, there can be times when some startup programs or services utilize the maximum CPU and keep running in the background.
Hence, if the fans remain on and make loud noises even when your laptop is idle, these startup applications might be the culprit. So, the best way to fix this is by disabling those programs that run on Windows startup:
- Launch Windows Settings and move to Apps > Startup.
- From the list of applications, find the ones labeled ‘High Impact’.
- Then, toggle them off and restart your laptop to see if the issue persists.


Additional Tip: You can try performing a clean boot on your laptop to see if the startup programs or services are actually causing this issue. You can skip this section if the problem still exists, as the startup or background apps aren’t the culprit.
Enable Silent Mode
Every laptop manufacturer has dedicated software where users can control their system settings, power management, network, display, etc. For example, you can use HP Command Center’s Thermal Profile to enable Quiet Mode, which will turn off the fan but will reduce CPU performance.
Likewise, Samsung laptops have a dedicated setting application that enables a similar setting. Here’s a quick demonstration of how to do just that:
- Navigate to the Instant Search menu to search and launch Samsung Settings.
- From the left pane, choose System.
- Now, move to the right and find Silent mode.
- Simply toggle it on. Once that’s done, the fan speed will be significantly reduced, and your system will start running in the Power Saving mode.

Note: The setting should be similar on other laptops as well. You can perform a Google search to find the appropriate software for your brand and proceed with the above steps.
Reset Your BIOS
Firstly, we recommend resetting the BIOS to revert your system back to its original configuration. Hence, if the fan is running continuously due to some misconfigured BIOS settings, this technique should help.
If you have an outdated BIOS, there might be bugs tampering with your hardware components. Thus, we recommend updating your UEFI/BIOS settings to resolve such issues that should manage the fans and CPU power loads much better.
However, updating BIOS can be risky, as a failure in doing so might make your motherboard malfunction. Hence, you should only do this if absolutely required.
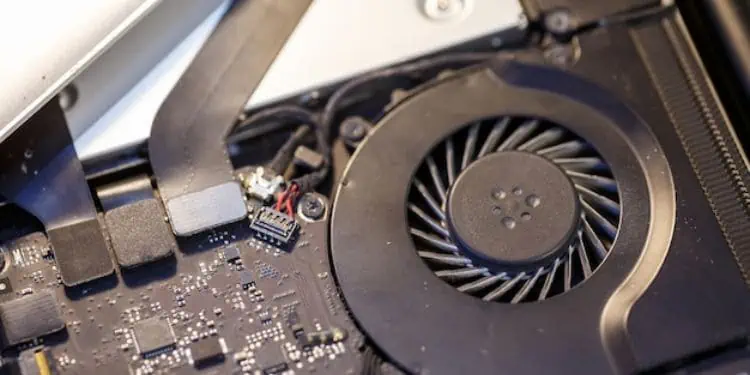
Clean Fans and Vents
If the fans and vents are clogged with dust and dirt, they will likely block the airflow, eventually overheating the laptop. Hence, your fan starts making noises and will remain on trying to cool the device.
Thus, we highly recommend cleaning your laptop fan and vents once in a while to prevent any problems:
- Firstly, shut down the computer and wait until it cools down.
- Now, remove the external battery latch if present.
- Next, carefully unscrew the laptop’s back panel and open the casing.
- Then, use a can of compressed air to blow off any dirt and dust in the fans.
- Repeat the process if you have multiple fans.
- Now, use the compressed air to blow off the dust particles from the vents as well.
- Use a brush to clean the corners and inner compartments of both the fans and vents.
- Finally, close the laptop’s back panel and use a screwdriver to tighten the screws.


Undervolt Both GPU and CPU
As mentioned earlier, an increased GPU and CPU temperature is why your fan is always on. Hence, undervolting is an excellent technique to reduce the overheating problem and make the fan work only when required.
Basically, undervolting means reducing the voltage supply at the constant clock speed, ensuring no effect on the component’s performance. However, while doing so, do not undervolt your CPU and GPU too much, as this can cause frequent system crashes and trigger BSOD errors.
- Undervolt GPU safely
- Undervolt CPU to reduce its temperature
Reapply Thermal Paste
Thermal paste is another factor that can overheat your laptop. Hence, if it has dried out, your laptop fan can always remain on.
The thermal paste can last three to four years or even more, depending on the heat produced. So, if you have a relatively older laptop, it might be time to reapply the thermal paste:
- Shut down your PC and also remove the laptop battery.
- Next, use a screwdriver to unscrew the screws and remove the base plate.
- Then, unscrew the screws of the heatsink that’s holding it in place.
- Carefully remove the heatsink from the laptop’s motherboard.
- Now, use a cotton swab dipped in 70% isopropyl alcohol to clean the residue of the older thermal paste.
- Next, reapply a small amount of the thermal paste and spread it across the chip.
- Then, screw the heatsink back in its place and also cover the laptop’s back panel.
- Now, turn on the system, and your problem should be solved.


Replace Fan or Upgrade Other Components
The laptop fan is probably damaged if none of the aforementioned fixes helped you. Moreover, there could be issues with other hardware components as well.
Thus, the final option is to replace the cooling fan and heatsink. However, we suggest taking your laptop to the retail store to ensure you get a compatible one.
But if your fans are alright and the issues lie in other hardware components, you might want to upgrade them. In fact, you can follow our two articles that should help you upgrade the laptop’s CPU and graphics card.