When the shutdown function is called, Windows starts closing all the applications and unloading open handles from memory. Then, it activates the ACPI drivers to cut off power from the battery. But various causes can hinder this process from running smoothly.
Faulty peripheral devices attached to the laptop can freeze Windows and make it unresponsive to the shutdown function.
But other than that, some specific causes of the problem have been summarized below:
- Enabled Fast Startup
- Misconfigured Power Plans
- Windows Update Issues
- Applications Not Closing
- Corrupted chipset drivers or ACPI drivers
- Issues with Intel Management Engine
From unresponsive shutdown function to tedious shutdown loop scenarios, this article is just prepared for you to solve the ‘Laptop won’t shutdown’ issue.
How to Fix Laptop Won’t Shutdown Error?
Before moving on, try detaching unnecessary peripherals. If the shutdown button isn’t working, try shutdown.exe /s in an elevated command prompt. Or you can try to force the shutdown of your laptop by pressing the power button for more than 10 seconds.
If the problem persists, follow along with the solutions mentioned below:
Power Cycle
A power cycle can help you reset the I/O devices and the laptop’s battery. And it is also expected to fix laptops stuck within ‘shutdown is in the process loops’. You can follow the steps below to perform a power cycle:
- Detach the power source cable from your laptop.
- Press the power button to close it. If it doesn’t, press and hold the power button for more than 3 seconds to force shutdown.
- Now, take out the battery.
- Then, press and hold the power button for more than 20 seconds. It will drain all the charges from components and will help them refresh their configurations.
- Put the battery back and connect the charger to your laptop.
- Boot it up and check if it resolves the issue.
Change Power Plans
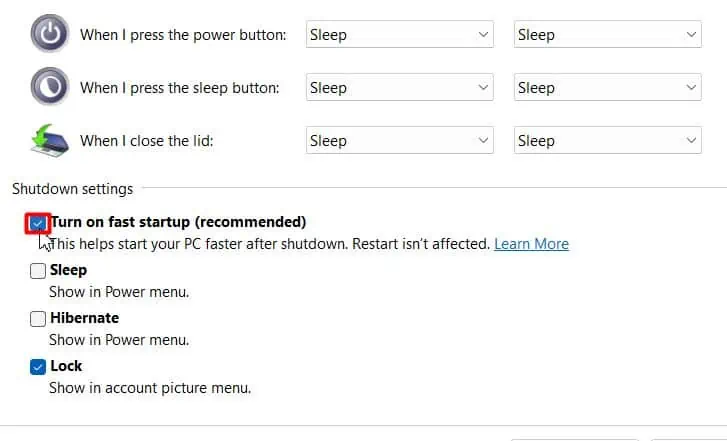
In Windows, the control panel has options to re-assign the power button’s function. If the button is assigned to some other functions like sleep, it won’t help you shut down your laptop. Or even if it’s assigned to shut down, some other features like hibernate and fast startup might not let your laptop completely shut down.
It is because a fast startup, along with hibernation, won’t let a computer properly stop all the kernel functions. Although both come enabled with Windows by default, sometimes they can show noticeable impacts. So, you can disable them with the following steps and resolve the issue:
- Press Windows + R to open Run.
- Type
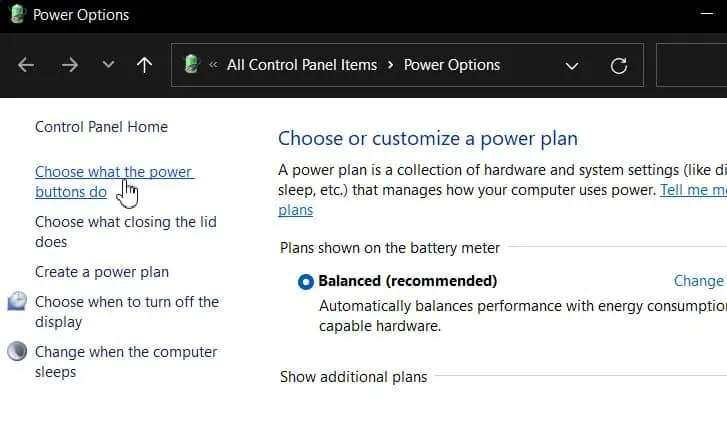
powercfg.cpland hit Enter to open Power Options (Control Panel). - Go to Choose what power buttons do

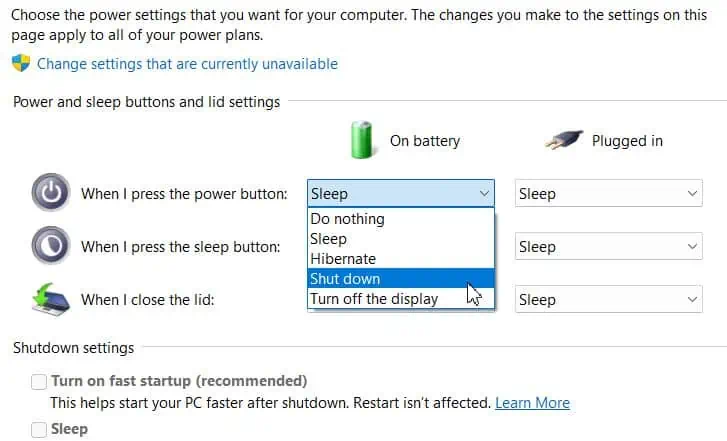
- Expand the When I press power button: dropdown menus.
- Choose Shut down if they aren’t already to assign the shutdown function to your Power button.

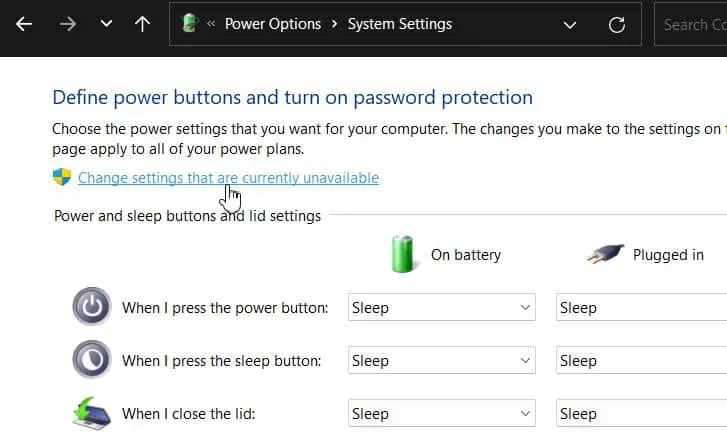
- Click on Change settings that are currently unavailable to other settings.

- Untick the Turn on fast startup option to disable fast startup.

- Now open Run, type
cmdfor Command Prompt, and hit Ctrl + Shift + Enter. - Click on the Yes button to give it admin privileges.
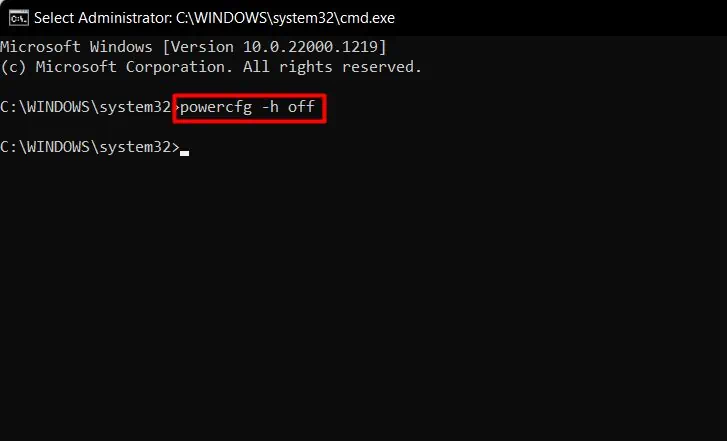
- Run the command
powercfg -h offto turn off hibernation mode.
Reset Power Plans
Many other power settings of Windows can alter how the computer behaves on shutting-down process. Narrowing down specifically would not be feasible if you aren’t aware of the changes.
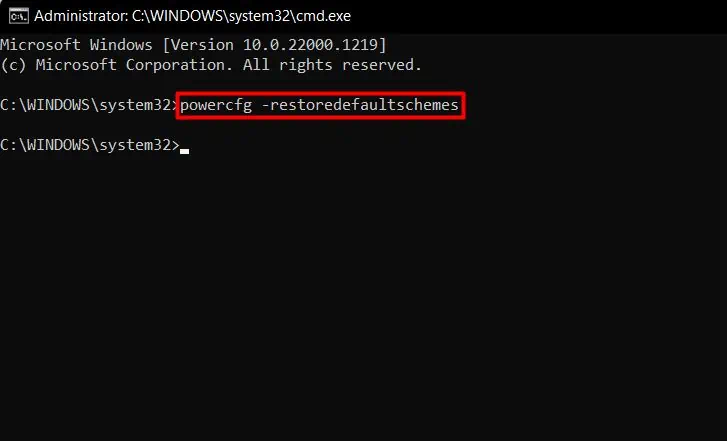
So, just to make sure no other settings are causing the issue, you can try to restore the default power schemes with the command. The steps to follow would include the following:
- Open Command Prompt in elevated mode.
- Execute:
powercfg -restoredefaultschemes
Troubleshoot Windows Update
Many of us have definitely experienced delayed shutdowns because of system updates. In ideal situations, it would take some time to update Windows and restart afterwards.
But if Windows updates run into some trouble, the system gets stuck into restart loops. To fix this, you can run the Windows update troubleshooter:
- Press and hold the power button to force shut down the laptop.
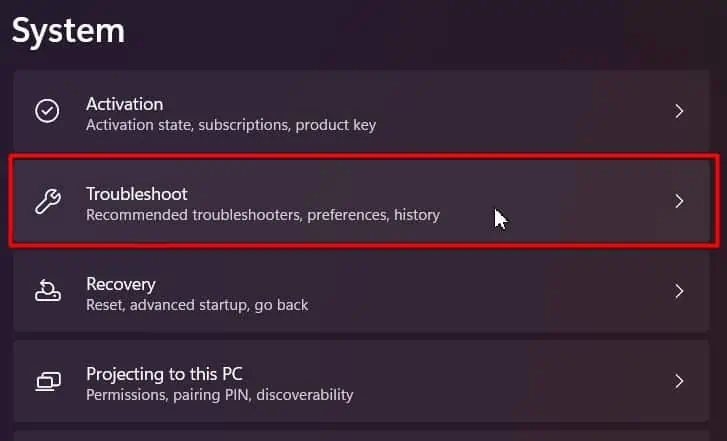
- Boot it up and press Windows + I to open Settings once it starts.
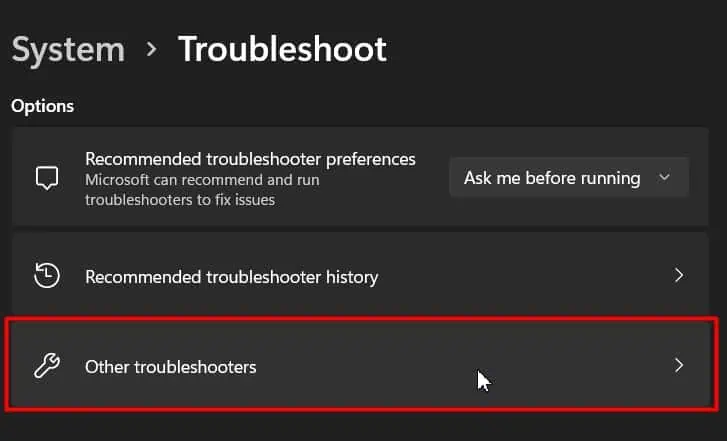
- Go to Troubleshoot within System.

- Click on Other Troubleshooters.

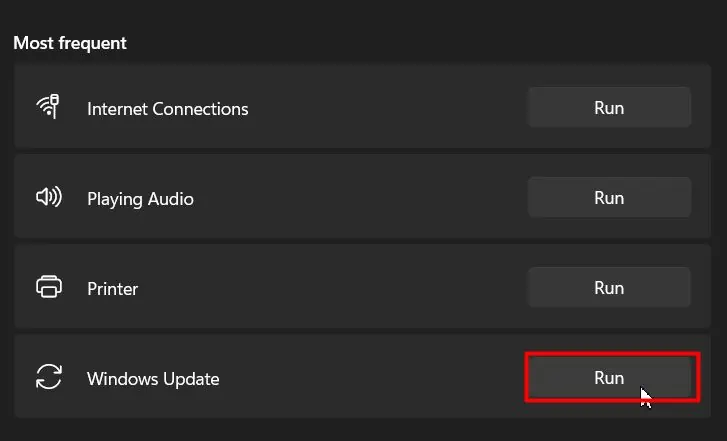
- Hit the Run button of Windows update.

- Follow along with the onscreen steps to complete.
If that doesn’t fix your problem, you should reset the Windows update components by deleting the downloaded update files and instructions, as well as the state of the update. To do so, follow the steps:
- Open an elevated Command Prompt.
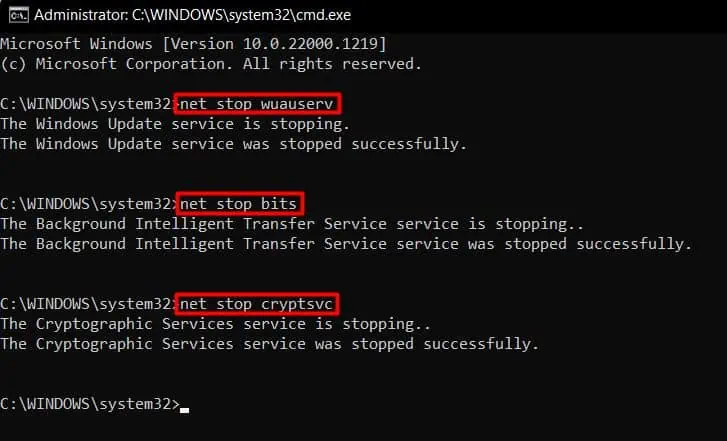
- Run the listed commands:
net stop wuauservto stop Windows Update Servicenet stop bitsto stop Background Intelligent Transfer Servicenet stop cryptsvcto stop Cryptographic Services
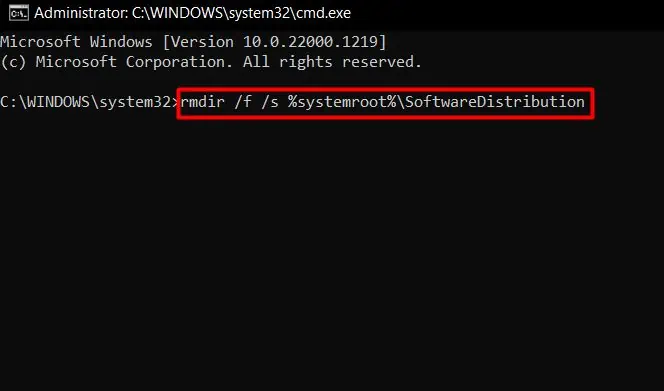
- Then, run the following commands to delete the folders:
rmdir /f /s %systemroot%\SoftwareDistribution
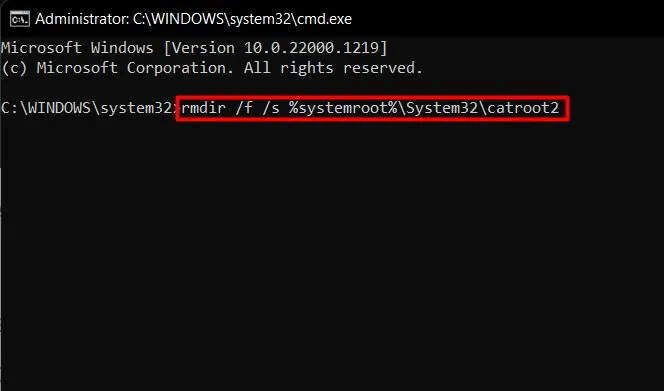
rmdir /f /s %systemroot%\System32\catroot2
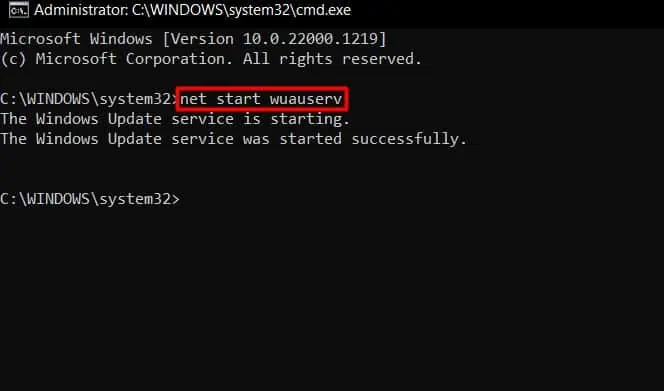
- Then, you can use
net start wuauservcommand to restart the Windows update service and commands accordingly for other services
Your laptop should be able to shut down without a problem.
Turn Off Problematic Applications
Before shutting down, Windows opts to stop every open process on the dynamic memory. So, it asks to close the open app/service or confirms and closes them itself. But, if any application/service doesn’t unload memory while closing, the OS won’t shut down.
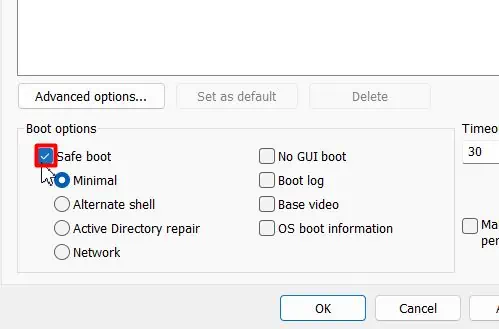
To figure out if any third-party app or service is causing issues, you can enter safe mode. The app/service hindering Windows from shutting down in normal mode won’t cause problems in safe mode because it won’t run at all. To Enter safe mode, you can follow the steps below:
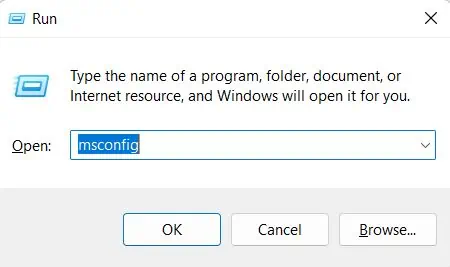
- Open Run, type
msconfig, and hit Enter to open System Configuration.
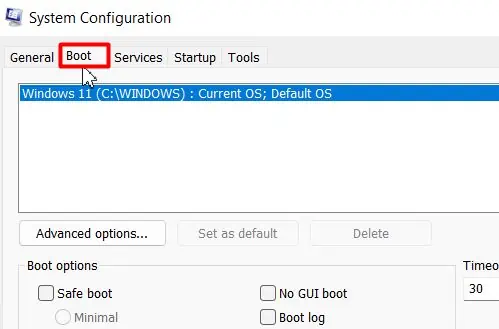
- Head towards the Boot tab.

- Tick the Safe boot checkbox.

- Hit Apply, and then OK.
- Click on the Restart button on the prompt.
You will Enter the safe mode once the laptop restarts. But, if the laptop doesn’t restart, force restart it three times consecutively with the power button (press and hold). It will load the Windows Advanced startup options.
- Then, go to Troubleshoot > Advanced options > Startup Settings > Restart. After it restarts, press 4/F4 to enter safe mode.
- Check if it shuts down in Safe boot mode or not. If it does flawlessly, some app/service might be causing problems in normal boot mode, as already mentioned.
- Now, to figure out which app or service is causing the issue, you will have to go back to the normal boot mode. To do so, follow the same steps as above but untick the Safe boot checkbox and restart the laptop.
- Now, manually close the open apps/services and try to shut down the laptop. The steps for which have been listed below:
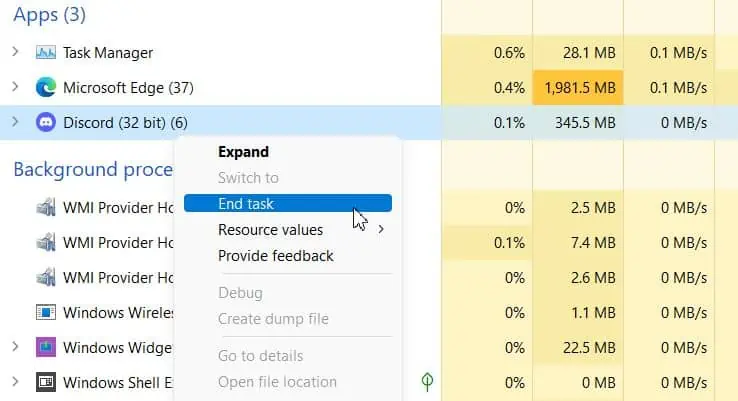
- Press Ctrl + Shift + Esc to open Task Manager.
- Right-click on the open app and choose End task.

- Repeat with all the open apps and processes you don’t recognize.
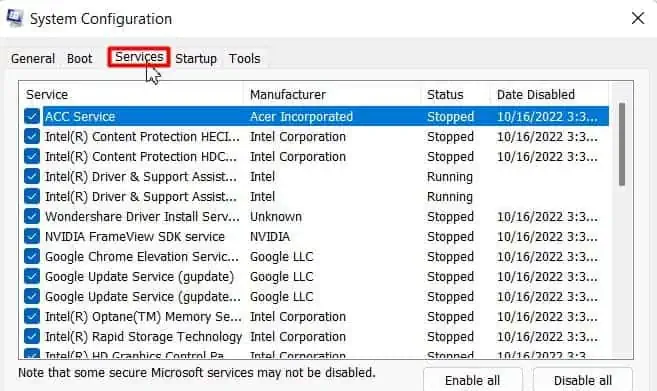
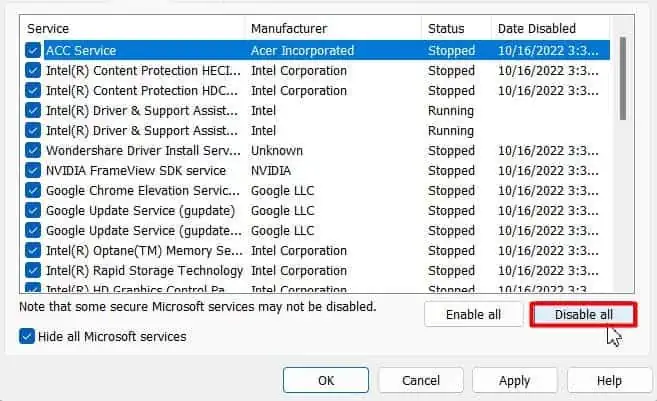
- Now, to disable the processes, Open Run, type
msconfigand hit Enter. - Go to the Services tab.

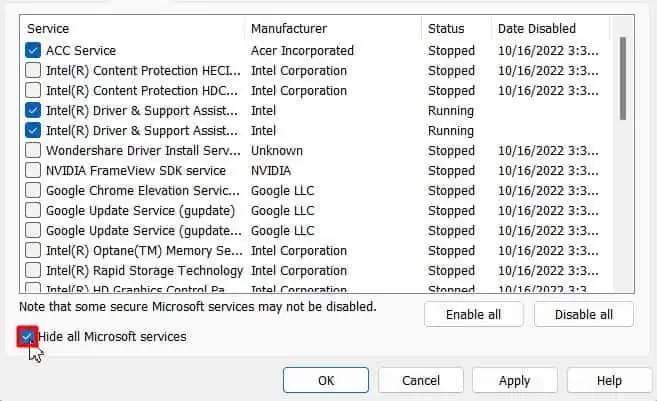
- Tick the Hide all Microsoft services check box.

- Check and select all the services listed if they aren’t already.
- Click on the Disable all button.

- Hit Apply and then OK.
- Reboot once (mandatory) and try to shut down your computer.
If it does, try to isolate the problematic app/services. To do so, shut down your computer after opening services on by one. However, this fix would only work after a reboot. If rebooting doesn’t happen as desired, try to force a shutdown by pressing and holding the power button.
Run SFC and DISM
Corrupt Windows systems and Image files may also be responsible for this issue. So, just to give a quick check, you can run the sfc and dism commands. System File Checker and Deployment Image Servicing and Management will repair/replace any damaged system files. You can follow the steps below to run them:
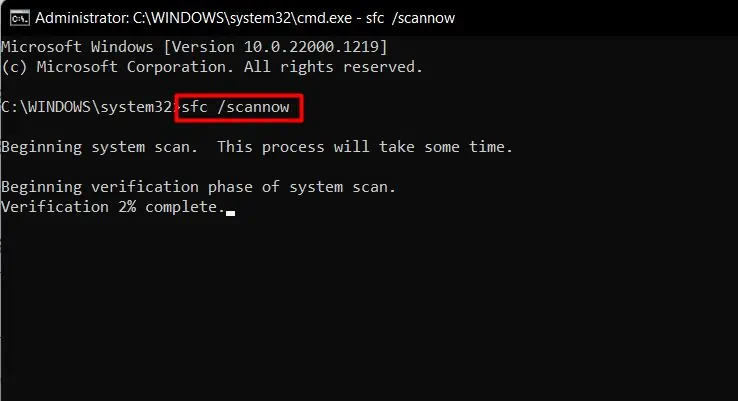
- Open the elevated Command Prompt.
- Run the command:
sfc /scannowto fix and replace corrupt system files.
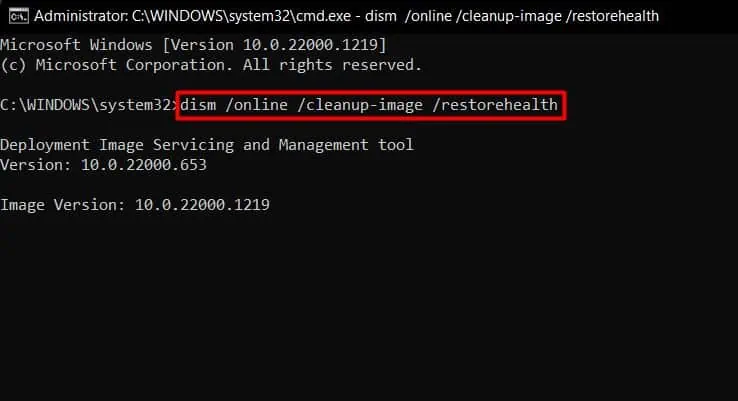
- Then, run
dism /online /cleanup-image /restorehealthto fix Windows image files.
Intel Management Engine Interface
Intel Management Engine is a system driver and ever-running program that comes along with many intel chipsets. It has access to some protected areas of the system memory, which is sometimes mismanaged due to bugs causing the laptop to be unresponsive to the shutdown command.
If nothing above fixed your problem on your Intel-powered laptop, try to Uninstall the Intel Management Engine Interface driver from the Device manager.
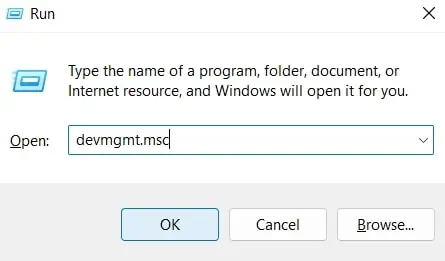
- Open Run, type
devmgmt.mscand hit Enter to open Device Manager.
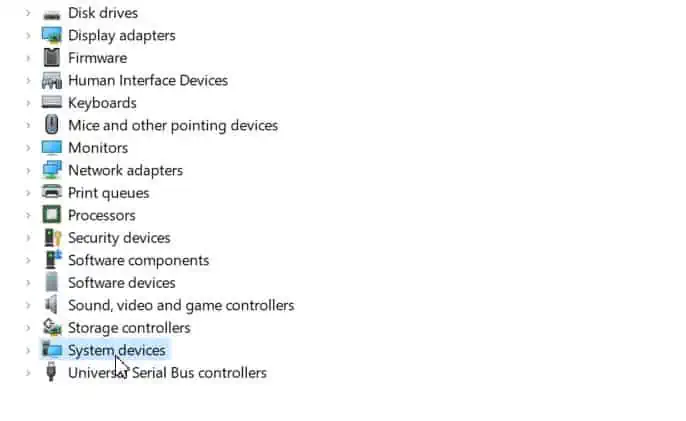
- Double-click on the System devices to expand the category.

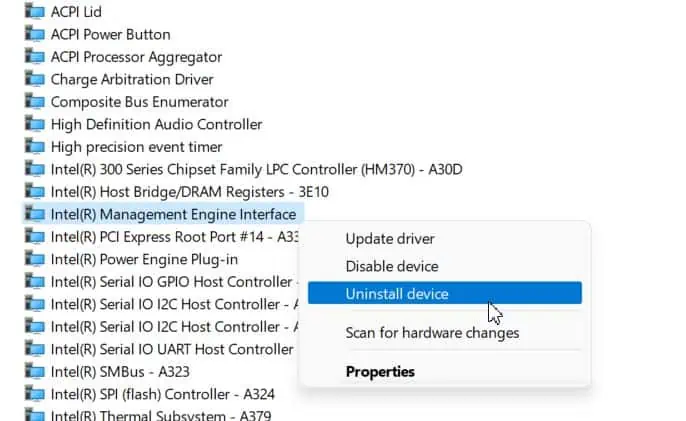
- Right-click on Intel Management Engine and choose Uninstall device.

- Click on the Uninstall button.
Now, try to Shut down your laptop. And if it does flawlessly, the culprit was the very driver.
Reinstall ACPI drivers
ACPI (Advanced Configuration and Power Interface) drivers are the BIOS extensions or sometimes WindowsOS components for Battery and Power management. When you press the power button, ACPI driver should come into action to provide power to all the electronics by enabling the power supply from the battery.
And as already mentioned, during the shutdown, it should do the opposite by cutting off the power supply from the battery. But, if its misconfigured, you can end up to the problem like the one discussed. To fix it, you can reinstall the ACPI drivers by following the steps mentioned below:
- Open Device Manager.
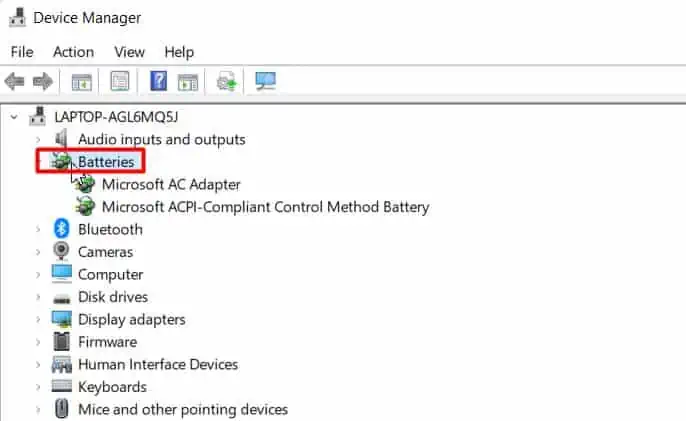
- Double-click on Batteries to expand.

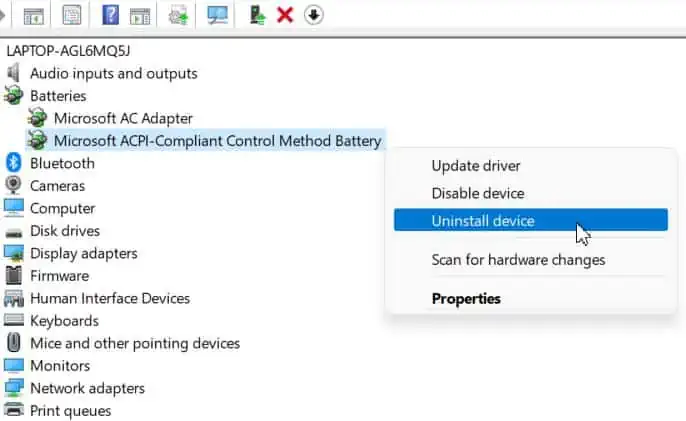
- Right-click on the ACPI driver and choose Uninstall device.

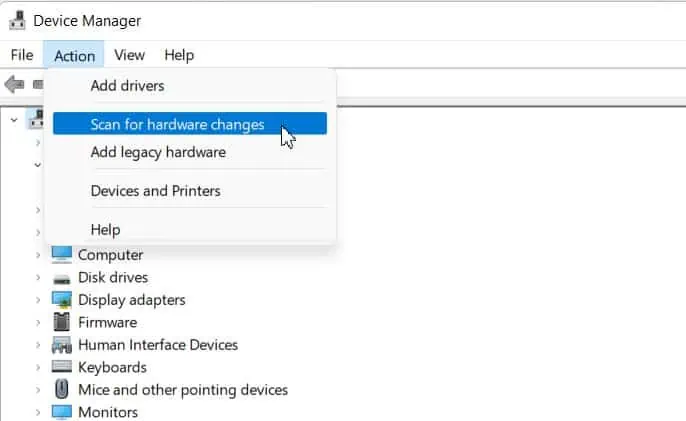
- Wait until the driver disappears, and click on Action at the top menu.
- Select Scan for hardware changes.

Windows will automatically reinstall the ACPI drivers.
System Restore
If nothing is helping to fix this issue for your laptop, you can perform a system restore to bring back your OS to some healthy point in the past. This will help clear corrupt registry entries and many more. You can do so by following the steps below:
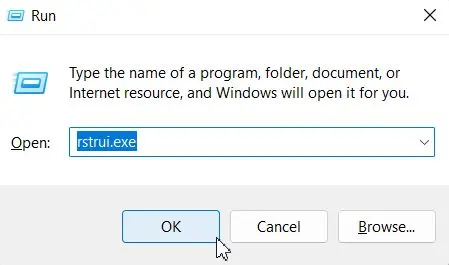
- Open Run.
- Type
rstrui.exeand hit Enter to open System Restore Utility.
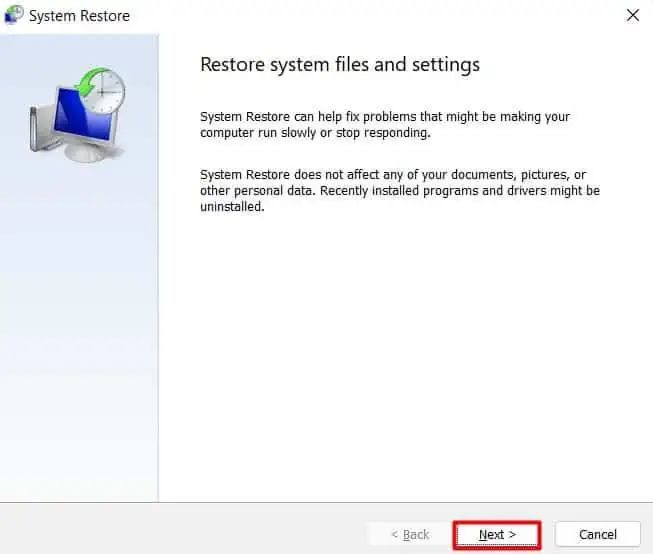
- Click on the Next button to continue.

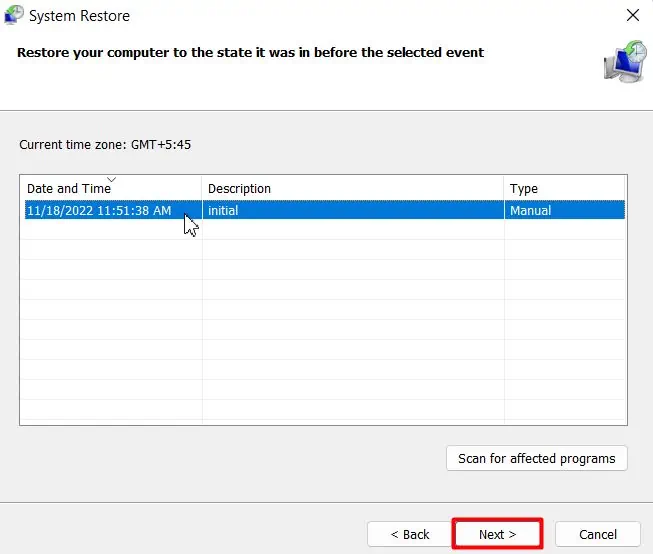
- Select a healthy Restore point from the list and Hit Next.

- Click on the Finish button and follow the onscreen instructions to complete.
Odds are, you may not have previously created any restore point, or the restore point may have deleted while updating, or the issue may not resolve even after restoring the system. In such cases, you can repair upgrade Windows.

