
BIOS checks the hardware and peripherals’ availability and provides a pathway for them to receive instructions from the CPU.
If the BIOS gets corrupted or damaged, the hardware will have no gateway to receive initiation signals. Then, your system will not boot at all and your motherboard will be considered bricked.
Having said that, it is also not an everyday thing for the BIOS to get damaged. We most often corrupt the firmware while updating BIOS. But your customized BIOS settings do get lost most of the time due to a faulty CMOS battery, by changing to default settings manually, or automatically because of system error.
Whatever the case, be it for recovery of BIOS or for loading your customized settings, it is better to backup the BIOS. It is quite easy to backup BIOS for some motherboards but for others, it can be quite tricky and you might need a few workarounds.
Nevertheless, you will be comfortable to backup the BIOS in your system after going through this article.
Before Backing Up the BIOS
You are probably looking to backup the BIOS as a preventive measure if something goes wrong while updating it. However, if you are able to resolve the issues on the motherboard or revert the settings that are causing you problems beforehand, you will not need to update or backup the BIOS.
If the problem lies on the motherboard setting, you may reset the board. To do so, you can either change the settings to default either from the BIOS page or clear the CMOS by removing the CMOS battery from the motherboard.

Similarly, if you are unable to boot your system, you can try to boot into secondary BIOS as some motherboards provide such dual-BIOS nowadays. Apart from these, sometimes changing boot mode to either UEFI or Legacy in BIOS also does the trick.
See if your problem is resolved after trying these steps. And if not, let’s move towards backing up the BIOS.
Backup Only The BIOS Settings of Motherboard
If you just want to backup your modified BIOS settings for future, you can manually note them down on your notebook or phone. You can also use a Frame Grabber to capture your BIOS or record the settings on your phone. Then, use that as your reference to change the BIOS settings.

Some motherboards also provide a list of changed settings when you try to load default settings on BIOS. After you press the key to Load Default settings, it will show you your customized settings that will be changed to default. You can take a screenshot of the settings there.
But, you should not apply the changes after pressing the Load Default key, otherwise, you might accidentally reset them without noting the modifications.
Backup BIOS of Your Motherboard
Flashing a motherboard’s BIOS involves a few dangers. As we said earlier, if you installed the BIOS using a corrupted file, your system might get permanently damaged. So, most of the motherboards do not provide the feature to backup their BIOS to prevent users from updating BIOS from a corrupted backup, in case.
However, all motherboards have a function to update BIOS. You might be looking to backup BIOS to get back to this version at the time of need later. So, you can take advantage of the Update BIOS feature to downgrade your BIOS to the one you want.
Let’s see what you need for this and the process of doing it.
- Press Windows + ‘R’ to open the Run dialogue box.
- Type
msinfo32and press Enter. - You will see a window that has your motherboard’s name, current BIOS version, and other information. Note the current BIOS version.

- Go to your motherboard’s website and look for that particular version of BIOS.
- Download the BIOS file.
- Use the motherboard’s utility tool or BIOS page to update that version of BIOS.

Since it requires few precautions and has several methods, we have prepared a separate comprehensive guide for updating the BIOS.
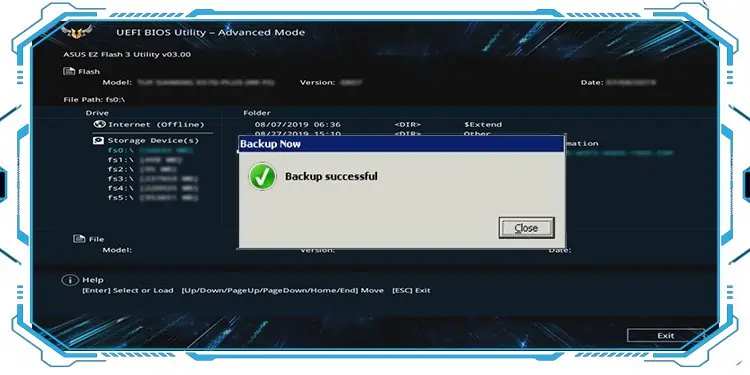
Backup BIOS in Motherboard with Q-Flash Feature
If your system’s BIOS has a Q-Flash feature, you are in luck here. It is a feature provided in some motherboards with the primary purpose of updating the BIOS. But it also has the function to back up your system’s BIOS.
One of the motherboards to feature Q-flash is Gigabyte. Hence, we are using the system with a Gigabyte motherboard to explain the process. You will just need a USB drive to save the backup with this method.
- First, get a USB flash drive and insert the drive into your Laptop. On a desktop, make sure you have inserted the USB on the motherboard’s USB port on the back of your system.
- Restart your system and press repeatedly the Delete, Esc, F2, or the corresponding key that opens BIOS in your PC right after the system starts.
- A BIOS page will appear on your screen. Inside the page, find the Q-flash option in it. You can also press F8 while remaining on the BIOS page to open the Q-flash page.
- Alternatively, press TAB repeatedly while your system is booting up and you will land on the Q-flash page directly.
- There, you can see the Update BIOS and Save BIOS options. Click on the Save BIOS to Drive option.
- Follow the instructions and save the backup on your USB flash drive.


You now have a backup image of your current BIOS version. You can perform this process using the BIOS utility or Motherboard utility tool provided by your vendor if it has the Q-flash option. The steps are similar and you can open the utility from Windows itself.
Backup BIOS in Windows
If your motherboard is the one that does not provide the option to backup BIOS, you can do it directly from Windows. You will have to take help from third-party applications to do it for you.
One of such programs that accommodate the function of backup BIOS is the Universal BIOS Backup Toolkit.
Let’s see how you can do this using the Universal BIOS Backup Toolkit on your system.
- Download Universal BIOS Backup Toolkit on your PC and Install the application.
- Search with the keyword BIOS Backup on the search box on your windows.
- Right-click on Universal BIOS Backup Toolkit and click Run as administrator to open the application.
- When the program runs, click on the Read option.
- After the process completes, click on Ok and select the Backup option.
- Save the
.binfile on the drive of your choice.


You will find the backup file of your BIOS in the drive.
Backup BIOS Using CH341a Programmer
CH341a programmer is a USB-like device that is used to flash the IC of several electronics including the EEPROM of a computer. The BIOS is contained in the EEPROM of a computer.
Hence, you can use the CH341a programmer to detect, change, backup as well as update the BIOS of your motherboard. The programmer can be used for 24-series I2C and 25-series SPI IC chips of any system.
Let’s look at the connection you have to make and the steps to be followed to backup BIOS using the CH341a programmer.
- Buy a CH341a programmer or mini programmer from the nearest electronics vendor or online.
- You will find a circuit board connected to a USB dongle with a handle consisting of a yellow jumper connected to pins 1 and 2 for USB detection. Similarly, you will see a converter for a 25-series IC, another PCB where you can solder the IC, and an 8-pin clip converter with a PCB. We will be using this clip converter and PCB to connect to our BIOS chip.
- On the PCB, you will find pins with numbers from 1 to 8. Insert the connector to the pins such that the red color wire lies on pin 1. Remember a wrong connection can damage the BIOS chip.
- Now connect the PCB to the CH341a programmer in such a way that pin 1 of the circuit lies on the side near the handle.
- Disconnect all the connections to the motherboard whose BIOS you want to backup. Find the BIOS chip and connect the clip to it such that the pin of the red wire is connected to pin 1 of the BIOS.
- We advise you to use another computer to save the BIOS. Insert the programmer into the USB port keeping the handle downwards. Install the drivers for the device.
- Run the driver software after installing. If the installer does not appear, you can go to Device Manager and install it manually.
- Click on the Detect option to show the code of the BIOS file.
- Uncheck the Blank Check and Erase option on the Auto menu.
- Click on Read and then Verify after you see 100 % on the progress bar at the lower end.
- You see the Chip Main Memory and Buffer Same dialogue box at the end.
- Click Save and enter the file name to save the backup BIOS image of your motherboard.


You can use this backup image to flash your BIOS later.
How to Restore the Backup BIOS in Windows?
It is not helpful to backup your BIOS and not know how to install it in the time of need. But installing the BIOS from the backup image is pretty much the same as updating the BIOS. Some motherboards like Gigabyte automatically boot into backup bios if the current BIOS fails and re-flashes it.
You must know that updating or restoring BIOS is risky and it might permanently damage your computer. Hence, you have to make sure to have a stable power supply. You can use a UPS for a desktop computer while reinstalling BIOS. Also, please do not close the system in the middle of the process.
Now that you know about the risk and the safety measures, you will just need a USB drive and software called Rufus to make the drive bootable. Let’s see the way to install the backup .rom file to your system.
- Download Rufus on your system. If your system is not working, then use a working system.
- Insert the USB drive and Open Rufus on the PC either through its icon on the desktop or by searching it in windows.
- On the opened window, select the USB drive and choose FreeDOS on the Boot Selection Menu. Click Start.
- Copy the Backup file you saved earlier to the USB.
- Restart your system and press F8 or the corresponding key repeatedly to go to the Boot Options.
- Choose the USB drive which you have kept the file in.
- You will see a window similar to the command prompt.
- Enter
dirin the window and find the.romfile you saved earlier as the BIOS backup. - Type the name of the file along with the extension name at the end and press Enter.
- Go through the instructions on the installation window and complete the restoring process.


You will find your BIOS restored from the backup file that you created earlier.