
There are three ways to connect your Canon printer to a laptop. You can either:
- Establish a direct connection using a USB A-B cable.
- Connect both of them to a common Wi-Fi network.
- Or, enable Wi-Fi Direct on the printer and connect to it.
Let’s go through the details for each of these methods.
Connect Through a USB A-B Cable
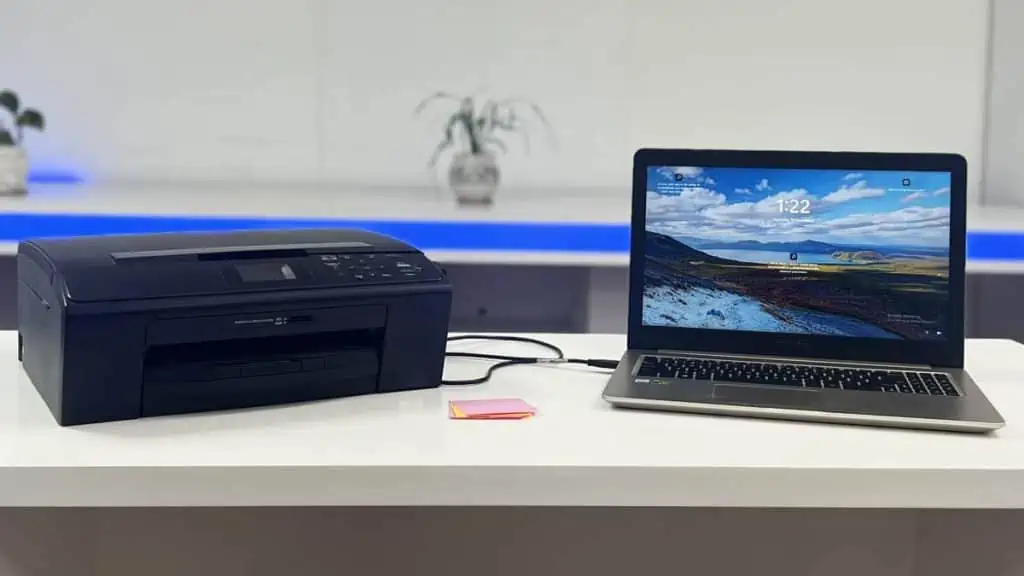
If you are unaware of the USB A-B cable, here’s what it looks like. It came packaged with my Canon E400 series printer.

Grab the cable and connect the rectangular (A) side to one of the USB ports on the laptop. Similarly, attach the square (B) side to the USB port on your Canon printer. The port generally lies on the left or right-hand side of the back panel.
Once you establish the connection, Windows will automatically prompt you to install the compatible printer driver. If it doesn’t,
- Go to the Canon printer driver download page.
- Click the Set Up (Start Here) button on the home page.

- Search your printer model and download the driver.
- Launch the setup file and click Next.
- Choose your residence on the next screen.
- Choose the software you want to install.
- Follow the on-screen instructions to complete the installation.
- Once the setup is complete, you can start printing.


Connect Over a Wi-Fi Network
Let me quickly remind you that a direct USB connection does not allow other computers to access the printer. Yeah, you may turn on network printer sharing to do it, but it’s only a hassle.
So, if you want to grant easy printer access to other devices on a network, the Wi-Fi method might be a feasible option for you.
For that, first, connect your Canon printer to Wi-Fi. Then, go to the computer you are willing to add the network printer and do it. After that, install the printer driver as we did earlier.
Use Wi-Fi Direct
The Wi-Fi Direct feature is extremely useful to connect a printer to a laptop if you don’t have access to a Wi-Fi network.
But sadly, not all printers come with it. So, first, go to Canon’s user manual library and check the specifications sheet for your printer.

If it supports Wi-Fi Direct, also, see the steps to turn it on. Find the SSID (Wi-Fi network name) and password (generally, 10 characters) from the printer’s screen.
Then, open the Wi-Fi settings on your laptop and connect to it. I have a PIXMA TR8520 printer, and as you can see, its Wi-Fi Direct SSID is DIRECT-C89B3D-TR8500series.

Once you connect it, you can start printing right away. Do note that you should install the Canon PRINT Inkjet/SELPHY app to print this way.