If your PC comes with a relatively low-storage HDD or SSD, you might want to upgrade it. But the main question is whether it’s possible to move the genuine Windows to your new drive.
Well, the short answer is yes! In fact, there are two possible ways to do it. This way, you do not need to install Windows entirely on your new storage device. Also, this can come in handy if you’re trying to back up the drive to recover the system in case of a future failure.
In this article, we will guide you through both methods on how to move Windows to another drive, whether it be on an HDD, SSD, optical disk, or even your flash drive!
Before You Begin
Before jumping into the main content, there are a few things you need to consider. You might want to get some additional devices, like a UPS (to prevent data loss from a power failure), a secondary device (flash drive or SD card for backing up data), and, most importantly, the right destination drive.
Get the Right Drive
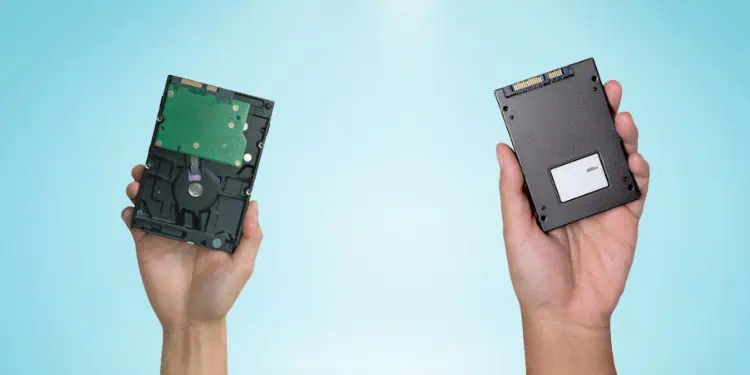
If you haven’t already bought a drive, we recommend getting one larger or with equivalent disk space than the former. While it’s possible to migrate Windows from a larger to a smaller drive, you will require a third-party cloning tool to do this correctly. In such a case, you may skip the first method as you’ll likely encounter a re-imaging process error.
Likewise, we also recommend getting an SSD over a traditional HDD or other storage disks. These days, you can find NVMe, SATA, or M.2 SSDs, all of which are faster, more durable, and quieter than traditional drives.
Backup Important Files
Moving Windows to another drive may take approximately 20 minutes to 1 hour, depending on your system. Thus, there’s a potential risk of data loss due to power failure or other reasons.
As a precaution, we highly recommend backing up your important data using any preferred method. Well, you could use a secondary storage device (flash drive or SD card) or even online backup tools like OneDrive, Google Drive, and iCloud.
Defrag Your HDD
Defragging means rearranging the unordered or unorganized files on your hard drive. Basically, this is a Windows optimization technique that helps improve the speed and performance of your HDD.
Well, this process will store all the HDD’s data in a contiguous block, which can speed up the cloning process. Indeed, defragging your drive will organize all the unordered files, and hence the migration of Windows to another device becomes much more efficient.
However, we do not recommend defragging an SSD if you’re already using one. This is because it has no significant advantage and even has a chance of reducing its lifespan.
Perform Disk Cleanup
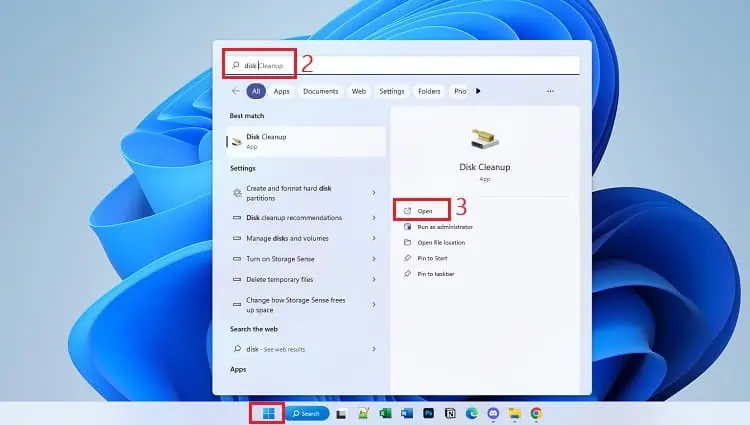
Since cloning produces the exact copy of your source drive, all the temporary and junk files will also migrate to the new storage device. To prevent this, we recommend performing a disk cleanup, and here’s a quick guide on how you can do just that:
- Press the Windows/Start key and search for Disk Cleanup.

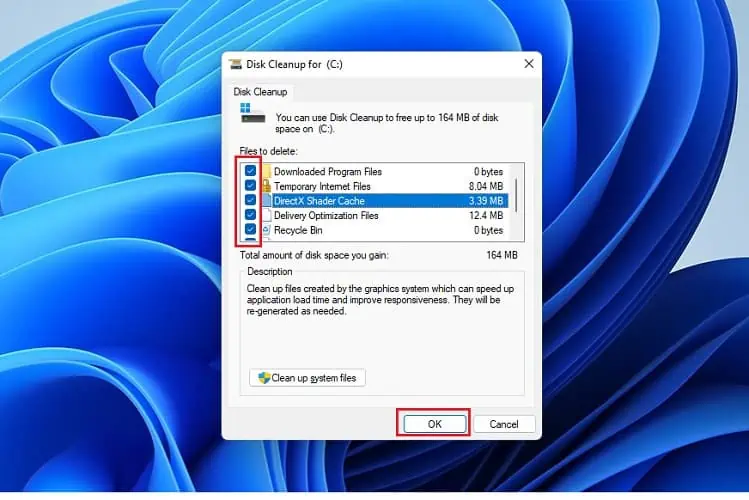
- Launch the utility and wait until the disk space is calculated.
- Under Files to delete, you’ll get a long list of items you might want to remove.
- Select all and hit the Ok button.

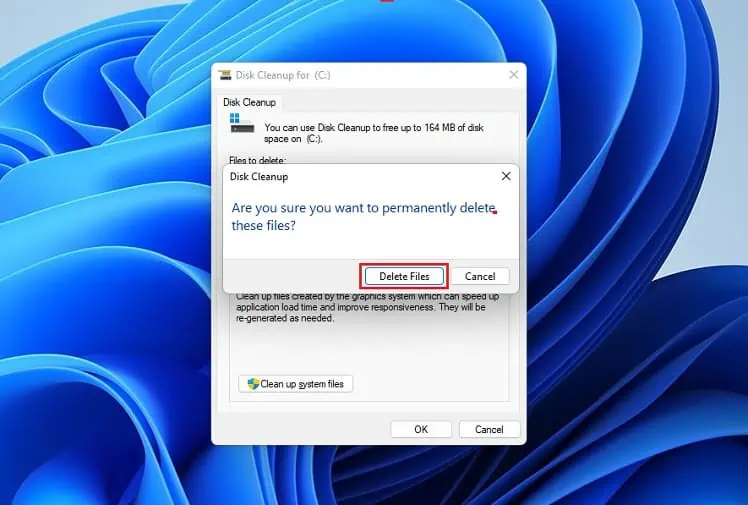
- Finally, press Delete all and wait until your HDD or SSD space is freed.

2 Ways to Move Windows to Another Drive
Now that you have backed up vital files, defragged your HDD, and performed a disk cleanup, it’s time to start moving Windows to your destination drive. Before that, kindly install your new HDD or SSD in the right slot and plug in the data and power connectors.
Once that’s done, you can now proceed with one of the two methods below. As mentioned earlier, you may skip the first one if you’re trying to clone a hard drive from a larger source to a smaller destination drive.
Restoring System Image
If you’re planning to transfer Windows to an equivalent-sized drive or on a larger one, the best method is to create a system image. Then, you can use this at your destination HDD, SSD, or an alternative disk to move the OS.
An advantage of this is that you won’t require any third-party cloning tool. However, you need to first create a bootable USB flash drive or DVD using the Windows Media Creation tool. Please follow the below instructions on how you can do it the right way:
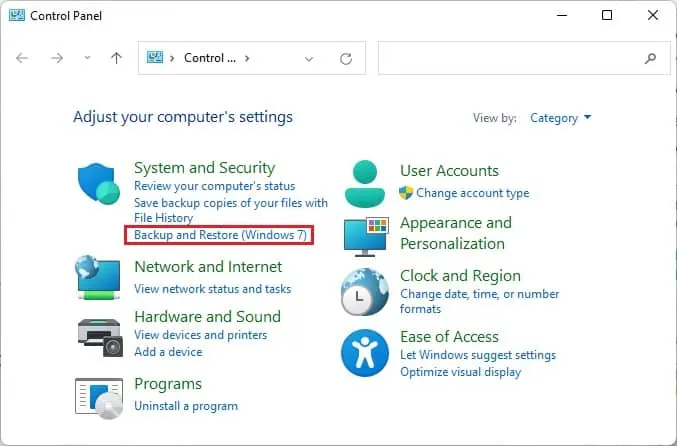
- First, press Windows + R and run the
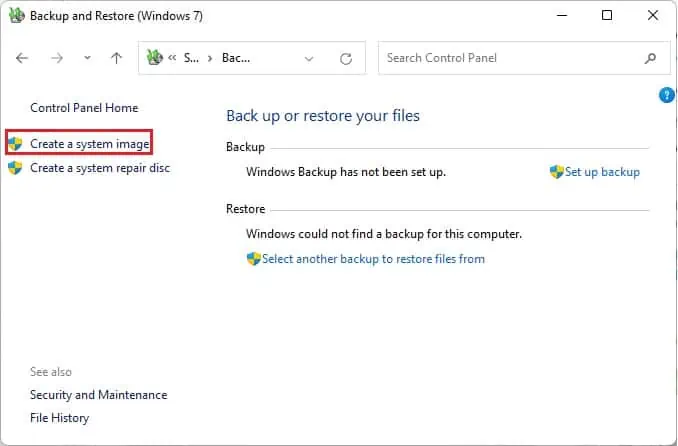
controlcommand to launch Control Panel. - Under System and Security, select Backup and Restore (Windows 7).

- Next, choose to Create a system image.

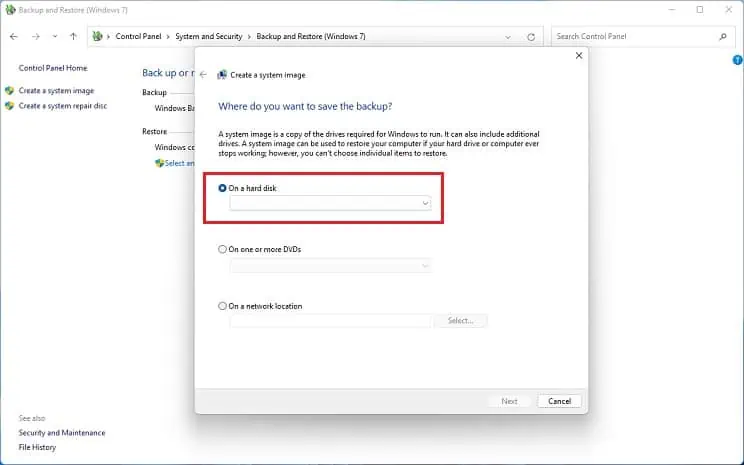
- Once a new window pops up, choose the On a hard disk option, select your drive from the drop-down, and hit Next.

- You’ll get a list of all your partitions that will be backed up. Press the Start Backup button to continue.
- Now, wait until you’re asked whether to create a system repair disk. For now, you can select No. However, we recommend pressing Yes if you’re facing severe Windows issues and wish to fix this.
- Once this process is completed, shut down Windows, and remove your current drive.
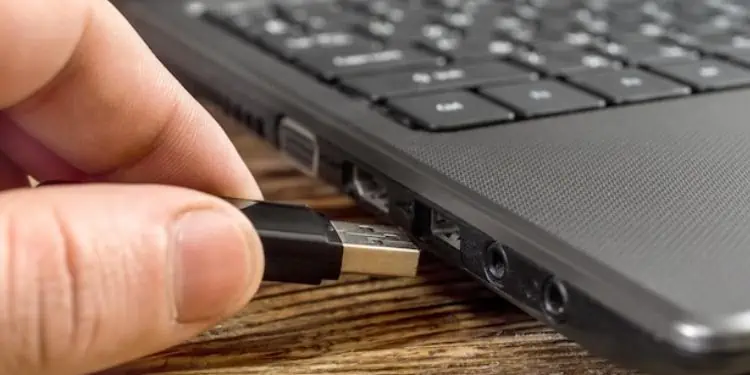
- Then, insert the bootable USB or DVD and turn on your PC.

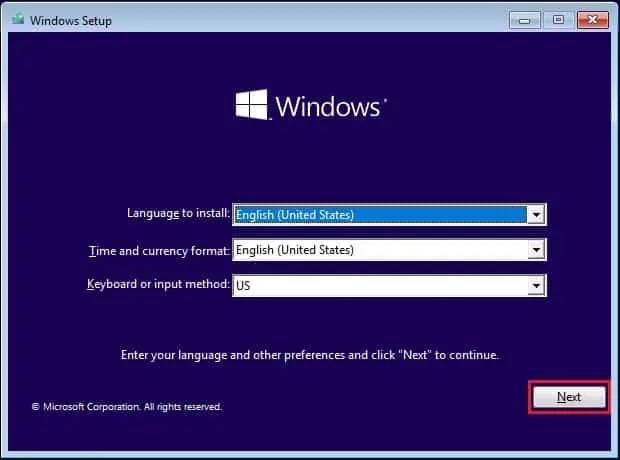
- Now, you should automatically enter the Windows Setup screen, where you can press Next to continue.

If it doesn’t, you might need to change the boot priority. For this, we have prepared a separate guide to help you change the boot drive in Windows. - Next, click the Repair your computer link at the screen’s bottom-left corner.

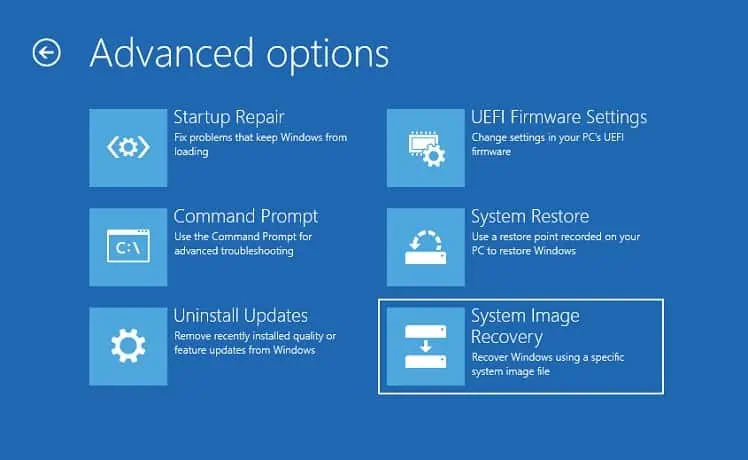
- Once you enter the Advanced Startup screen, go to Troubleshoot > Advanced Options > System Image Recovery.

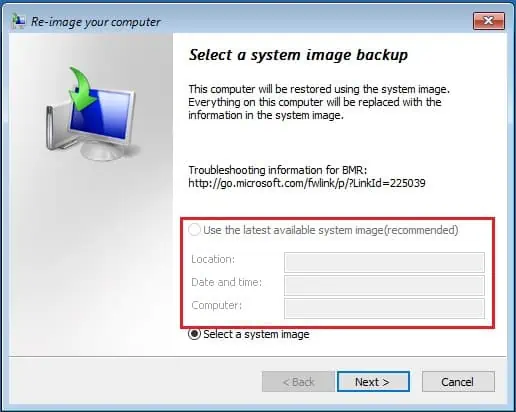
- After the Re-image your computer dialogue box shows up, select Use the latest available system image, and click on Next.

- Now, you can press Exclude disks button and remove any partition you wish. But if you want to clone the exact copy, you can directly press Next.
- Then, tap the Yes button to confirm your action.
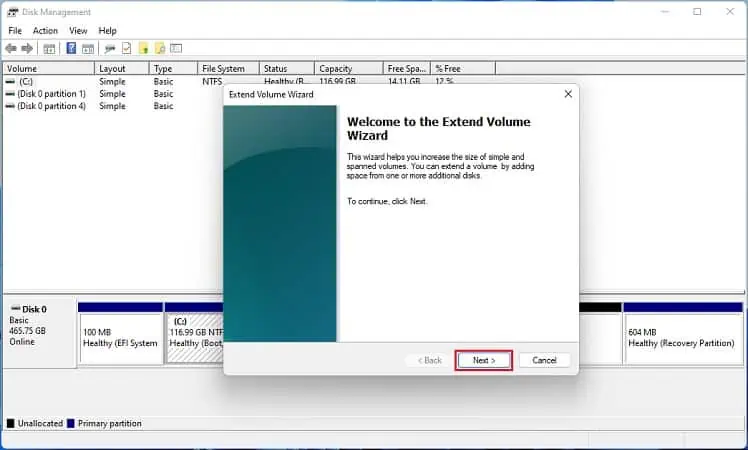
Now, your PC should boot normally, and the transfer of Windows to the new drive should be successful. However, if an unallocated partition remains, you might want to extend your drive’s volume to take complete advantage:
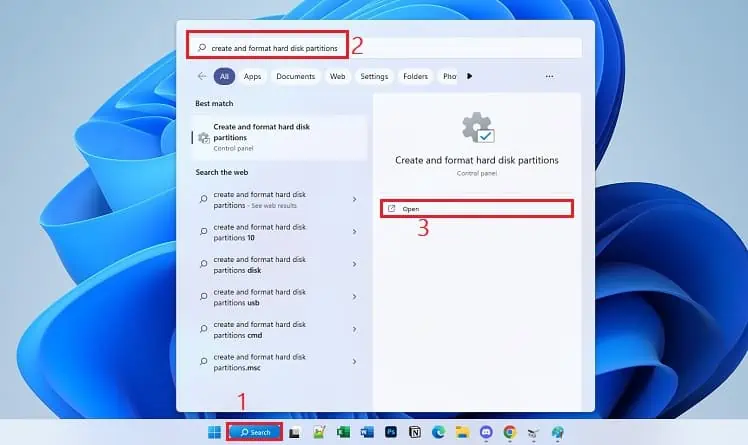
- In the instant search section on your Windows taskbar, search for
Create and format hard disk partitions. Select this to launch the Disk Management utility.
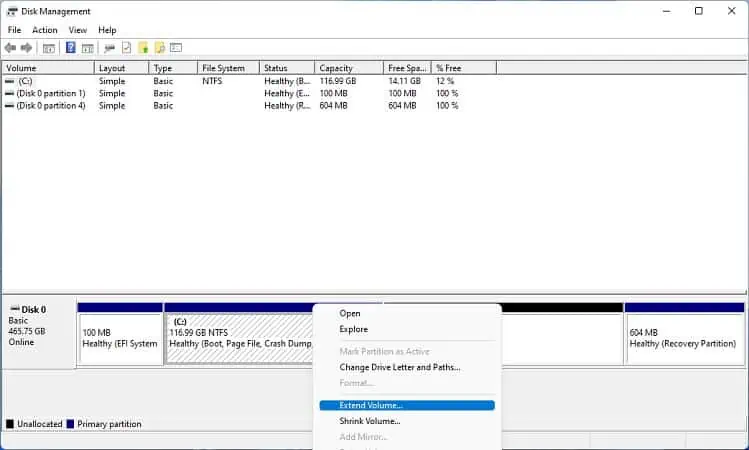
- Right-click your drive and select the Extend Volume option.

- In the Extend Volume Wizard, press Next.

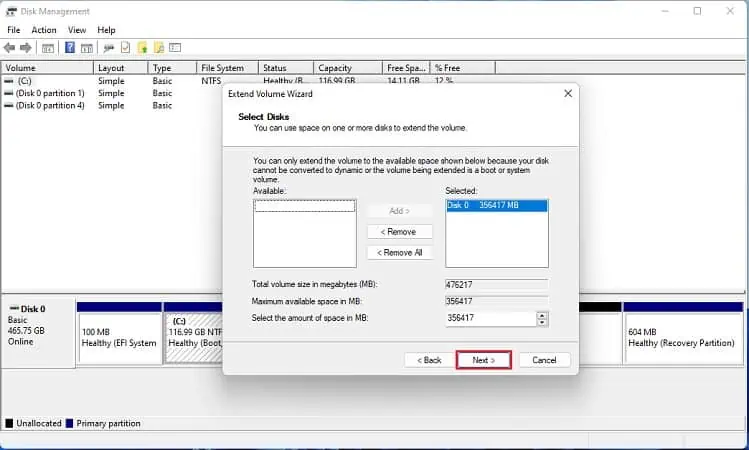
- Now, ensure the amount of space is correctly configured and tap Next.

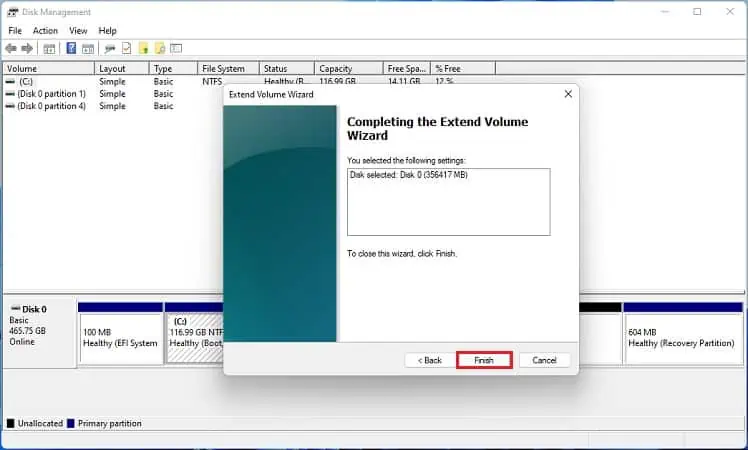
- Finally, click the Finish button, which should merge the partitions.

Cloning Your Storage Device
The other easy way to move Windows to another drive is by cloning your bootable drive. However, the process requires a third-party cloning tool. Some popular ones include Clonezilla, AOMEI Partition Manager, Macrium Reflect, etc.
For demonstration purposes, we have included the steps for Macrium Reflect. You may choose any other software, as the process should be somewhat similar:
- Firstly, navigate to the manufacturer’s website and download the installation file.
- After setup, launch the utility. Some software, including Macrium Reflect, requires admin privilege. So, you may have to press the Yes button to get past the user-control prompt.
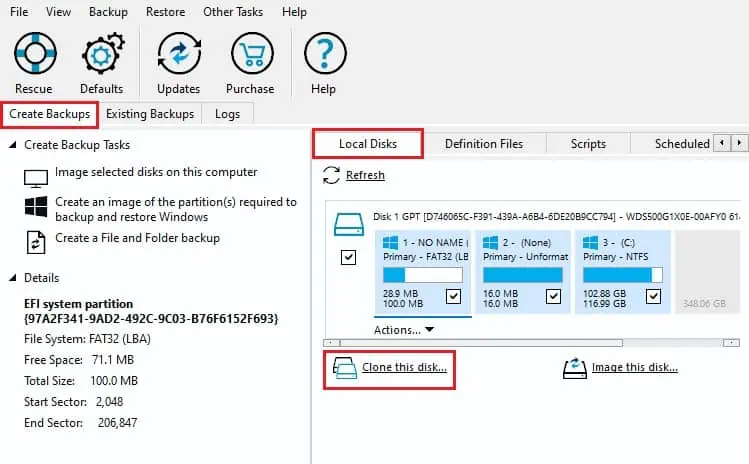
- Now, navigate to the Local disks section on the right pane.
- Here, check the disk you’re trying to clone and select Clone this disk option.

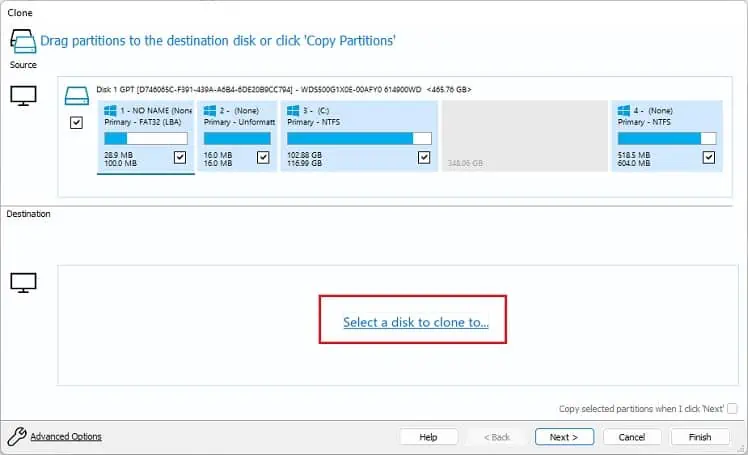
- Once the clone window pops up, check the source drive from the Source section again.
- Then, move to the Destination section and press the Select a disk to clone to option.

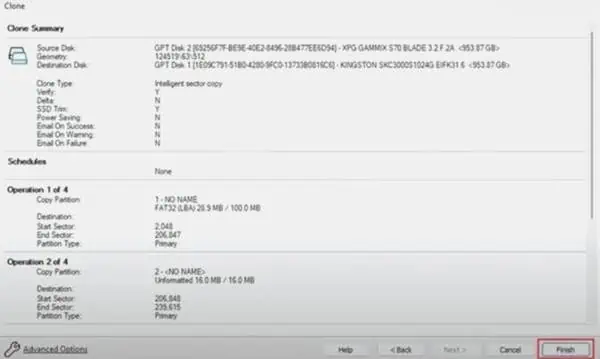
- Here, choose your destination drive and tap Next to move forward. While you’re at it, you may also choose to delete any additional partition.
- Lastly, hit the Finish button and wait for the cloning process to finish.

- Once the clone is completed, press the Ok button and restart your computer.
- Now, get into BIOS and change the boot priority. You should find this option under the Boot options.
- Save the setting using the dedicated key and start Windows. You should be able to boot without any issues.
- Now, you can extend your drive to remove the unallocated partition (after cloning a smaller to a larger hard drive).

