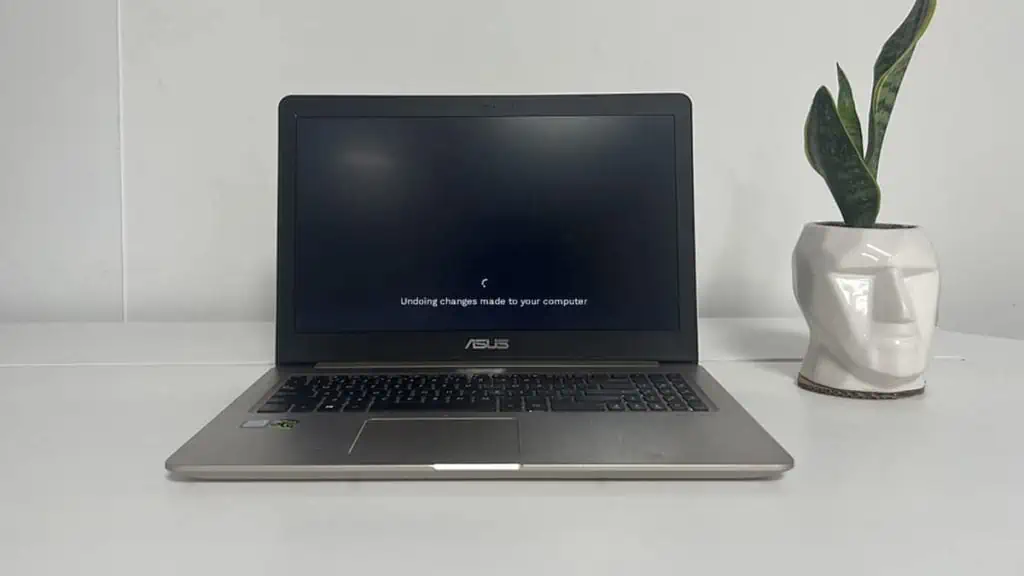
Whenever a Windows update process is interrupted or goes wrong, you can see the “Undoing changes made to your computer.“
Depending on your particular system, your PC automatically fixes such an issue on its own and boots normally after leaving it for like several hours (can range from 2 to 8 hours).
However, sometimes your PC might get stuck in a loop and display the same message with a black screen each time after restarting. In such cases, you probably need to uninstall the previous updates.
Start PC in Safe Mode and Uninstall Recent Updates
If your PC is stuck on a loop and displaying the same message, you need to boot your PC into safe mode first. You can find the safe mode option in the Advanced Startup options screen.
That said, sometimes your PC can fail to boot into the Advanced startup options screen. In that case, first boot using a USB that contains the Windows installation media.
For more information, follow the steps mentioned in “Sign-On With Bootable Media” until you reach that screen.
For this,
- First, turn off your PC and turn it on again. When the Windows logo appears, turn off the PC by holding the power button for at least 5 seconds.
- Repeat the above step until the system boots up displaying “Diagnosing your PC”. It usually shows up after the third attempt.
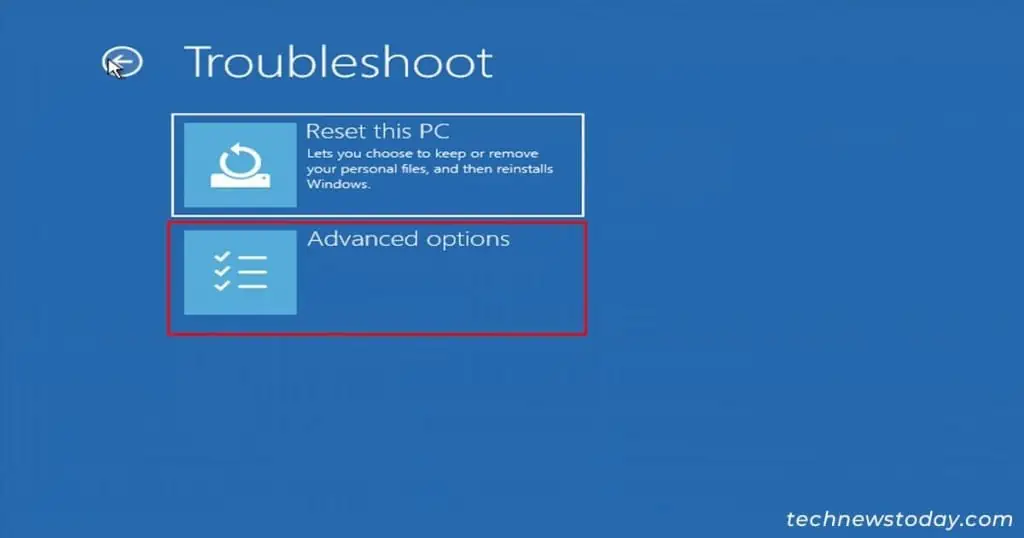
- Then, go to Advanced options > Troubleshoot > Advanced Options.

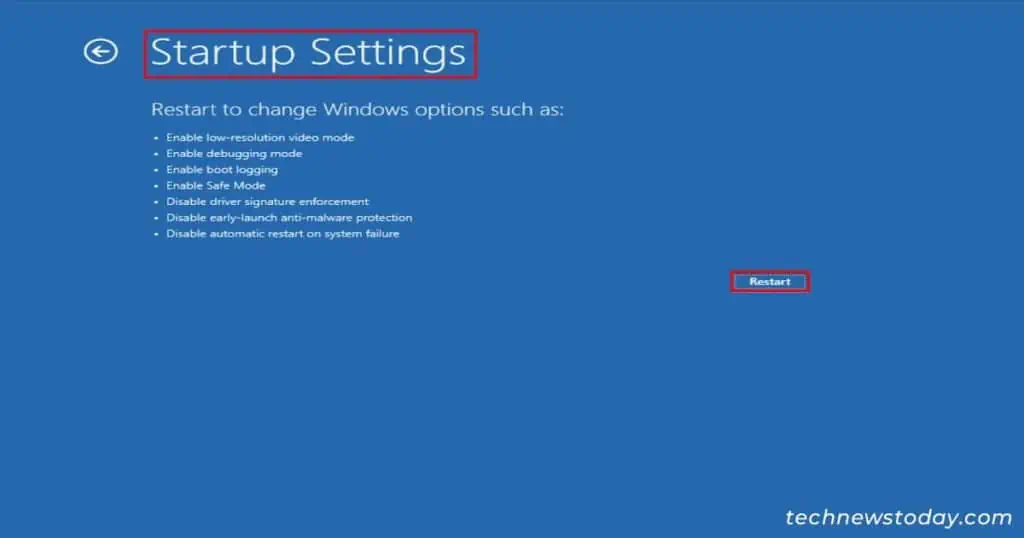
- Select Startup settings and click Restart on the next page.

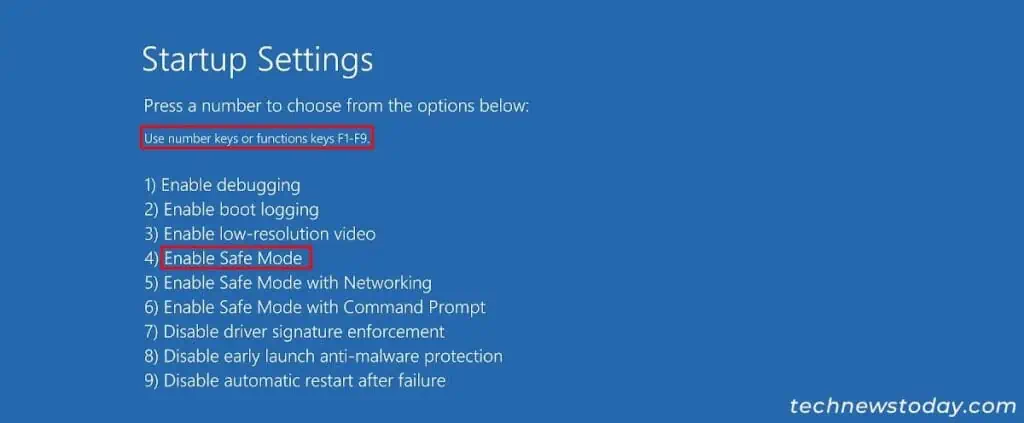
- Now, press the 4 or F4 key to boot into safe mode.

- Once your system enters into the safe mode, press Windows + R key and type
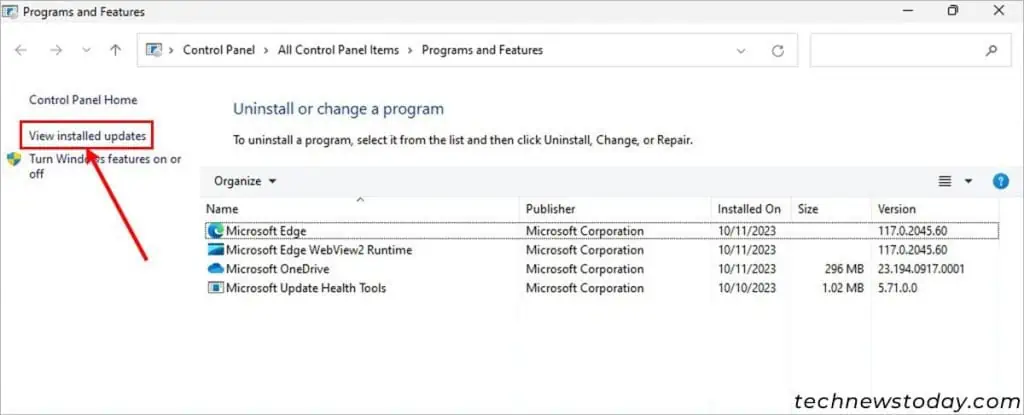
appwiz.cpl. - Then, click View installed updates in the top left corner of the control panel.

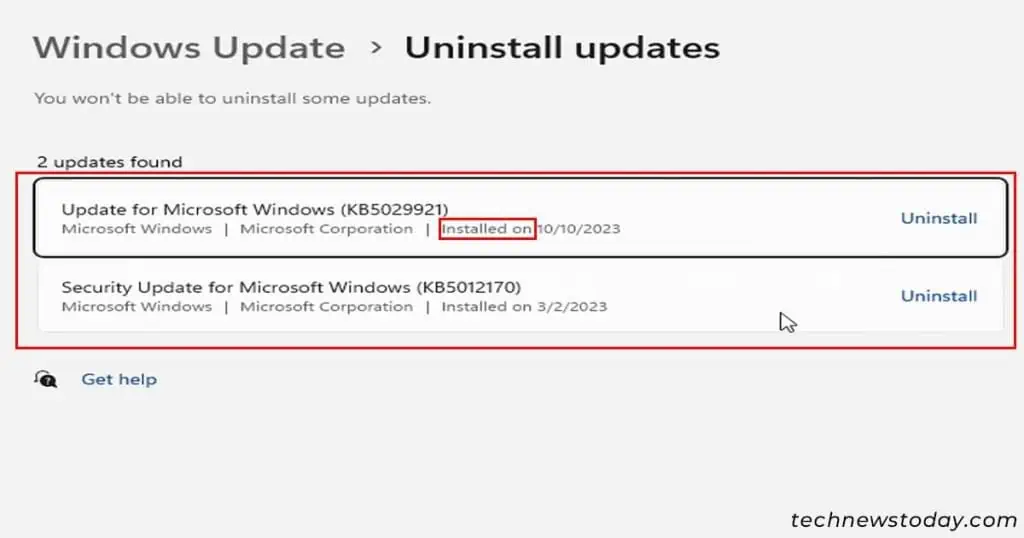
- Select the recent Windows update. You can figure it out by looking at the date mentioned by Installed On. If you are using Windows 10, you may see a different interface.

- Click on Uninstall.
- Click on Yes.
- Restart your PC.
Use the Startup Repair
In case your PC is experiencing startup problems, it can fail to boot successfully and display the undoing changes error.
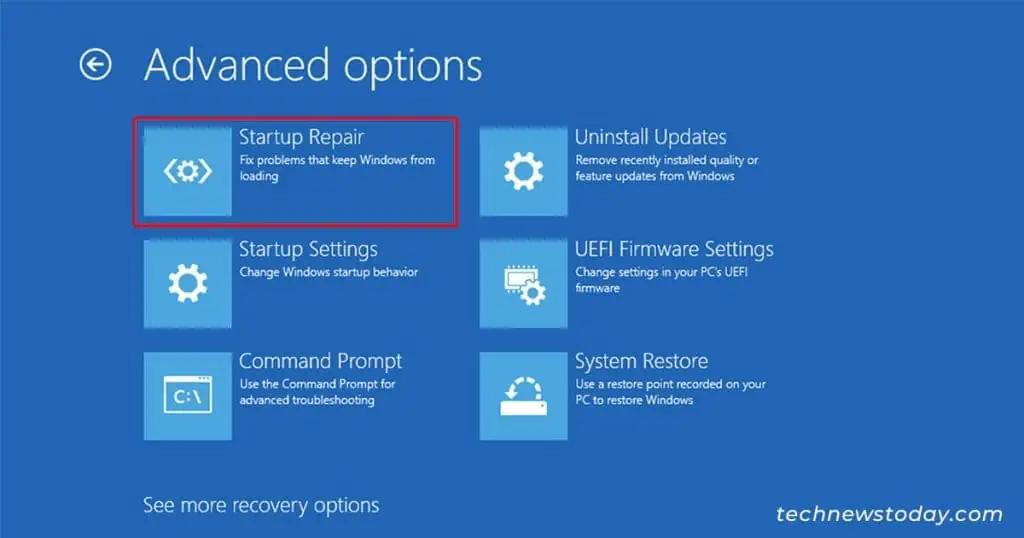
To fix it, you can use the Startup Repair option in the Advanced Startup options screen. Such an option will automatically diagnose and fix any startup-related problems on your PC.
- Enter into the Advanced Startup options screen.
- Then, select Troubleshoot > Advanced Options > Startup Repair.

- Wait for the repair process to finish.
- Restart the system.
Repair System Files
The system file checker, also known as SFC scan, scans and repairs corrupt system files.
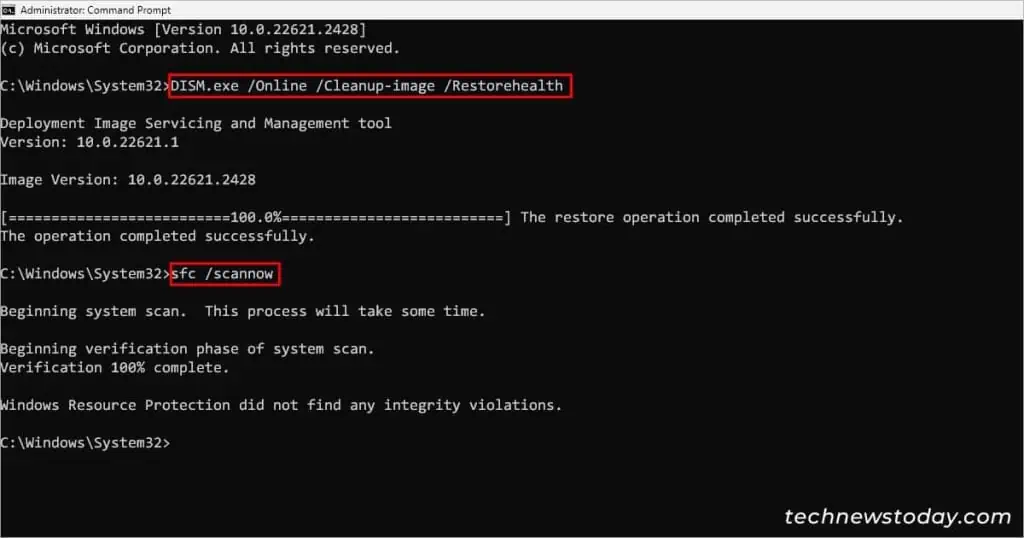
So, if your previous update was interrupted or contains such files, you can run an SFC scan along with a DISM command.
- Press Windows + R key and type
cmd. - Then, press Ctrl + Shift + Enter key to run Command Prompt as an administrator.
- Now, type the following commands one by one and press Enter after each.
DISM.exe /Online /Cleanup-image /Restorehealthsfc /scannow
- Wait for the scan to complete.
- Restart the system and check if the update process goes smoothly.
Restore the PC
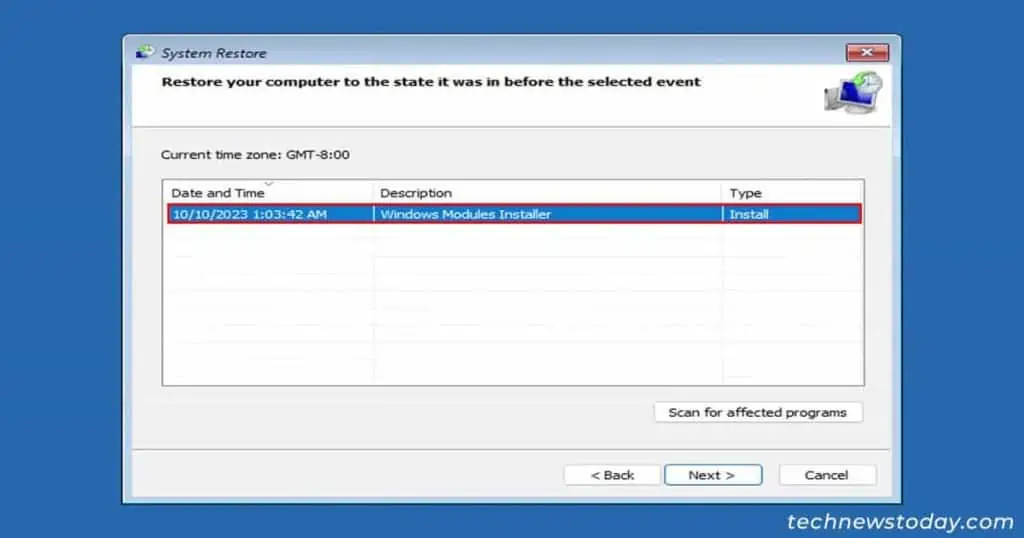
In case you have created a restore point, you can use the System Restore option to revert your PC to that point in time.
Here’s how you can use system restore inside the safe mode.
- Press Windows + R and type
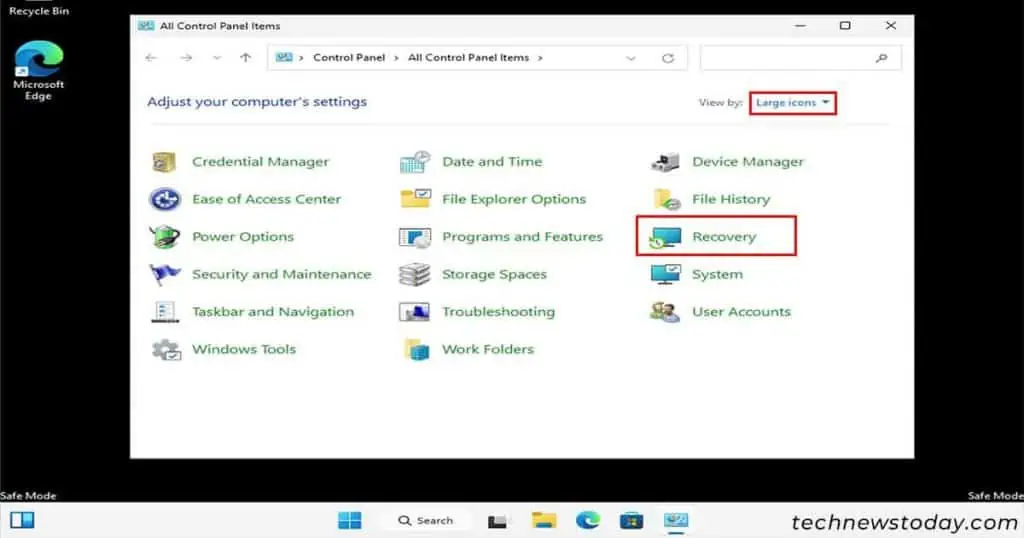
controlto open the control panel. - On the top-left corner of the window, switch the View by field to Large icons option.
- Click on Recovery.

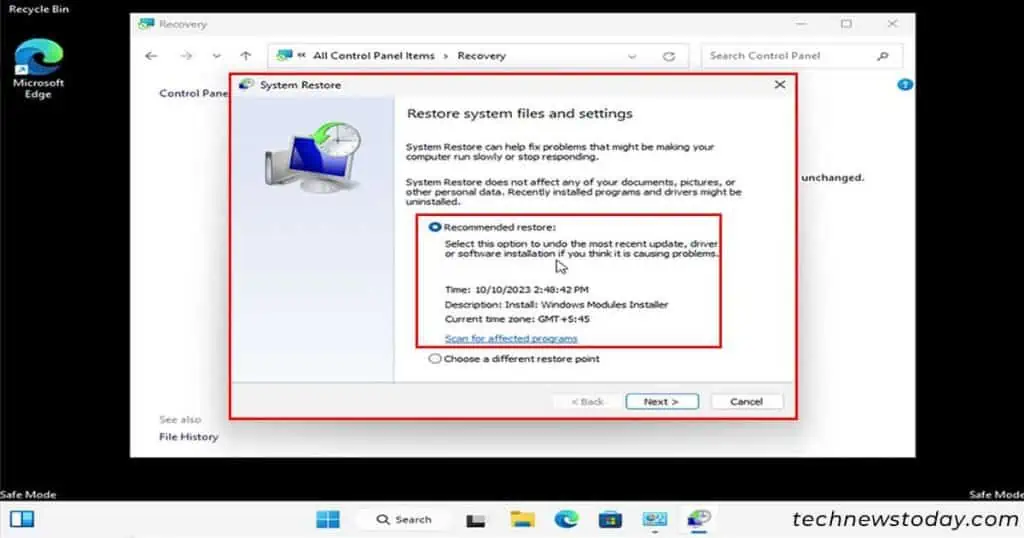
- Then, select Open System Restore.
- Click on Next and select the restore point when your PC was working fine.

If you are unable to boot into the safe mode, follow the steps below.
- Enter the Advanced startup screen.
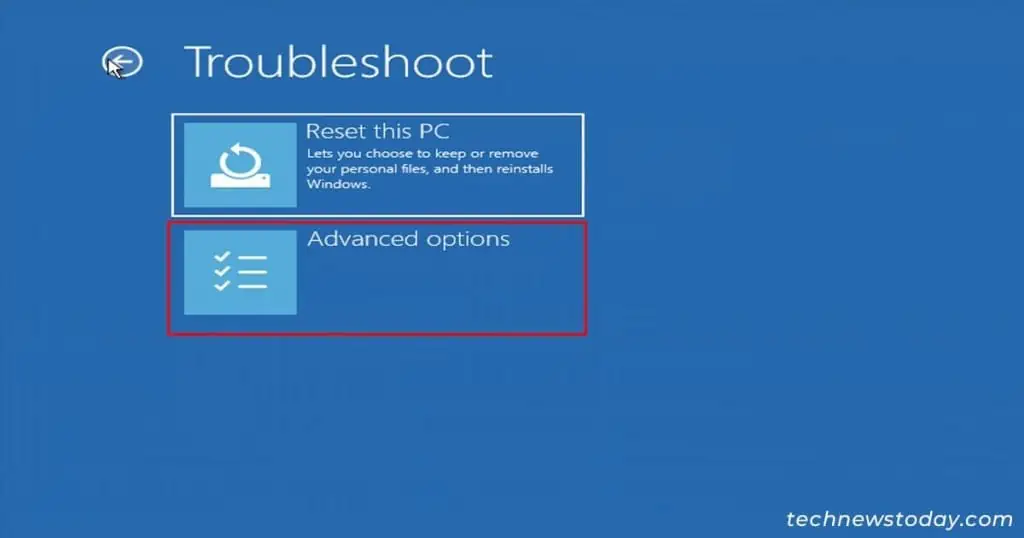
- Navigate to Advanced options > Troubleshoot > Advanced options.

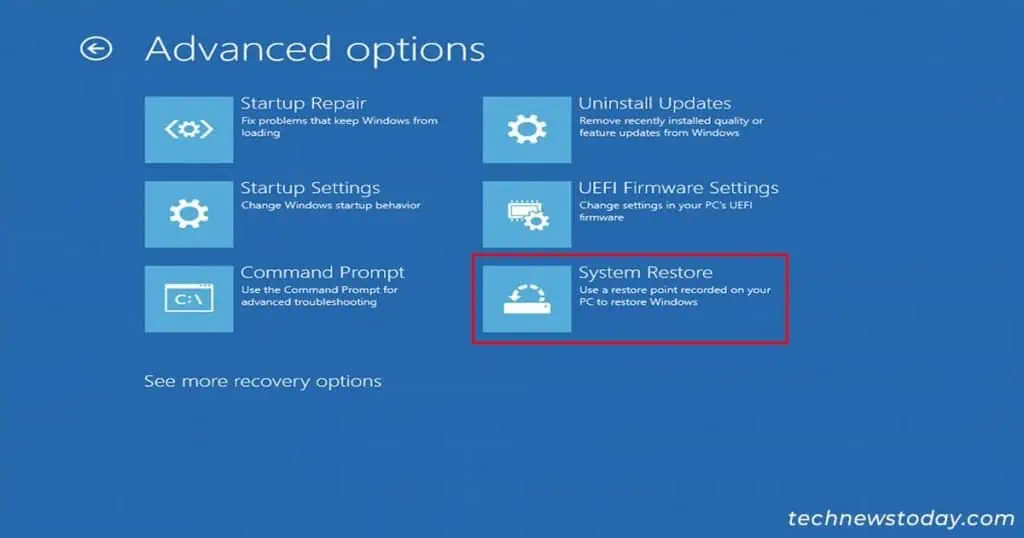
- Then, click the System Restore option.

- Select the restore point you created sometime earlier and follow the on-screen instructions to revert to it.


