
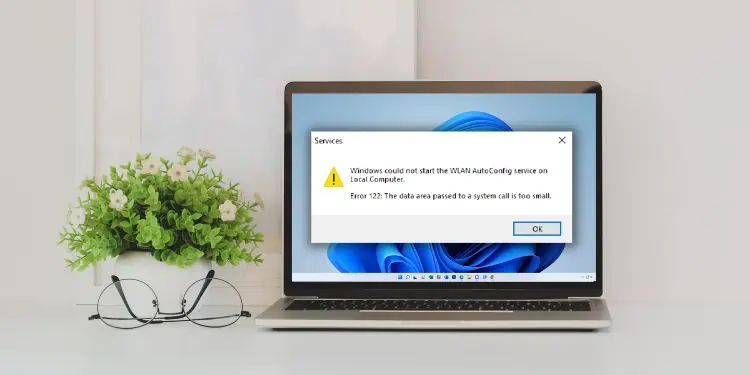
If you encounter the ‘Windows could not start the WLAN Autoconfig service on Local Computer’ network error, you likely won’t be able to use your wireless network.
Generally, this happens due to corrupted network drivers, outdated operating systems, or even hard drive issues. Moreover, some Windows users have complained about getting the error message after their PC crashed or when updating or upgrading OS.
Hence, if your ethernet is working fine but facing issues with the wireless connection, you’re at the right place! Here, we will provide simple tips that should help you fix the Windows network error.
Why Am I Seeing the ‘Windows Could Not Start The WLAN Autoconfig Service on Local Computer’ Error?
You’ll likely get an error code in the ‘Windows could not start the WLAN Autoconfig service on Local Computer’ service dialogue box. Indeed, this helps determine the nature of the network problem.
Well, these error codes can be 1068, 122, 21, 1075, etc. Basically, each of them has a different meaning, and they are triggered due to issues on distinct areas of the local computer.
- The wireless network adapter is disabled
- Startup issues with the WLAN Autoconfig service
- Corrupted system files or hard disk errors
- Firewall or antivirus program issues
- Corrupted Winsock Catalog and network drivers
- Outdated drivers or operating system
- Problems with some motherboard units
11 Ways to Fix Windows Could Not Start The WLAN Autoconfig Service on Local Computer
Since ‘Windows could not start the WLAN Autoconfig service on Local Computer’ is a network error, we first recommend power cycling your router. All you have to do is turn off the device using a dedicated button, wait for about a minute, and turn it back again.
Restarting the network device will fix hung processes and reorganize them in an ordered sequence. Moreover, a new IP address is assigned to your PC after the connection is reestablished, which should fix the WLAN Autoconfig service error.
Furthermore, Windows service or networking errors can be triggered when your OS fails to recognize the hard drive. Thus, we advise restarting your computer, which should do the trick.
Is there an underlying Windows update? Indeed, if your OS remains outdated for a long time, there’s a high chance of encountering this network error having any code.
Therefore, you need to check for system updates in Settings > Windows Update regularly. Interestingly, you can also update Windows from the command line.
If you’re still seeing the WLAN Autoconfig service error after trying the aforementioned fixes, the solutions below should help you out.
Ensure Wireless Connection is Enabled
Indeed, the WLAN Autoconfig service may not run if you have disabled the wireless connection itself. Hence, the first thing is to ensure that your Wi-Fi is physically turned on and the wireless adapter is also enabled.
Generally, most laptops have a dedicated button or key with an LED to enable/disable the wireless connection. If not, other models support this feature using combined keys, like Fn + F5.
Likewise, you can also check the wireless network adapter to see if this has been enabled/disabled:
- Using the instant search icon, search for Control Panel and launch it.
- Under Network and Internet, click on the View network status and tasks option.

- Then, choose Change adapter settings from the left panel.
- Here, look for the Wireless Network Connection or Wi-Fi adapter. If you see it pinked out, right-click on it and choose Enable.
- Now, join the wireless connection and see if this fixes the network error.


Check & Fix Issues With the WLAN Autoconfig Service
The WLAN Autoconfig service is responsible for selecting the correct wireless adapter for your PC and managing its settings. Hence, anything wrong with it will eventually trigger the ‘Windows could not start the WLAN Autoconfig service on Local Computer’ error.
When you switch from a wireless to an ethernet connection, the WLAN Autoconfig service can sometimes get disabled. Hence, we suggest enabling it manually:
- Open Run and run
services.mscto navigate to the Services program. - From the Windows services list, find WLAN AutoConfig and check if it’s running.
- If the status field is blank, right-click and choose Start.
But if it’s already running, you can select Restart. - Wait for a few seconds, and this should start the service.


However, running it manually can also show you the same network error. This can happen due to an incorrectly configured startup type. So, here’s how you can fix this:
- Double-click the WLAN AutoConfig service.
- Once its Properties window opens, find the Startup type option in the General tab.
- Here, expand the choices and set it to Automatic.
- Now, hit the Ok button to save this WLAN setting.
- Finally, reboot your computer and check if you still see the network error.

Furthermore, the WLAN AutoConfig depends on some other Windows services. Thus, this error might have occurred due to these faulty system components. Please follow the guide below on how to check and fix them manually:
- In the WLAN AutoConfig Properties, switch to the Dependencies tab.
- Under ‘This service depends on the following system components’, you’ll find that the WLAN AutoConfig service depends on NativeWiFi Filter, NDIS Usermode I/O, Remote Procedure Call (RPC), and Windows Connection Manager.
- Go to the Services window and find Windows Connection Manager. Right-click on it and choose restart.
Unfortunately, the restarting option isn’t available for RPC. - Since Windows Connection Manager depends on the Network Store Interface, we recommend refreshing and restarting this service as well.
- Once all these services are running, try connecting to your wireless network. This should resolve the error.


Make Changes in the DHCP Register
Dynamic Host Configuration Protocol (DHCP) is responsible for assigning and changing IP addresses on your computer. But if it fails to provide a valid IP configuration, you might face networking errors, including ‘Windows could not start the WLAN Autoconfig service on Local Computer’.
Generally, refreshing or restarting the DHCP Client service should fix any problems related to DHCP. However, dependency issues can also trigger this Windows network error. In such a case, we recommend tweaking the DHCP register:
- Press Windows + R to open Run, and here, run the
regedit.execommand to launch Registry Editor. - Next, navigate to the below path:
Computer\HKEY_LOCAL_MACHINE\SYSTEM\CurrentControlSet\Services\Dhcp - Move to the right pane and double-click the DependOnService value.
- In the Value data field, you may find several dependencies. Delete all of them and only keep Afd. This will make the DHCP Client service depend only on AFD (Ancillary Function Driver).
- Restart your PC and see if this runs the WLAN Autoconfig service.
- If you encounter another error message and lose network connectivity, go back to the same path in Registry Editor and double-click the DependOnService value again.
- This time, edit and add the below data in the Value Data field:
NSI
Afd
This will make the DHCP Client depend on NSI (Network Store Interface) service too, which is responsible for delivering network notifications. - Reboot your system again, and you should no longer face the network error.


Reset Winsock Entries and TCP/IP Stack
No matter the error code you get, it’s pretty much sure that you’re seeing the ‘Windows could not start the WLAN Autoconfig service on Local Computer’ message due to corrupted network configuration.
Thus, resetting the Winsock catalog will reset all your network settings and fix the cause behind the Windows error. Kindly go through the below steps to learn how to do just that:
- Press the Windows key and search Command Prompt or Powershell. Right-click on it and choose Run as administrator.
- Hit the Yes button, and you’ll be navigated to the terminal.
- Here, run the below command line to reset the Winsock entries:
netsh winsock reset catalog - Press Enter, and this will successfully complete the reset.
- Again, use the below command to reset the TCP/IP stack:
netsh int ip reset reset.log hit
Basically, this will restore the TCP/IP and DHCP configuration to their default values. - Finally, restart your computer to complete both resets.


Run Windows Network Diagnostics
Windows Network Diagnostics is an excellent option to diagnose possible errors with your network adapter. Well, running it is relatively easy, and below are the necessary steps you need to follow:
- Go to Control Panel > Network and Internet > View network status and tasks.
- Now, select ‘Change adapter settings’ from the left pane to launch the Network Connections window.
- Here, right-click on your wireless adapter and choose Diagnose.
- The problem should be listed once the troubleshooter detects problems.
Lastly, close the dialogue box.


Run Network Adapter Troubleshooter
Like Windows Network Diagnostics, you can run the Network Adapter troubleshooter to find and fix network-related issues. Here, you can select your wireless adapter or even identify problems in other network drivers:
- Use the Windows + I hotkey to open Settings and move to System > Troubleshoot.
- Here, pick Other troubleshooters.
- Now, find and run the Network Adapter troubleshooter.
- Once a new dialogue box launches, select Wi-Fi and tap Next.
- Wait for several seconds until the dedicated troubleshooter scans through your PC and fixes network bugs and glitches.


Update or Reinstall Network Drivers
If you’re still seeing the network error after running Windows Network Diagnostics and Network Adapter troubleshooter, there are serious issues within the network drivers. Generally, updating or reinstalling them should resolve such network errors:
- From the Instant Search, find and launch Device Manager.
- Expand Network Adapters and right-click on your device driver. Here, choose Update driver.
- Next, pick the Search automatically for drivers option, and the network adapter should be updated.
- If you can’t update the driver, right-click on the network driver again and select Uninstall device.
- Then, press the Uninstall button to complete the deletion.
- Now, restart Windows, and the necessary driver is installed automatically when your computer boots.
- Finally, try running the WLAN Autoconfig service and check if the error persists.


Run SFC, DISM, and CHKDSK Commands
Indeed, the WLAN Autoconfig service error can be triggered due to corrupted system files or hard disk. But before moving forward, we recommend joining your PC or laptop port with an ethernet cable if possible. Now, you can use simple yet effective commands to fix them:
- Firstly, launch any Windows terminal – Powershell or Command Prompt with admin privilege, as explained earlier.
- Now, run the SFC command to check and repair possible bugs in the system files:
sfc /scannow - Next, use the below command to check possible problems with the Windows image files and restore their health:
DISM /Online /Cleanup-Image /RestoreHealth
However, if you’re unable to set up an ethernet connection, you may use the below command:DISM /Cleanup-Mountpoints - After the DISM command, we recommend rerunning the SFC command.
- Then, restart your PC, and the Windows error should stop troubling you.
- If it doesn’t, we recommend running the CHKDSK command to repair any hard drive issues:
chkdsk /f /r /x - Again, restart your computer. If your hard drive was the cause behind the Windows error, the CHKDSK command should solve your problem.


Scan for Malware & Disable Windows Defender
If the WLAN Autoconfig is infected with viruses, the firewall will close the ports for security purposes. Hence, you need to first run a full scan to remove any malware:
- Navigate to the start menu and search for Windows Security.
- Next, pick Virus & threat protection.
- Then, find and select Scan options.
- In the next window, mark the Full Scan choice and press the Scan now button to start the scanning.


Caution: Some third-party anti-virus programs can also tamper with your network and trigger the error message. Hence, you need to disable or permanently delete such applications.
Sometimes, eliminating viruses can solve your problem. But if this doesn’t help, the Windows Defender Firewall is probably protecting your PC from network violations or malicious programs. Therefore, the next thing to do is disable the firewall to check if this is causing it:
- Go to the Control Panel using the
controlcommand in the Run dialogue box. - Next, move to System and Security > Windows Defender Firewall.
- Now, tap the Turn Windows Defender on or off option from the left side of the Control Panel window.
- Then, move to the ‘Private network settings’ and select Turn off Windows Defender Firewall (not recommended). Also, repeat this for ‘Public network settings’.
- Finally, click the Ok button and try running the WLAN Autoconfig service manually.


If the service runs without showing the ‘Windows could not start the WLAN Autoconfig service on Local Computer’, know that the firewall was preventing it. So, you can now allow the WLAN services through the Windows Defender:
- Firstly, enable the firewall.
- Then, go back to the Windows Defender Firewall settings.
- From the left pane, select Allow an app or feature through Windows Defender Firewall.
- Here, press the Change settings button to enable administrative privilege.
- From the list of apps and features, find WLAN Service – WFD Application Services Platform Coordination Protocol (Uses UDP) and WLAN Service – WFD Services Kernel Mode Driver Rules. Check both the Private and Public options.
- Finally, press Ok to apply the changes.


Restore or Reinstall Windows
Sometimes, corrupted Windows updates can also cause issues with the WLAN Autoconfig service. So, you can try restoring your computer to the state when you didn’t get the error message:
- In settings, navigate to System > About.
- Expand the Device specifications and choose Advanced system settings.
- After the System Properties pops up, switch to the System Protection tab.
- Find the System Restore button and click on it.
- Now, hit Next to continue.
- Then, choose a restoration point from the list and press Next.
- Tap the Finish button. Now, you need to follow the on-screen instructions, and your computer should be restored.
- Once Windows boots, the WLAN Autoconfig service should run automatically. If it doesn’t, you can do so manually from the Service application.


Well, if system restoration didn’t do the trick, you might want to reinstall the operating system. Basically, you can either perform a factory reset or clean install Windows.
Update or Reset BIOS
Reportedly, after reinstalling the OS, some users still faced the ‘Windows could not start the WLAN Autoconfig service on Local Computer’ error message. This means there’s probably an issue with your BIOS settings or some motherboard units.
Firstly, we suggest getting into BIOS and enabling the WLAN option, if available. To do so, find Power Management and look for Wireless Radio Control, where the WLAN setting should be visible.
If the problem persists even after updating your BIOS, the final method is to reset it. All you have to do is reseat the CMOS battery, as shown in the figure above. Now, restart your PC and run the WLAN Autoconfig service.