
To change ink in your HP printer, first open the cartridge access door and reach the cartridge setup.
- For two/four cartridge setup: Dislodge the old ink cartridges and install the new ones.
- For two cartridge setups with ink tanks: These kinds of printers do not require changing ink cartridges. Directly refill the ink tanks and you are good to go.
Let’s go through the details now.
Turn on Your Printer and Open the Access Doors
To start, connect your printer to a power supply and press the power button. Once the printer turns on, open the access doors.

Printers generally have cartridge access doors at the front or top. While most printers have a single door, some of them like my HP Ink Tank Wireless 415 even have dual doors.
Please check and act accordingly.

Dislodge the Old Ink Cartridges
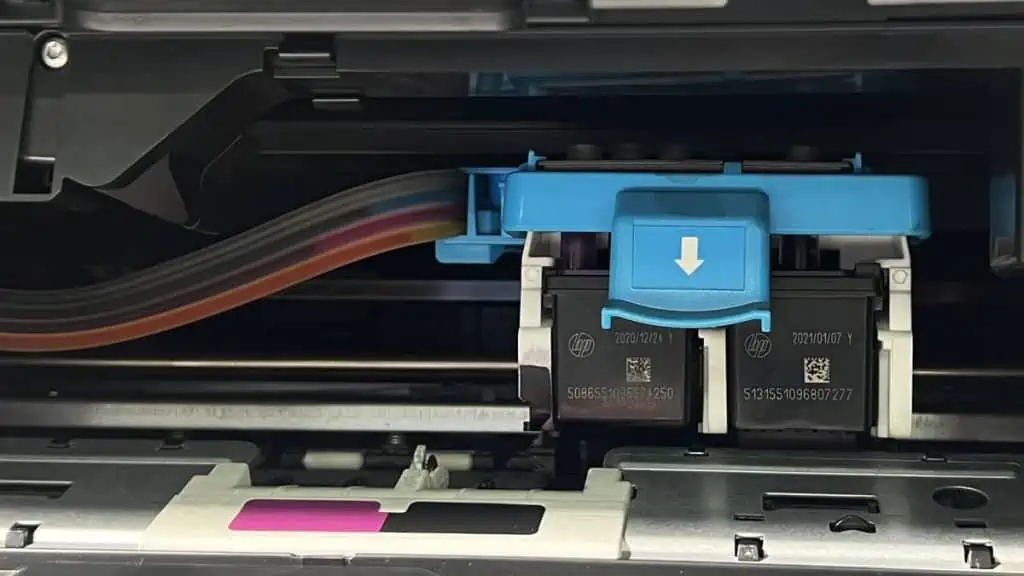
Now that you have opened the doors, you’ll see ink cartridges slowly moving to the center. Wait until they are in the middle of the paper path.
In some models, the cartridges may not move to the center themselves. In such cases, gently bring them to the center with your hands.

Once they are at the center, press the carriage cover to unlock it.

Then, press the latch on the cartridge’s top and get them out. You may either remove all of them or specific ones, depending upon the ink levels on your printer.

For instance, if your printer is running out of black ink only, you can remove the black cartridge.
Install New Ink Cartridges
Now bring the new ink cartridge from HP and remove all the tape and protective covering stuff. While you’re at it, please refrain from touching the nozzle and yellow-colored contact chips.

You should only hold the cartridge by its sides. Or else, your printer won’t recognize the cartridge later.

After that, insert the new cartridge into the slot and make sure it correctly snaps into its place. Once you’re done, close the cartridge access doors.
Align the Printhead and Complete the Installation
Now that you are here, I believe you have successfully changed the ink on your HP printer. But hold on! We’re yet to finalize the installation.
What you need to know is, the image quality of your printer gets quite blurry/grainy after the new cartridge installation. So, you must always align the printheads after changing the ink cartridges.
Here’s how to do it.
- Launch HP Smart on your PC.

- Select the Printer Settings tab.
- Then, choose Print Quality Tools under the Tools section.
- Tap Align Printheads.
- Click the Print Alignment Page button and then follow the on-screen instructions to complete the alignment.


