Tech News Today
  • Hardware
    • Motherboards
    • CPUs
    • Graphic Cards
    • RAM
    • SSDs
    • Computer Cases
    • Monitors
    • Peripherals
    • Power Supply Unit
    • PC Builds
    • Computer Tips
  • Software
  • Operating System
    • Windows
    • Mac
    • Linux
  • Gaming
  • Mobile
  • Console
  • More
    • Internet
    • Networking
    • Security
    • Buyer’s Guide
    • Gadgets
    • Laptops
    • Reviews
    • How To
    • News
Facebook Twitter Instagram
Tech News Today
  • Hardware
    • Motherboards
    • CPUs
    • Graphic Cards
    • RAM
    • SSDs
    • Computer Cases
    • Monitors
    • Peripherals
    • Power Supply Unit
    • PC Builds
    • Computer Tips
  • Software
  • Operating System
    • Windows
    • Mac
    • Linux
  • Gaming
  • Mobile
  • Console
  • More
    • Internet
    • Networking
    • Security
    • Buyer’s Guide
    • Gadgets
    • Laptops
    • Reviews
    • How To
    • News
Tech News Today
Home»Windows»How to Fix DRIVER VERIFIER DMA VIOLATION BSOD Error

How to Fix DRIVER VERIFIER DMA VIOLATION BSOD Error

Anup ThapaBy Anup ThapaSeptember 8, 2022
driver verifier dma violation bsod error

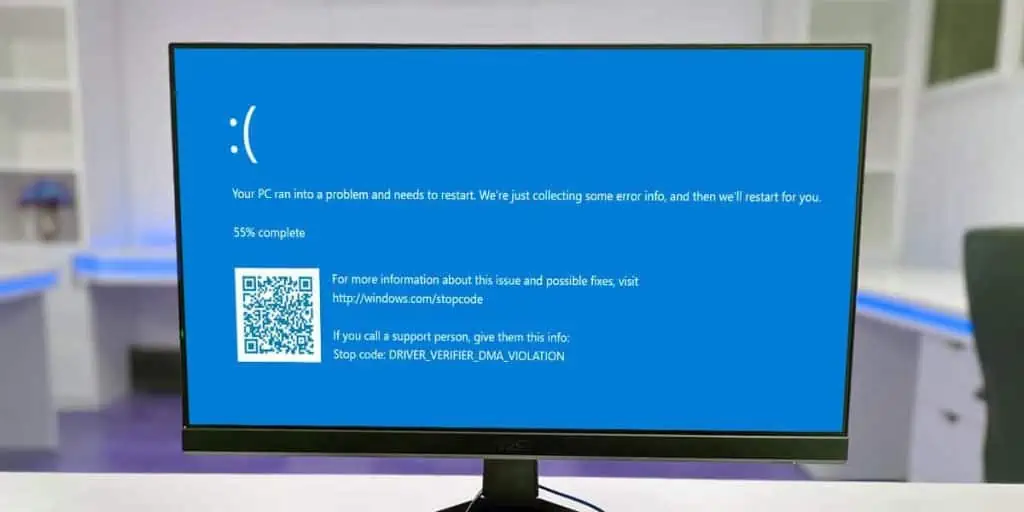
When Driver Verifier detects a violation, it generates a bugcheck to provide you with info to debug the problem. The DRIVER VERIFIER DMA VIOLATION BSOD Error, which has a value of 0x000000E6, is one such bugcheck.

Once you’ve encountered this bugcheck, you should first disable Driver Verifier so that you don’t get the same error again. Afterward, you should analyze the generated dump file to single out the problematic driver on your system and troubleshoot it accordingly.

In rare cases, this BSOD can also occur due to implementation issues with Kernel DMA Protection in Windows.

Table of Contents

  • How to Fix DRIVER VERIFIER DMA VIOLATION BSOD Error
    • Disable Driver Verifier
    • Analyze Dump File
    • Troubleshoot Driver
    • Resolve Kernel DMA Protection Issues
    • Check SATA Operation Mode
    • Update BIOS

How to Fix DRIVER VERIFIER DMA VIOLATION BSOD Error

Driver Developers should check out Microsoft’s list of parameters for the DRIVER_VERIFIER_DMA_VIOLATION bugcheck. This should help you identify the exact violation and fix the bugs accordingly. But these won’t be of much help for normal users. Instead, we recommend trying out the solutions in the order listed below for the best efficiency.

Disable Driver Verifier

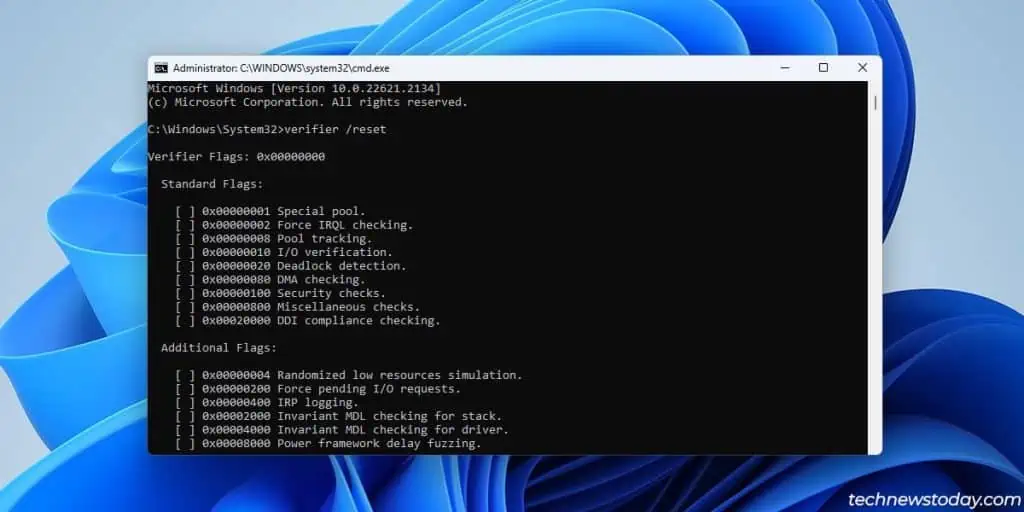
If you want multiple dump files, you could leave Driver Verifier enabled a bit longer so that it detects some more violations. But otherwise, it would be best to disable it so that you don’t unnecessarily encounter the same bugcheck again. You can easily do this by using the verifier /reset command in CMD.

verifier-reset

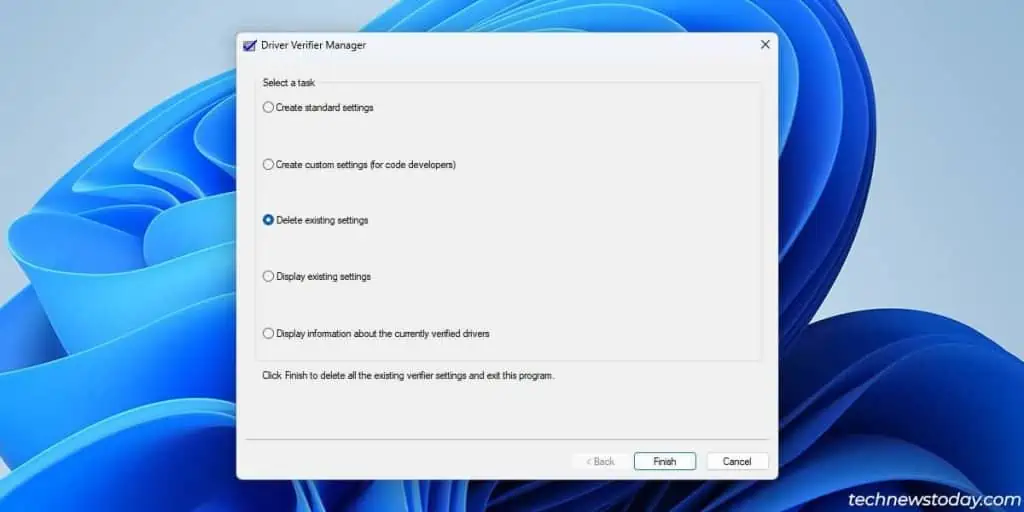
Alternatively, you can also do it via the GUI as such:

  1. Press Win + R, type verifier, and press Enter.
  2. Select Delete existing settings and press Finish.
    delete-existing-settings-driver-verifier

Analyze Dump File

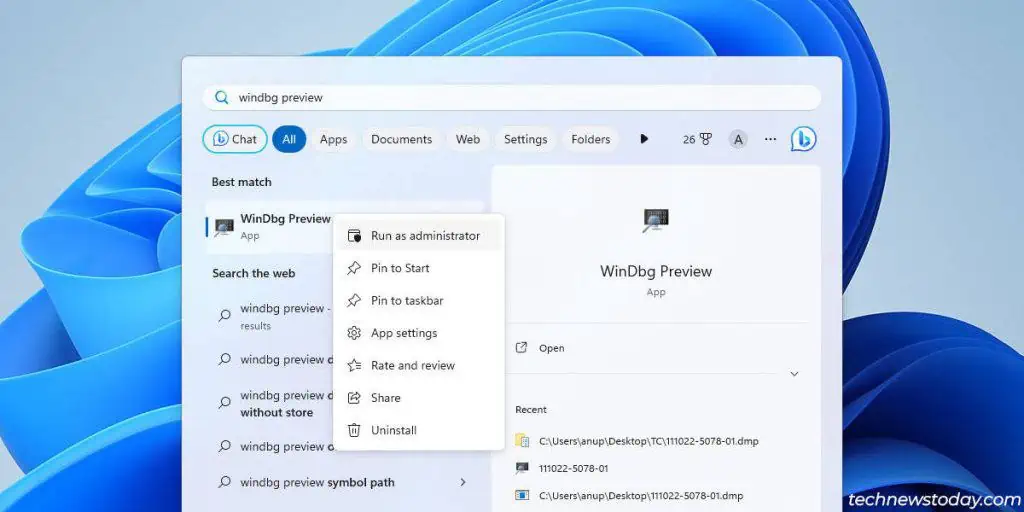
Now, you should analyze the dump file generated by the bugcheck to figure out what the problem was with your system in the first place. You can easily do this with the WinDbg Preview App from the Microsoft Store. Here are the steps for this:

  1. Install and launch the app if you haven’t already.
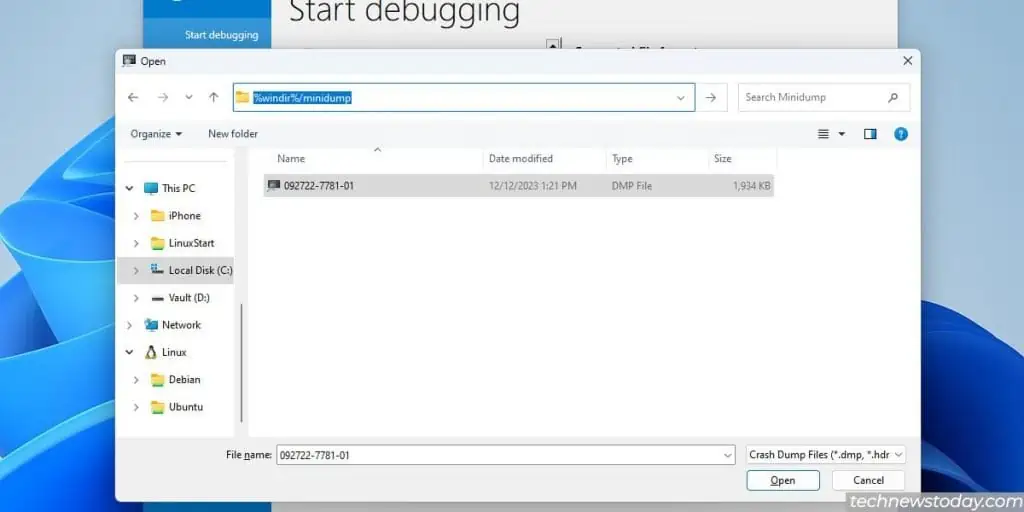
  2. Press CTRL + D, go to %windir% or %windir%/minidump/ and open the dump file.
    open dump file
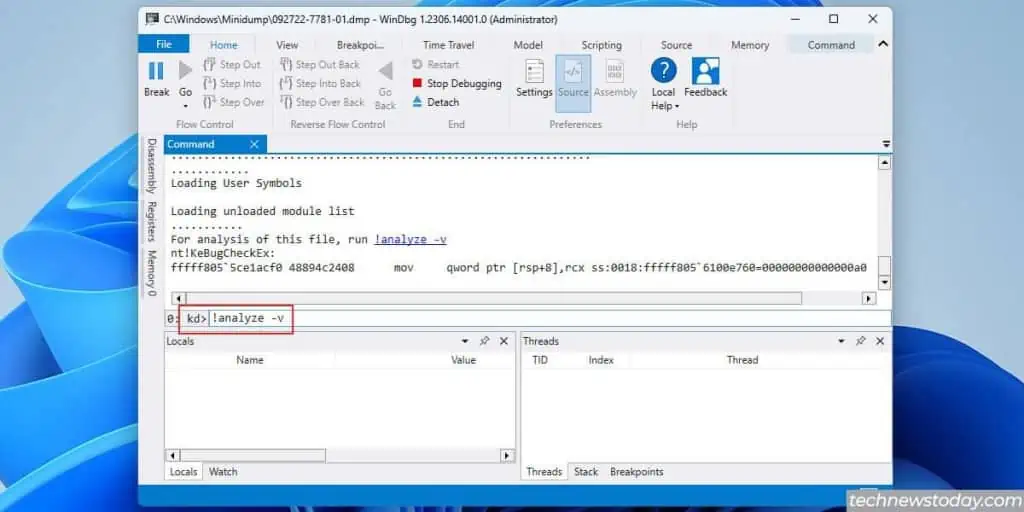
  3. Select View > Command and enter !analyze -v at the kd prompt.
    windbg analyze
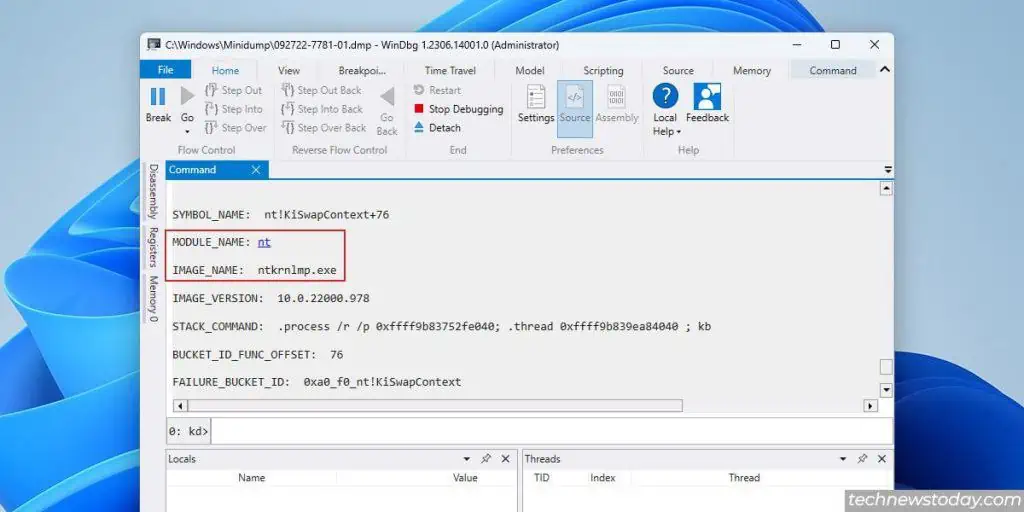
  4. Once the analysis completes, check the MODULE_NAME and Probably caused by sections for hints on which driver was the problem.
  5. If there’s multiple dump files, analyze the rest to get more information.

Troubleshoot Driver

After you’ve determined the problematic driver, you’ll want to troubleshoot it. First, it would be best to try and update it. But if the latest drivers don’t change much, you can roll back or uninstall as appropriate.

We’ll use the network driver, which is a common reason for BSODs, as an example for the steps listed below. You should adjust as appropriate.

Update Driver

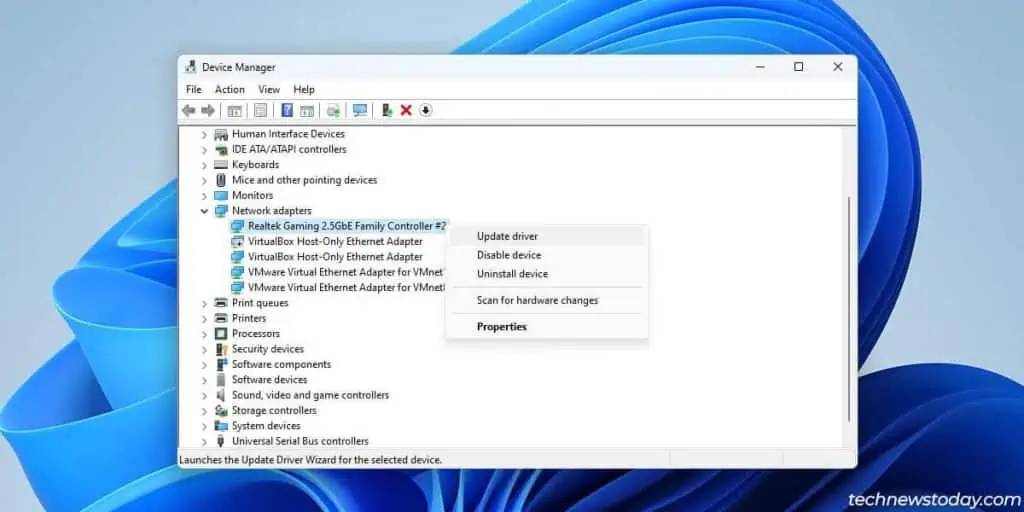
First, you should try updating the driver via the Device Manager. Here’s how you can do so:

  1. Press Win + R, type devmgmt.msc, and press Enter.
  2. Expand the Network Adapter section.
    update-network-driver'
  3. Right-click the Network Adapter and select Update Driver.
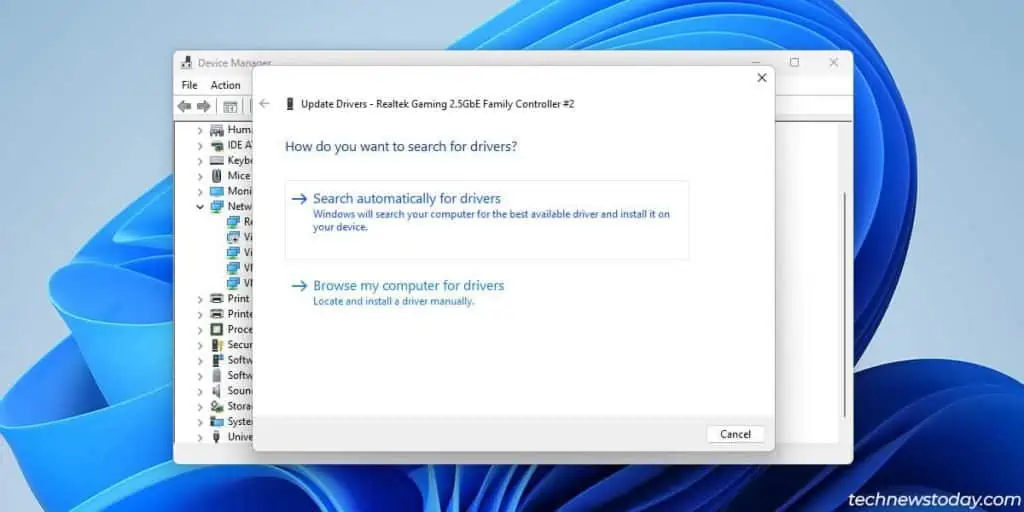
  4. There are a couple of options here:
    • First, you can select Search Automatically for Drivers > Search for updated drivers on Windows Update to download recent drivers via Windows Update. These drivers will rarely be the latest ones, though.
      choose search automatically for drivers
    • If you’ve manually downloaded driver files from the manufacturer’s site, you can select Browse my computer for drivers and locate the files manually.
      browse-driver-location

The second way to update drivers is by using the manufacturer’s software. For instance, in the case of graphics drivers, NVIDIA has GeForce Experience, and AMD has AMD Adrenalin.

Roll Back Drivers

If your problems started after you updated a certain driver, rolling back to the previous build would likely resolve the issue. Here’s how you can do so:

  1. Press Win + X and select Device Manager.
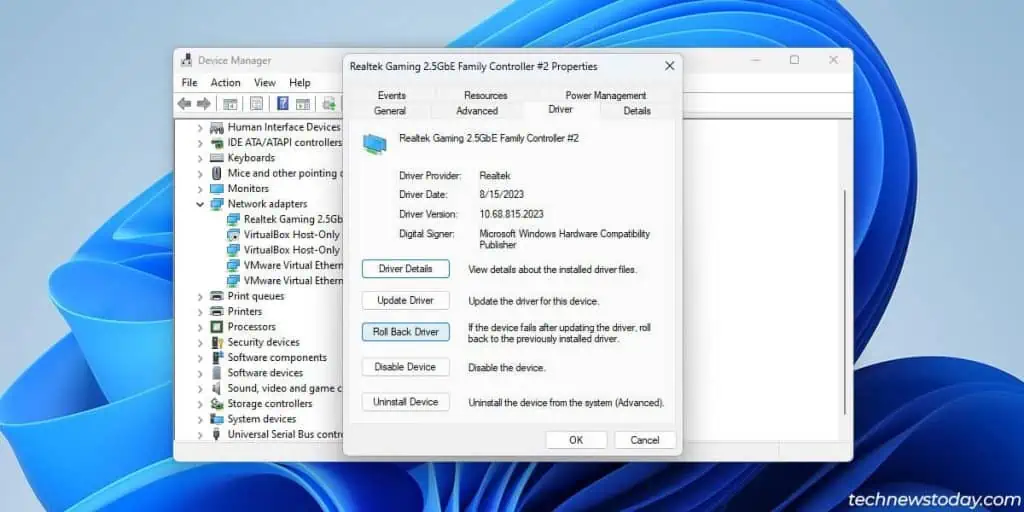
  2. Expand the Network Adapter section and double-click the Network Adapter.
  3. In the Driver tab, click on Roll Back driver.
    roll-back-network-driver
  4. Pick any reason for rolling back and proceed with the rollback.

Uninstall Driver

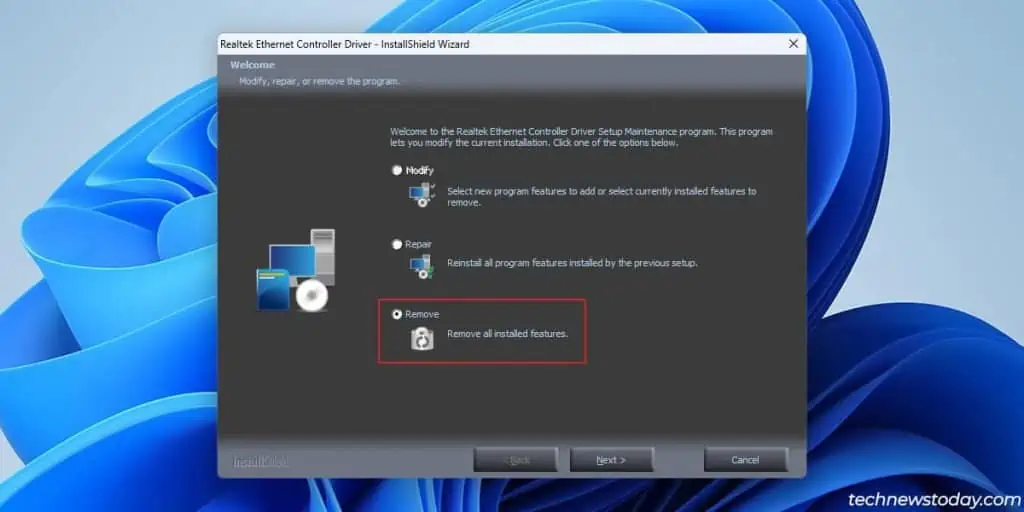
If updating or rolling back didn’t really help, the current driver files are likely corrupt. In such cases, you can uninstall the device and remove the driver files from your system. This will revert the driver to default provided by Microsoft.

  1. Open the Device Manager once again and expand the Network Adapter section.
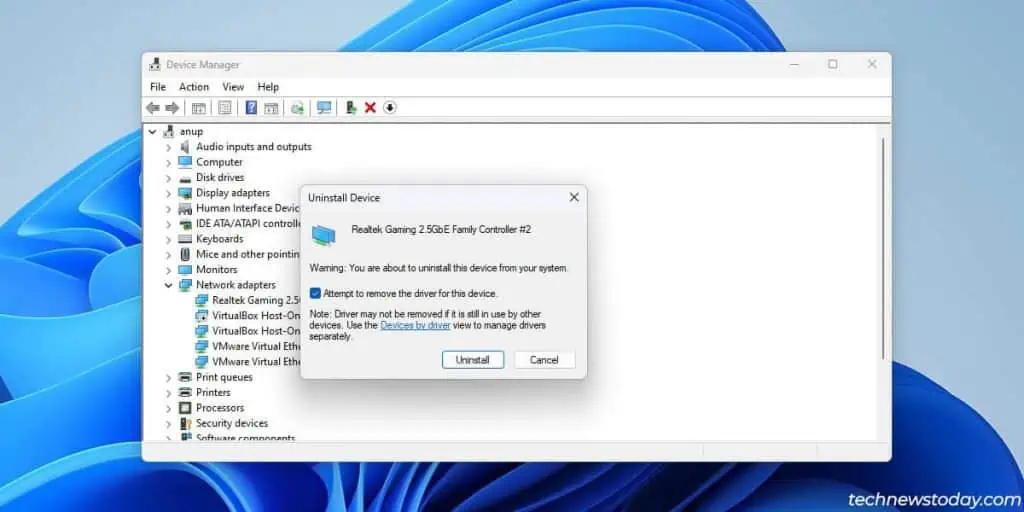
  2. Right-click the Network Adapter and select Uninstall Device.
    uninstall-network-adapter
  3. Enable the Attempt to remove the driver for this device option and proceed with the on-screen instructions.

Note: Windows 11 systems are known to encounter the DRIVER VERIFIER DMA VIOLATION BSOD error when connected to a Razer Core X or Cor X Chroma. This happens because the dGPU and eGPU driver versions don’t match. As such, you’ll want to follow the steps shown above to uninstall the drivers first, then manually download and install the drivers for both, ensuring the versions are the same.

Resolve Kernel DMA Protection Issues

There’s a known Direct Memory Access (DMA) implementation issue in Windows 10 build 1803, or later, where, if legacy PCI devices installed in an external chassis attempt DMA, the OS crashes.

As promised, Microsoft resolved this problem in 20H2 and newer versions with the KB5014699 service pack update. As such, updating Windows is an easy way to resolve this issue. Here are the steps for this:

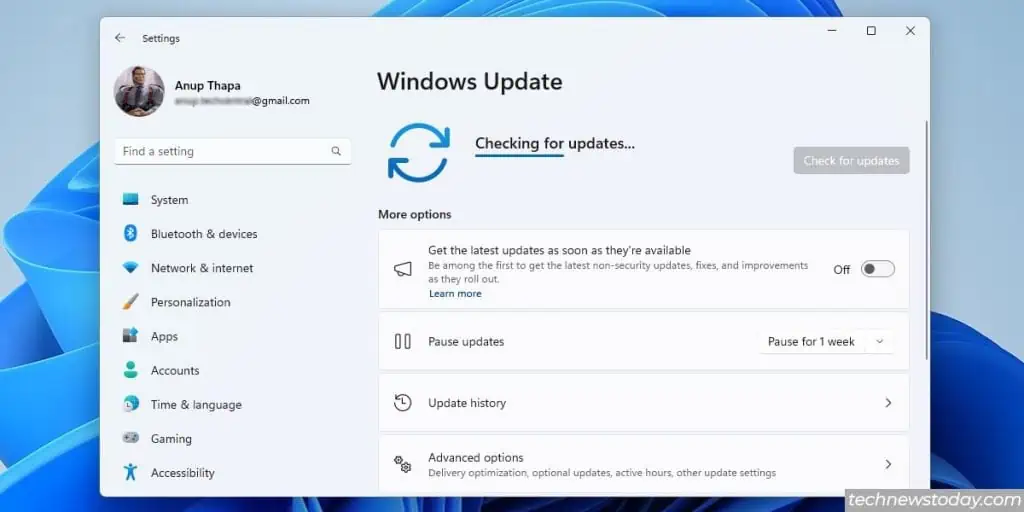
  1. Press Win + R, type control update, and press Enter.
  2. Click on Check for updates, and download and install any available ones.
    check-for-updates-download-and-install
  3. Restart your PC afterward.
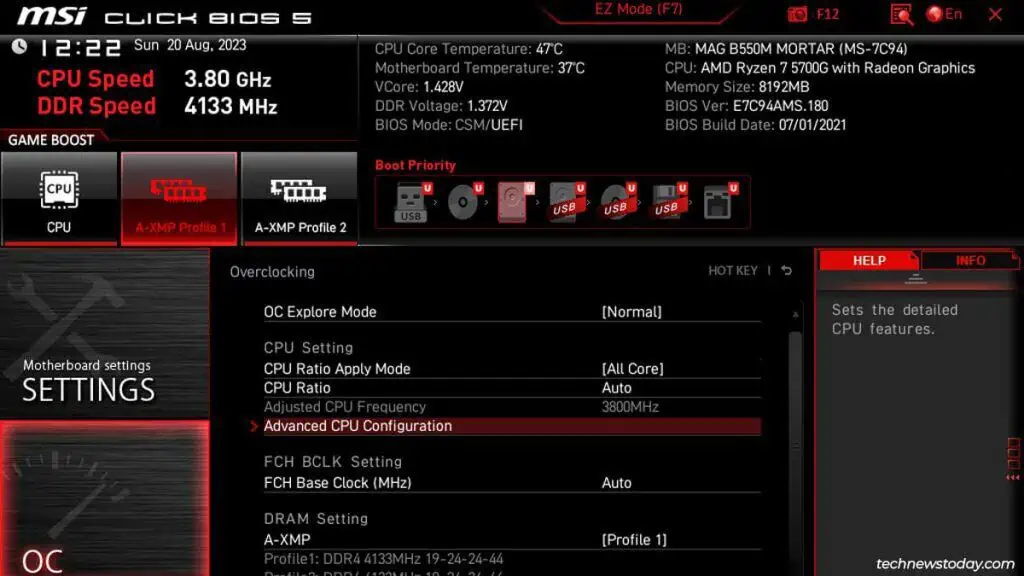
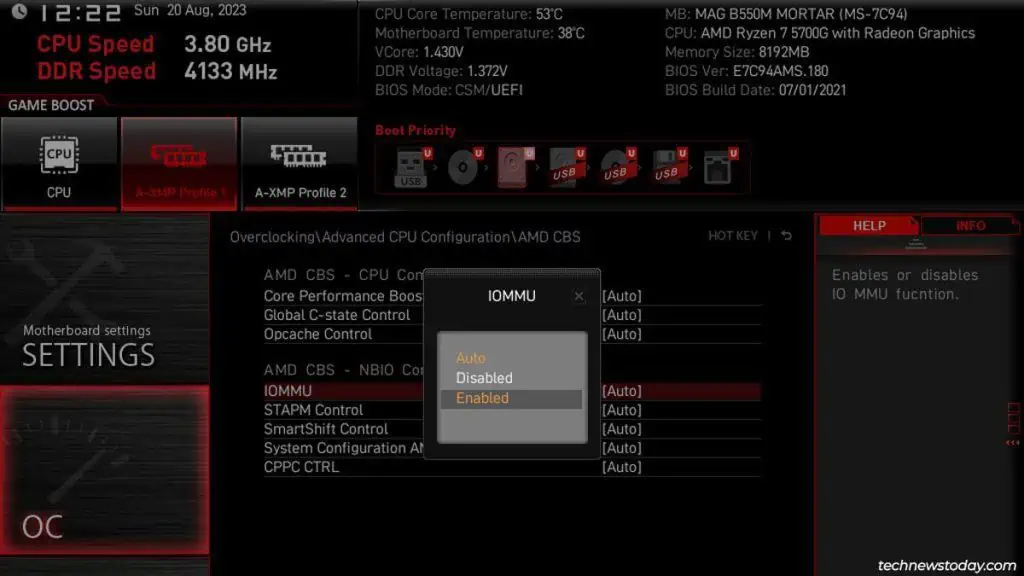
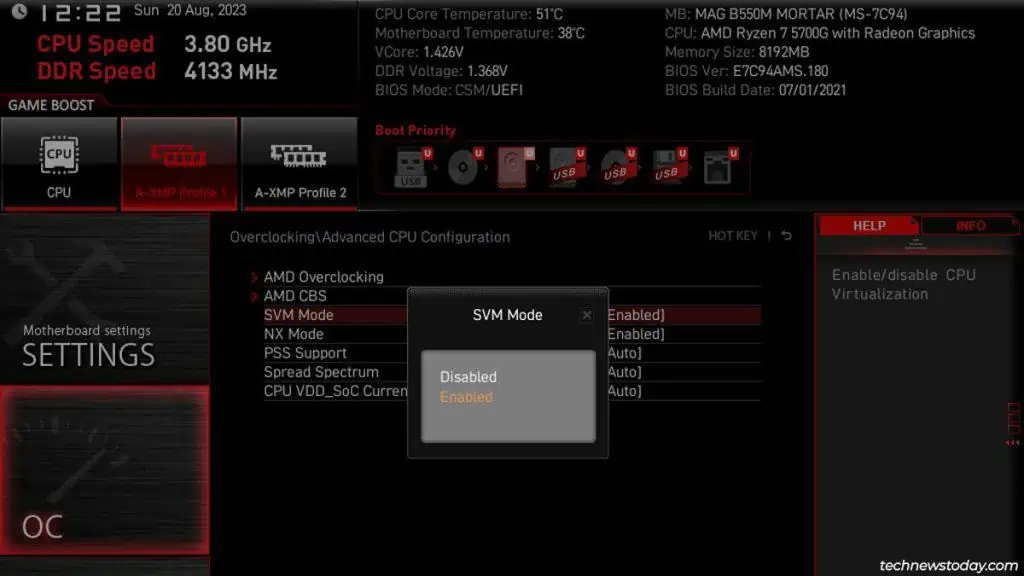
Another way to work around this problem without updating is by disabling Kernel DMA Protection in the BIOS. Here are the steps for this:

  1. Reboot your PC and press the BIOS key (Fn keys or Del).
  2. Navigate to the Virtualization section and disable Kernel DMA Protection.
    kernel-dma-protection
  3. If you don’t see this option, disable the Directed I/O option (VT-d) instead.
  4. Press the key shown on the screen (usually F10) to save the changes and exit.

Check SATA Operation Mode

There have been a few rare cases where users encountered this bugcheck because the SATA Operation Mode was configured incorrectly in the BIOS. Here’s how you can check if this is the problem:

  1. Reboot your PC and press the BIOS key (Fn keys or Del).
  2. Navigate to the Advanced or Storage Configuration section.
  3. Ensure SATA is configured correctly. For instance, if it were set to RAID on a non-RAID system, that wouldn’t work. You’d need to set it to AHCI or IDE instead.
    bios-sata-controller-mode
  4. Press the key shown on the screen to save the changes and exit (usually F10).

Update BIOS

bios-update

If your BIOS is outdated and none of the other fixes have worked so far, a BIOS update is worth trying. There are various ways to update the BIOS, and we have in-depth articles on each one on our website that will be of help to you.

Additionally, if the problem persists despite the BIOS update, we recommend taking the motherboard to a professional for checking, as it is likely the faulty component at this point.

fix
Anup Thapa
  • LinkedIn

Anup Thapa is a tech writer at TechNewsToday. He mostly writes informative articles, tutorials, and troubleshooting guides related to Windows systems, networking, and computer hardware. Anup has been writing professionally for almost 5 years, and tinkering with PCs for much longer. His love for all things tech started when he got his first PC over 15 years ago. It was a Pentium IV system running Windows XP on a single 256 MB stick. He spent his formative years glued to this PC, troubleshooting any hardware or software problems he encountered by himself. Professionally, Anup has had brief forays into a variety of fields like coding, hardware installation, writing, etc. In doing so, he's worked with people of different backgrounds and skill levels, from average joes to industry leaders and experts. This has given him not just a versatile skillset, but also a unique perspective for writing that enables him to concisely communicate complex information and solve his reader's problems efficiently. You can contact him at anup@technewstoday.com

Related Posts

computer suddenly slow

Why is My Computer Suddenly Slow? 11 Ways to Fix It

March 31, 2023
scheduled task reboot

How to Create a Reboot Scheduled Task in Windows

March 31, 2023
slow computer startup

14 Ways to Fix Slow Computer Startup

March 26, 2023
boot loop

14 Ways to Fix Windows Boot Loop

March 19, 2023
how to change windows startup sound

How to Change Windows Startup Sound

March 17, 2023
scan disk windows 10

How to Scan Disk Windows

March 16, 2023
View 2 Comments

2 Comments

  1. Joshua on March 14, 2023 10:09 am

    Hello, i have tried this but when i iook for windex file, it wasnt there, i tried looking for it everywhere but it didnt work. What am i doing wrong?

    Reply
    • Anup Thapa on March 14, 2023 1:13 pm

      Hi Joshua,
      I’m not sure what you mean by ‘windex’ file. Are you talking about the dump files by any chance?

      Reply

Leave A Reply Cancel Reply

Latest Posts
what-does-collate-mean-on-a-printer

What Does Collate Mean on a Printer?

March 31, 2023
usb-vs-pcie-wifi

USB Vs PCIe Wi-Fi—Which One is Better?

March 31, 2023
how often to replace laptop

How Often Should You Replace a Laptop

March 29, 2023
You may also like
computer suddenly slow

Why is My Computer Suddenly Slow? 11 Ways to Fix It

March 31, 2023
HTTP-Error-431

How to Fix HTTP Error 431

March 31, 2023
scheduled task reboot

How to Create a Reboot Scheduled Task in Windows

March 31, 2023
Recommended
Cookie Clicker Garden Guide

Cookie Clicker Garden Guide to Unlocking Every Seed

September 26, 2021
monitor no signal

Computer Turns On But Monitor Says No Signal (9 Ways To Fix)

November 10, 2022
Facebook Twitter Pinterest
  • Home
  • About Us
  • Our Team
  • Editorial Guidelines
  • Privacy Policy
  • Affiliate Disclosure
© 2023 TechNewsToday, editor@technewstoday.com | Tech Central Pvt. Ltd.

Type above and press Enter to search. Press Esc to cancel.