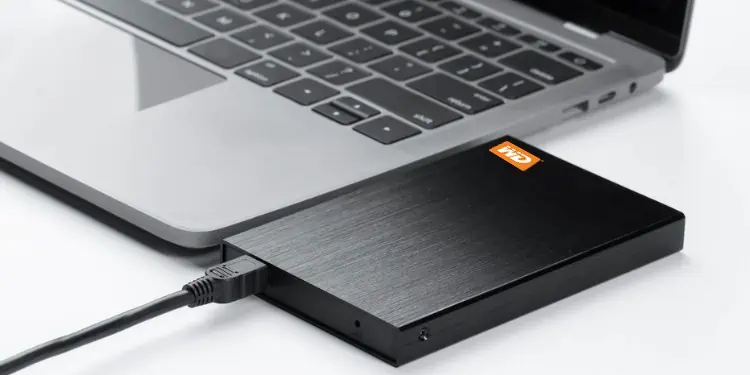
Western Digital’s My Passport is an ideal external drive choice among most Windows users. If it doesn’t show up in File Explorer despite the LED light indicating it’s working fine, you might feel that your money has gone down the drain.
But you need not worry, as this is a common issue among those who recently migrated their drive or upgraded to Windows 11. The problem can lie within your computer, operating system, or the My Passport HDD or SSD itself. Nonetheless, the simple solutions mentioned here should help you fix it.
Why is WD Passport Not Showing Up in Windows?
While some Windows users claim that the drive letter does not show up, others say that WD My Passport doesn’t appear even in the Disk Management utility. There can be several reasons why such a problem occurs.
- Broken USB cable, port, or controller
- Insufficient power supply
- USB incompatibility
- Unassigned drive letter
- Partition-related issues
- Enabled USB Selective Suspend
- Outdated or corrupted device drivers
- Outdated BIOS and chipset drivers
How to Fix WD Passport Not Showing Up
Although WD My Passport not showing up is a severe issue, trying out simple things can actually solve it. Therefore, we first suggest reconnecting the external drive, which fixes possible connectivity problems.
If you’ve plugged in the My Passport SSD or HDD to a USB Hub, there’s a possible chance of insufficient power supply. To prevent this, we recommend connecting the drive to the USB port directly.
Next, it’s a wise thing to keep Windows updated. This ensures no vulnerabilities and bugs to tamper with the external drive. Likewise, you can run the SFC command in the CLI to fix corrupted system files.
Although USB interfaces are backward-compatible, some older WD My Passport drives may not be compatible with USB 3.0, 3.1, or 3.2. For this reason, we suggest connecting the device to a different USB port (2.0) and using the same USB cable that comes with the drive.
If these general solutions didn’t solve your problem, let’s dive into the hard fixes. However, if you’re a Microsoft Surface Pro user, we recommend trying out the final two fixes first.
Check for Hardware Defects
If the WD My Passport is still not showing up, there are probably hardware defects. So, we recommend checking if the ports are broken. While you’re at it, also examine if the USB cable and the adapter are fine.
You never know if one of the USB headers on the motherboard may be damaged. Therefore, we advise plugging the internal cable into another header to see if this fixes your problem.
Assign Drive Letter
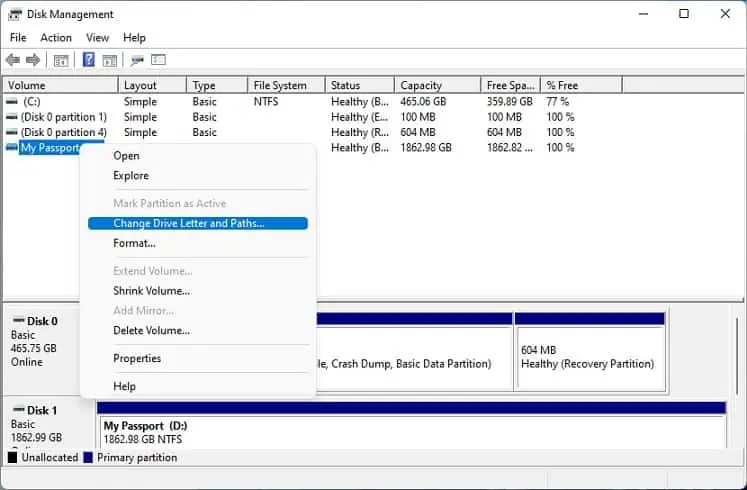
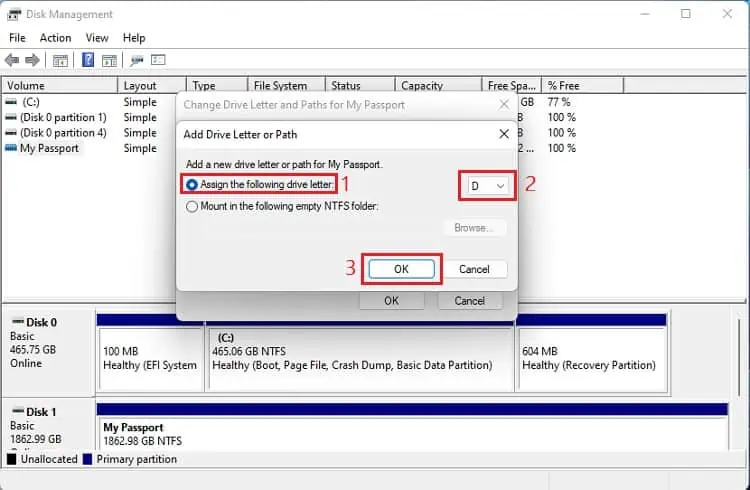
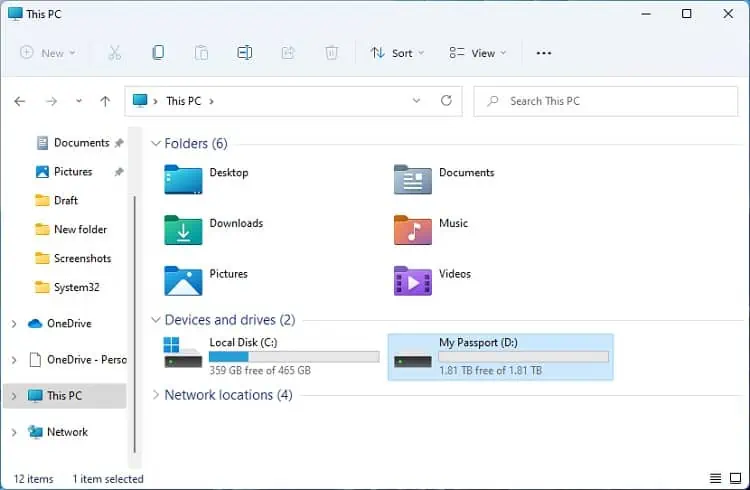
In some cases, the WD My Passport drive shows up on Disk Management, Device Manager, and other utilities but not under Devices and drives in This PC. This happens when a drive letter isn’t assigned, making the computer unable to recognize the external drive. Here’s a quick workaround to this fix:
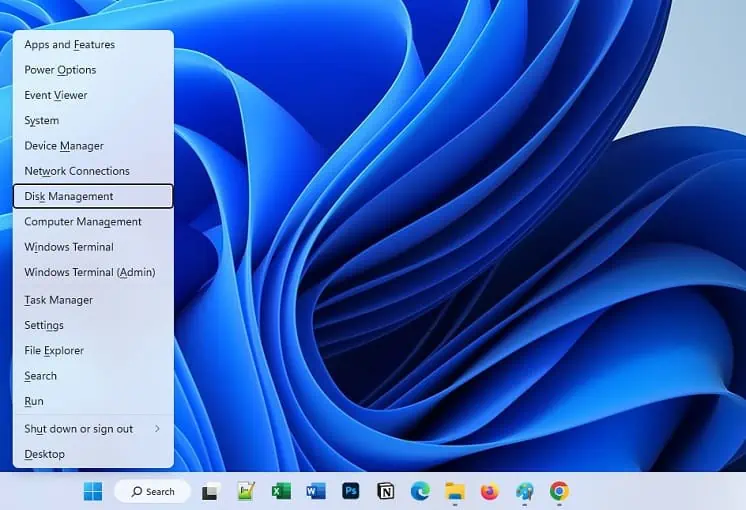
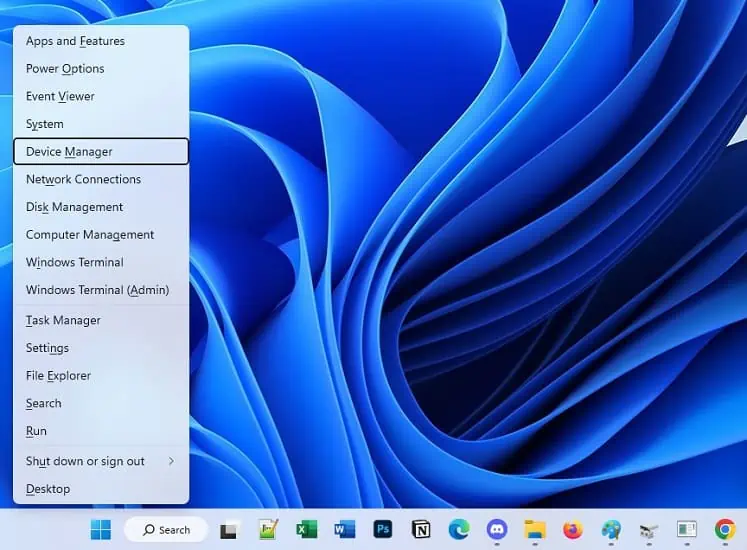
- Press Windows + X to launch the Quick Link menu.
- Here, select Disk Management.

- Once a new window pops up, right-click on the drive, and pick Change Drive Letter and Paths.

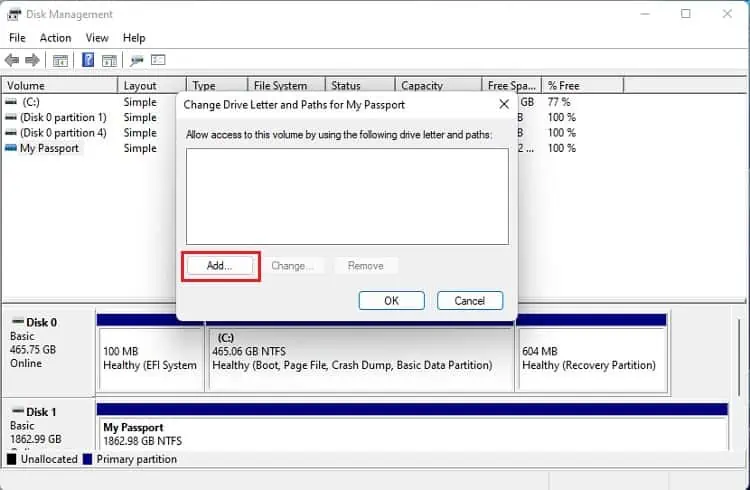
- Next, press the Add button.

- Then, select Assign the following drive letter, and choose the desired letter.
- Now, press Ok on both dialogue boxes.

- Finally, restart your PC and check if the WD My Passport drive is now showing in the File Explorer.

Check Drive Status in WD Drive Utilities
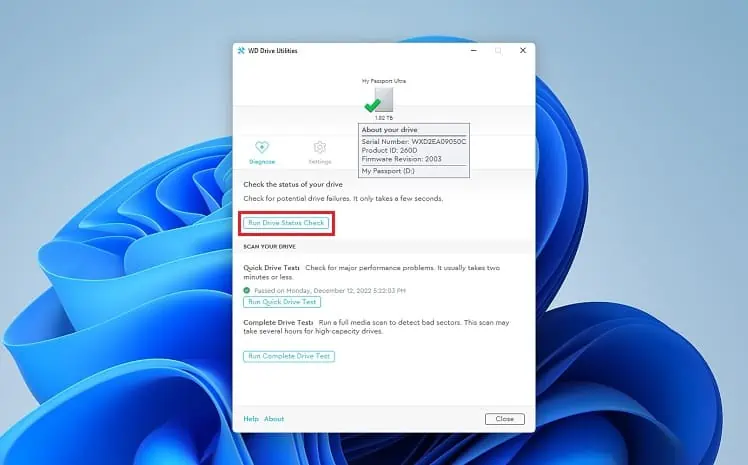
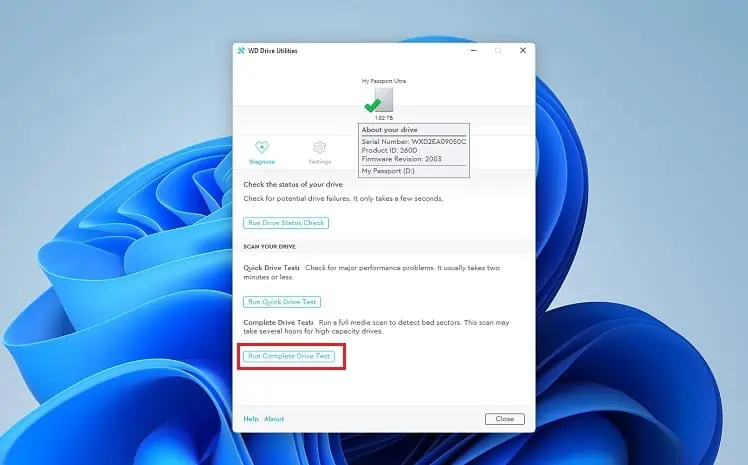
WD Drive Utilities is a diagnostic tool that lets you check possible drive failures. Additionally, you can use this tool to scan your drive to detect bad sectors and potential drive failures. But before moving forward, you need to download and install this utility from the official Western Digital support page:
- Firstly, unzip the downloaded item and install WD Drive Utilities on your PC.
- Once the installation is complete, launch the application.
- In the Diagnose tab, press the Run drive status check button. If you get the message “SMART status passed”, the WD Passport drive should now show up.

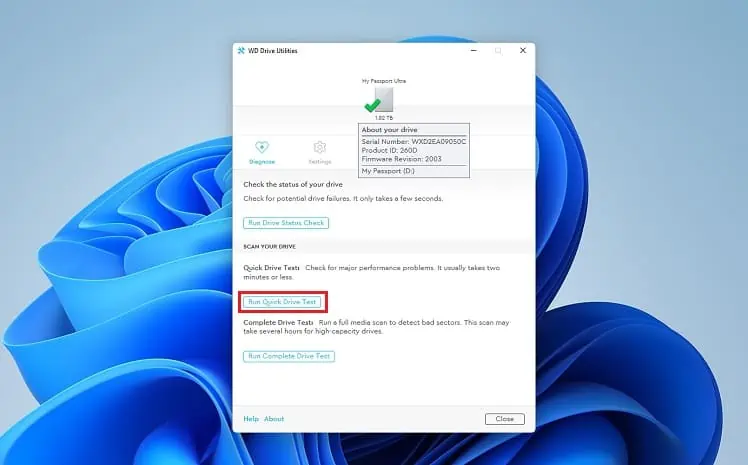
- If this doesn’t help, press the Run Quick Drive Test button, and wait until the problems are solved and fixed.

- If the quick scan method didn’t solve your problem, run the complete drive test.

Use Diskpart Utility
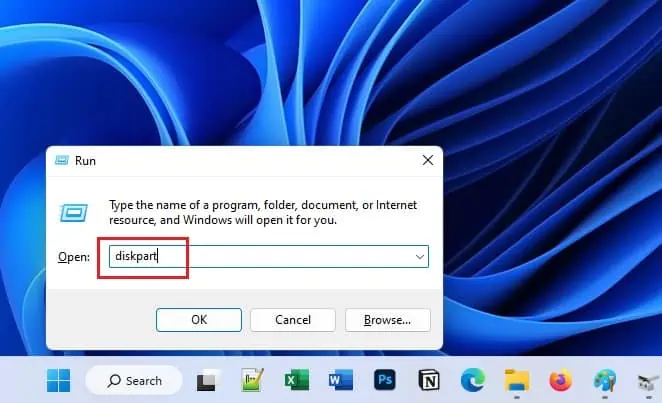
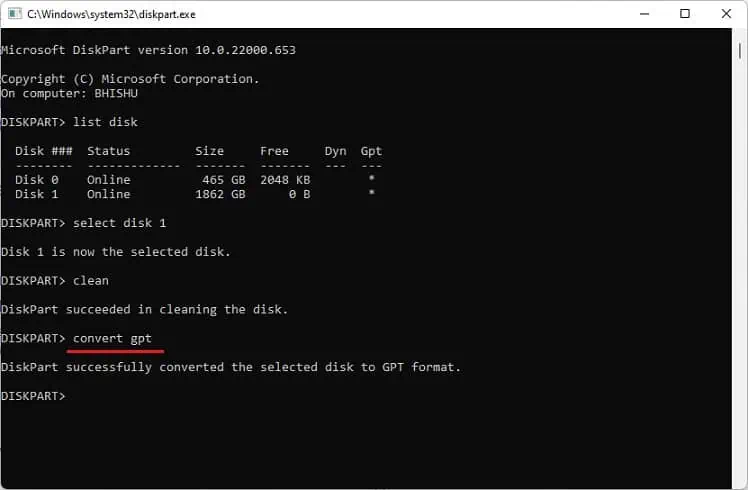
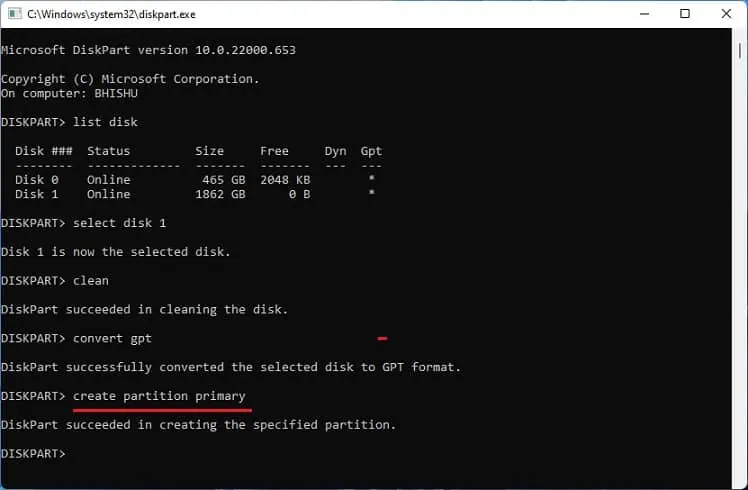
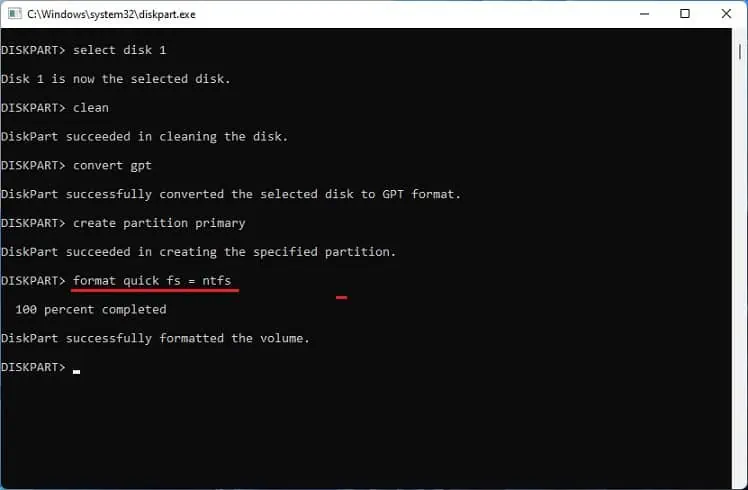
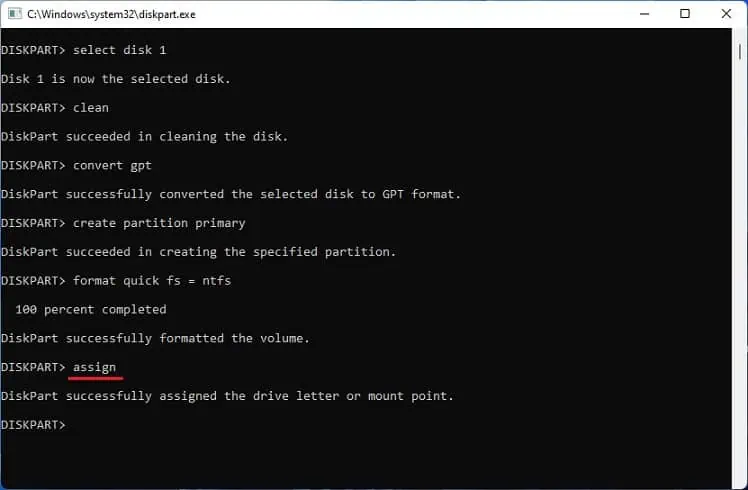
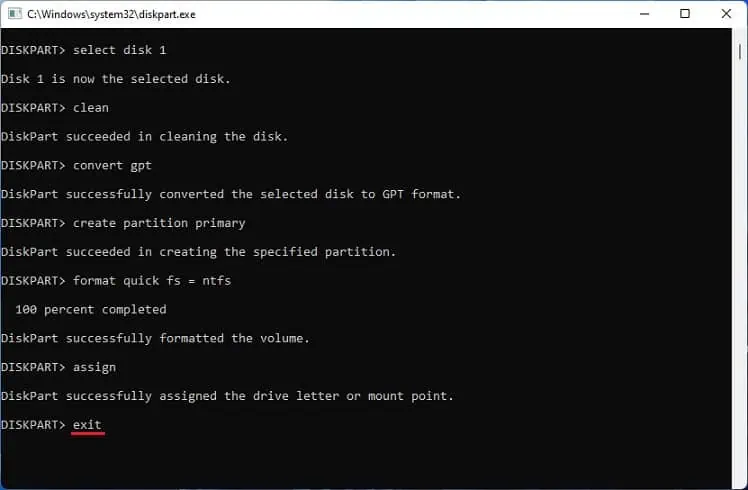
Diskpart is a command-line disk partition utility that can be invoked using a run command. This excellent tool lets you manage all the drives and partitions on Windows. So, we recommend trying this out to clean the drive, convert GPT or MBR, create a primary partition, format in NTFS, and assign a letter:
- Firstly, provoke the Run dialogue box using Windows + R.
- Execute the
diskpartcommand to launch this utility.
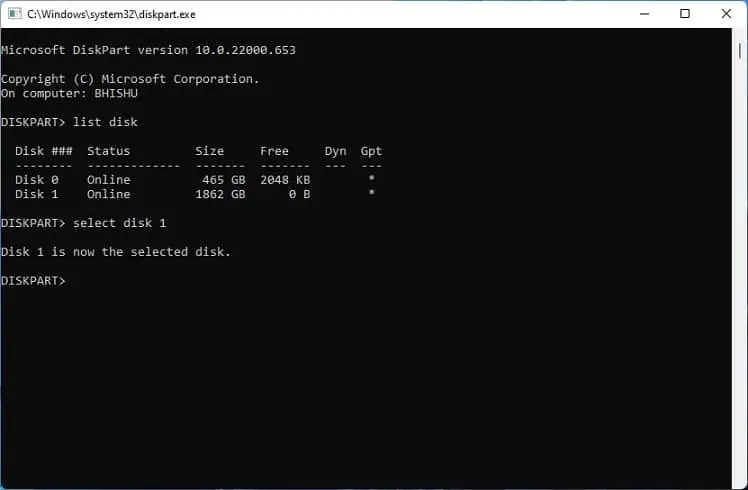
- Now, run the below command line to list all the disks available on your PC:
list disk
- Then, paste the following to select the WD My Passport drive and hit Enter:
select disk [number]
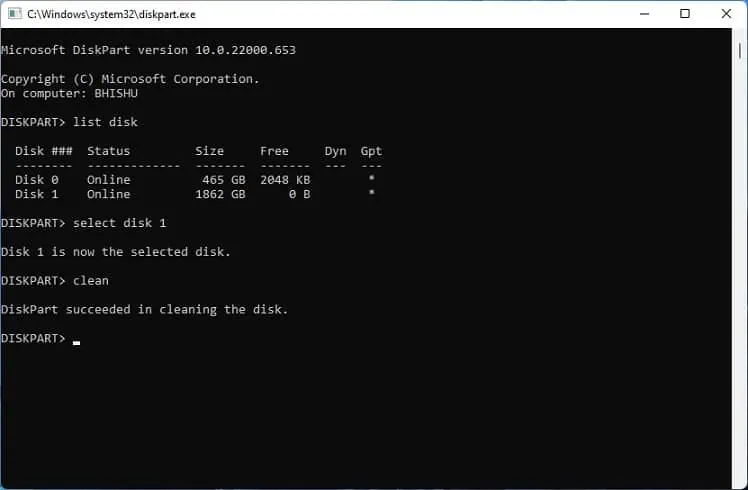
- To clean the drive, use the below command:
clean
- Next, execute one of the following lines to convert MBR to GPT and vice versa:
convert gptconvert mbr
- Now, copy and paste the below command line to create a primary partition:
create partition primary
- Once that’s done, you need to format the drive in NTFS, and here’s how:
format quick fs = ntfs
- Lastly, use the following to assign the drive:
assign
- Close the Dispart utility using the
exitcommand, and check if the WD My Passport drive is now showing in Windows.
Make Partition in Another PC
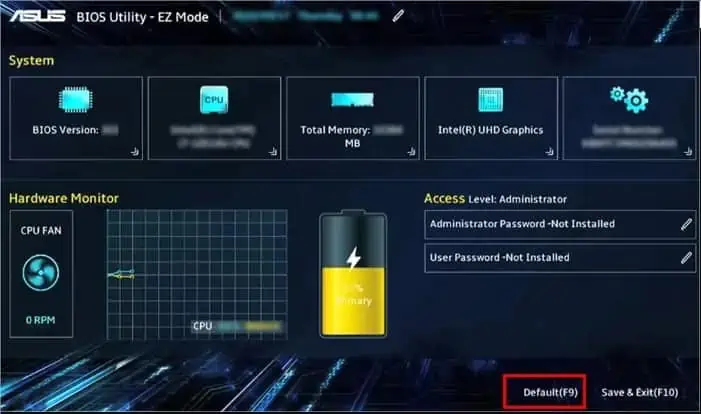
If the problem lies in BIOS, you may need the assistance of another computer where the WD Passport is up and running. Some Windows users claim to have solved the problem by resetting BIOS, deleting the installed device, and making a partition using another PC. Here’s a complete guide on what you should do:
- First of all, get into BIOS and look for the reset option. For your comfort, we have prepared a separate article to help you safely reset BIOS.

- Now, connect the WD My Passport HDD or SSD to another computer.
- Here, open the Disk Management application to make a small partition. If you have no idea about this, kindly have a look at our other guide to learn how to partition an external drive.
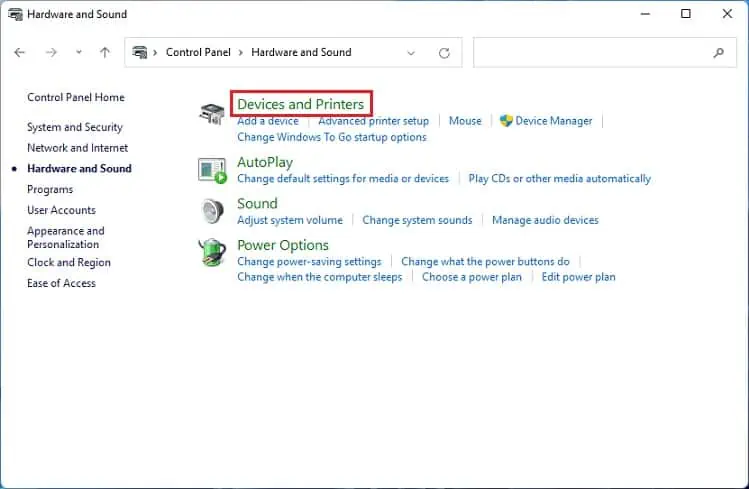
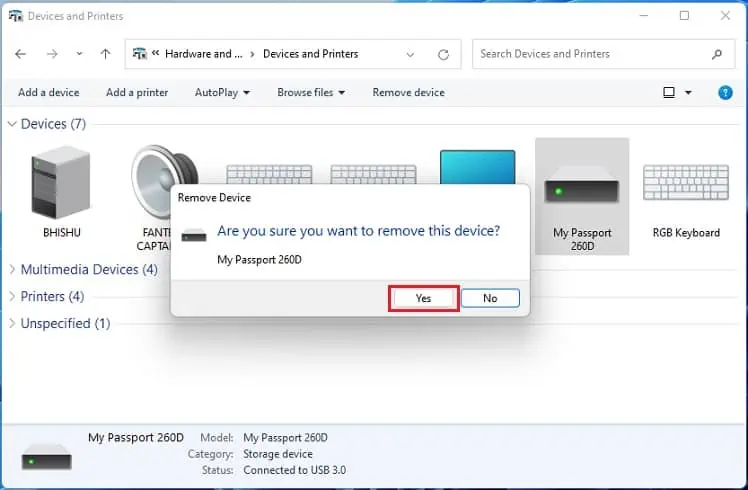
- Once that’s done, plug in the device to the target computer and navigate to Control Panel > Hardware and Sound > Devices and Printers.

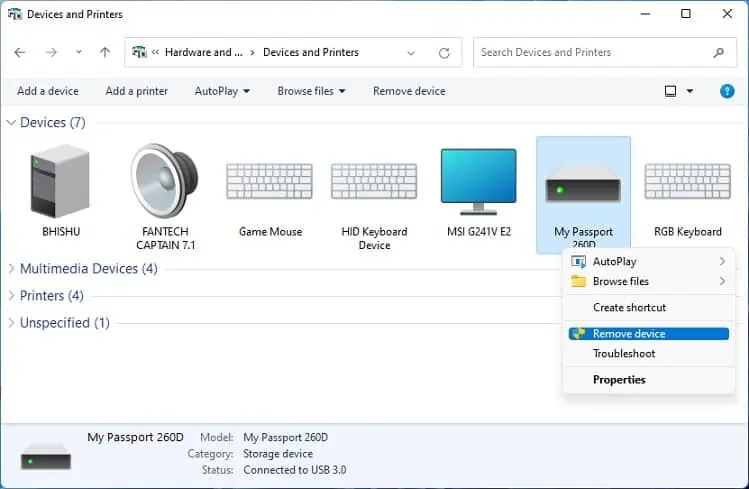
- Under Devices, find the My Passport external drive, right-click, and choose Remove device.

- In the new dialogue box, hit the Yes button to confirm your action.

- After the device disappears from the Devices and Printers, reconnect the WD My Passport drive.
- Finally, move to This PC and check if the external drive is showing up.
Update, Reinstall, or Roll Back Disk Drive
There could also be issues within the disk drivers. This means the WD My Passport external drive is having problems communicating with the connected PC and hence not showing up. Therefore, we advise updating the dedicated drivers:
- Use the Windows + X hotkey and choose Device Manager from the Quick Link menu.

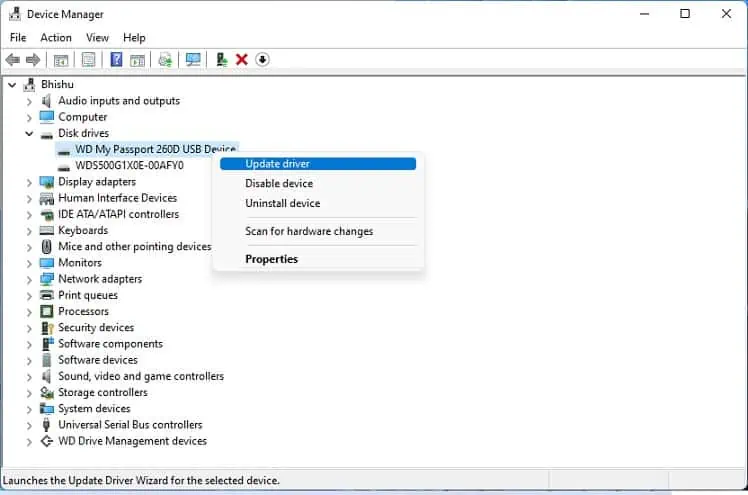
- Expand Disk Drive and right-click on WD My Passport.
- Choose Update driver.

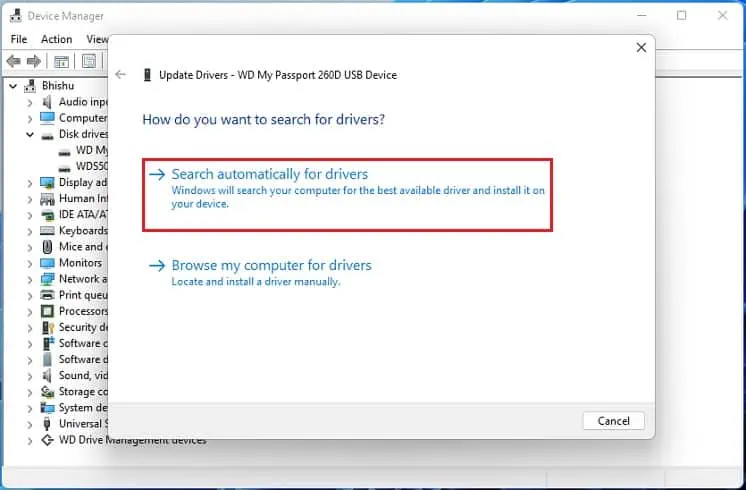
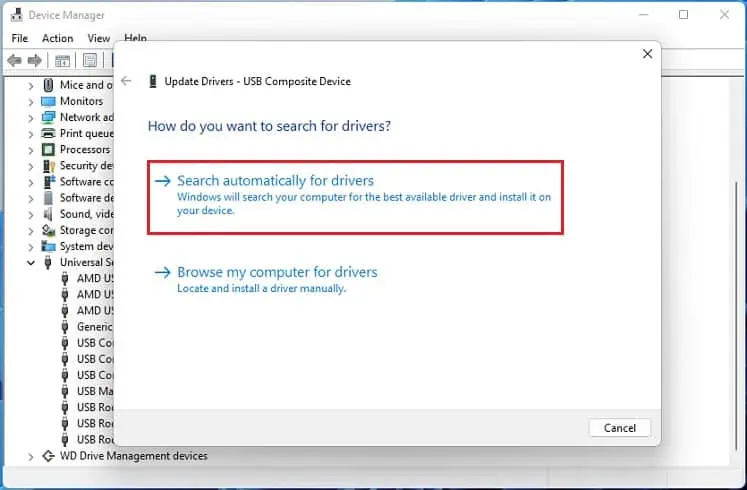
- Now, select the Search automatically for drivers option to quickly find and install the latest drivers.

- If you get the “The best drivers for your device are already installed” message, close the dialogue box and navigate to Device Manager again.
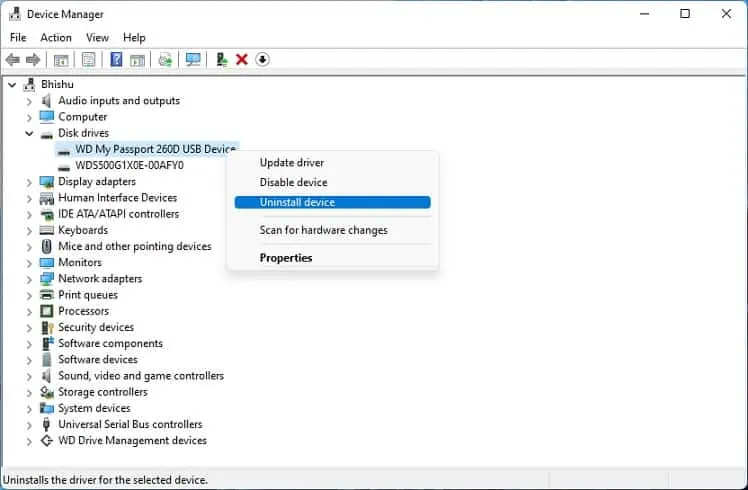
- This time, right-click on WD My Passport and select Uninstall device.

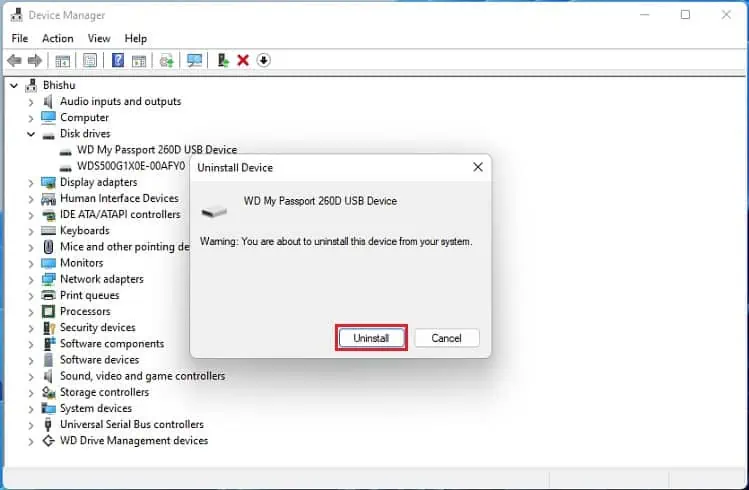
- In the confirmation dialogue box, press the Uninstall button.

- Then, hit the Yes button to restart your PC. After Windows boots, the necessary drivers are automatically installed on your computer.
If you experienced this issue after updating the WD disk drivers, we recommend reverting to its normal state. Follow the below procedure on how to do just that:
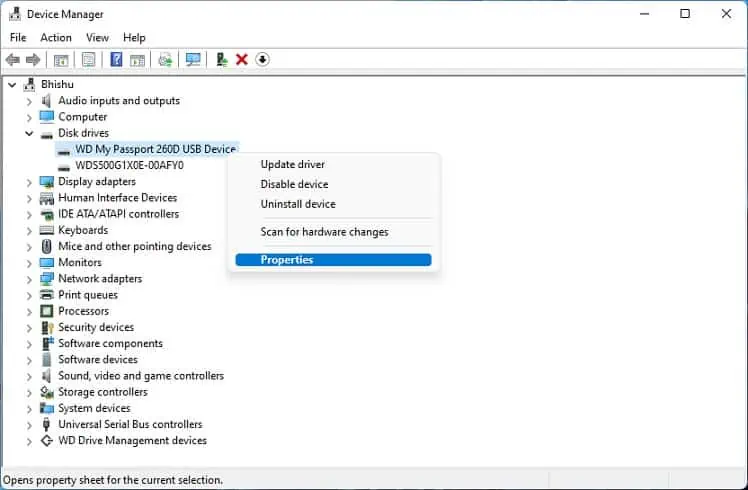
- Right-click on WD My Passport disk drive and select Properties.

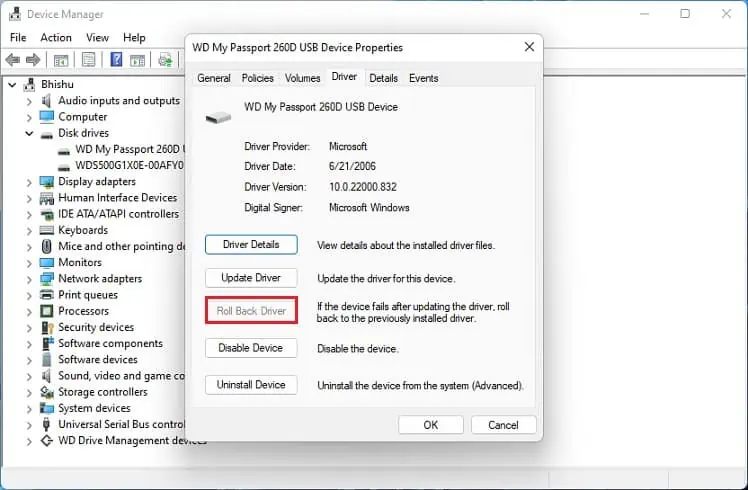
- Switch to the Driver tab and hit the Roll Back driver button.

- Next, choose a reason from the list, and press the Yes button.
- Finally, check if the WD Passport is now showing in File Explorer.
Update or Reinstall USB Controllers
Unlike internal storage drives, the WD Passport and other external HDDs or SSDs have a SATA to USB interface attached to the casing. So, the problem can also lie due to corrupted USB controllers, and here’s how you can fix it:
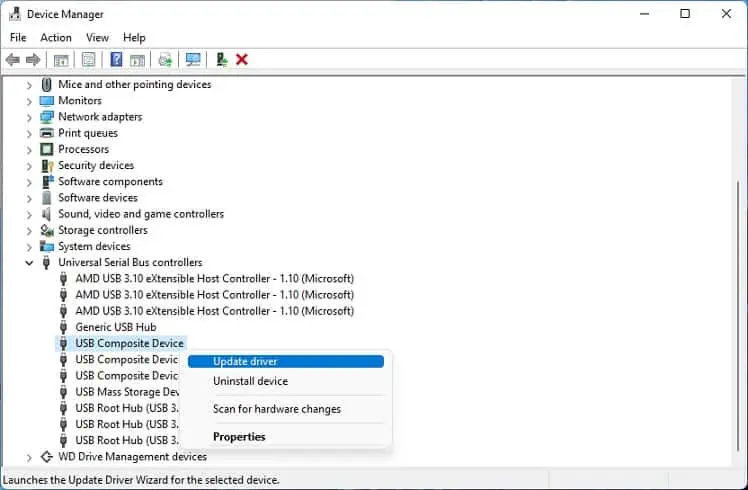
- In the Device Manager utility, expand Universal Serial Bus controllers.
- Here, look for an exclamation sign to identify the conflicting driver. If not, right-click on each of them and choose Update driver.

- As earlier, click on Search automatically for drivers and wait until the latest one gets installed.

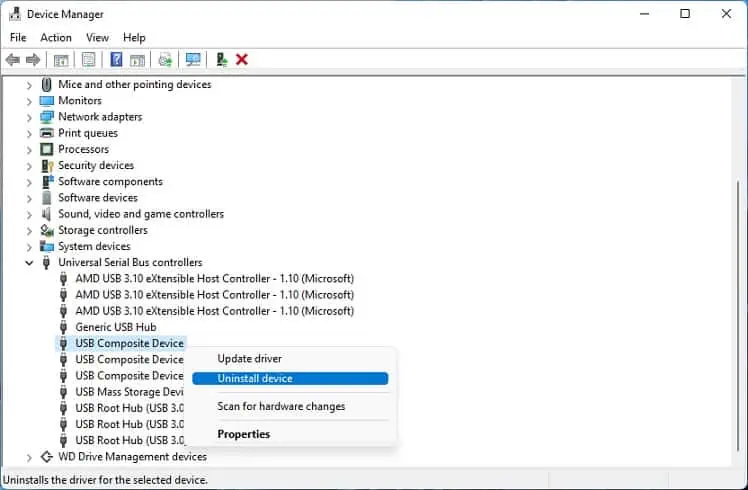
- If this doesn’t help, open Device Manager again, right-click the driver and pick Uninstall device.

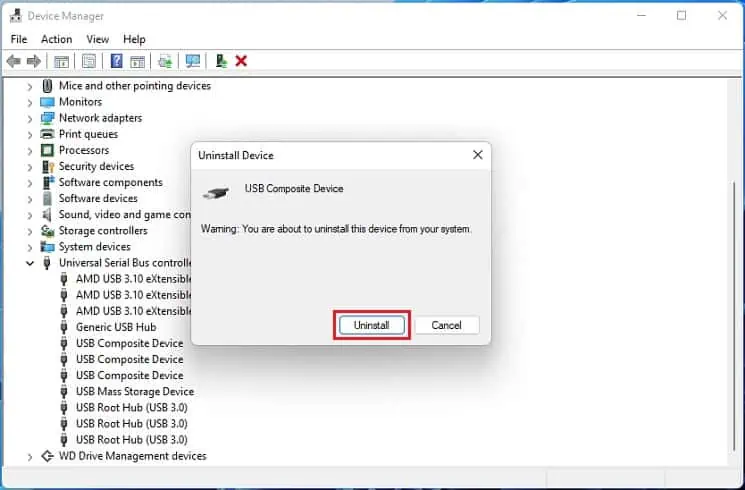
- In the new dialogue box, hit the Uninstall button to confirm your action.

- Now, restart your computer, which should install the required USB controllers.
- Finally, open This PC and check whether the WD My Passport external drive is available under Devices and drives.
Run Hardware and Device Troubleshooter
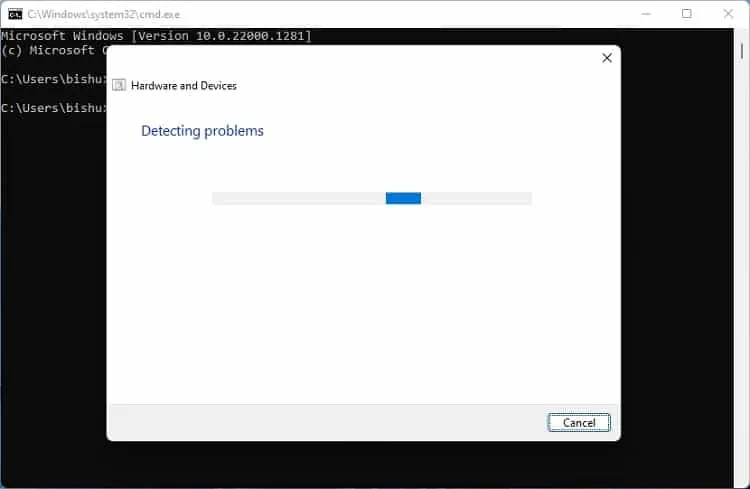
If fixing the device drivers didn’t do the trick, the issue probably lies within the external hard drive. Fortunately, Windows has a built-in Hardware and Device Troubleshooter that fixes bugs and ensures the drive is installed correctly on your computer. Kindly follow the below instructions on how to run this troubleshooter:
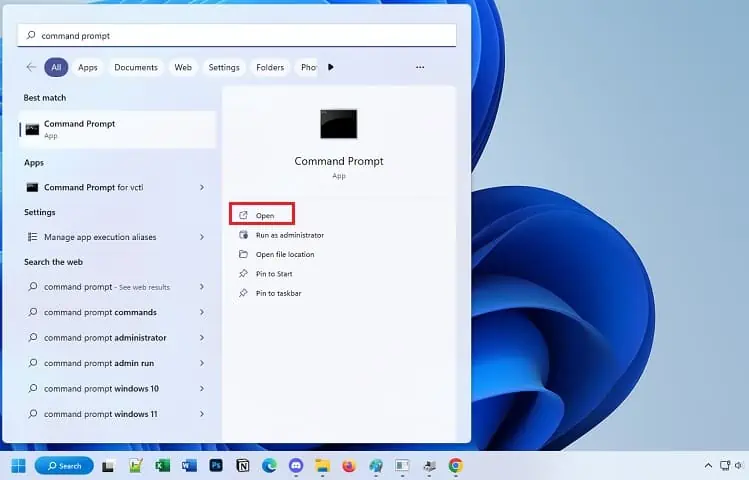
- Open the Start Menu to search and launch Command Prompt.

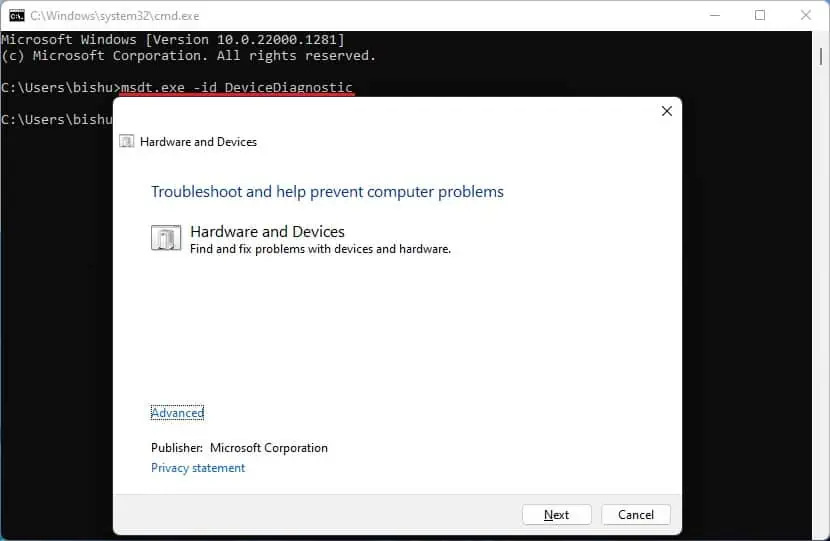
- Here, execute the following command to launch the Hardware and Device Troubleshooter:
msdt.exe -id DeviceDiagnostic
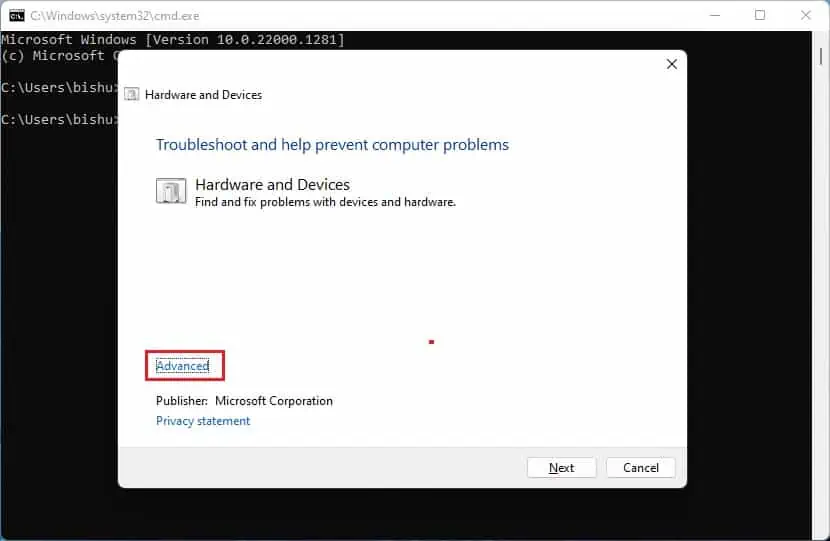
- After the window launches, click on Advanced.

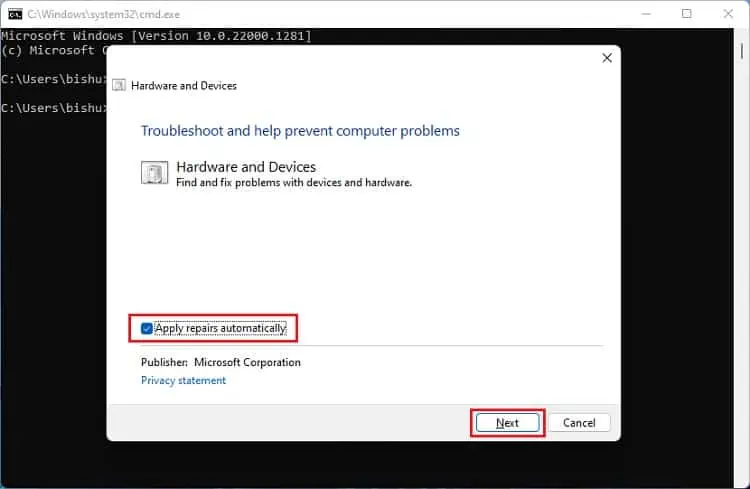
- Ensure that the Apply repairs automatically option is marked, and hit Next.

- Wait until the problems get detected and fixed.

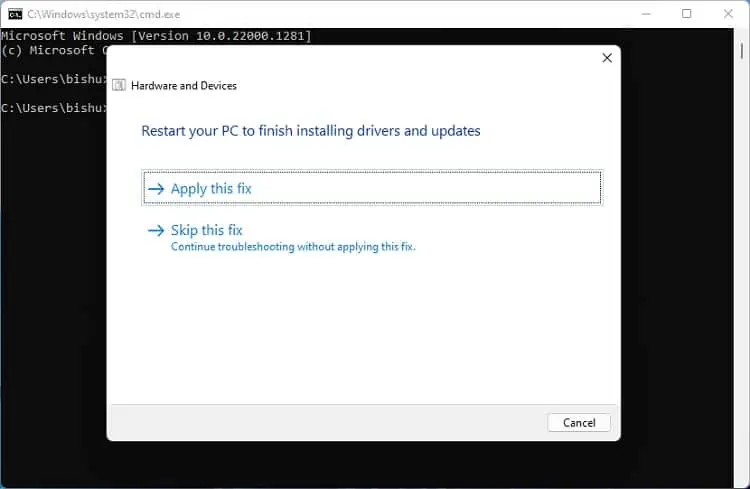
- Finally, pick Apply this fix to restart your computer. This will install the necessary drives and updates that might be missing on your PC.
You may pick the Skip this step option to search for additional problems with your hardware and other devices.
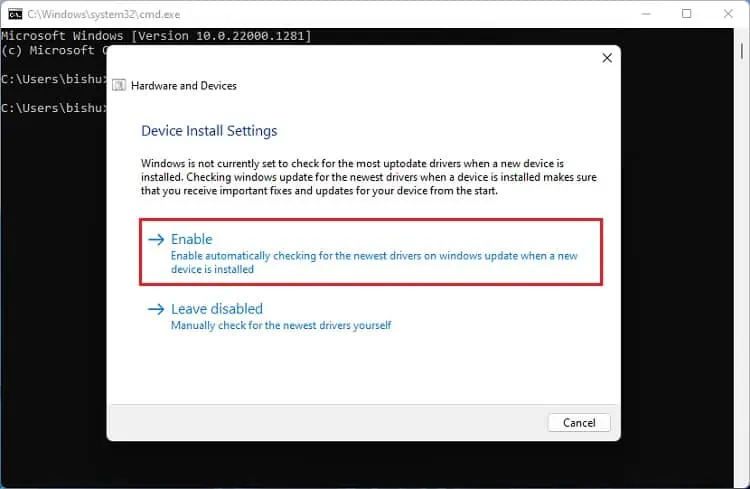
- Under Device Install settings, select Enable.

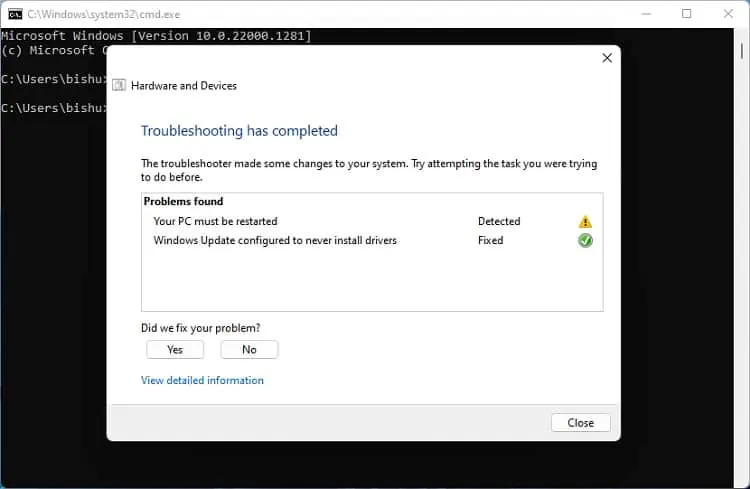
- Once the troubleshooting is complete, you’ll get the report. Close the window and check whether WD Passport is now showing up in Windows.

Disable USB Selective Suspend
The USB Selective Suspend feature puts the devices in low-power mode when not in use. Although it’s considered good to keep it enabled, we suggest turning it off if your external drive isn’t showing up. Go through the below guide on how to disable it on Windows 11:
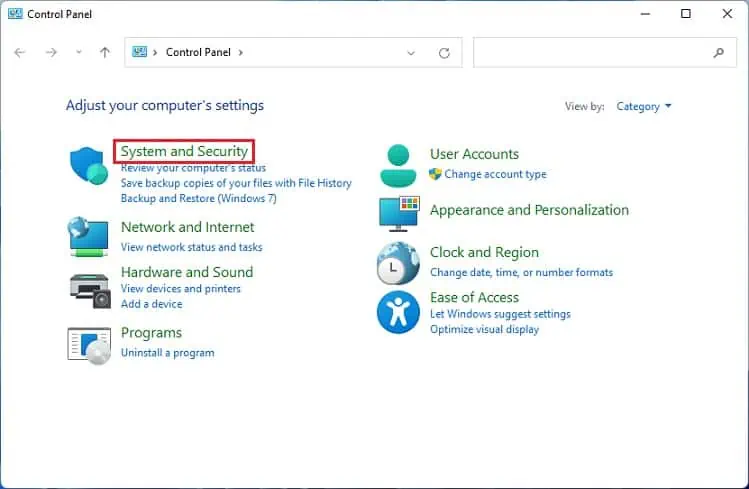
- Press Windows + R and run the
controlcommand to open Control Panel. - Here, go to System and Security.

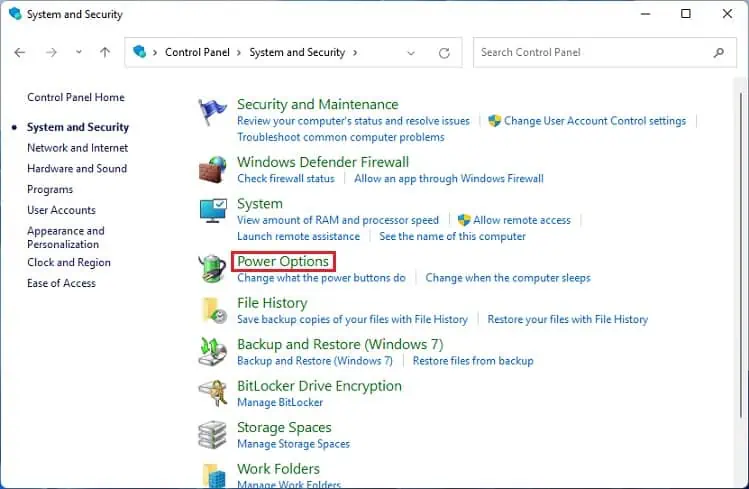
- Then, navigate to Power Options.

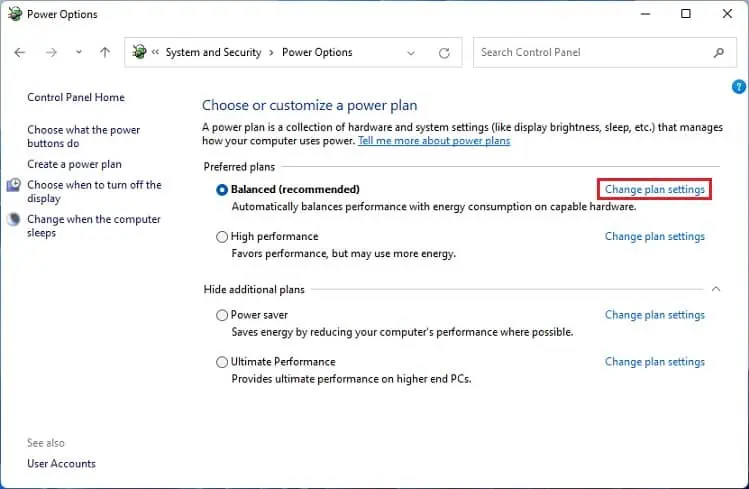
- Next, click on Change plan settings next to your power plan.

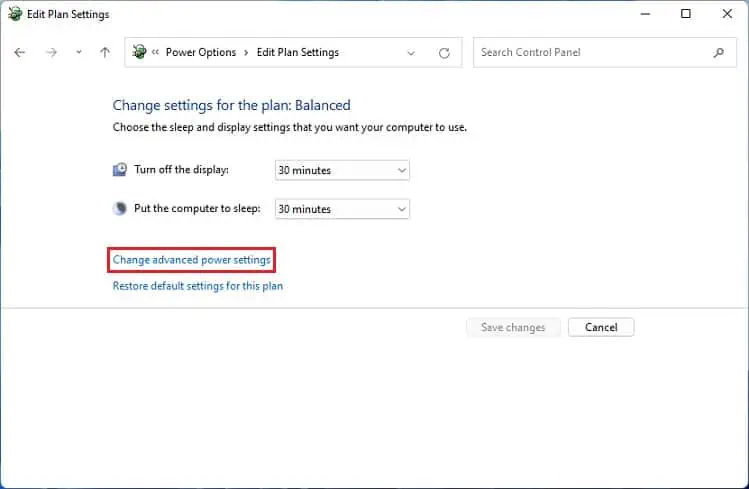
- Now, select Change advanced power settings.

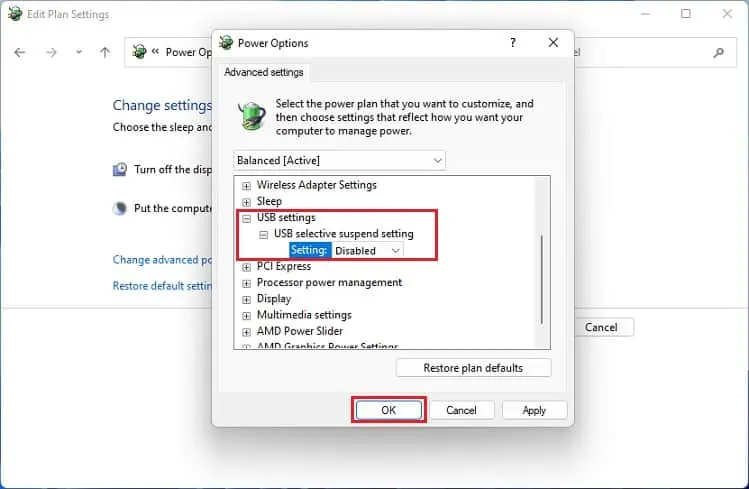
- Expand USB settings > USB selective suspend setting.
- Set this to Disabled. If you’re a laptop user, disable it for both On Battery and Plugged In.

- Finally, hit the Ok button and check if the issue persists.
Update Your BIOS
You’ve probably tried resetting your BIOS already. Now, try updating it to fix possible bugs or add compatibility to the new WD Passport hard drive.
However, you need to consider many things before performing an update. Doing it improperly or a power loss during the upgrade can eventually crash your entire system or even damage the motherboard.
Run Surface Diagnostic Toolkit [For Surface Pro Users]
According to Microsoft Forums, most Surface Pro users claim that the WD My Passport external drive doesn’t appear on Windows. If you’re one of them, try running the Surface Diagnostic Toolkit, which lets you perform both hardware and software diagnostics to resolve any issues within your device.
Before moving forward, ensure that you have downloaded the application from Microsoft Store:
- After installing the program, launch it from the Start Menu.
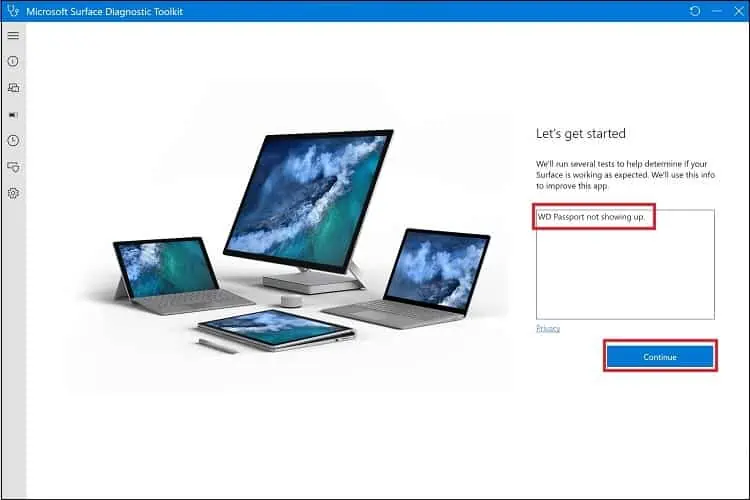
- In the Let’s Get Started Window, type your problem in the text area and hit Continue.

- Now, wait until the diagnostic tool detects and resolves all the issues.
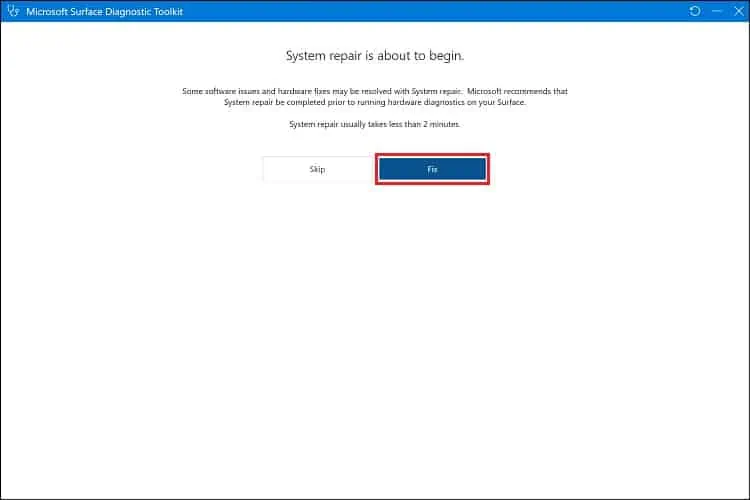
- Next, hit the Fix button to perform system repair.

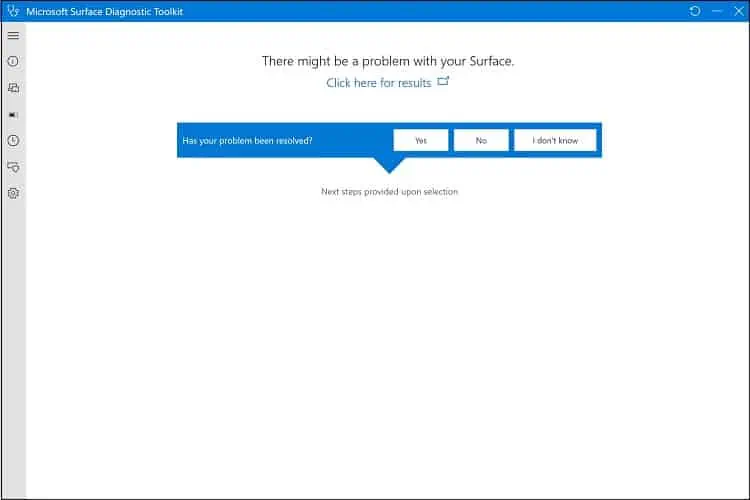
- Follow the on-screen instructions, and you’ll get the test result at the end.

- Once that’s completed, navigate to This PC. And check if the WD My Passport is now showing up.
Unlock Password-Protected Drive [For Surface Pro Users]
One of the prime reasons the Surface Pro cannot detect the WD My Passport drive is that it’s password-protected and can’t be unlocked. Surface tablets or laptops have ARM processors, which is why the x86-based external drives do not work here.
Well, the only solution to this problem is to remove the password protection on the external drive using another Windows computer. Once that’s done, reconnect the WD My Passport drive on the Surface Pro laptop or tablet. This time, the device should show up on your device.

